
Sometimes, the simplest household challenges become the most frustrating. A tightly sealed jar—especially one filled with pickles, pasta sauce, or spices—can resist even the strongest grip. For individuals with limited hand strength, arthritis, or just an unlucky twist of fate, opening such jars can feel impossible. But there’s a surprisingly effective solution hiding in plain sight: the humble rubber band.
Using nothing more than one or two rubber bands, you can dramatically improve your grip and leverage on stubborn jar lids. This method requires no special tools, no brute force, and no risk of injury. Whether you're in a kitchen pinch or looking for a reliable life hack, this guide will walk you through why rubber bands work, how to apply them correctly, and additional tricks to maximize success.
Why Rubber Bands Work: The Science Behind the Grip
The difficulty in opening a jar lid isn’t always about strength—it’s often about friction. Smooth metal or plastic lids, especially when cold or damp, offer little traction for fingers. This lack of grip causes hands to slip, reducing torque and making twisting nearly futile.
Rubber bands increase surface friction between your hand and the lid. Rubber is naturally tacky and elastic, allowing it to conform to small ridges and grooves on the lid’s surface. When wrapped around the lid, the band creates micro-grips that prevent slippage. This enhanced traction means less effort is needed to generate rotational force.
Additionally, rubber bands can slightly compress the lid, creating a tiny gap between the threads of the lid and the jar. This micro-expansion reduces vacuum seal resistance, which is often the real culprit behind “impossible” jars.
“Grip enhancement through friction is more effective than raw strength when dealing with sealed containers.” — Dr. Lena Peterson, Biomechanics Researcher, University of Colorado
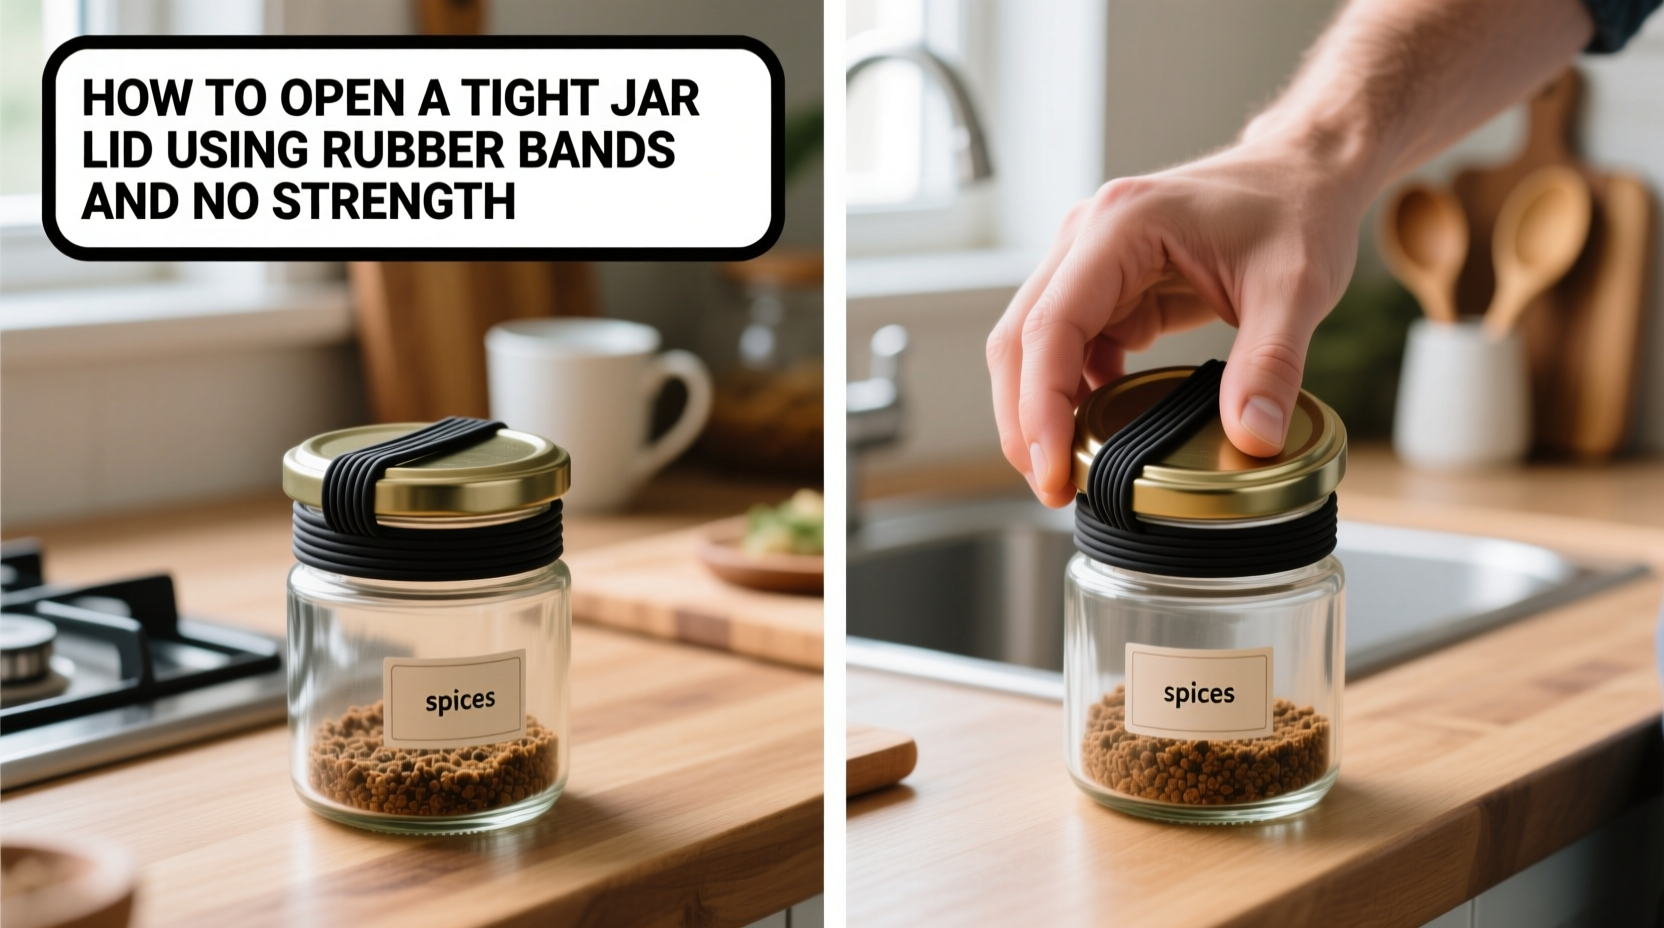
Step-by-Step Guide: How to Use Rubber Bands to Open a Tight Jar
This method is straightforward and works in most kitchen environments. Follow these steps carefully for best results:
- Select the right rubber band: Use a wide, thick rubber band (like those used for produce or mail). Thin bands may snap; overly stretchy ones won’t provide enough grip.
- Clean the lid and hands: Wipe the lid dry and ensure your hands are free of grease or moisture. A wet surface defeats the purpose of added friction.
- Wrap the rubber band around the lid: Place the band horizontally around the circumference of the lid. For better coverage, use two bands—one near the top edge and one near the bottom edge of the lid.
- Position your hand for maximum torque: Grip the jar firmly with one hand at the base. With the other hand, place your fingers across the rubber band(s), ensuring full contact with the textured surface.
- Twist counter-clockwise with steady pressure: Apply consistent, smooth force. Avoid jerking motions, which reduce grip effectiveness.
- If still stuck, tap the lid first: Gently tap the edge of the lid against a countertop or use the back of a knife to break the vacuum seal before reapplying the rubber band method.
Advanced Techniques: Combining Rubber Bands with Other Methods
While rubber bands alone are often sufficient, combining them with complementary techniques increases success rates, especially with long-sealed or vacuum-packed jars.
1. Heat Expansion Method
Running the lid under warm water for 20–30 seconds causes the metal to expand slightly, loosening its grip on the glass threads. After heating, dry the lid completely and apply the rubber band. The combination of thermal expansion and improved traction is highly effective.
2. Tapping to Break the Vacuum
Use the handle of a butter knife or spoon to gently tap around the edge of the lid. Rotate the jar as you tap to ensure even impact. This disrupts the airtight seal, reducing internal suction. Immediately follow with the rubber band technique.
3. Using a Non-Slip Surface
Place the rubber-banded lid on a non-slip mat, silicone trivet, or folded dish towel. Press down and twist the jar body instead of the lid. This reverses the motion and can provide better mechanical advantage.
4. Double Band Cross Pattern
For extra grip, wrap one rubber band horizontally and another vertically across the lid, forming a cross. This creates multidirectional traction points, ideal for slick or rounded lids.
“I’ve taught this method to patients with rheumatoid arthritis for years. It’s not about power—it’s about smart mechanics.” — Dr. Alan Reyes, Occupational Therapist
Do’s and Don’ts: Best Practices for Success
| Do’s | Don’ts |
|---|---|
| Use wide, durable rubber bands | Avoid thin or brittle bands that may snap |
| Dry the lid and your hands before applying the band | Don’t attempt with wet or greasy surfaces |
| Apply steady, rotational pressure—not sudden jerks | Don’t twist violently; risk of dropping or breaking the jar |
| Combine with tapping or warming for stubborn seals | Don’t overheat glass jars, which may crack |
| Store rubber bands in a drawer near the pantry for quick access | Don’t leave bands on jars long-term—they degrade and stick |
Real-Life Example: Maria’s Kitchen Hack That Went Viral
Maria Thompson, a retired teacher from Portland, Oregon, struggled with jar openings due to carpal tunnel syndrome. She avoided canned goods altogether until she discovered the rubber band trick during a community cooking class.
“I tried everything—rubber gloves, towels, even asking my neighbor,” she recalls. “Then someone handed me a broccoli band and said, ‘Try this.’ I wrapped it around the pickle jar, twisted slowly, and it opened like magic.”
Maria now keeps a small container of repurposed produce bands in her kitchen drawer. She even demonstrated the method at a local senior wellness fair, where attendees dubbed it “The Band Aid for Jars.” Her story was later featured in a regional health newsletter, highlighting low-effort solutions for age-related dexterity challenges.
Her experience underscores a key truth: simple solutions often outperform complex gadgets, especially when they’re accessible, reusable, and cost nothing.
Tips Box: Quick Hacks for Immediate Results
Frequently Asked Questions
Can I use any type of rubber band?
Thicker, natural rubber bands work best. Avoid old or cracked bands, as they may break under pressure. Synthetic or latex-free bands can also work but may offer less elasticity and grip.
What if the rubber band method doesn’t work?
If the lid remains stuck, combine the band with other techniques: run the lid under warm water for 30 seconds, tap the rim with a spoon, or place the jar in a zip-top bag filled with coarse salt for added traction. In rare cases, use a jar opener tool as a last resort.
Is this method safe for all jar types?
Yes, it’s safe for glass, plastic, and metal containers. Just avoid excessive force with thin plastic lids, which may crack. Never heat a sealed jar in a microwave or oven—thermal shock can cause explosions.
Checklist: How to Open a Tight Jar Lid Using Rubber Bands
- ☐ Gather a thick rubber band (or two)
- ☐ Wipe the lid and your hands dry
- ☐ Wrap the band snugly around the lid’s circumference
- ☐ Hold the jar base firmly with one hand
- ☐ Grip the rubber band with the other hand
- ☐ Twist counter-clockwise with steady pressure
- ☐ If stuck, tap the lid edge or warm it briefly
- ☐ Repeat with adjusted technique if necessary
- ☐ Store rubber bands nearby for future use
Conclusion: Empower Yourself with Simple Solutions
Opening a tight jar lid shouldn’t require strength, struggle, or embarrassment. With a single rubber band and a bit of know-how, anyone can overcome this everyday obstacle. The technique is rooted in physics, validated by medical professionals, and proven in real kitchens across the world.
What makes this method truly powerful is its accessibility. No batteries, no gadgets, no expense—just a common household item used in a smarter way. Whether you’re managing joint pain, teaching kids kitchen independence, or just tired of wrestling with spaghetti sauce jars, this hack delivers immediate results.


 浙公网安备
33010002000092号
浙公网安备
33010002000092号 浙B2-20120091-4
Comments
No comments yet. Why don't you start the discussion?