
A cluttered pantry can make meal prep stressful, grocery shopping inefficient, and snacks mysteriously disappear. The good news? You don’t need a custom-built system or expensive containers to transform your space. With just a few strategically chosen dollar store bins, you can create a streamlined, functional pantry that’s easy to maintain. This guide walks through the process of turning chaos into clarity—without breaking the bank.
Why Dollar Store Bins Work for Pantry Organization
Dollar store bins are often overlooked as too flimsy or basic, but they offer surprising versatility when used correctly. Most are made from durable plastic or fabric-covered cardboard, come in multiple sizes, and feature handles or labels—perfect for stacking, pulling out, or grouping similar items. Their affordability allows you to experiment without financial risk, and their uniform appearance creates visual calm on shelves.
The key isn’t the bin itself—it’s how you use it. Thoughtful categorization, proper sizing, and consistent placement turn inexpensive organizers into powerful tools for long-term order. As organizational psychologist Dr. Linda Sapadin notes:
“Clarity reduces decision fatigue. When everything has a clear home, people are more likely to maintain the system.” — Dr. Linda Sapadin, Author of *Problem Solved!*
This principle applies directly to pantries. A well-labeled bin eliminates the “Where did I put the quinoa?” question and makes restocking intuitive.
Step-by-Step: Transform Your Pantry in 5 Stages
Organizing a chaotic pantry takes more than just tossing items into bins. It requires a methodical approach that addresses both physical layout and behavioral habits. Follow this five-stage process to build a sustainable system.
Stage 1: Empty and Assess
Remove every item from your pantry. Yes, everything. This allows you to see exactly what you own, check expiration dates, and wipe down shelves. As you pull things out, sort them into broad categories:
- Dry goods (pasta, rice, grains)
- Canned goods
- Baking supplies (flour, sugar, baking soda)
- Snacks (chips, granola bars, nuts)
- Condiments and sauces
- Spices and seasonings
- Breakfast items (cereal, oatmeal, pancake mix)
Stage 2: Declutter Ruthlessly
Now is the time to let go of expired, stale, or rarely used items. If something hasn’t been touched in six months and isn’t a seasonal staple (like holiday baking ingredients), consider donating it or discarding it. Duplicate items—three nearly empty bags of brown sugar, for example—can be consolidated.
Ask yourself:
- Have I used this in the past 3–6 months?
- Does this align with my current eating habits?
- Is there a healthier or more efficient alternative?
Be honest. Holding onto items “just in case” creates clutter, not preparedness.
Stage 3: Measure and Select Bins
Visit your local dollar store with measurements of your pantry shelves. Note shelf depth, height between shelves, and any awkward corners. Bring a tape measure if needed.
Look for these types of bins:
- Rectangular plastic bins – Ideal for stacking and holding boxes or bags.
- Clear-front bins – Let you see contents at a glance.
- Canvas or fabric bins with cardboard inserts – Lightweight and collapsible; great for snacks.
- Bins with handles – Make pulling out heavy items like flour or pet food easier.
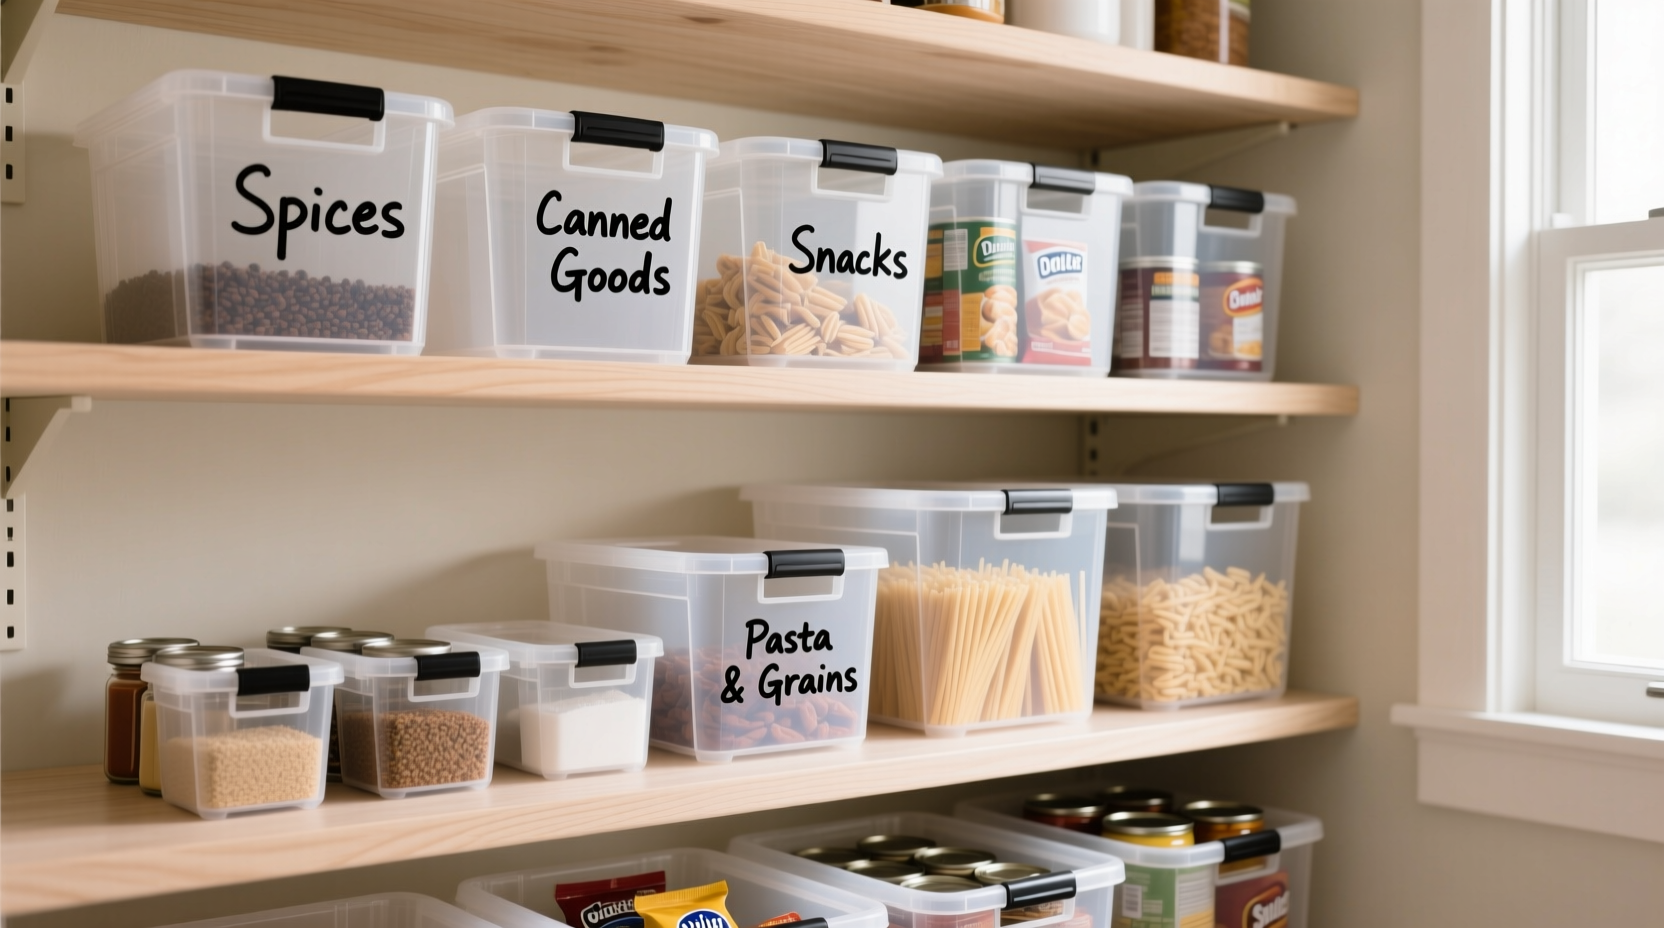
- Labeled bins or ones you can label – Use masking tape and a marker for temporary labels, or invest in waterproof labels later.
Aim for consistency in size where possible. Uniform bins stack better and look more cohesive. Don’t buy more than 8–10 bins on your first trip—you can always return for more once you’ve tested the layout.
Stage 4: Group and Assign Zones
Create designated zones in your pantry based on usage frequency and category. Common zones include:
| Zone | Best For | Recommended Bin Type |
|---|---|---|
| Eye-Level Shelves | Daily-use items (snacks, cereal, coffee) | Clear bins with labels |
| Middle Shelves | Dry goods, canned goods, pasta | Stackable plastic bins |
| Lower Shelves | Heavy items (pet food, oils, bulk bags) | Reinforced bins with handles |
| Top Shelves | Infrequently used items (party supplies, holiday ingredients) | Fabric bins or lidded containers |
| Door Storage | Spices, small packets, wraps | Shallow bins or over-the-door organizers |
Place frequently accessed items at eye level and within easy reach. Keep heavier bins on lower shelves to prevent tipping and strain when lifting.
Stage 5: Label, Load, and Maintain
Once bins are assigned to zones, label each one clearly. Use simple language: “Pasta & Noodles,” “Snack Bars,” “Baking Mixes.” Avoid vague labels like “Misc” or “Stuff.”
Transfer items into bins. For open bags, fold the top and clip with a binder clip or chip clip (also available at dollar stores). If desired, pour loose items like rice or lentils into reusable zip-top bags before placing them in bins—this protects against pests and moisture.
Finally, establish a weekly maintenance habit. Every Sunday, do a 5-minute sweep: return misplaced items to their bins, wipe spills, and check for upcoming expirations.
Real-Life Example: From Chaos to Calm in One Afternoon
Take Sarah, a working mom of two in suburban Ohio. Her pantry was overflowing—boxes spilling off shelves, snacks buried under canned tomatoes, and no clear system. She spent 10 minutes every morning searching for breakfast bars.
Using only $18 worth of bins from her local dollar store, she transformed the space in four hours over a weekend. She measured her shelves beforehand and bought eight rectangular plastic bins and two fabric baskets. She created zones: snacks in front-facing bins at kid-height, baking supplies grouped together, and canned goods stacked vertically in deep bins.
She labeled each bin with a permanent marker on masking tape. Within a week, her family adapted to the new system. Her kids could find their own snacks, and grocery restocking became faster. Six months later, the system still holds—proof that simplicity, not expense, drives sustainability.
Pantry Organization Checklist
Use this checklist to stay on track during your organizing project:
- ☐ Remove all items from the pantry
- ☐ Wipe down shelves and inspect for pests or moisture
- ☐ Sort items into categories (dry goods, snacks, etc.)
- ☐ Discard expired or unused products
- ☐ Measure shelf dimensions and note spacing
- ☐ Purchase 6–10 dollar store bins in varying sizes
- ☐ Assign zones based on usage and accessibility
- ☐ Transfer items into bins and consolidate open packages
- ☐ Label each bin clearly with category names
- ☐ Implement a weekly 5-minute maintenance routine
Common Mistakes to Avoid
Even with the best intentions, it’s easy to undermine your efforts. Watch out for these pitfalls:
- Buying too many bins at once – Start small. Over-purchasing leads to unused organizers and wasted money.
- Ignoring shelf height – Tall bins may look full but won’t fit under shelves. Always measure gaps.
- Not labeling – Without labels, anyone using the pantry will revert to old habits.
- Overfilling bins – Packed bins make it hard to see contents and encourage disorganization.
- Forgetting accessibility – Don’t place daily items on high or low shelves that are hard to reach.
“The most effective systems are the ones people actually use. Simplicity beats sophistication every time.” — Marie De Santis, Home Organization Consultant
Frequently Asked Questions
Can dollar store bins really hold up over time?
Yes, especially if used appropriately. Plastic bins handle dry goods and canned foods well. Fabric bins work best for lightweight snacks or infrequently moved items. Avoid using thin bins for heavy loads like flour or pet food unless they have reinforced bases. Replace any bin that cracks or warps promptly.
What if my pantry has odd shapes or limited space?
Dollar store bins are ideal for small or irregular spaces because they’re compact and flexible. Use shallow bins for narrow gaps and stack smaller bins vertically. Corner shelves can hold triangular or L-shaped arrangements. Focus on function over perfection—some asymmetry is fine if it improves access.
How do I keep pests out of my pantry bins?
While dollar store bins aren’t airtight, they still reduce exposure compared to open boxes. For added protection, transfer grains, flour, and pet food into sealed glass or plastic containers (if budget allows), or place bay leaves or food-safe pest deterrents inside bins. Regularly inspect for signs of bugs and clean spills immediately.
Final Thoughts: Small Changes, Lasting Results
Organizing a chaotic pantry doesn’t require a renovation or designer containers. It requires intention, consistency, and smart use of affordable tools. Dollar store bins may cost little, but their impact can be significant—reducing stress, saving time, and even cutting food waste.
The goal isn’t perfection. It’s progress. Start with one shelf. Pick one category. Use one bin. Build momentum gradually. Before long, you’ll find that opening your pantry feels less like a scavenger hunt and more like stepping into an orderly, purposeful space.


 浙公网安备
33010002000092号
浙公网安备
33010002000092号 浙B2-20120091-4
Comments
No comments yet. Why don't you start the discussion?