
A junk drawer is one of those household fixtures that seems harmless—until you open it and get buried under a landslide of rubber bands, expired coupons, spare batteries, and mystery screws. Most people accept the chaos as inevitable. But it doesn’t have to be. With the right approach, a junk drawer can become a functional, intuitive space that actually helps you find what you need—quickly and consistently. The key isn’t just organizing it once; it’s designing a system that prevents clutter from returning. This guide walks through actionable, sustainable methods to transform your junk drawer into a model of efficiency—one that stays organized not just for weeks, but for good.
Why Junk Drawers Become Chaos Zones
Junk drawers accumulate clutter because they serve as catch-alls for items too small or infrequent to warrant their own storage spot. Over time, without clear boundaries or categorization, they turn into dumping grounds. The problem isn’t the drawer—it’s the lack of structure. Without designated zones or rules for what belongs, anything goes in, nothing comes out, and retrieval becomes guesswork.
Psychologically, these drawers thrive on convenience. People toss things in “for now,” assuming they’ll sort them later. But later rarely comes. Instead, the drawer becomes a vortex of forgotten items, outdated tools, and duplicates. The solution isn’t willpower—it’s design. A well-organized junk drawer functions like a curated toolkit: every item has a purpose and a place.
Step-by-Step Guide to a Lasting Junk Drawer System
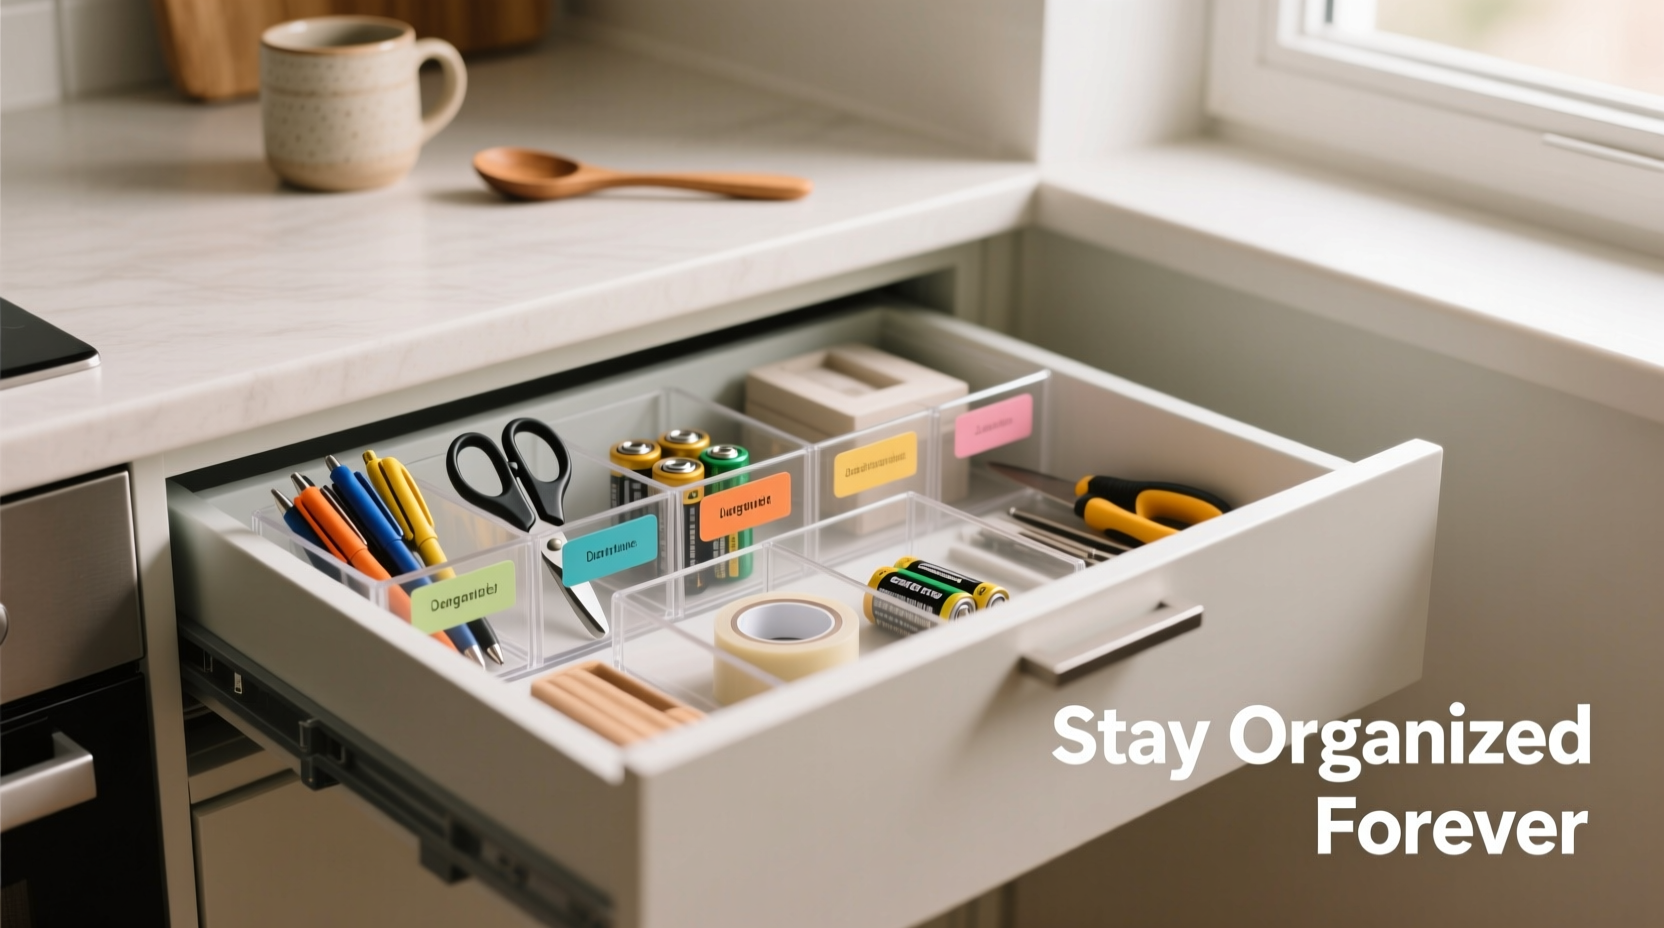
Organizing a junk drawer isn’t about perfection—it’s about creating a sustainable system. Follow this six-step process to build order that sticks.
- Empty Everything: Remove all contents and place them on a clean surface. This gives you full visibility and forces accountability for each item.
- Sort Into Categories: Group similar items together—batteries, tape, pens, hardware, etc. Be ruthless. If you haven’t used it in a year, consider discarding or relocating it.
- Purge Ruthlessly: Toss dried-up glue sticks, broken chargers, expired coupons, and unidentified screws. Recycle old electronics and donate usable duplicates.
- Choose the Right Containers: Use small bins, dividers, or repurposed containers (like mint tins or film canisters) to separate categories. Clear containers help you see contents at a glance.
- Label Everything: Labels prevent ambiguity. Even if you know where the rubber bands are today, will you remember in six months? Use sticky labels or a label maker for clarity.
- Reintroduce Items Mindfully: Only return what you’ve sorted and approved. Place frequently used items near the front. Store bulkier tools at the back.
This process takes less than 30 minutes but sets the foundation for long-term order. The real test comes in maintenance—so build habits that support consistency.
Smart Storage Solutions That Prevent Reversion
The best organizational systems are invisible—they require no effort to maintain. To keep your junk drawer tidy, choose storage aids that enforce order naturally.
Drawer organizers with adjustable dividers allow you to customize compartments based on your inventory. For example, a narrow slot for scissors, a square bin for batteries, and a shallow tray for sticky notes. Magnetic strips inside the drawer front can hold bobby pins, paperclips, or small tools. Repurpose everyday objects: baby food jars store thumbtacks, and ice cube trays work perfectly for sorting screws by size.
Size matters. Oversized containers invite clutter. A drawer packed with empty space tempts you to overfill it. Fill unused areas with a folded cloth or a spare box to reduce dead space and discourage random additions.
| Solution | Best For | Why It Works |
|---|---|---|
| Adjustable acrylic divider set | Deep drawers with mixed items | Flexible layout adapts to changing needs |
| Small plastic bins (3–5 cm tall) | Flat drawers with limited depth | Prevents stacking and visual clutter |
| Magnetic strip + steel tins | Small metal items (pins, clips) | Maximizes vertical space, keeps items visible |
| Repurposed mint tins | Batteries, USB drives, earplugs | Cheap, portable, stackable |
Real-Life Example: From Chaos to Clarity
Sarah, a freelance graphic designer and mother of two, had a kitchen junk drawer she avoided opening. It held everything from loose change to half-used candles, tangled cords, and a broken calculator. Every time she needed a pen, she spent five minutes digging. After reading about intentional organization, she cleared the drawer during her Sunday routine.
She sorted items into seven piles: office supplies, tools, batteries, tape, cables, miscellaneous, and trash. She donated duplicate scissors and tossed expired gift cards. Then, she installed a $7 adjustable organizer and assigned zones: left side for office items, center for tools, right for tech accessories. She labeled each section with removable stickers.
Three months later, the drawer remains functional. Her rule: if something doesn’t belong, it doesn’t go back in. When her son tried to stash a loose Lego piece, she redirected it to the toy bin. The drawer now saves her time instead of wasting it. “It’s not just tidy,” she says. “It feels like I finally have a home for the little things that matter.”
Expert Insight: What Organizers Know That You Don’t
Professional organizers emphasize one principle above all: systems beat motivation. “People fail not because they’re disorganized, but because they rely on memory instead of structure,” says Laura Nguyen, certified home efficiency consultant with over a decade of experience.
“Every item in a junk drawer should pass the 'purpose test'—does it solve a recurring problem? If not, it doesn’t earn a spot. And every zone should be self-explanatory. If you have to think about where something goes, the system is already failing.” — Laura Nguyen, Home Efficiency Consultant
Nguyen also warns against emotional attachment to junk drawer items. “That novelty spoon from 2012? It’s not useful. That instruction manual for a toaster you no longer own? It’s not helpful. Sentiment has its place—but not in functional storage.”
Checklist: Build Your Forever-Tidy Junk Drawer
Use this checklist to ensure your junk drawer transformation is thorough and sustainable.
- ☐ Empty the drawer completely
- ☐ Sort items into logical categories
- ☐ Discard expired, broken, or unnecessary items
- ☐ Choose appropriate containers or dividers
- ☐ Assign a dedicated zone for each category
- ☐ Label all sections clearly
- ☐ Return only approved items to the drawer
- ☐ Set a monthly 5-minute review to reset the system
- ☐ Establish a household rule: nothing goes in unless it belongs
- ☐ Test accessibility—can you find a battery in under 10 seconds?
Common Mistakes That Undo Your Progress
Even well-intentioned efforts fall apart when common pitfalls aren’t addressed. Avoid these mistakes to protect your progress.
- Keeping “just in case” items: If you haven’t used it in a year, odds are you won’t. Emergency supplies should be purposefully stocked—not guessed at.
- Using containers that are too large: Oversized bins encourage overfilling and make items harder to access.
- Failing to label: Without labels, family members won’t know where things belong, leading to gradual disarray.
- Allowing exceptions: If you let one random item slide, others will follow. Consistency is critical.
- Ignoring maintenance: No system survives without periodic review. Schedule a quick monthly check-in.
One subtle trap is the “dual-purpose drawer.” Combining junk items with utensils or mail creates confusion. Keep the junk drawer strictly for utility items. Other functions deserve their own spaces.
FAQ: Your Junk Drawer Questions, Answered
How many categories should I have in my junk drawer?
Aim for 5 to 7 main categories—enough to cover essentials without overcomplicating. Common ones include: office supplies, batteries, tape, small tools, cables, emergency items, and miscellaneous. Too many categories defeat the purpose of simplicity.
What if I don’t have room for dividers?
No problem. Use small containers you already own—like yogurt cups or matchboxes. Cut cardboard to size to create DIY dividers. The goal is separation, not perfection. Even folding a piece of cardboard in half can create a simple barrier between zones.
How do I get my family to respect the system?
Involve them in the setup. Let each person suggest a category or pick a label color. Post a small sign inside the drawer showing the layout. Make it easy to follow by placing the most-used items up front. Lead by example—return items promptly and praise others when they do the same.
Conclusion: Turn Chaos Into Calm—For Good
A junk drawer doesn’t have to be a black hole of forgotten things. With a clear plan, the right tools, and a few smart habits, it can become one of the most reliable spots in your home. The goal isn’t perfection—it’s functionality. It’s knowing exactly where the duct tape is when the shelf breaks. It’s finding a working AA battery when the remote dies. It’s saving time, reducing stress, and reclaiming control over the small things that add up.
Organization isn’t a one-time event. It’s a practice. By setting up a system designed for real life—not idealized Pinterest boards—you create lasting change. Start today. Empty that drawer. Sort with intention. Build a layout that works for you. And then, protect it with simple rules and regular check-ins.


 浙公网安备
33010002000092号
浙公网安备
33010002000092号 浙B2-20120091-4
Comments
No comments yet. Why don't you start the discussion?