
A well-organized pantry transforms the way you cook, shop, and maintain your kitchen. When everything is visible, accessible, and properly labeled, meal prep becomes faster, food waste decreases, and grocery trips turn into targeted missions rather than guesswork. The foundation of a streamlined pantry? Clear containers and smart labeling. These two tools eliminate visual clutter, protect dry goods from pests and moisture, and make it easy to see what you have—and what you’re running low on. This guide walks through practical strategies, expert-backed systems, and real-life-tested hacks to help you build a pantry that’s as functional as it is satisfying to look at.
Why Clear Containers Work Better Than Original Packaging
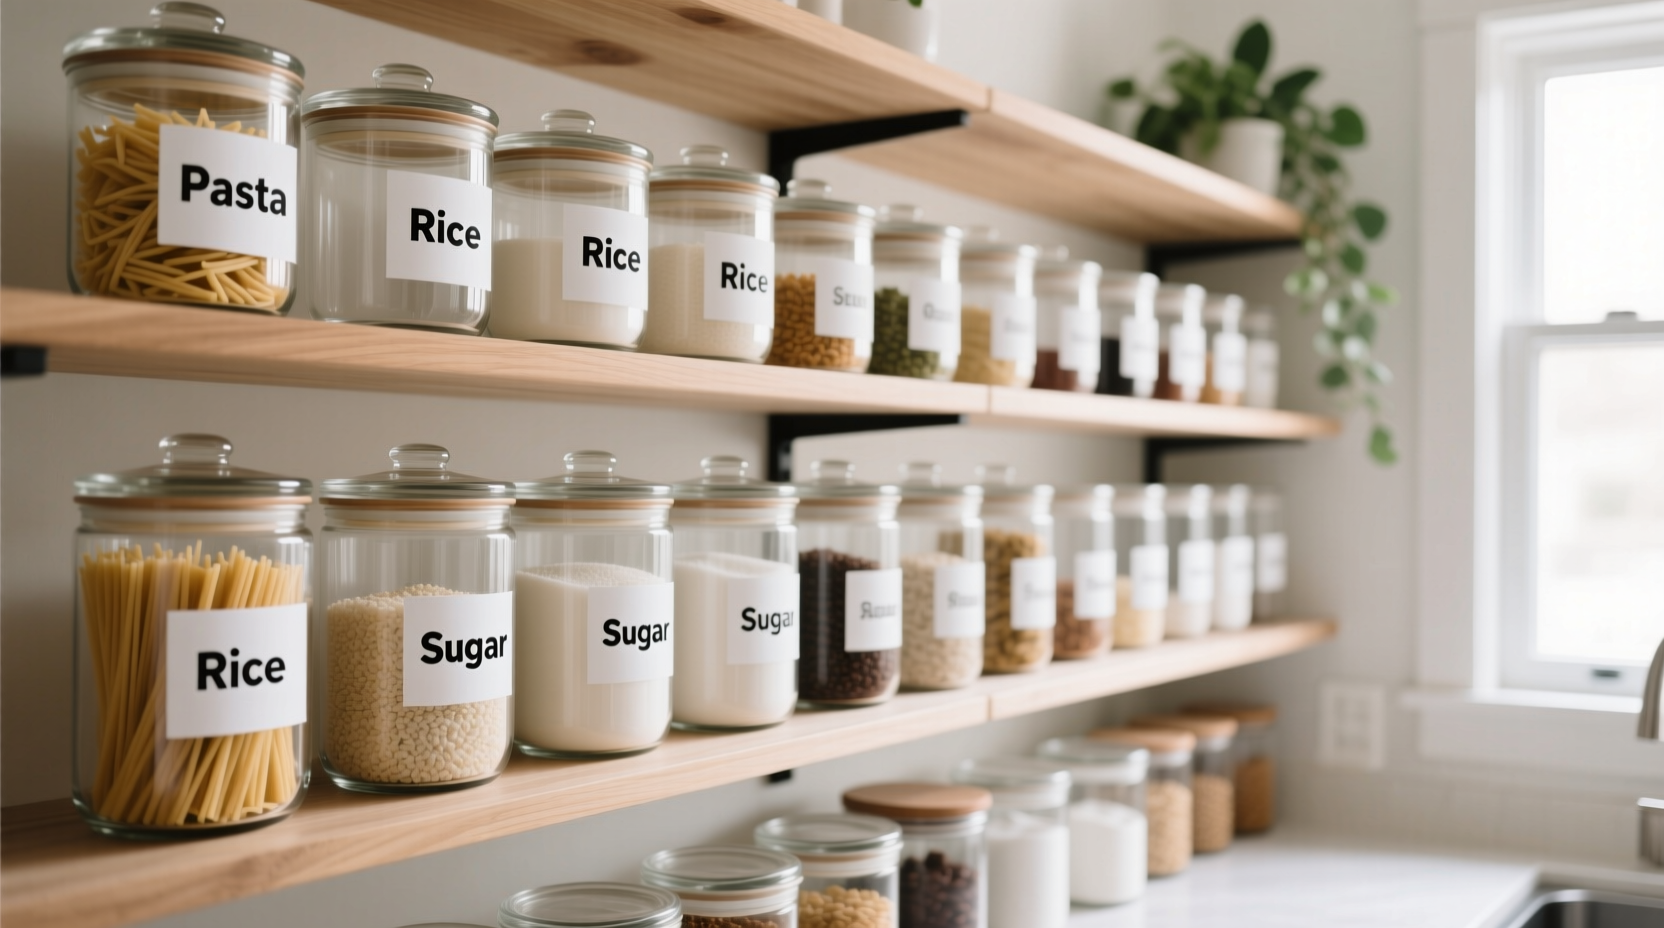
Most dry goods—rice, pasta, cereal, flour, sugar—come in flimsy bags or colorful boxes that quickly become crumpled, torn, or difficult to stack. Transferring these items into clear, airtight containers does more than just create a uniform look. It extends shelf life by protecting contents from humidity, light, and pests. Glass or BPA-free plastic containers with secure lids prevent spills and keep ingredients fresh far longer than paper or thin plastic packaging.
Beyond preservation, visibility is key. When you can see exactly how much brown sugar remains without unstacking three boxes, you reduce overbuying and duplication. Clear containers also allow for quick identification, which matters when you're reaching for baking soda in a hurry and don’t want to mistake it for powdered sugar.
The Right Labeling System Makes All the Difference
Even the most beautiful pantry fails if labels are missing or inconsistent. A good labeling system should be legible, durable, and informative. At minimum, each container should display the item name. But going further—by adding purchase or expiration dates, serving sizes, or even recipe icons—can elevate your organization to professional levels.
There are several labeling approaches:
- Chalkboard labels: Reusable and customizable, ideal for frequently changing items.
- Printed vinyl labels: Smudge-proof and clean-looking, perfect for a cohesive aesthetic.
- Tape and marker: Low-cost and immediate, though less durable over time.
- Label maker: Offers consistency in font and size; thermal printers require no ink.
For households with multiple users—especially children or caregivers—labels should use simple language and large fonts. Consider including icons (like a coffee cup for ground coffee) to support visual recognition.
“Consistency in labeling reduces decision fatigue and prevents food waste.” — Laura Chen, Home Organization Consultant
Step-by-Step Guide to Pantry Organization
Transforming your pantry doesn’t have to happen overnight. Follow this proven sequence to build a lasting system:
- Empty the pantry completely. Take every item out and place it on a counter or table. This allows you to assess what you own and spot expired goods.
- Sort by category. Group like items: baking supplies, snacks, canned goods, grains, spices, etc. Be specific—keep pasta separate from rice, sugars from flours.
- Check expiration dates. Discard anything expired or rancid. Donate unopened, non-perishable items you won’t use.
- Choose appropriate containers. Measure your shelf height and depth to avoid buying containers that don’t fit. Prioritize airtight seals and wide mouths for easy access.
- Transfer dry goods. Pour items into containers, leaving about an inch of headspace for easier pouring. Use funnels to minimize mess.
- Label everything immediately. Don’t wait—label each container before returning it to the shelf.
- Zone your pantry. Assign areas based on usage: everyday items at eye level, heavy appliances on lower shelves, rarely used goods up high.
- Add organizational tools. Include tiered shelves, lazy Susans, or pull-out bins to improve access to back items.
- Create a inventory list. Keep a master list on your phone or inside the pantry door to track what you have and what needs restocking.
- Maintain monthly. Schedule a 15-minute weekly scan and a deeper monthly review to reset the system.
Pantry Container Comparison: What Works Best
Not all containers are created equal. The right choice depends on your storage needs, shelf dimensions, and personal habits. Below is a comparison of popular container types:
| Material | Pros | Cons | Best For |
|---|---|---|---|
| Tempered Glass | Durable, non-porous, odor-resistant, microwave-safe | Heavy, breakable, expensive | Flour, sugar, coffee, spices |
| BPA-Free Plastic | Lightweight, affordable, shatterproof | Can stain or absorb odors over time | Cereal, snacks, pasta, pet food |
| Stainless Steel | Airtight, pest-proof, modern look | Opaque (can't see contents), costly | Long-term grain storage, bulk items |
| Silicone-Foldable | Space-saving when empty, flexible | Less stable, not fully rigid | Occasional use items, travel-sized portions |
For most home pantries, a mix of glass and high-quality plastic offers the best balance of function and aesthetics. Look for containers with removable, washable lids and pour spouts for liquids like oil or honey.
Real-Life Example: From Chaos to Clarity in One Weekend
Sarah, a busy mother of two in Portland, used to dread opening her pantry. Cereal boxes spilled over, flour bags had been chewed by mice, and she often bought duplicates because she couldn’t see what she already had. After watching a pantry organization video, she dedicated one Saturday morning to a full overhaul.
She began by removing everything and wiping down shelves. She sorted items into categories and donated three grocery bags of expired or unused products. Then, she invested in 15 medium-sized glass containers with rubber-seal lids and a handheld label maker. Each container was filled with a single ingredient—from quinoa to chocolate chips—and clearly labeled with both the name and date of transfer.
She installed a tiered shelf for canned goods and placed baskets on lower shelves for apples and onions. Within two hours, her pantry was transformed. Three months later, she reports saving nearly $40 a month on groceries because she finally knows what she has. “It feels like I gained extra cabinet space,” she says, “and my kids can now grab their own snacks safely.”
Labeling Hacks You Haven’t Tried (But Should)
Basic labeling works, but these advanced hacks add functionality and personality:
- Color-code by category: Use green labels for baking, blue for breakfast, red for snacks. Great for visual learners.
- Include fill lines: Mark the maximum fill level inside containers to ensure consistent packing and easier stacking.
- Add QR codes: Link to recipes, inventory lists, or reorder pages using scannable stickers.
- Use chalk markers on glass: Write directly on containers for temporary updates (e.g., “Use first!” during meal prep).
- Rotate stock with “First In, First Out” (FIFO): Label containers with purchase dates and place newer items behind older ones.
Pantry Organization Checklist
Use this checklist to stay on track during your pantry transformation:
- ☐ Remove all items from the pantry
- ☐ Wipe down shelves and walls
- ☐ Sort items into categories
- ☐ Discard expired or damaged goods
- ☐ Measure shelf dimensions
- ☐ Purchase clear, airtight containers
- ☐ Transfer dry goods into containers
- ☐ Label each container with name and date
- ☐ Group like items together (zones)
- ☐ Install organizers (lazy Susan, risers, bins)
- ☐ Create a digital or physical inventory list
- ☐ Set a monthly maintenance reminder
Frequently Asked Questions
How do I prevent labels from peeling off over time?
Use waterproof, laminated, or vinyl labels designed for kitchen use. If using tape, opt for clear packing tape over the entire label to seal it. Avoid placing containers near steam sources like dishwashers or stoves, as heat and moisture accelerate peeling.
Can I use mason jars for pantry storage?
Yes, mason jars are excellent for dry goods like pasta, beans, and spices. They’re airtight when sealed properly and offer a rustic-chic look. However, they’re less ideal for very large quantities due to weight and fragility. Use them for smaller, frequently used items.
What should I do with oddly shaped items that don’t fit in standard containers?
Use baskets, bins, or fabric drawer dividers to corral items like tortillas, snack bars, or seasoning packets. Label the bin itself, not each individual package. This maintains uniformity while accommodating irregular shapes.
Final Thoughts: Turn Your Pantry Into a Functional Hub
A pantry organized with clear containers and thoughtful labels isn’t just about appearances—it’s about efficiency, economy, and peace of mind. Every time you open the door and instantly find what you need, you save seconds that add up over weeks, months, and years. You reduce stress during meal prep, cut down on duplicate purchases, and gain confidence in your kitchen routines.
The process takes effort upfront, but the payoff lasts for years. Start small if needed—even organizing one shelf with matching oatmeal containers and neat labels creates momentum. Build from there. Use the tips, tools, and systems outlined here to design a pantry that reflects your lifestyle and supports your goals.


 浙公网安备
33010002000092号
浙公网安备
33010002000092号 浙B2-20120091-4
Comments
No comments yet. Why don't you start the discussion?