
A small pantry doesn’t have to mean limited functionality. With thoughtful planning and strategic organization, even the most compact storage area can become a highly efficient hub for your kitchen essentials. The key lies not in how much space you have, but in how well you use it. Whether you're working with a reach-in closet, a shallow cabinet, or a narrow hallway nook, these practical methods will help you reclaim lost space, reduce clutter, and make meal prep faster and more enjoyable.
Assess and Declutter: Start with a Clean Slate
Before organizing, take everything out. This step is non-negotiable. Only by seeing all your items laid out can you accurately assess what you own, identify duplicates, expired goods, or underused products. Group similar items together—canned goods, baking supplies, snacks, pasta, sauces—to get a clear picture of your inventory.
Check expiration dates rigorously. Discard anything past its prime. Consider donating unopened, non-perishable items you know you won’t use. Be honest about what you actually consume. That bulk bag of quinoa from two years ago? If it hasn’t been touched, it’s taking up valuable real estate for no reason.
This process isn’t just about clearing space—it’s about resetting your relationship with your pantry. A clutter-free start sets the foundation for long-term order.
Maximize Vertical and Door Space
In a small pantry, floor space is limited, but vertical space is often underutilized. Install adjustable shelving to customize shelf heights based on your tallest items. For example, lower shelves can accommodate cereal boxes or wine bottles, while upper shelves hold lighter goods like spices or tea bags.
Door-mounted solutions are game-changers. Over-the-door organizers with pockets or baskets work exceptionally well for small items: seasoning packets, drink mixes, wraps, or spice jars. Choose models with clear pockets so contents are visible at a glance.
Consider adding a tiered shelf inside the door to create layers, mimicking a supermarket display. This allows you to see labels without pulling items forward. Magnetic strips can also be mounted on the back of the door to hold metal spice tins or small tools like measuring spoons.
“Vertical organization doubles accessible storage in pantries under 3 feet wide.” — Sarah Lin, Home Organization Consultant
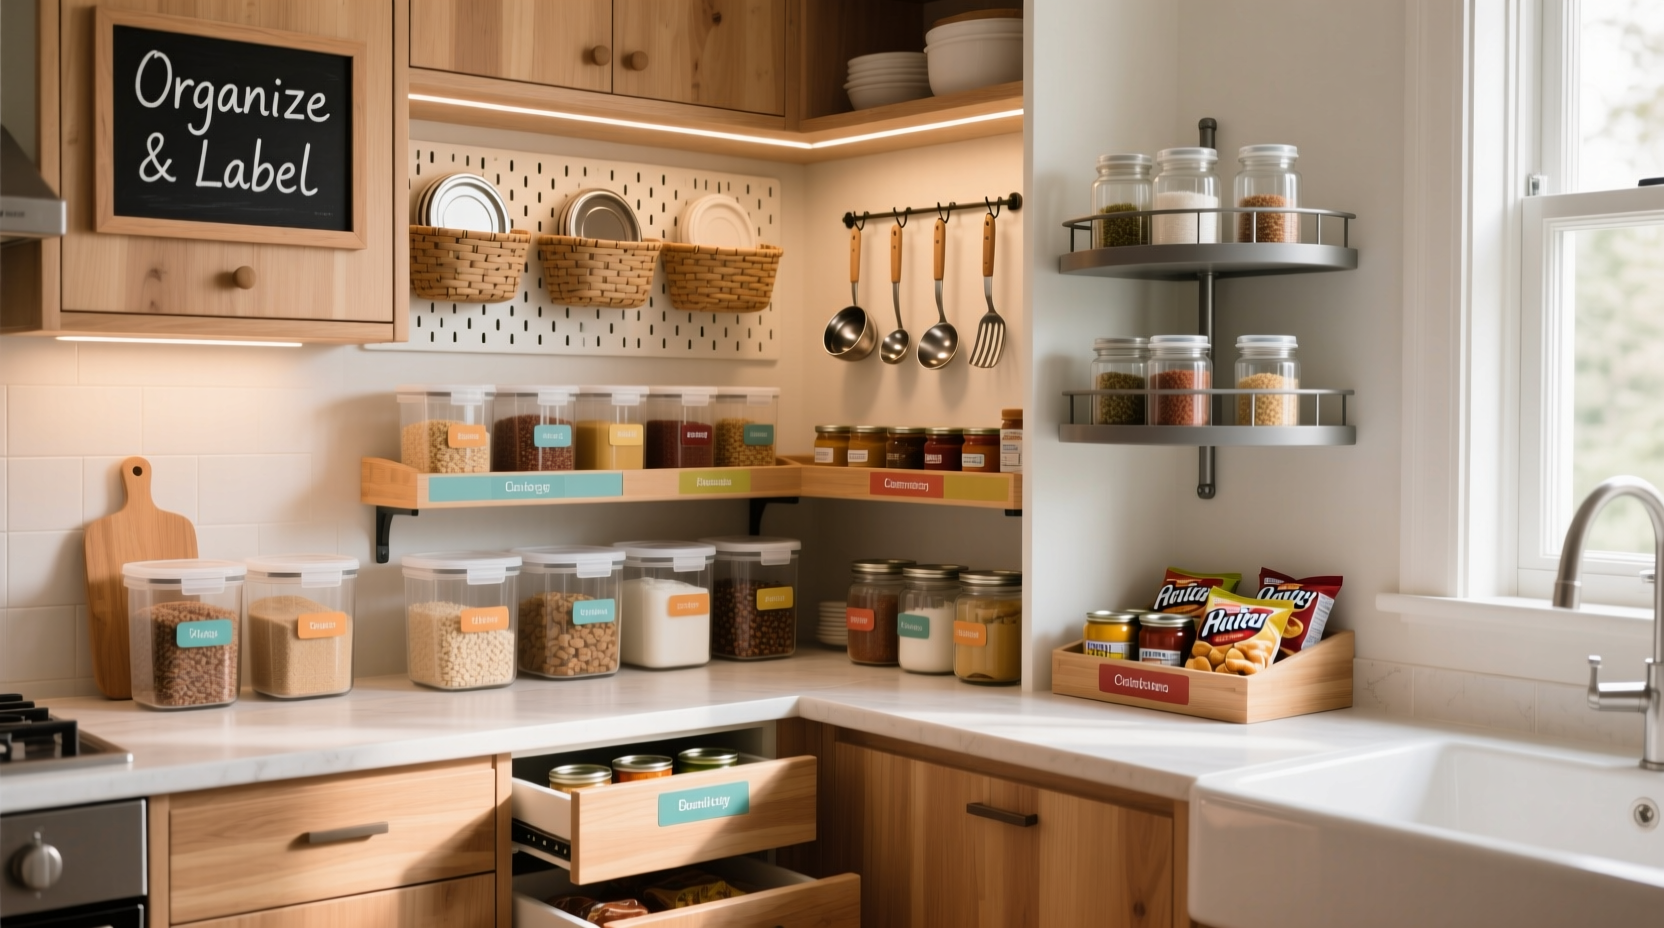
Use Uniform Containers for Efficiency and Aesthetics
Transferring dry goods into matching, airtight containers does more than create a clean look—it enhances functionality. Clear, labeled containers make it easy to see when supplies are running low and protect food from moisture, pests, and odors.
Choose square or rectangular bins instead of round ones—they fit together more efficiently and waste less space. Opt for stackable designs to build upward rather than outward. Look for containers with wide openings for easy scooping and cleaning.
Foods ideal for container storage include:
- Rice, quinoa, and other grains
- Pasta (especially small shapes)
- Sugar, flour, and baking soda
- Cereal and granola
- Dried beans and lentils
Zone-Based Organization System
Divide your pantry into logical zones based on usage and category. This reduces decision fatigue and speeds up cooking. Common zones include:
- Baking Station: Flour, sugar, chocolate chips, vanilla, baking powder—group everything needed for desserts and breads together.
- Breakfast Corner: Cereal, oatmeal, pancake mix, syrup, coffee, tea.
- Canned Goods & Soups: Organize by type—vegetables, beans, broths, tomatoes—and consider using a turntable for visibility.
- Snack Zone: Individual packs, nuts, crackers, granola bars—ideal for families with kids.
- Meal Builders: Pasta, rice, sauces, canned proteins—keep these together for quick weeknight meals.
Zoning works best when placed according to frequency of use. Frequently accessed items (like coffee or snacks) should be at eye level. Heavy items (like oils or large jars) belong on lower, sturdy shelves. Rarely used appliances or seasonal items can go on the highest or hardest-to-reach shelves.
Mini Case Study: The 3x2-Foot Pantry Transformation
Emily, a busy professional living in a downtown apartment, struggled with her 3-foot-wide pantry. It was crammed with overlapping boxes, hidden spices, and no system. After removing everything and discarding expired items, she installed one additional shelf and added a door organizer.
She grouped items into three zones: breakfast, cooking staples, and snacks. She transferred rice, pasta, and sugar into six identical square containers and labeled them. A small lazy Susan was added for oils and vinegars. The result? She now finds ingredients in seconds, reduces food waste, and enjoys a sense of calm every time she opens the door.
Smart Storage Solutions and Accessories
The right tools can dramatically increase usable space. Invest in accessories that promote visibility, accessibility, and stability.
| Solution | Best For | Space Saved |
|---|---|---|
| Lazy Susans (turntables) | Oils, sauces, spices, condiments | Up to 30% in corner access |
| Pull-out baskets | Canned goods, onions, potatoes | Eliminates deep-shelf loss |
| Stackable bins | Snacks, packets, small items | Up to 40% vertical gain |
| Under-shelf baskets | Spices, tea bags, wraps | Utilizes dead space |
| Can organizers (shelf risers) | Canned vegetables, beans, soups | Double-layer access |
Pull-out drawers are especially effective in deeper pantries, bringing rear items forward. If budget allows, slide-out pantry units can be retrofitted into existing cabinets. For renters or those avoiding permanent changes, adhesive shelf liners prevent slipping and make cleaning easier.
Step-by-Step Guide to Pantry Organization
Follow this proven sequence to transform your pantry in under three hours:
- Empty everything: Remove all items and place them on a table or counter.
- Sort and purge: Group by category and discard expired or unused items.
- Wipe down surfaces: Clean shelves, walls, and floor with a mild disinfectant.
- Plan zones: Decide on 3–5 functional areas based on your cooking habits.
- Install organizers: Add shelf risers, door racks, turntables, or bins as needed.
- Transfer to containers: Decant dry goods into uniform, labeled airtight jars.
- Place items strategically: Store by zone, frequency, and weight.
- Label everything: Use consistent labels for containers, baskets, and zones.
- Create a maintenance routine: Schedule a 10-minute weekly check and a quarterly refresh.
This method ensures a thorough, sustainable overhaul—not just a temporary tidy-up.
Common Mistakes to Avoid
Even well-intentioned efforts can backfire if common pitfalls aren’t avoided:
- Overbuying in bulk: Just because it’s on sale doesn’t mean you need 12 cans of soup. Buy only what fits comfortably in your space.
- Ignoring first-in, first-out (FIFO): Always place newer items behind older ones to prevent forgotten food at the back.
- Using mismatched containers: Random jars and bags defeat the purpose of streamlined access.
- Blocking airflow: Overcrowding shelves restricts air circulation, increasing moisture buildup and spoilage risk.
- Skipping labels: Without clear identification, anyone using the pantry wastes time guessing contents.
“The most organized pantry fails if it doesn’t align with how the household actually cooks and eats.” — Marcus Reed, Kitchen Design Specialist
Frequently Asked Questions
How do I keep pests out of a small pantry?
Store all dry goods in sealed, airtight containers made of glass or thick plastic. Avoid keeping food in cardboard or paper packaging, which pests can easily chew through. Regularly inspect for signs of ants or moths, and clean spills immediately. Bay leaves or cedar blocks can act as natural deterrents, though they’re not foolproof.
What if my pantry has no shelves?
Start with adjustable shelf kits or tension rods to create levels. Use stackable bins and crates to form your own structure. Anchor freestanding organizers like rolling carts or tiered racks that fit within the footprint. Even in a bare space, modular solutions can bring order quickly.
How often should I reorganize my pantry?
A full reorganization once or twice a year is sufficient for most households. However, perform a quick 10-minute review weekly to rotate stock, wipe spills, and return misplaced items. Seasonal shifts (e.g., switching from soup to salad ingredients) are ideal times for a refresh.
Final Checklist: Your Pantry Success Plan
Use this checklist to ensure no step is missed:
- ✅ Removed all items from the pantry
- ✅ Discarded expired or unused products
- ✅ Cleaned shelves and walls thoroughly
- ✅ Measured space and planned zones
- ✅ Purchased or installed organizers (bins, turntables, door racks)
- ✅ Transferred dry goods to uniform containers
- ✅ Labeled all containers and zones clearly
- ✅ Arranged items by category and frequency of use
- ✅ Established a weekly maintenance habit
- ✅ Shared the system with household members
Conclusion: Transform Functionality One Shelf at a Time
Organizing a small pantry isn’t about achieving perfection—it’s about creating a system that works for your lifestyle. With smart zoning, the right containers, and a commitment to consistency, even the tiniest storage space can support a smooth, stress-free kitchen routine. The benefits go beyond aesthetics: reduced food waste, faster meal prep, and greater confidence in your daily habits.


 浙公网安备
33010002000092号
浙公网安备
33010002000092号 浙B2-20120091-4
Comments
No comments yet. Why don't you start the discussion?