
A cluttered pantry doesn’t just make meal prep frustrating—it wastes time, money, and usable space. For those with limited square footage, every shelf and corner counts. The good news? With a strategic approach, even the tiniest pantry can be transformed into an efficient, easy-to-navigate storage hub. This guide walks you through a proven method to declutter, categorize, and reorganize your pantry using smart storage techniques and practical design principles.
Step 1: Empty and Assess Your Pantry
The first rule of organization is visibility. To understand what you’re working with, remove everything from your pantry. Place items on a nearby counter or table so you can see them clearly. This step serves multiple purposes: it allows you to check expiration dates, identify duplicates, and assess which containers are functional versus outdated.
As you empty shelves, group similar items together—canned goods, baking supplies, snacks, grains, etc. This initial sorting helps reveal patterns in your inventory and highlights areas of overstocking or disorganization.
While the pantry is empty, take a moment to clean the shelves thoroughly. Wipe down surfaces with a mild cleaning solution, vacuum crumbs from corners, and consider lining shelves with removable shelf paper for easier future maintenance.
Step 2: Categorize and Prioritize Items
Once everything is out, refine your categories based on how frequently you use each item. Common pantry categories include:
- Dry goods (pasta, rice, quinoa)
- Canned foods (vegetables, beans, soups)
- Baking essentials (flour, sugar, baking powder)
- Snacks (chips, nuts, granola bars)
- Breakfast items (cereal, oats, pancake mix)
- Spices and seasonings
- Oils, vinegars, and condiments
- Beverages (coffee, tea, drink mixes)
Prioritize accessibility by placing everyday items at eye level. Reserve higher and lower shelves for less frequently used products like holiday baking ingredients or bulk water bottles.
“Grouping by category reduces decision fatigue and speeds up meal prep.” — Maria Thompson, Home Organization Consultant
Consider also creating “zones” within your pantry. For example, a breakfast zone might house cereal, oatmeal, and coffee near each other. A cooking zone could keep oils, spices, and canned tomatoes together for quick access during dinner prep.
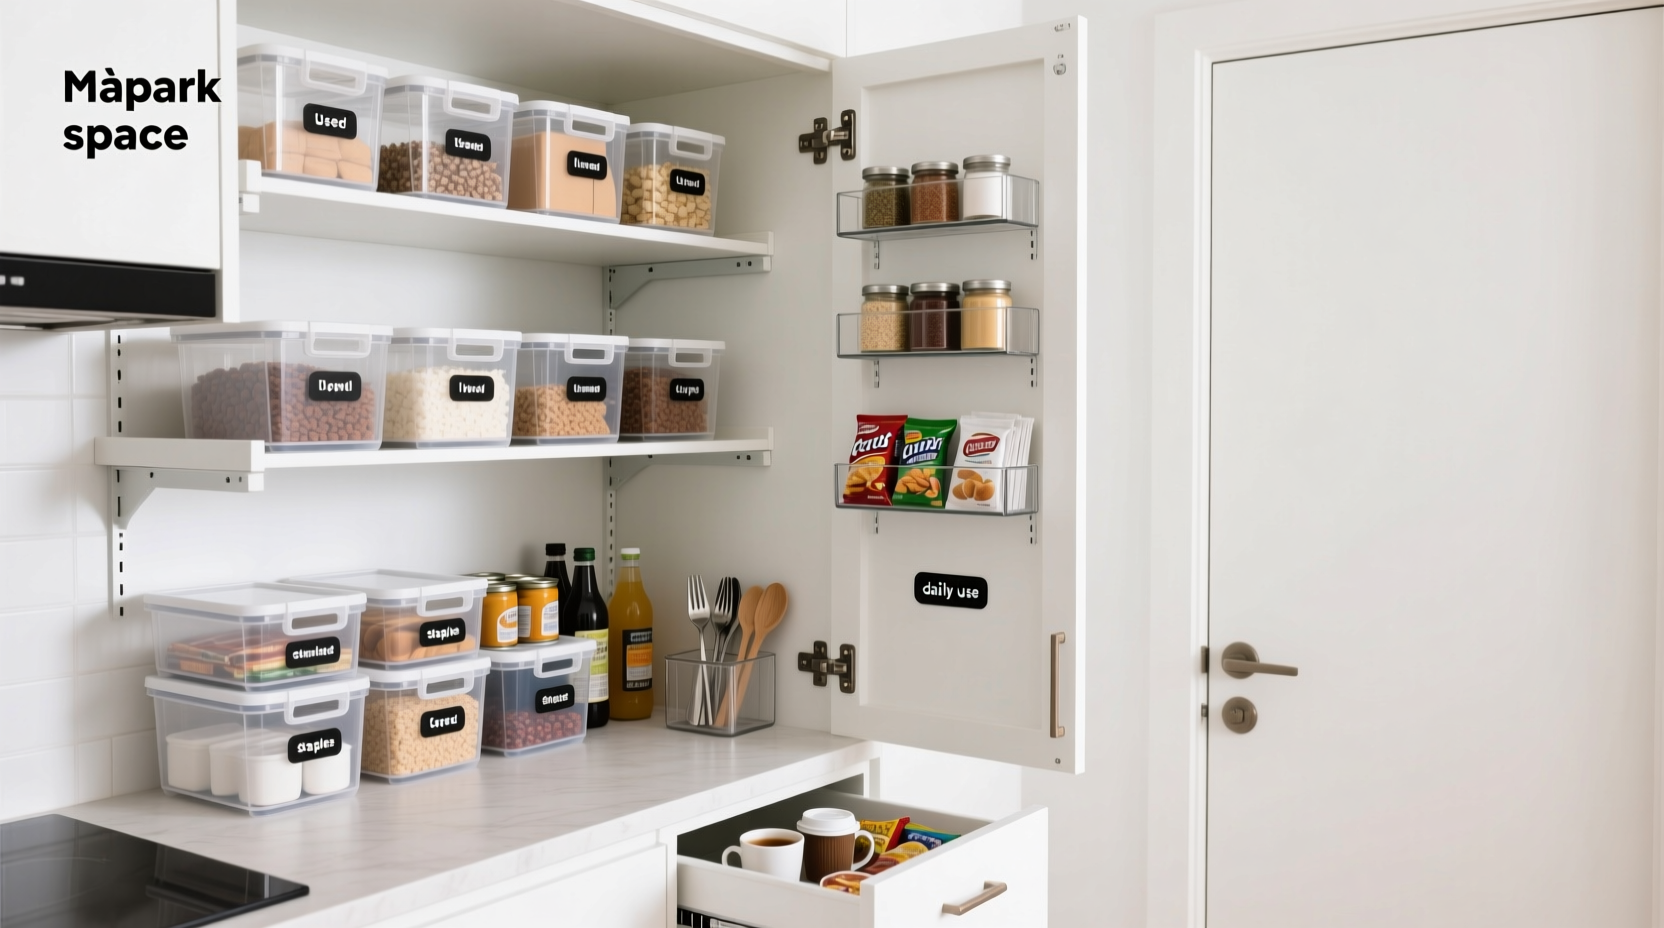
Step 3: Invest in Smart Storage Solutions
Storage containers are the backbone of a well-organized pantry. Opt for clear, airtight containers that protect food from moisture, pests, and staleness. Uniform sizes create visual harmony and improve stacking efficiency.
Use the following guidelines when selecting containers:
- Label everything: Use a label maker or chalkboard labels to mark contents and expiration dates.
- Right-size containers: Match container volume to typical purchase amounts (e.g., a 5-pound flour bin vs. a small spice jar).
- Stackable designs: Choose containers that nest or stack securely to save vertical space.
Don’t overlook door storage. Over-the-door organizers with pockets or bins can hold small items like seasoning packets, tea bags, or spice jars. Pull-out baskets or lazy Susans in deep pantries help access items at the back without pulling everything forward.
Step 4: Maximize Vertical and Hidden Space
Most people underutilize vertical space. Install adjustable shelving if possible, or add risers to create two levels on one shelf. For example, place a shelf riser in front of canned goods so you can store smaller items behind them.
Consider these space-maximizing tools:
| Solution | Best For | Space Saved |
|---|---|---|
| Stackable bins | Snacks, fruit cups, pudding pouches | Up to 30% |
| Under-shelf baskets | Spice jars, small packets | 15–20% |
| Pull-out drawers | Heavy items like potatoes, onions | Improves access, reduces wasted depth |
| Hanging door racks | Condiments, wraps, small tools | Reclaims 100% of door space |
Deep pantries often waste rear space. Use turntables (lazy Susans) for oils, sauces, or jars so nothing gets lost in the back. Corner units benefit especially from rotating trays that bring hidden items into view.
If your pantry has tall ceilings, install a top shelf for infrequently used appliances or seasonal items like holiday serving dishes. Just ensure heavy objects remain on lower shelves for safety.
Step 5: Maintain the System with Routine Checks
An organized pantry only stays useful if maintained. Set a monthly reminder to do a quick sweep: check for expired items, wipe spills, and re-align containers that have shifted.
Adopt the “first in, first out” (FIFO) method: when restocking, move older items to the front and place new purchases behind them. This simple habit prevents food waste and ensures freshness.
“Consistency is key. A five-minute weekly check keeps your pantry functional year-round.” — David Lin, Kitchen Efficiency Expert
Track your shopping habits. If you consistently run out of olive oil or oatmeal, consider keeping a spare bottle or box in the pantry. Conversely, if certain items sit untouched for months, stop buying them in bulk.
Mini Case Study: Transforming a 3-Shelf Apartment Pantry
Sophia, a working professional living in a studio apartment in Chicago, struggled with a narrow 3-shelf pantry just 18 inches wide. It overflowed with mismatched packages, making it hard to find anything quickly. After following the steps in this guide, she implemented the following changes:
- Transferred pasta, rice, and cereal into uniform, labeled acrylic containers.
- Installed an over-the-door organizer for tea and seasoning packets.
- Used a small lazy Susan for oils and vinegar.
- Added a shelf riser to double her front-row capacity.
The result? She reduced visible clutter by 70%, cut grocery prep time in half, and stopped repurchasing items she already had. “I can now see everything at a glance,” she said. “It’s made cooking after work actually enjoyable.”
Pantry Organization Checklist
Follow this checklist to ensure no step is missed:
- Remove all items from the pantry
- Discard expired or stale food
- Wipe down shelves and repair any damage
- Sort items into logical categories
- Decide which items to keep, donate, or discard
- Purchase clear, airtight containers as needed
- Transfer dry goods into labeled containers
- Install door organizers or shelf risers
- Arrange items by frequency of use and category
- Implement FIFO system for restocking
- Schedule monthly maintenance checks
Frequently Asked Questions
How do I organize a walk-in pantry vs. a reach-in pantry?
Walk-in pantries allow for more zoning and larger storage systems like freestanding cabinets or rolling carts. You can dedicate entire sections to baking, snacks, or beverages. Reach-in pantries require tighter optimization—focus on vertical space, door storage, and pull-out bins to maximize accessibility in limited depth.
What are the best containers for a small pantry?
Rectangular, stackable containers with airtight seals work best because they fit together efficiently and minimize air gaps. Glass jars are ideal for spices and small quantities, while BPA-free plastic bins are lightweight and durable for bulkier items like flour or pet food.
How often should I reorganize my pantry?
A full reorganization isn’t needed often—once a year is sufficient if maintenance is consistent. However, a quick refresh every 3–4 months helps adjust for seasonal changes, new dietary habits, or shifts in household size.
Final Thoughts: Small Space, Big Impact
Organizing a small pantry isn’t about achieving perfection—it’s about creating a system that works for your lifestyle. By following a structured process, using the right tools, and maintaining consistency, you can turn a cramped, chaotic space into a model of efficiency. The benefits go beyond aesthetics: you’ll reduce food waste, save time during meal prep, and gain confidence in your kitchen routines.


 浙公网安备
33010002000092号
浙公网安备
33010002000092号 浙B2-20120091-4
Comments
No comments yet. Why don't you start the discussion?