
Living in a small space doesn’t mean sacrificing function or style—especially when it comes to your closet. A tiny closet can become a highly efficient, visually pleasing wardrobe hub if organized with intention. The key is visibility: when every item has a designated, accessible spot, getting dressed becomes faster, stress-free, and even enjoyable. Unlike traditional closets that hide clothes behind doors or buried under piles, an organized tiny closet emphasizes transparency and ease. This guide walks through practical, tested methods to transform your cramped space into a streamlined system where nothing gets lost, forgotten, or wrinkled.
Declutter Before You Organize
Before adding shelves or bins, you must reduce what’s already inside. A cluttered closet, no matter how cleverly designed, will never feel spacious. Start by removing every single item. Yes, everything. Lay them out on your bed or floor so you can assess each piece objectively.
Use the “Keep, Donate, Repair, Discard” method:
- Keep: Items you wear regularly, fit well, and make you feel confident.
- Donate: Clothes in good condition but no longer worn or suited to your lifestyle.
- Repair: Pieces with minor damage (missing button, loose hem) that you intend to fix within two weeks.
- Discard: Stained, torn, or worn-out items beyond repair.
Apply the 90-day rule: If you haven’t worn it in the past three months—and it wasn’t seasonal—let it go. Seasonal items should be rotated and stored outside the primary closet during off-months.
Create Zones for Visibility
Once you’ve reduced your collection, divide the remaining items into functional zones. Think of your closet like a retail store display—everything categorized and easy to find. Common zones include:
- Daily wear tops
- Bottoms (pants, skirts, shorts)
- Dresses and jumpsuits
- Outerwear (jackets, coats)
- Accessories (belts, scarves, hats)
- Shoes (if space allows)
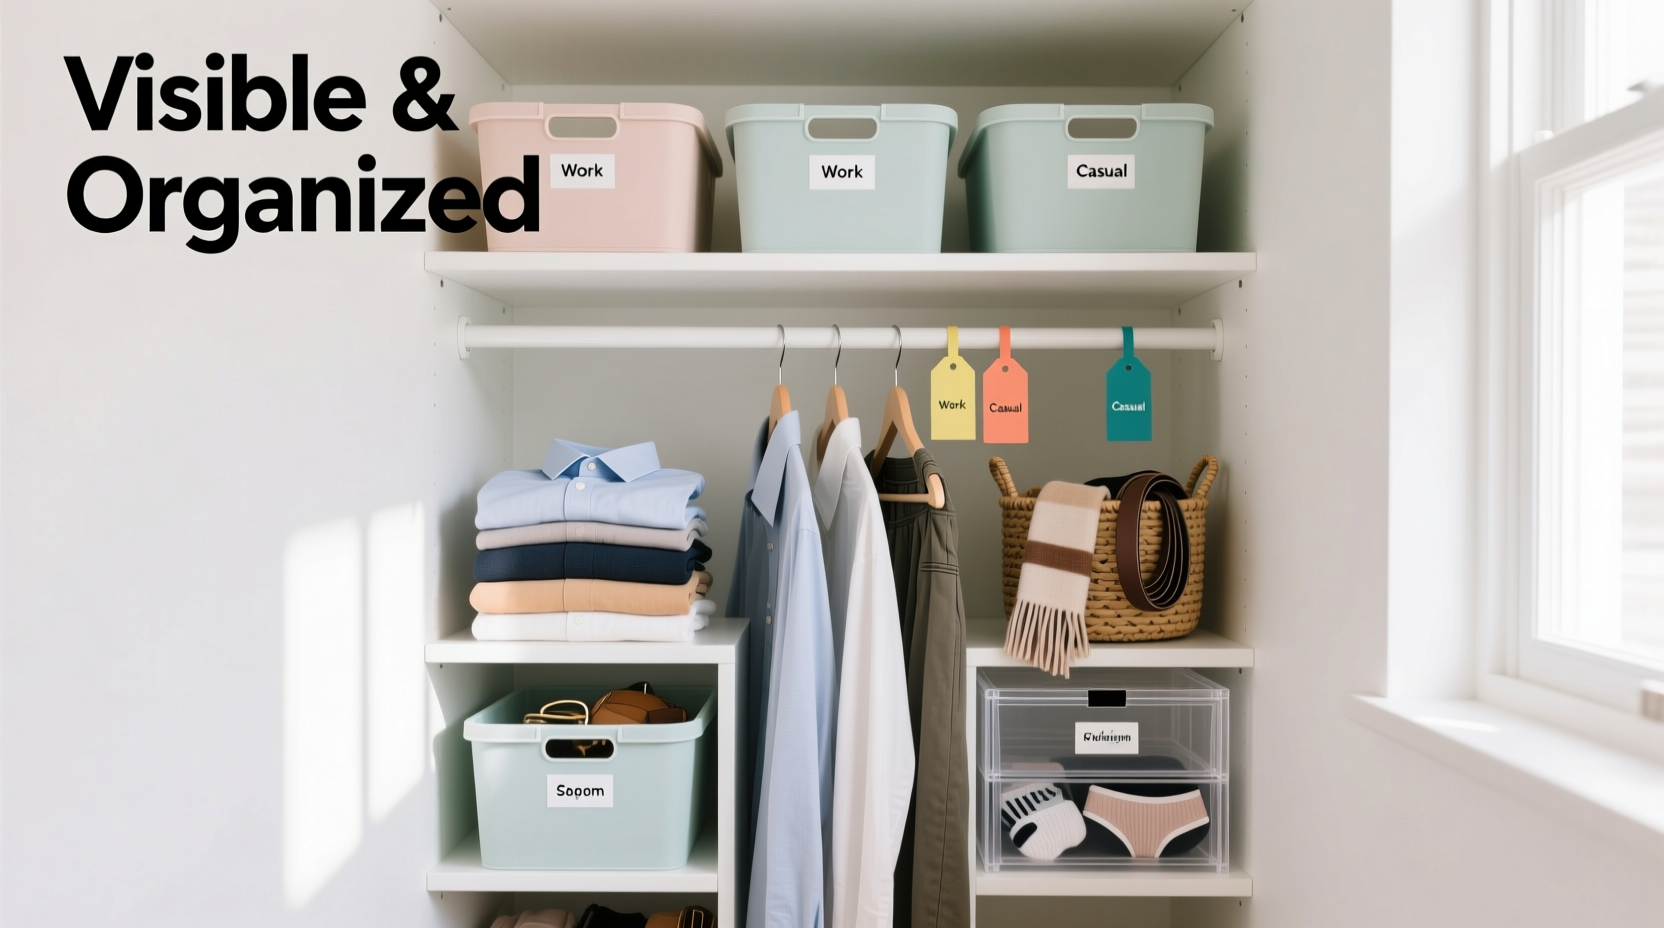
Assign each zone a specific area. Hang shirts together, fold sweaters on a shelf, roll jeans vertically in a bin. The goal is to see all options at a glance without digging. Use open-front bins, baskets, or fabric drawers labeled clearly. Avoid opaque containers unless they’re for infrequently used items.
“Visibility reduces decision fatigue. When you can see every option, choosing an outfit takes seconds, not minutes.” — Lena Torres, Professional Organizer & Author of *Small Space, Big Style*
Maximize Vertical and Horizontal Space
Tiny closets often have underutilized vertical height and door space. Standard rod placement leaves valuable upper and lower areas empty. Here’s how to reclaim every inch:
Double-Hang Your Rod
Install a second rod below the existing one to create two hanging levels. Use the top for longer items like dresses and coats, and the bottom for shirts, blouses, and pants. This effectively doubles hanging capacity without expanding footprint.
Add Adjustable Shelving
Replace fixed shelves with adjustable units. This flexibility lets you customize spacing based on changing needs—tall boots in winter, folded tees in summer. Open shelving keeps items visible; avoid deep shelves where things get buried.
Use the Door Wisely
The back of the closet door is prime real estate. Install over-the-door organizers with clear pockets for accessories, socks, or jewelry. Slim hooks can hold robes, bags, or frequently worn belts. Magnetic strips work well for bobby pins or small metal tools.
Utilize the Floor
If shoes live in the closet, use stackable shoe cubbies or angled shelves to maximize visibility. Store off-season footwear elsewhere to free up space.
| Area | Optimization Strategy | Best For |
|---|---|---|
| Upper Closet | High shelves or bins | Off-season storage, luggage |
| Middle Section | Hanging rods + shelves | Clothes in rotation |
| Lower Section | Shoe racks, pull-out bins | Footwear, folded denim |
| Door | Pockets, hooks, racks | Accessories, scarves, hats |
| Floor | Rolling bins, baskets | Items needing quick access |
Adopt a One-In, One-Out Rule
Maintaining order in a small closet requires ongoing discipline. Every time you bring in a new piece of clothing, remove one. This prevents gradual re-cluttering and forces mindful consumption. It also ensures your closet remains curated to your current lifestyle and preferences.
This rule isn’t just about quantity—it’s about quality. Ask yourself: Does this new item serve a purpose? Is it better than something I already own? If not, reconsider the purchase.
Step-by-Step Guide to Organizing Your Tiny Closet
Follow this sequence to achieve a fully visible, functional closet in under four hours:
- Empty the closet completely. Remove all clothes, shoes, and accessories.
- Sort items into categories. Group by type (tops, bottoms, etc.) and season.
- Declutter ruthlessly. Use the 90-day rule and try-on method to eliminate unused pieces.
- Deep clean the space. Wipe down shelves, vacuum corners, and dust rods.
- Plan your layout. Sketch a quick map showing where each zone will go.
- Install organizational tools. Add double rods, shelves, bins, and door organizers.
- Place items back by category. Hang similar items together, fold others neatly.
- Label containers. Use tags or labels for bins so contents are instantly recognizable.
- Test the system. Get dressed for three days using only the closet. Adjust as needed.
- Set a maintenance schedule. Reassess every 6–8 weeks; rotate seasonally.
Real-Life Example: From Chaos to Clarity
Sophie, a graphic designer living in a 500-square-foot apartment in Seattle, struggled with a 24-inch-deep reach-in closet. Her clothes were crammed on a single rod, shoes spilled onto the floor, and scarves tangled in a drawer. She avoided opening the door, often wearing the same few outfits out of frustration.
After following the steps above, she installed a second hanging rod, added two adjustable shelves, and mounted a clear-pocket organizer on the door. She donated 60% of her wardrobe, kept only what she loved, and grouped items by color and function. Now, Sophie sees every top, pant, and accessory at a glance. Getting ready takes less than five minutes, and she feels more put-together daily. “It’s shocking how much mental clarity comes from seeing my clothes,” she said. “I’m not just organized—I’m happier.”
Smart Storage Solutions for Maximum Visibility
Choosing the right containers and hangers makes a dramatic difference. Prioritize materials and designs that promote airflow and visibility:
- Clear acrylic bins: Ideal for folded items like sweaters or pajamas. Stackable and see-through.
- Fabric bins with front labels: Breathable and soft on delicate fabrics. Choose ones with open fronts.
- Uniform slimline hangers: Velvet-flocked or wooden hangers prevent slipping and save space. Avoid mismatched plastic hangers.
- Rolling carts: For closets with floor space, a narrow rolling cart with three tiers holds folded items and pulls out for full access.
- Drawer dividers: Use in any built-in drawers to separate socks, underwear, or accessories.
Avoid deep drawers or closed cabinets in tiny closets—they hide items and encourage disorganization. If you must use drawers, keep them shallow and use dividers.
Checklist: Your Tiny Closet Transformation Plan
Print or save this checklist to stay on track:
- ☐ Remove all items from the closet
- ☐ Sort into categories (tops, bottoms, outerwear, etc.)
- ☐ Declutter using the 90-day rule
- ☐ Clean shelves, rods, and floor
- ☐ Measure closet dimensions (height, width, depth)
- ☐ Purchase organizational tools (double rod, bins, door rack)
- ☐ Install upgrades
- ☐ Assign zones for each clothing type
- ☐ Hang clothes by category and color
- ☐ Fold and store non-hangables in labeled bins
- ☐ Place accessories in door organizers or trays
- ☐ Implement one-in, one-out rule
- ☐ Schedule next review in 8 weeks
Frequently Asked Questions
How do I organize a tiny closet without spending money?
You don’t need to buy anything to start. Begin by decluttering and rearranging what you already own. Use cardboard boxes as temporary bins, repurpose old hangers, and group items by frequency of use. Often, simply reducing volume and improving layout creates enough breathing room.
Should I hang or fold clothes in a small closet?
Hang structured garments like shirts, blazers, and dresses to maintain shape. Fold knits, sweaters, jeans, and tees to prevent stretching. Rolling clothes vertically in bins saves space and increases visibility—popularized by military packing methods.
What if my closet has no shelves or rods?
Consider a freestanding clothing rack or a tension rod system. These require no drilling and can be adjusted as needed. Pair with under-bed storage for off-season items. Even in rentals, removable adhesive hooks and over-the-door solutions offer significant gains.
Final Thoughts: A Visible Closet, A Calmer Mind
An organized tiny closet isn’t just about fitting more in less space—it’s about designing a system that supports your daily life. When everything has a visible, logical place, you stop wasting time searching and start enjoying your wardrobe. The process takes effort upfront, but the payoff is lasting: confidence, efficiency, and peace of mind.
Start today. Empty that closet. Make hard choices. Build a layout that reflects how you actually dress. Then maintain it with simple habits like the one-in-one-out rule and quarterly reviews. You’ll find that a small closet, done right, can outperform even the largest walk-ins.


 浙公网安备
33010002000092号
浙公网安备
33010002000092号 浙B2-20120091-4
Comments
No comments yet. Why don't you start the discussion?