
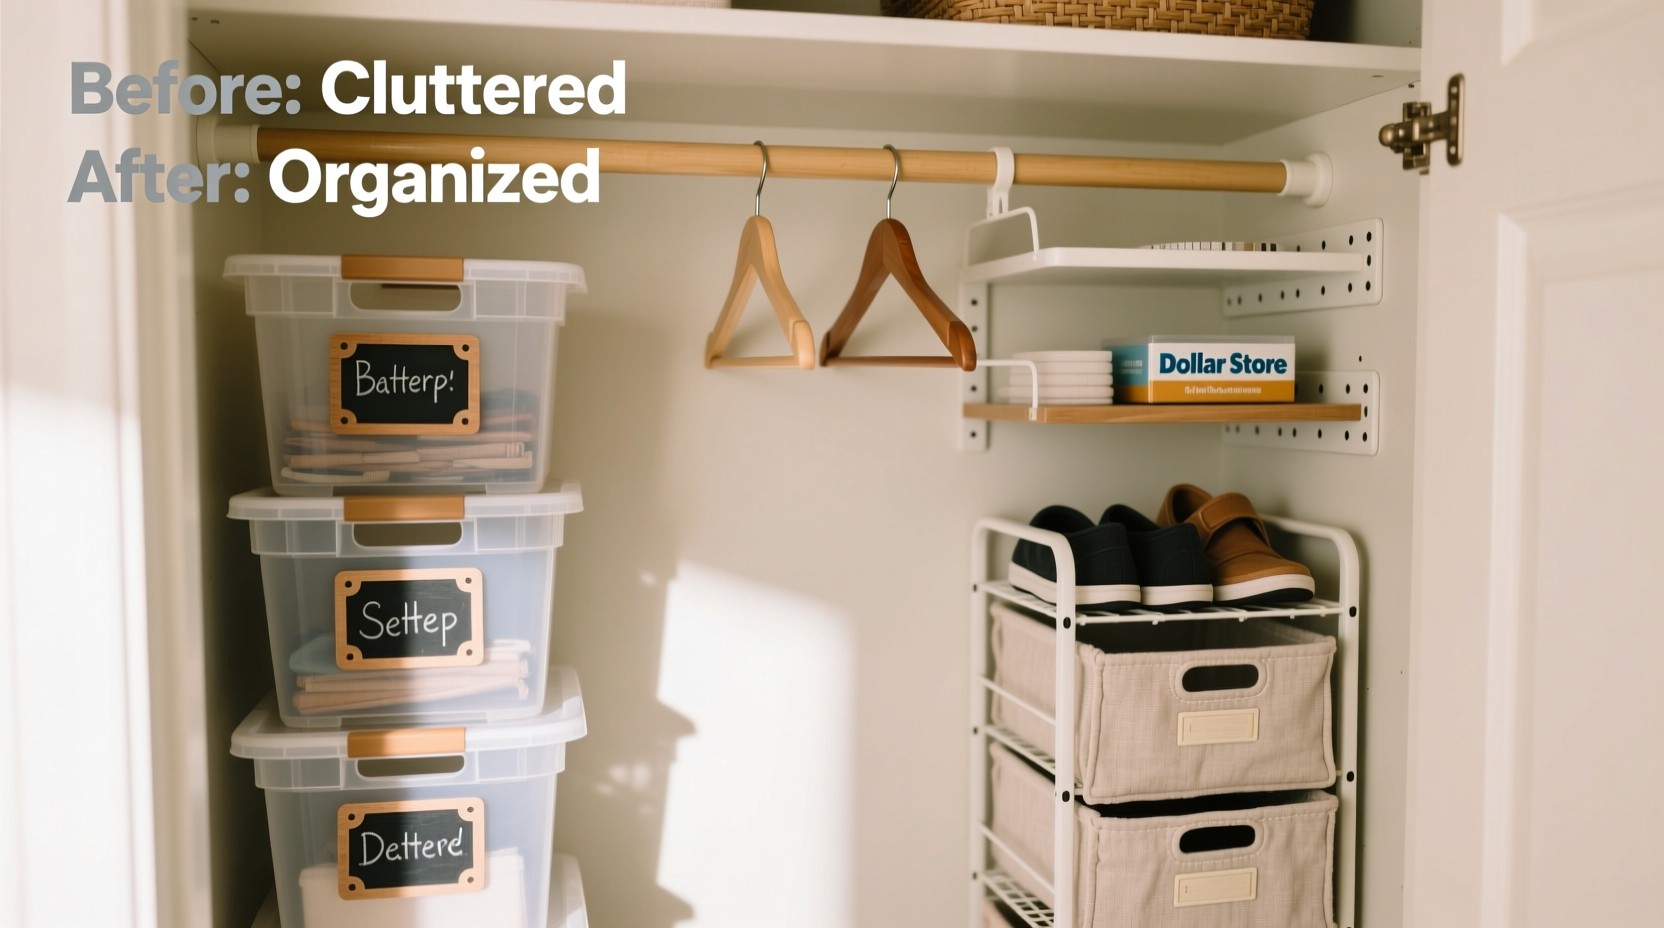
Living with limited space doesn’t mean you have to live with clutter. A small closet can become highly functional with smart organization—even when your budget is tight. Contrary to popular belief, you don’t need custom shelving or designer bins to transform a cramped, chaotic closet into an efficient storage hub. With a few strategic purchases from your local dollar store, you can unlock every inch of usable space and keep everything neatly in its place.
Dollar stores are treasure troves for organizing essentials: adhesive hooks, stackable bins, over-the-door organizers, drawer dividers, and more. These inexpensive tools, when used creatively, can rival high-end storage systems in both function and appearance. The key lies not in what you buy, but how you use it. This guide walks through practical, proven strategies to reorganize even the tiniest closet using only budget-friendly finds.
Assess Your Space and Needs
Before purchasing any supplies, take time to evaluate your current closet setup. Measure the dimensions: height, width, and depth. Note where space is wasted—such as unused vertical areas, empty wall surfaces, or gaps between hanging clothes. Identify what types of items dominate your closet: folded clothes, shoes, accessories, seasonal wear, or bags.
This assessment helps determine which organizational tools will deliver the most impact. For example, if you own many scarves or belts, slim over-the-door organizers make sense. If shelf space is limited, stacking bins can double your surface area. Understanding your usage patterns prevents buying unnecessary items and ensures each dollar-store purchase serves a clear purpose.
Essential Dollar Store Organizers That Work
Not all dollar store items are created equal. Some are flimsy or poorly designed, but others offer surprising durability and versatility. Focus on these eight categories that consistently deliver results:
- Over-the-door shoe organizers: Use clear pockets to store folded tops, socks, jewelry, or cleaning supplies.
- Plastic drawer bins: Stackable containers ideal for grouping similar items like workout gear or winter accessories.
- Adhesive hooks: Mount inside doors or walls to hang robes, hats, or reusable shopping bags.
- Shelf dividers: Prevent stacks of sweaters from toppling and help maintain neat piles.
- Hangers (non-slip or velvet): Maximize rod space by preventing slippage and bunching.
- Label makers or sticky labels: Create instant clarity across bins and boxes.
- Drawer organizers: Originally meant for utensils, these fit perfectly in shallow closet drawers for ties, sunglasses, or underwear.
- Baskets with handles: Great for storing off-season clothing or items needing quick access.
When selecting products, prioritize sturdiness. Test plastic bins for rigidity, check hook adhesives, and avoid overly thin materials that may crack under weight. Most dollar stores carry brand-name equivalents or generic versions of well-known organizers at a fraction of retail cost.
Smart Hacks for Maximizing Each Item
The real magic happens when you repurpose items beyond their intended use. A kitchen drawer organizer isn’t just for silverware—it works beautifully for rolled t-shirts or scarves. An over-the-door shoe rack becomes a command center for small handbags or folded jeans. Here’s how to stretch each purchase:
- Turn a spice rack into a tie or belt holder by mounting it vertically on the back of the door.
- Use small plastic bins to corral shoes on the floor, keeping pairs together and dust-free.
- Stack two or three shallow bins sideways to create cubby-style storage for handbags or hats.
- Line up adhesive hooks along the upper frame of the closet to suspend lightweight baskets or netted produce bags for gloves or chargers.
- Place non-slip shelf liner inside bins to prevent sliding and add grip to stacked items.
Step-by-Step Closet Transformation Plan
Follow this six-step process to completely reorganize your tiny closet using only dollar store tools:
- Empty and clean: Take out all contents. Wipe down shelves, vacuum corners, and let the space breathe.
- Sort and purge: Categorize items into keep, donate, repair, and discard piles. Be ruthless—only keep what fits and gets worn.
- Measure and plan zones: Divide the closet into functional zones: hanging, folding, shoes, accessories. Sketch a rough layout if needed.
- Shop strategically: Visit the dollar store with a list based on your zone plan. Stick to essential items only.
- Install and arrange: Begin with permanent fixtures like hooks and racks, then layer in bins and dividers. <6> Label and maintain: Label every bin and set a monthly reminder to reset the system and remove clutter.
This methodical approach ensures no step is skipped and prevents post-organization regret. Many people rush the sorting phase, only to re-clutter within weeks. Taking time upfront pays long-term dividends in usability.
Do’s and Don’ts of Budget Closet Organization
| Do’s | Don’ts |
|---|---|
| Use vertical space with over-the-door organizers and stacked bins. | Ignore the back of the closet door—it’s prime real estate. |
| Group like items together (e.g., all tank tops in one bin). | Mix unrelated categories in the same container. |
| Invest in non-slip hangers to maximize rod capacity. | Use wire hangers that stretch shoulders or cause slippage. |
| Label everything clearly—even if you think you’ll remember. | Leave unlabeled bins that become dumping grounds. |
| Reevaluate every 3 months and adjust as seasons change. | Set it and forget it—clutter creeps back quickly. |
Real-Life Example: Maria’s 3x4 Foot Closet Makeover
Maria lives in a studio apartment in downtown Seattle. Her closet measures just 3 feet wide by 4 feet deep—barely enough room for a single rod and a narrow shelf. Before organizing, she stuffed clothes onto hangers, piled sweaters on the floor, and lost scarves and belts in the chaos.
She visited her local dollar store with a $15 budget and bought: one over-the-door shoe organizer ($3), four stackable plastic bins ($1 each), a pack of adhesive hooks ($2), non-slip hangers ($1 for 5), and a label maker ($3). She also picked up shelf liner for $1.
After emptying and cleaning the closet, she installed the shoe organizer on the inside of the door for folded jeans and t-shirts. She mounted adhesive hooks to hang her robe and reusable tote. The plastic bins were stacked into two columns: one for underwear and socks, another for workout clothes. Non-slip hangers freed up 30% more rod space by eliminating bunching. Labels made finding items effortless.
The total cost? $13. The result? A fully functional, visually tidy closet that lasted over a year with minimal upkeep. “I was shocked how much I could do for under $15,” Maria said. “Now I actually enjoy opening my closet instead of dreading it.”
“Small spaces require smarter systems, not bigger budgets. Often, the simplest solutions—like a $1 bin or a $2 hook—are the most effective.” — Dana Lin, Minimalist Home Organizer & Author of *Space-Smart Living*
Checklist: Your Dollar Store Closet Upgrade
Use this checklist to ensure a smooth, complete transformation:
- ☐ Empty the entire closet and clean all surfaces
- ☐ Sort clothing into categories and declutter aggressively
- ☐ Measure closet dimensions and identify dead zones
- ☐ List needed organizers based on storage goals
- ☐ Purchase only essential dollar store items (stick to the list!)
- ☐ Install over-the-door racks, hooks, and shelves
- ☐ Place bins and dividers; assign designated homes for each category
- ☐ Use non-slip hangers and optimize hanging space
- ☐ Label all containers clearly
- ☐ Set a recurring calendar reminder to reassess in 3 months
Frequently Asked Questions
Can dollar store organizers really last?
Yes—if chosen wisely. Look for thicker plastics, strong adhesive backing, and reinforced edges. Reinforce weak points with tape if necessary. While they may not last decades, most can endure 1–2 years of regular use, which is often enough for evolving storage needs.
What if my closet has no door for over-the-door organizers?
No problem. Mount a tension rod inside the closet and hang mesh or fabric organizers from it. Alternatively, use adhesive hooks on side walls or install a slim shelving unit to hold bins horizontally.
How do I prevent bins from tipping over?
Choose wider, lower-profile bins for stability. Avoid overloading. Place heavier items at the bottom. You can also secure stacked bins together with small zip ties through pre-existing holes or drilled pilot points.
Final Thoughts: Small Investment, Big Impact
A tiny closet doesn’t have to be a source of frustration. With thoughtful planning and a handful of cleverly repurposed dollar store finds, you can create a system that’s both functional and sustainable. The beauty of this approach lies in its accessibility: anyone, regardless of income or living situation, can achieve a clutter-free space without spending hundreds on renovations or specialty furniture.
Organization isn’t about perfection—it’s about progress. Start small. Pick one corner of your closet. Add one bin or hook. Build momentum gradually. Over time, those small changes compound into lasting order. And the best part? You’ll save money, reduce stress, and actually enjoy getting dressed each morning.


 浙公网安备
33010002000092号
浙公网安备
33010002000092号 浙B2-20120091-4
Comments
No comments yet. Why don't you start the discussion?