
Living with limited space doesn’t mean sacrificing order or style. A tiny closet can become highly functional with thoughtful planning and the right tools—even if your entire budget comes from a single trip to the dollar store. With creativity and strategic use of affordable items, you can maximize every inch of storage, reduce clutter, and make daily dressing effortless. This guide walks through proven methods to reorganize even the smallest closets using only low-cost, widely available supplies—no specialty hardware or renovations required.
Assess Your Space and Needs
Before purchasing any supplies, take time to evaluate your closet’s dimensions, current layout, and usage patterns. Measure the width, depth, and height of your closet, noting any obstructions like shelves, rods, or vents. Then, categorize what you store: clothes, shoes, accessories, seasonal items, etc. Understanding how much of each item you own helps determine which organizational solutions are most needed.
Ask yourself:
- Do I have more hanging items than shelf space allows?
- Are my shoes piling up on the floor?
- Do I frequently misplace small accessories like scarves or belts?
- Is there unused vertical or door space?
This assessment prevents overbuying and ensures that every dollar store purchase serves a purpose. It also reveals opportunities to reconfigure existing elements—like lowering a hanging rod to add shelving underneath—without spending a cent.
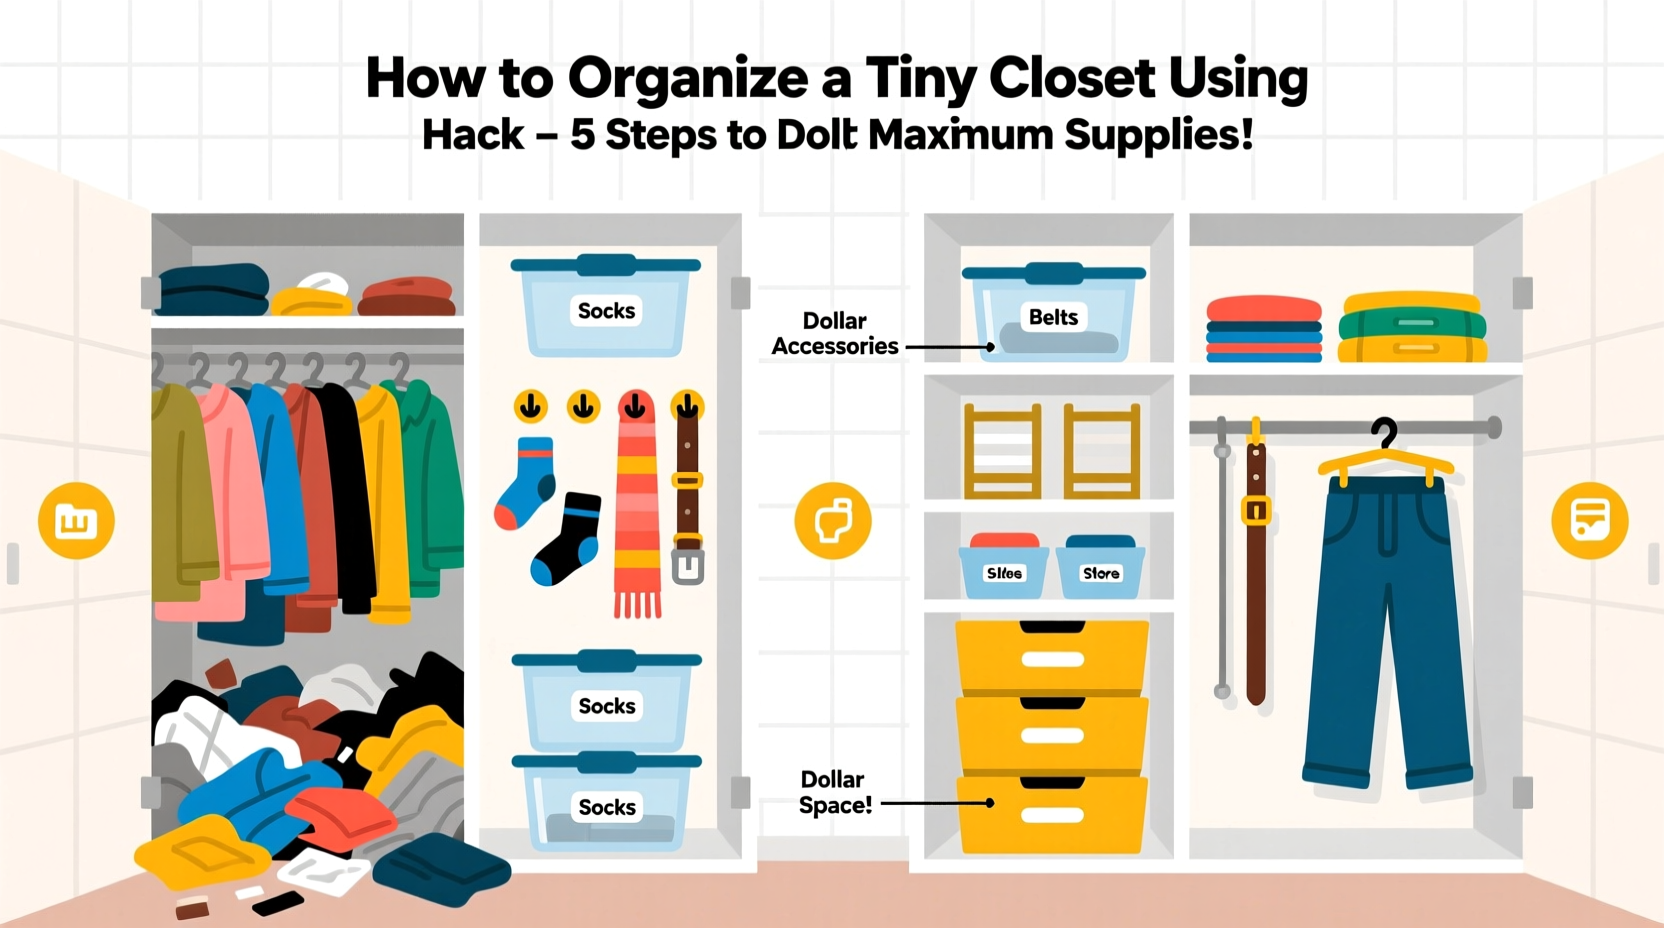
Essential Dollar Store Supplies for Closet Organization
The key to success lies in selecting versatile, sturdy items that serve multiple functions. Most dollar stores carry a surprising range of organizational tools perfect for closets. Here’s a list of commonly available supplies and how to use them effectively:
| Item | Primary Use | Creative Hack |
|---|---|---|
| Plastic bins (clear or colored) | Storing folded clothes, accessories, or off-season items | Label lids with masking tape and marker; stack vertically to save floor space |
| Over-the-door shoe organizer | Shoe storage | Use pockets for scarves, hats, jewelry, or toiletries in travel bags |
| Hangers (velvet, plastic, or wooden look-alikes) | Hanging clothes uniformly | Clip-on hangers double as skirt/pant dividers or towel holders |
| Drawer dividers (for kitchen or office) | Organizing folded t-shirts, socks, or undergarments | Place inside bins to create compartments for small items |
| Command hooks (or adhesive hooks) | Hanging belts, robes, or bags | Attach inside doors or walls for lightweight item storage |
| Baskets or fabric bins | Holding bulky items like sweaters or pajamas | Use as decorative cubby organizers if placed on open shelves |
| Shelf liners | Preventing slippage and protecting surfaces | Cut into strips to stabilize stacked bins or line drawer bottoms |
Stick to clear or neutral-colored containers when possible—they create a cohesive, clean aesthetic and allow visibility of contents. Avoid flimsy materials; test sturdiness by gently pressing on bins or bending hangers before buying.
Step-by-Step: Transform Your Tiny Closet in One Afternoon
You don’t need days to overhaul your closet. Follow this realistic, four-hour timeline using only dollar store finds:
- Hour 1: Empty & Sort (30 min)
Remove everything from the closet. Sort items into piles: keep, donate, repair, discard. Fold or hang similar categories together. - Hour 1: Clean & Prep (30 min)
Wipe down shelves, vacuum corners, and dust the rod. Line shelves with non-slip shelf liner to prevent bin sliding. - Hour 2: Install Vertical Storage (60 min)
Hang an over-the-door shoe organizer on the inside of the closet door. Use top shelf for out-of-season clothing stored in labeled plastic bins. Install adhesive hooks along side walls or back panel for bags, ties, or robes. - Hour 3: Optimize Hanging Space (60 min)
Replace mismatched hangers with uniform velvet or slim plastic ones (dollar stores often sell packs of 20+). Use double-tier hangers for pants or skirts. Hang frequently worn items at eye level. - Hour 4: Fold, Bin, and Label (60 min)
Fold shirts, jeans, and sweaters using the KonMari method (vertical folding) so they stand upright in bins. Place drawer dividers inside shallow bins to separate socks or underwear. Label all containers clearly with masking tape and a pen.
Real-Life Example: Maria’s 3x4 Foot Reach-In Closet
Maria lives in a studio apartment in downtown Seattle. Her closet measures just 3 feet wide and 4 feet deep, yet she managed to fit her entire wardrobe—including winter coats, shoes, and workout gear—using only $15 worth of dollar store supplies.
She started by removing old wire shelves and replacing them with two stackable plastic bins on the floor for folded jeans and tees. She mounted an over-the-door shoe organizer and filled it with scarves, beanies, and gym socks. Above the rod, she added another bin for off-season sweaters. Adhesive hooks on the side wall hold her three favorite handbags.
By switching to slim velvet hangers, she freed up 6 inches of horizontal space, allowing room for a second hanging rack via a cascading hanger. Now, blouses hang above pants, maximizing vertical air space. She uses kitchen drawer dividers inside a bin to separate tank tops by sleeve style.
“I was skeptical,” Maria admits, “but after one trip to the dollar store, my closet actually feels bigger. I get ready faster now because I can see everything.”
“Small spaces demand smart systems, not expensive solutions. The best organizers aren’t the priciest—they’re the ones that match your habits.” — Lena Torres, Urban Living Organizer & Author of *Compact Spaces, Full Lives*
Maximizing Function Without Renovations
Tiny closets often come with fixed structures—you can’t move walls or install built-ins. But you can still gain usable space through clever hacks:
- Double up rods: Hang a second rod below the main one using S-hooks or a tension rod between walls. Use the lower level for shorter items like shirts or skirts.
- Use shelf risers: Stack bins vertically and place a flat plastic tray on top to create a new layer for folded items.
- Repurpose kitchen items: Tension rods aren’t just for curtains—they can corral rolled t-shirts in a deep bin or keep scarf bundles upright.
- Create zones: Designate areas: top shelf for storage, middle for daily wear, floor for shoes or baskets. This mental mapping reduces decision fatigue.
Avoid overcrowding. Leave at least 2 inches of breathing room around bins and ensure the door closes smoothly. If something no longer fits, it’s a sign to edit your collection—not squeeze more in.
Common Mistakes to Avoid
Even well-intentioned efforts can backfire without awareness of common pitfalls. Steer clear of these errors:
| Don’t | Why It’s a Problem | Do Instead |
|---|---|---|
| Use opaque bins without labels | You’ll forget what’s inside and waste time searching | Label every container or use clear bins |
| Buy too many supplies upfront | Can lead to clutter and wasted money | Purchase only what solves an immediate need |
| Hang heavy items on adhesive hooks | May peel off and damage walls | Reserve adhesive hooks for lightweight items only |
| Ignore shoe storage | Leaves floors messy and wastes floor space | Use door organizers or stackable shoe boxes |
Frequently Asked Questions
Can dollar store organizers really last long-term?
Yes—if chosen wisely. Look for thick plastic bins, reinforced hangers, and non-slip liners. While not indestructible, many dollar store products perform well for 1–3 years with moderate use. Replace as needed rather than investing heavily upfront.
What if my closet has no door?
No problem. Use a freestanding clothing rack with bins beneath, or hang a curtain rod outside the closet opening and drape a fabric curtain for privacy. Mount adhesive hooks on the adjacent wall instead of the door.
How do I prevent my system from becoming cluttered again?
Adopt a “one in, one out” rule: for every new clothing item brought in, remove one. Also, schedule a 15-minute weekly reset to straighten hangers, fold stray items, and return misplaced things to their zones.
Final Checklist: Your Dollar Store Closet Makeover Plan
- Empty and clean the closet
- Sort clothing into keep/donate/repair piles
- Measure space and sketch a simple layout
- Buy only essential supplies: bins, hangers, door organizer, adhesive hooks, shelf liner
- Install vertical and door-mounted storage
- Use uniform hangers and optimize hanging space
- Fold items vertically and store in labeled bins
- Create designated zones for different categories
- Add labels and final touches (hooks, dividers)
- Review and adjust the system monthly
Conclusion: Small Investment, Big Impact
A tiny closet doesn’t have to be a source of frustration. With less than $20 and a few hours of focused effort, you can build a streamlined, efficient system using nothing but dollar store supplies. The secret isn’t in expensive upgrades—it’s in consistency, creativity, and smart use of space. When everything has a home and is easy to access, getting dressed becomes simpler, and your space feels more peaceful.
Start today. Empty that closet, visit your local discount store, and put these strategies into action. You might be surprised at how much more your small space can do.


 浙公网安备
33010002000092号
浙公网安备
33010002000092号 浙B2-20120091-4
Comments
No comments yet. Why don't you start the discussion?