
A tiny closet without built-in shelves or drawers presents a common but solvable challenge. Whether you're living in a studio apartment, a dorm room, or an older home with outdated storage, the lack of structure doesn’t mean you have to sacrifice function. With thoughtful planning and strategic organization, even the smallest, most barren closet can become a highly efficient personal storage zone. The key lies not in adding permanent fixtures, but in leveraging adaptable solutions that maximize vertical space, minimize clutter, and keep your essentials visible and accessible.
Assess Your Space and Needs
Before introducing any tools or systems, take time to evaluate your closet’s dimensions and your storage requirements. Measure the width, depth, and height of the space. Note the location of the hanging rod—if one exists—and whether it’s fixed or removable. Identify what types of items you’ll store: clothing, shoes, accessories, seasonal gear, or a mix.
This assessment helps determine which organizational methods will work best. For example, if your closet is only 24 inches deep, bulky furniture won’t fit. If you own mostly folded garments like sweaters or jeans, hanging might not be the priority. Understanding your usage patterns prevents wasted effort on solutions that don’t align with your lifestyle.
Create Zones for Different Categories
Even in a small space, dividing your closet into functional zones improves usability. Think of it like urban planning for your clothes: each category gets its designated area. Common zones include:
- Hanging: Shirts, dresses, blazers, pants
- Folded: Sweaters, t-shirts, jeans, pajamas
- Shoes & Accessories: Footwear, belts, scarves, hats
- Seasonal Storage: Off-season coats, swimwear, holiday attire
Zoning reduces decision fatigue. When everything has a place, putting things away becomes automatic. It also makes retrieval faster—you’re not digging through mixed categories to find a single item.
To define zones without permanent construction, use color-coded bins, labeled fabric boxes, or distinct shelving units. Position frequently used items at eye level and less-used ones higher or lower.
Maximize Vertical Space with Adjustable Solutions
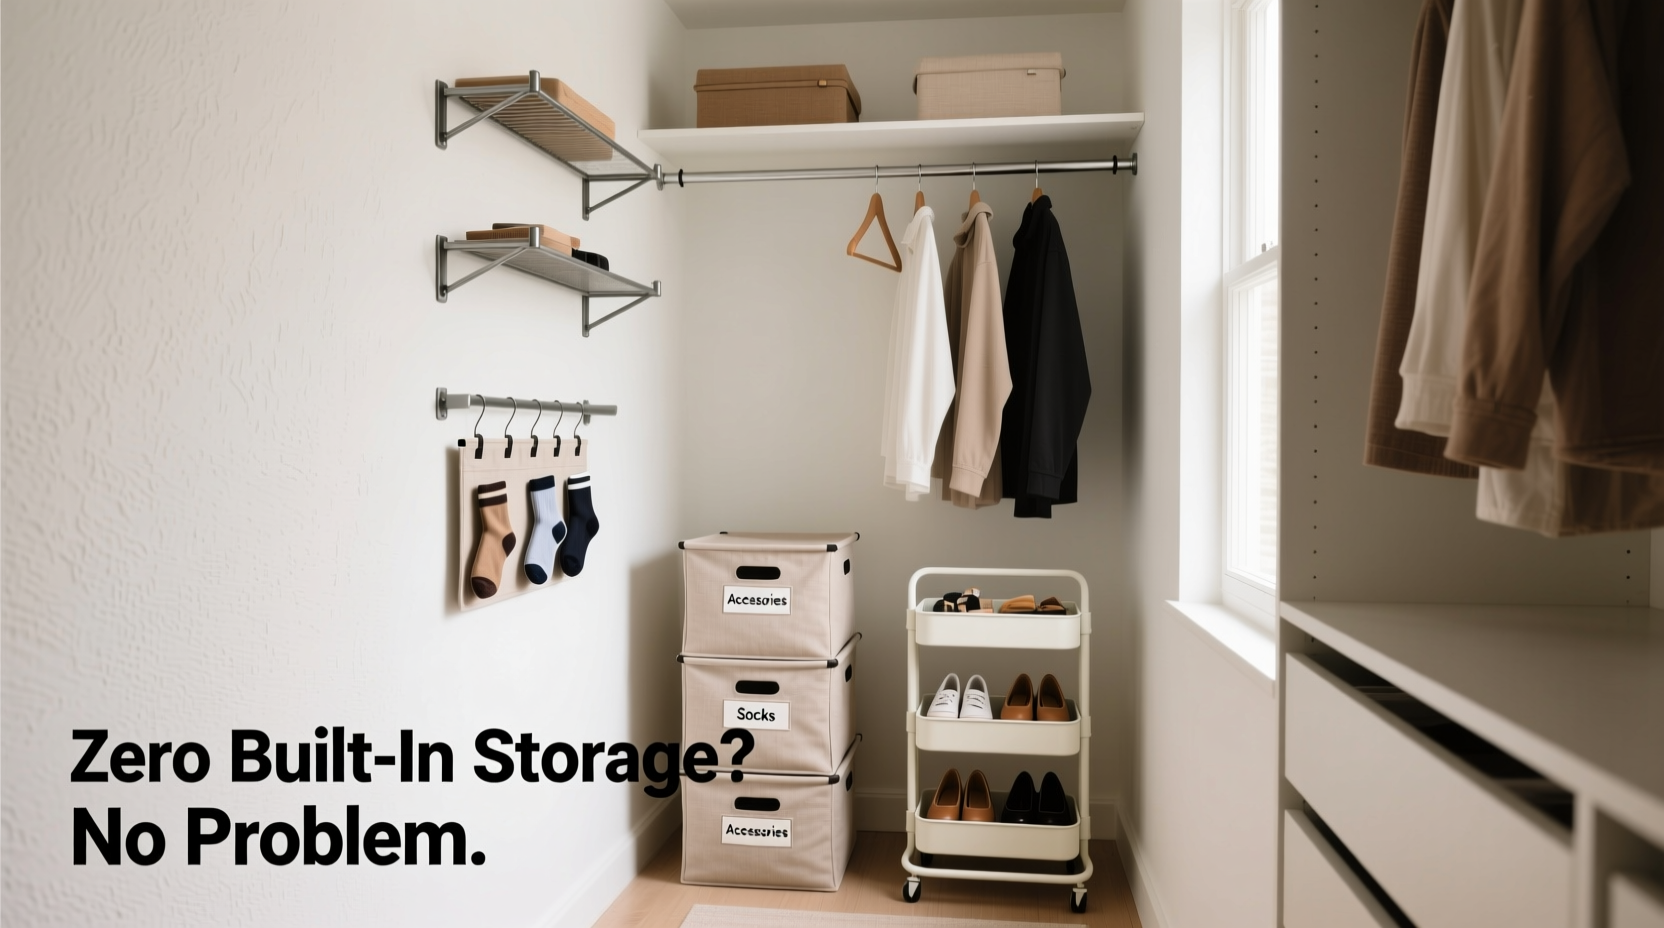
In a closet lacking shelves, vertical space is your greatest asset. Most people underutilize the upper third of their closets, missing out on valuable real estate. Here are practical, non-permanent ways to add layers of storage:
- Freestanding Closet Organizers: These modular units slide into closets and offer shelves, drawers, and hanging rods—all without screws or drilling. Look for slim models (under 14” deep) designed for tight spaces.
- Over-the-Door Organizers: Clear pockets or canvas sleeves hang over the door and are ideal for accessories, socks, or toiletries. Choose lightweight versions to avoid straining hinges.
- Tension Rods: Install horizontal tension rods at different heights to create multiple hanging levels. One rod can hold shirts, another skirts, and a third scarves or robes.
- Stackable Bins: Use sturdy, open-top bins made of canvas or plastic. Stack them vertically and label each for quick identification. Avoid stacking more than three high unless they’re on a stable surface.
Vertical stacking multiplies storage capacity without increasing footprint. For example, a 6-foot-tall closet with no shelves offers just floor space. Add two freestanding shelves and you triple usable area.
Step-by-Step: Installing a Multi-Level Hanging System
If your closet has only one rod, here’s how to double your hanging capacity safely:
- Measure the distance between side walls and ceiling height.
- Purchase two adjustable tension rods rated for clothing weight (typically 20+ lbs).
- Install the first rod 12–15 inches below the existing one.
- Add a second rod another 12 inches down if space allows.
- Use shorter hangers on lower rods to prevent crowding.
- Hang lighter garments (blouses, scarves) on bottom rods; heavier items (coats, suits) on top.
This system adds up to two extra hanging tiers without damaging walls. It’s especially effective for storing seasonal layers during transition months.
Smart Storage Products That Work Without Renovation
You don’t need carpentry skills or a renovation budget to transform a bare closet. The market offers numerous rental-friendly, damage-free products that deliver shelf-like functionality. Below is a comparison of popular options:
| Solution | Best For | Installation | Weight Capacity | Durability |
|---|---|---|---|---|
| Freestanding Shelf Tower | Folded clothes, bins, shoes | None – slides in place | Medium (20–30 lbs per shelf) | High – lasts years |
| Tension Rod + Fabric Bin Combo | Jeans, sweaters, linens | Adjusts by pressure | Low–Medium (10–15 lbs) | Medium – depends on bin quality |
| Over-the-Door Organizer | Accessories, socks, toiletries | Hooks or fabric straps | Low (5–8 lbs total) | Medium – fabric may sag over time |
| Wall-Mounted Pegboard (adhesive strips) | Belts, bags, jewelry | Peel-and-stick adhesive | Low (decorative items only) | Medium – not for heavy loads |
| Rolling Under-Shelf Cart | Shoes, folded items, cleaning supplies | Slides under rod | Medium (25 lbs) | High – wheels may wear |
Choose combinations based on your needs. A freestanding tower paired with an over-the-door organizer covers most storage categories efficiently.
“In compact living, every inch counts. The most organized closets aren’t the biggest—they’re the ones where systems adapt to the user, not the other way around.” — Lena Torres, Urban Living Organizer & Author of *Small Space, Big Style*
Real Example: Transforming a 2x3-Foot Bedroom Closet
Maria, a graduate student in Chicago, faced a major challenge: her bedroom closet measured just 2 feet wide and 3 feet deep, with a single rod and no shelves. Her clothes were piled on the floor, and she spent 10 minutes daily searching for outfits.
She implemented a three-phase solution:
- Declutter: She removed 40% of her wardrobe—items she hadn’t worn in six months or didn’t fit.
- Zone Setup: She placed a narrow freestanding organizer (12” deep) against the back wall. Top shelf: folded sweaters. Middle: bins for sleepwear and workout clothes. Bottom: shoes.
- Vertical Expansion: She added a tension rod beneath the original one for short-hang items like shirts and used an over-the-door organizer for scarves and sunglasses.
The result? Full visibility of all clothing, reduced morning stress, and reclaimed floor space. The entire project cost under $75 and took two hours.
Essential Checklist: Organizing a Bare Closet in 7 Steps
Follow this actionable checklist to turn your empty closet into a streamlined storage hub:
- Empty the closet completely and clean the interior surfaces.
- Sort all items into keep, donate, repair, and discard piles.
- Measure closet dimensions (width, depth, height).
- Define storage zones based on your wardrobe (e.g., hanging, folded, shoes).
- Select 2–3 non-permanent storage solutions (e.g., shelf tower + over-door organizer).
- Install systems and assign items to designated zones.
- Label bins and maintain the system with weekly 5-minute tidy-ups.
This sequence ensures you start with a clean slate, make intentional choices, and build a sustainable system—not just a temporary fix.
Common Mistakes to Avoid
Even with good intentions, people often undermine their closet organization. Watch out for these pitfalls:
- Overbuying organizers: More isn’t always better. Too many bins create visual clutter and reduce accessibility.
- Ignoring frequency of use: Store everyday items behind rarely used ones, making access inconvenient.
- Using mismatched hangers: Wooden, plastic, and wire hangers vary in width and thickness, wasting space and creating uneven lines.
- Blocking airflow: Piling clothes too tightly or sealing bins shut encourages mildew, especially in humid climates.
- Skipping labels: Unmarked containers turn into mystery boxes, defeating the purpose of organization.
Instead, adopt a minimalist mindset. Prioritize versatility, accessibility, and maintenance ease over aesthetic perfection.
Frequently Asked Questions
Can I install shelves without drilling?
Yes. Use freestanding shelf towers, tension-based corner shelves, or adhesive-backed pegboards for lightweight items. For heavier loads, consider furniture-grade cubes that fit within the closet footprint.
How do I prevent my closet from looking messy?
Stick to a cohesive color palette for bins and hangers. Use closed containers for visually busy items like socks or accessories. Fold clothes uniformly (like in retail stores) and rotate seasonal items out when not in use.
What’s the best way to store shoes in a tiny closet?
Use a rolling shoe cart that slides under hanging clothes, or stackable clear shoe boxes. Hang over-the-door shoe pockets only if doors open fully without obstruction. Always keep shoes off the floor to protect soles and improve cleanliness.
Final Thoughts: Turn Limitations Into Advantages
A tiny closet with no built-in shelves isn’t a design flaw—it’s an invitation to get creative. The absence of fixed structures means your system remains flexible, easy to adjust, and fully tailored to your current needs. Unlike built-ins, which lock you into a single configuration, a modular approach lets you pivot as your wardrobe evolves.
Start small. Pick one zone to organize today. Add a bin, a rod, or a shelf. Build momentum through incremental improvements. Over time, these small changes compound into a remarkably functional space—one that supports your routine instead of complicating it.


 浙公网安备
33010002000092号
浙公网安备
33010002000092号 浙B2-20120091-4
Comments
No comments yet. Why don't you start the discussion?