
Living in a small space often means making the most of what you have—especially when it comes to storage. A tiny closet without built-in shelves can feel like a lost cause: clothes piled on the floor, shoes spilling out, and accessories tangled beyond recognition. But with thoughtful planning and strategic organization, even the most barren closet can become a highly functional wardrobe hub. The key isn’t more space—it’s smarter use of the space you already have.
This guide walks through practical, budget-friendly solutions to transform your empty closet into an organized system tailored to your lifestyle. No renovations or carpentry required. Just intelligent layout choices, the right tools, and a few clever hacks used by professional organizers every day.
Assess Your Space and Inventory
Before adding any storage solutions, take stock of what you’re working with. Measure the closet’s dimensions: height, width, and depth. Note where doors open, where light falls, and whether there’s a rod already installed. This information will inform which organizational tools fit and function best.
Next, evaluate your clothing and accessories. Remove everything from the closet and sort items into categories: tops, bottoms, dresses, outerwear, shoes, bags, and accessories. As you sort, be honest about what you actually wear. If an item hasn’t been used in the past year—and isn’t seasonally relevant—consider donating or storing it elsewhere.
Understanding your wardrobe habits is just as important as measuring square footage. Do you dress in layers? Then sweaters and cardigans need prime real estate. Are you a shoe collector? Prioritize footwear storage. Tailoring the organization to your actual usage—not idealized versions of yourself—ensures long-term success.
Maximize Vertical Space with Adjustable Systems
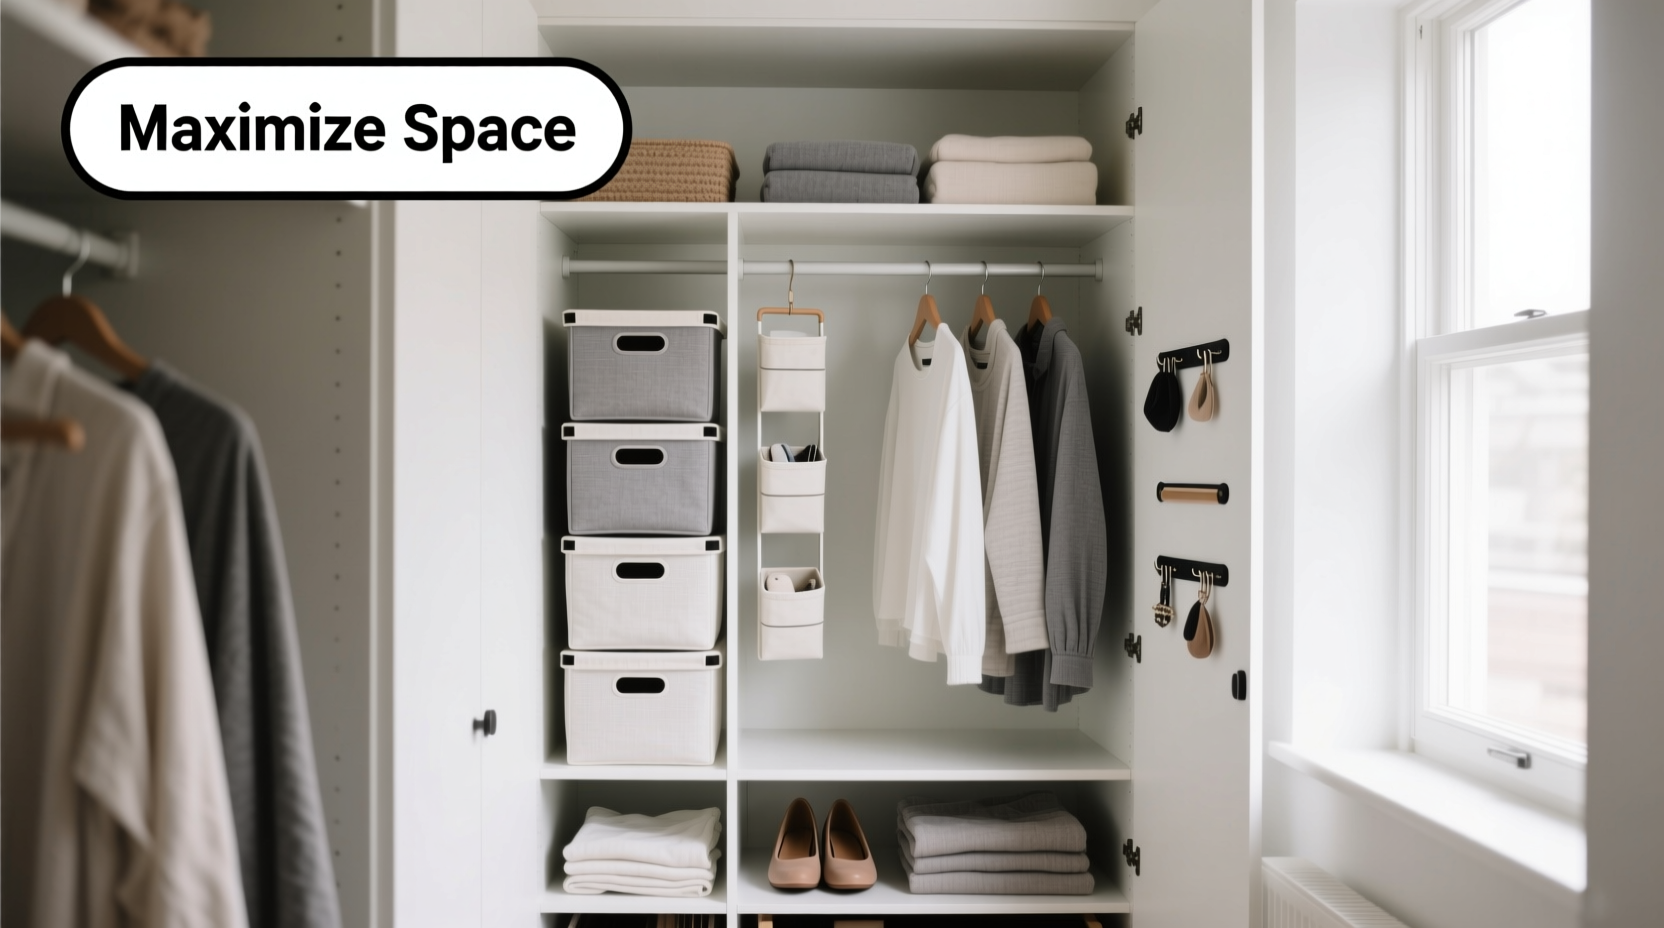
Without built-in shelves, vertical space becomes your greatest asset. Most people underutilize the upper third of their closet, assuming it’s too high to reach. But with the right tools, that dead zone can house off-season storage, rarely used items, or folded stacks.
Start by installing an adjustable shelving system. Units like ClosetMaid or Rubbermaid Easy Shelf allow you to customize shelf height without drilling or permanent fixtures. They rest securely on the floor and adjust in 1-inch increments, making them ideal for awkward spaces. Place heavier items like boots or sweater bundles on lower shelves, lighter boxes or bags above.
If you prefer a simpler approach, stackable fabric bins or plastic drawers work well. Choose ones with front labels so contents are visible at a glance. Avoid overloading the top shelves—anything too heavy risks becoming a hazard when reaching.
“Vertical organization isn’t just about stacking—it’s about zoning. Assign each level a purpose: daily wear at eye level, seasonal below, and archives up top.” — Lisa Tran, Professional Home Organizer
Create Zones for Different Clothing Types
A chaotic closet often results from mixing incompatible items. Shoes next to scarves, jeans piled under blouses—this leads to clutter and frustration. Instead, divide your closet into dedicated zones based on category and frequency of use.
Use the following framework:
- Hanging Zone: For shirts, dresses, jackets, and pants that wrinkle easily.
- Folded Storage Zone: For sweaters, t-shirts, jeans, and loungewear.
- Shoe & Accessory Zone: For footwear, belts, hats, and bags.
- Deep Storage Zone: For off-season clothes, formalwear, or travel kits.
To create these zones without shelves, combine different organizers. For example, place a slim rolling cart beside the hanging rod for folded items. Use over-the-door shoe pockets for flats and sandals. Hang a multi-hook organizer behind the door for belts and scarves.
Step-by-Step: Transforming a Bare Closet in One Afternoon
You don’t need days to reorganize. Follow this realistic, four-hour timeline to overhaul your tiny closet efficiently.
- Hour 1: Empty and Sort (60 min)
Remove all items. Sort into keep/donate/seasonal piles. Wipe down walls and floor. - Hour 2: Install Core Systems (60 min)
Set up freestanding shelves, add a second clothing rod if needed, mount over-door organizers. - Hour 3: Organize by Zone (60 min)
Hang clothes by type and color. Fold and bin sweaters, tees, and jeans. Place shoes in designated spots. - Hour 4: Refine and Label (60 min)
Add labels to bins, test accessibility, adjust heights, remove anything still causing clutter.
This method prevents overwhelm and ensures progress at every stage. By the end, you’ll have a fully functional system—not just a tidy space.
Smart Storage Solutions That Don’t Require Shelves
When shelves aren’t an option, creativity fills the gap. Below are proven alternatives that deliver shelf-like functionality without installation.
| Solution | Best For | Pros | Cons |
|---|---|---|---|
| Freestanding Shelving Unit | Heavy folded items, bins, shoes | Adjustable, sturdy, no mounting | Takes floor space |
| Over-the-Door Organizer | Shoes, accessories, small bags | Uses unused space, affordable | Limited weight capacity |
| Hanging Closet Organizer | Folded clothes, scarves, socks | Utilizes vertical rod space | Can sag when overloaded |
| Rolling Storage Cart | Active-use items, nightwear, workout gear | Movable, stylish, multi-tiered | May not fit in narrow closets |
| Stackable Bins | Seasonal storage, accessories | Clear visibility, modular | Less durable than wood shelves |
Combine two or more of these to create a layered system. For example, pair a narrow rolling cart with an over-the-door shoe rack and a hanging sweater organizer. This way, every inch serves a purpose.
Real-Life Example: Sarah’s Studio Apartment Closet
Sarah lives in a 450-square-foot studio in Chicago. Her closet measures just 3 feet wide and 6 feet deep—with a single rod and no shelves. Before organizing, she stuffed clothes onto the rod, dumped shoes on the floor, and stored scarves in a drawer outside the closet.
She applied the following changes:
- Added a second clothing rod underneath the existing one using tension rods, doubling hanging space.
- Installed an over-the-door shoe organizer for her 12 pairs of flats, heels, and sneakers.
- Bought a three-tier rolling cart for folded jeans, tees, and pajamas—positioned beside the rod.
- Used stackable clear bins on the floor for winter hats, gloves, and off-season sweaters.
- Hung a fabric hanging organizer on the rod for scarves and belts.
The result? She gained 40% more usable space, reduced morning decision fatigue, and kept the closet functional for six months without major reorganization.
“After I stopped trying to fit everything on the rod, everything clicked. The cart became my favorite piece—it’s easy to pull out and matches my decor.” — Sarah T., Urban Dweller
Avoid Common Organization Mistakes
Even well-intentioned efforts can backfire. Here are frequent pitfalls and how to avoid them:
- Over-purchasing organizers: Buy only what you need after measuring. Extra bins and hangers just add clutter.
- Hanging everything: Knits and heavy sweaters stretch on hangers. Fold them instead.
- Ignoring floor space: The floor isn’t wasted space. Use it for bins, shoe racks, or baskets.
- Not labeling: Unmarked containers lead to digging and disarray. Use removable labels or masking tape.
- Forgetting airflow: Overcrowding traps moisture. Leave gaps between items, especially in humid climates.
Essential Checklist: Organizing a Shelf-Free Closet
Follow this concise checklist to ensure nothing is missed during your closet transformation:
- ☐ Empty the entire closet and clean the interior
- ☐ Sort clothes into keep, donate, store-offseason
- ☐ Measure closet dimensions (height, width, depth)
- ☐ Identify your most-worn clothing categories
- ☐ Choose 2–3 non-permanent storage solutions (e.g., shelves, cart, door organizer)
- ☐ Install systems safely and securely
- ☐ Designate zones for hanging, folding, shoes, and accessories
- ☐ Fold bulky items using the KonMari method for compact stacking
- ☐ Label all bins and containers
- ☐ Test accessibility and adjust as needed
FAQ: Common Questions About Tiny Closet Organization
Can I add shelves without drilling?
Yes. Freestanding shelving units, tension pole systems, and stackable cubes require no drilling. Some adhesive shelves exist, but they’re better suited for lightweight items like jewelry or toiletries.
How do I prevent clothes from slipping off hangers?
Use non-slip velvet hangers. They grip fabric better than plastic or wire and take up less space due to their slim profile. Group similar garments together to reduce movement.
What if my closet is too narrow for shelves or carts?
Focus on vertical and door-mounted solutions. Hanging organizers, over-door racks, and wall hooks maximize space without encroaching on the floor. You can also use the back of the door for a full-length mirror with hidden storage.
Conclusion: Turn Limitations Into Opportunities
A tiny closet with no built-in shelves doesn’t have to be a source of stress. In fact, constraints often spark the most creative solutions. By leveraging vertical space, defining functional zones, and selecting adaptable organizers, you can build a system that works harder with less.
The goal isn’t perfection—it’s sustainability. An organized closet should make your life easier, not demand constant upkeep. Choose solutions that align with how you actually live, dress, and move through your day.


 浙公网安备
33010002000092号
浙公网安备
33010002000092号 浙B2-20120091-4
Comments
No comments yet. Why don't you start the discussion?