
A small pantry doesn’t have to mean chaos. With smart planning and the right tools, even the tiniest storage space can become a model of efficiency. The secret? Dollar store organizers. These budget-friendly finds are not only practical but surprisingly durable and versatile. When used strategically, they transform cramped shelves into streamlined systems that make meal prep faster, grocery shopping smarter, and expiration dates easier to track. This guide walks through exactly how to turn your compact pantry into a highly functional hub using accessible, low-cost solutions.
Assess Your Space and Inventory
Before buying any containers or stacking bins, take stock of what you’re working with. Measure your pantry’s interior dimensions—height, width, and depth of each shelf. Note any awkward corners, narrow gaps, or over-the-door space you might overlook. Then, empty everything out. Yes, everything. This step is non-negotiable for success.
Lay all items on a countertop and sort them into categories: baking supplies, canned goods, snacks, pasta and grains, condiments, breakfast foods, etc. While doing this, check expiration dates and toss anything expired or stale. You’ll likely discover duplicates or forgotten purchases—common in disorganized pantries.
This inventory phase reveals your true needs. If you have 15 spice bottles, you’ll need vertical storage. If snack bags dominate, containment is key. Understanding your usage patterns ensures every organizer serves a purpose—not just looks cute.
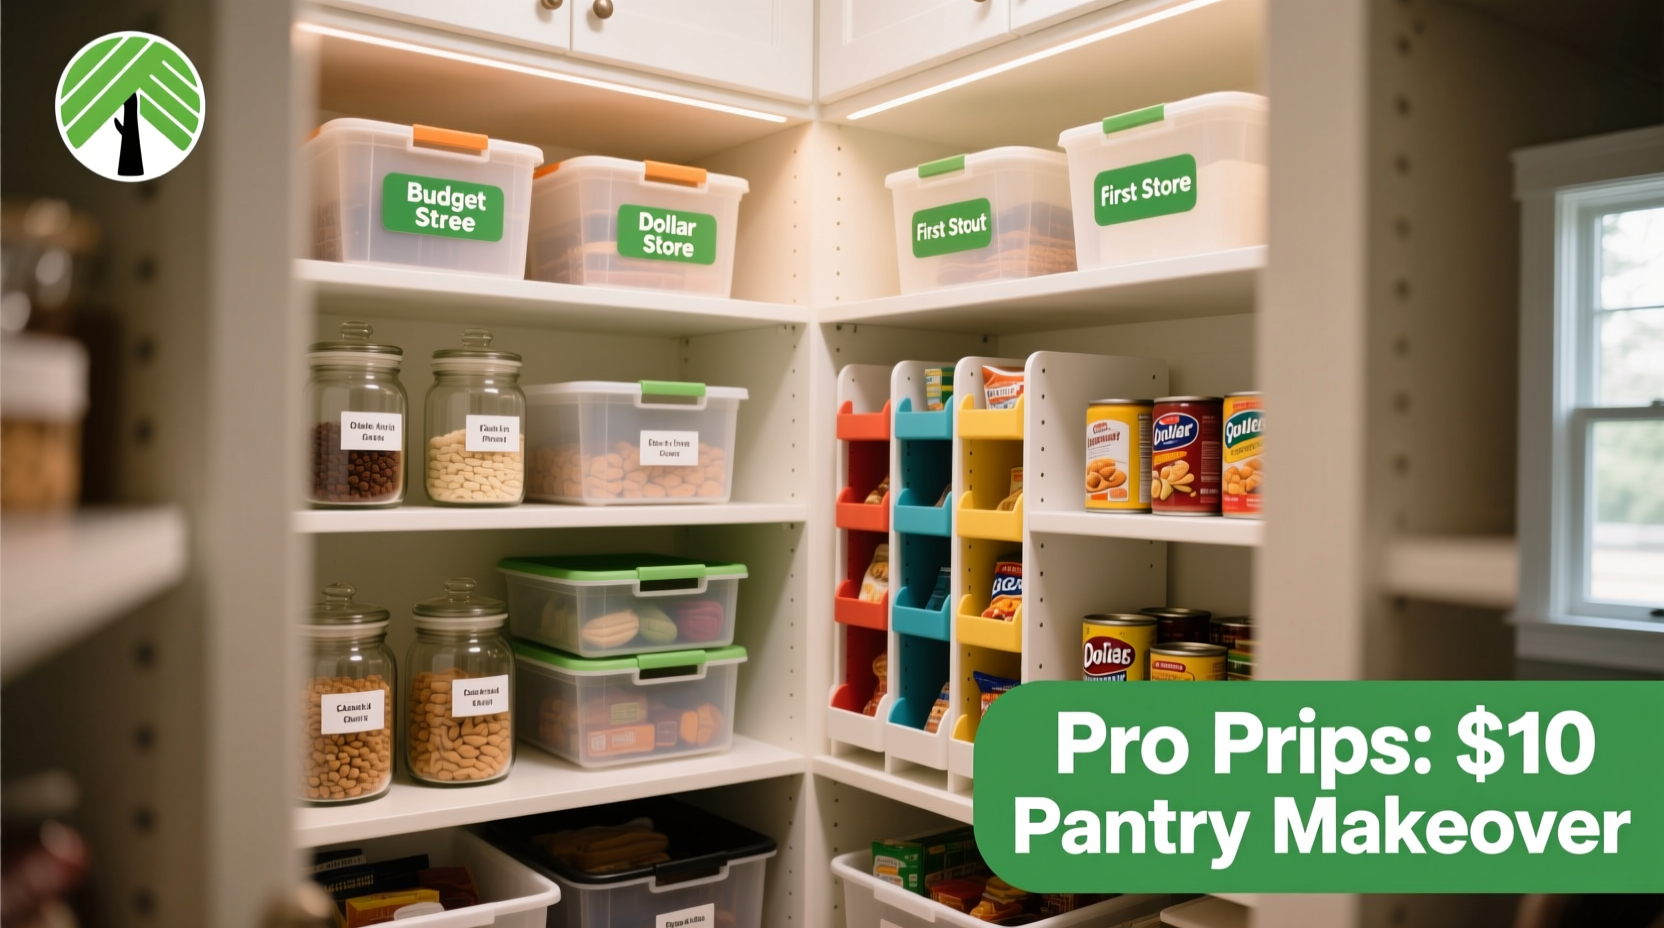
Choose the Right Dollar Store Organizers
Dollar stores carry more than just party favors. Their organizational section often includes stackable bins, wire baskets, drawer dividers, lazy Susans, and clear food-safe containers—all under $1.50 each. The trick is selecting pieces that align with your pantry’s layout and contents.
Focus on transparency and modularity. Clear bins let you see contents at a glance, reducing the “Did I buy chickpeas last week?” dilemma. Stackable designs maximize vertical space, crucial in shallow cabinets. Avoid bulky or oddly shaped items that waste precious inches.
“Function always trumps aesthetics in small-space organization. A $1 bin that fits perfectly and holds three cereal boxes is better than a $10 decorative canister that wobbles.” — Lena Ruiz, Home Efficiency Consultant
Top 5 Dollar Store Picks for Tiny Pantries
| Organizer Type | Best For | Pro Tip |
|---|---|---|
| Clear plastic shoebox bins | Snacks, tea bags, seasoning packets | Cut notches in the front edge to slide labels underneath |
| Turntable (lazy Susan) | Oils, sauces, spices | Use two sizes: large for tall bottles, small for spice jars |
| Wire mesh baskets | Canned goods, onions, potatoes | Allow airflow and prevent moisture buildup |
| Plastic drawer dividers | Packet seasonings, drink mixes, bouillon cubes | Place inside larger bins to subdivide space |
| Over-the-door shoe organizer | Snacks, drink pouches, small jars | Hang on pantry door—uses otherwise wasted space |
Don’t underestimate the power of repurposing. A cutlery tray can hold spice jars. A magazine holder works vertically for wrapping paper or flat cereal boxes. Creativity multiplies utility without increasing cost.
Step-by-Step: Transform Your Pantry in One Afternoon
Follow this proven sequence to complete your overhaul efficiently. Set aside 2–3 hours on a weekend morning when distractions are minimal.
- Empty and clean. Remove all items. Wipe down shelves with a damp cloth and mild cleaner. Let dry completely.
- Sort and purge. Group like items and discard expired or unneeded products.
- Measure and plan zones. Assign areas: top shelf for infrequently used items (e.g., holiday baking supplies), middle for daily essentials (cereal, pasta), lower for heavy cans or pet food.
- Buy organizers. Visit your local dollar store with measurements and a list. Stick strictly to what you need.
- Transfer and label. Decant dry goods into clear containers. Label everything—even if you think you’ll remember.
- Install and arrange. Place heavier items on lower shelves. Use risers or tiered shelves to create visibility.
- Final sweep. Step back and assess flow. Can you reach everything without moving three bins? Adjust as needed.
Real Example: From Chaos to Clarity in 90 Minutes
Sarah, a nurse and mother of two in Columbus, Ohio, had a walk-in pantry so packed she couldn’t find peanut butter without pulling out half the shelf. Her solution? A single trip to Dollar Tree with a measuring tape and a goal: “I want to grab dinner ingredients in under two minutes.”
She bought four clear shoebox bins ($1 each), one wire basket ($1.25), and a hanging shoe organizer ($2). She cleared expired soup cans and donated unopened gluten-free pasta she never used. Then, she grouped items: one bin for oatmeal and granola, another for individual snack packs, the wire basket for canned tomatoes and beans, and the shoe organizer on the door for fruit cups and applesauce pouches.
The result? She now preps school lunches in five minutes instead of ten. Her kids can access their own snacks safely. And she reduced impulse buys because she actually sees what she has. Total spent: $5.25. Time invested: 90 minutes.
Maximize Every Inch: Smart Layout Strategies
In a tiny pantry, every centimeter counts. Use these space-saving techniques to boost capacity without remodeling.
- Add shelf risers. Use sturdy cardboard boxes wrapped in contact paper or inexpensive acrylic risers to create two levels on one shelf—perfect for stacking spices behind smaller jars.
- Utilize the door. Over-the-door organizers aren’t just for shoes. Hang one for spice bottles, sauce packets, or tea boxes.
- Go vertical. Stack bins upward, not outward. Use labels on the front edge so you can read them without pulling the container out.
- Create pull-out zones. Slide wire baskets or flat bins onto shelves so you can pull them forward like drawers—ideal for seeing what’s behind larger items.
- Rotate FIFO-style. First In, First Out. Place newer groceries behind older ones to prevent forgotten items from expiring.
“Most people lose 30% of their usable pantry space to poor arrangement. Vertical stacking and door storage alone can reclaim nearly half of that.” — Marcus Tran, Small Space Design Specialist
Checklist: Your Pantry Organization Game Plan
Print or save this checklist to stay on track:
- ☐ Measure pantry shelves and door clearance
- ☐ Empty entire pantry
- ☐ Discard expired or unused items
- ☐ Sort remaining items by category
- ☐ Identify top 3 pain points (e.g., lost snacks, cluttered spices)
- ☐ List required organizers based on needs
- ☐ Purchase dollar store items (stick to the list!)
- ☐ Transfer dry goods into labeled containers
- ☐ Install door organizers and risers
- ☐ Arrange by frequency of use and weight
- ☐ Test accessibility: Can you reach everything easily?
- ☐ Schedule a monthly 10-minute refresh to maintain order
Frequently Asked Questions
Can dollar store containers handle heavy items like flour or sugar?
Yes, but choose wisely. Thick-walled plastic bins or reinforced wire baskets work best. Avoid flimsy containers for loads over 3 pounds. For heavier goods, consider doubling up—nest a cheaper bin inside a slightly sturdier one for support.
How do I keep pests out when using clear bins?
Ensure containers have tight-fitting lids. Transfer items like cereal, pasta, and pet food immediately upon opening. Clean spilled crumbs regularly. For extra protection, place bay leaves or food-safe silica gel packs inside bins—both available at dollar stores.
What if my pantry has no door or is open-shelved?
Use labeled bins to maintain visual neatness. Choose organizers in cohesive colors (e.g., all white or clear) for a streamlined look. Add small chalkboard labels for a custom feel. The key is consistency—even in open spaces, uniform containers reduce visual clutter.
Final Tips for Long-Term Success
Organization isn’t a one-time project—it’s a habit. To keep your tiny pantry running smoothly:
- Reserve 5 minutes weekly to straighten shelves.
- Restock thoughtfully: open a new bag only after finishing the old one.
- Update labels if contents change—don’t let “Pasta” bin become a catch-all.
- Reassess every 3 months. Seasons change, diets evolve, and systems may need tweaks.
Conclusion: Small Space, Big Impact
Organizing a tiny pantry doesn’t require a renovation or a big budget. With thoughtful planning and the humble dollar store as your ally, you can build a system that saves time, reduces stress, and cuts food waste. The tools are simple, the steps are clear, and the payoff is immediate. Whether you live in an apartment, a starter home, or a compact urban loft, a well-ordered pantry reflects control, clarity, and care.


 浙公网安备
33010002000092号
浙公网安备
33010002000092号 浙B2-20120091-4
Comments
No comments yet. Why don't you start the discussion?