
A cluttered desk with tangled cords isn’t just unsightly—it’s inefficient. Wires snaking across the floor, coiled around chair legs, or buried beneath a tangle of adapters create frustration every time you need to unplug a device or move your setup. While tape and zip ties are common fixes, they’re often temporary, messy, or damaging. Tape leaves residue; zip ties can’t be reused and may cut into insulation if overtightened. The good news? You don’t need them. There are smarter, more sustainable ways to manage cable chaos—methods that look professional, stay secure, and adapt as your tech needs evolve.
Whether you're working from home, managing a gaming station, or running a small office, organizing cables without adhesive or plastic restraints is not only possible—it’s easier than you think. This guide explores practical, long-term strategies that eliminate reliance on tape and zip ties while keeping your workspace neat, functional, and safe.
Why Avoid Tape and Zip Ties?
Tape and zip ties have dominated cable management for decades, but both come with notable drawbacks:
- Tape loses adhesion over time, especially in warm environments. It also leaves sticky residue on surfaces and cables, which is difficult to clean and can degrade materials.
- Zip ties, while strong, are single-use by design. Cutting them off damages their integrity, making reuse impossible. Over-tightening can pinch wires, leading to fraying or signal interference.
- Both options lack flexibility. If you add a new device or rearrange your desk, you’ll likely need to start over.
Modern workspaces demand adaptable, non-destructive solutions. The goal isn’t just tidiness—it’s creating a system that supports productivity, safety, and ease of access.
Effective Alternatives to Tape and Zip Ties
Thankfully, numerous alternatives exist that offer better performance and longevity. These tools prioritize reusability, adjustability, and aesthetics—key factors for any well-maintained workspace.
1. Velcro Cable Ties (Hook-and-Loop Straps)
Velcro straps are one of the most popular replacements for zip ties. They fasten securely but open easily, allowing you to add or remove cables without cutting anything. Choose flat, wide versions to bundle multiple cords neatly. Opt for black or gray to blend with your setup.
2. Braided Sleeves (Cable Looms)
Braided nylon sleeves encase multiple wires into a single, flexible tube. They stretch slightly to accommodate different thicknesses and give a sleek, industrial look. Installation involves threading your cables through the sleeve—best done when setting up your desk initially.
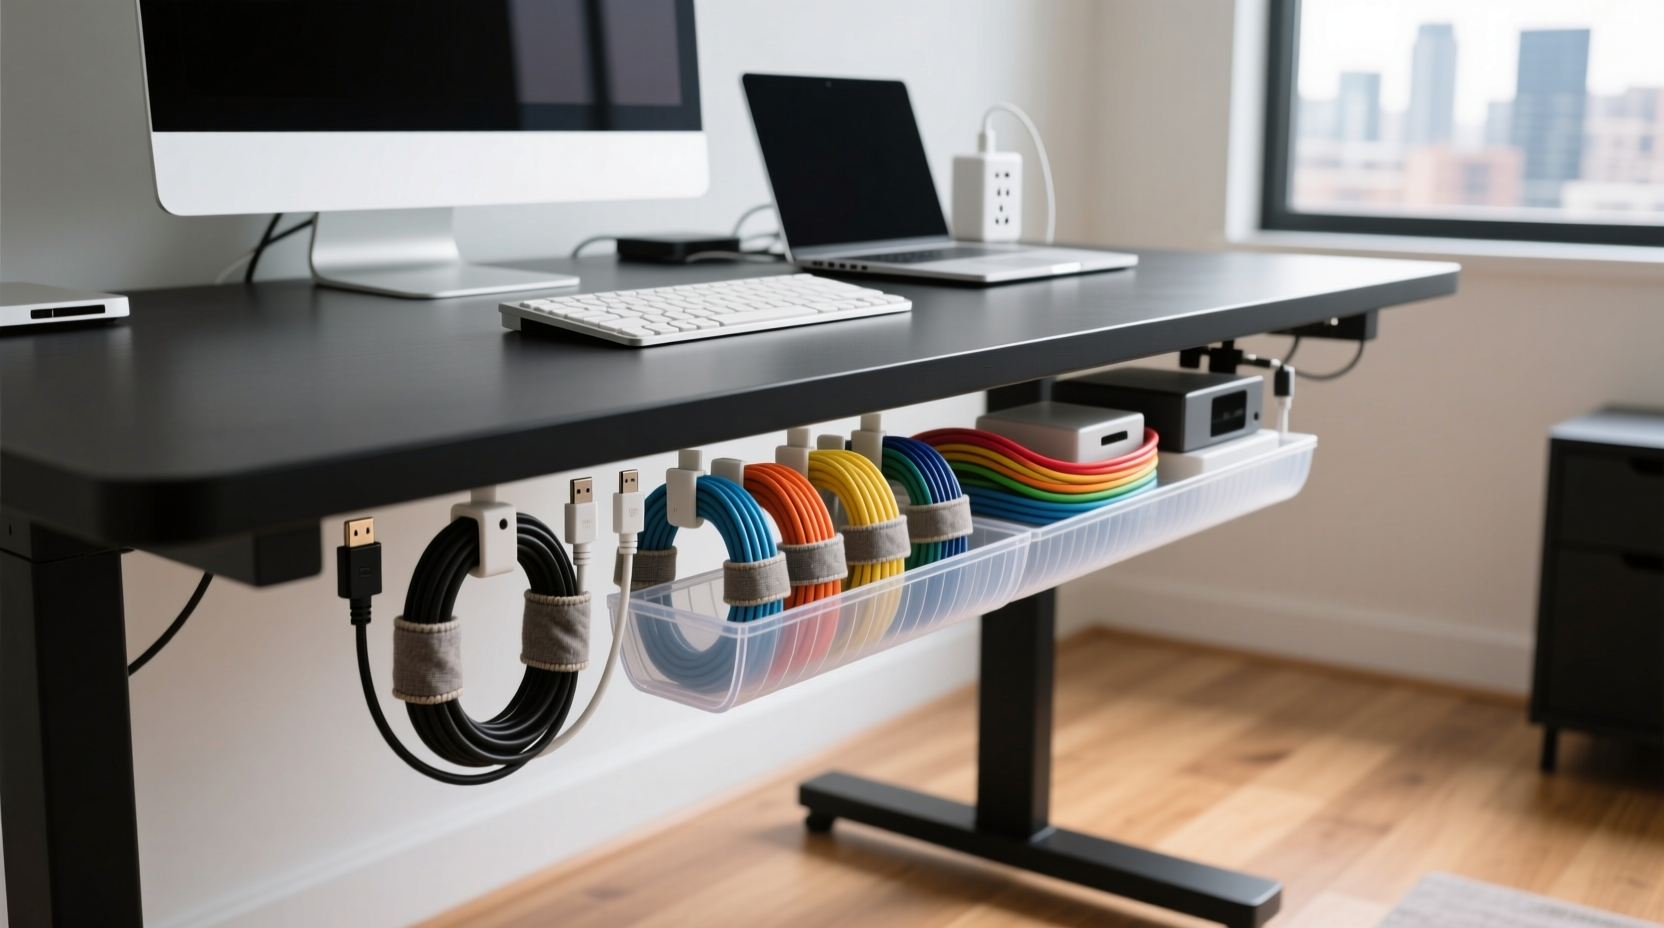
3. Under-Desk Cable Trays
These trays mount directly beneath your desk surface and act like shelves for your power strips and cords. Instead of dangling wires, they rest horizontally inside the tray, minimizing strain and visibility. Many models feature side cutouts for routing cables down to the floor or out to peripherals.
4. Magnetic Cable Clips
Strong neodymium magnets hold lightweight cords in place along metal desk frames or monitor stands. Unlike adhesive clips, they leave no marks and can be repositioned instantly. Ideal for HDMI, USB, or audio cables.
5. Cord Channels and Raceways
Rigid or semi-flexible plastic channels attach to desk edges or walls using screws or non-residue adhesive. They conceal bundles of cables and direct them along a clean path. Choose paintable white versions if you want them to disappear visually.
6. Modular Cable Management Boxes
These enclosed boxes store power strips and excess cord length underneath the desk. Some include built-in ventilation, surge protection compartments, and adjustable dividers. Cables enter and exit through grommets or slots, keeping everything contained yet accessible.
“Cable organization shouldn’t compromise future flexibility. Reusable systems pay off every time you upgrade a device.” — Jordan Lee, Workspace Ergonomics Consultant
Step-by-Step Guide to a Tape-Free, Zip-Tie-Free Desk Setup
Follow this sequence to transform a chaotic workspace into an organized, professional environment—without using a single piece of tape or plastic tie.
- Unplug and Audit All Devices
Remove every cable from your outlets and ports. Group them by function: charging, data transfer, display, audio, etc. Discard any frayed or obsolete cords. - Label Each Cord
Use removable labels or colored tags to identify what each cable connects to. This prevents confusion during reassembly and future troubleshooting. - Measure and Trim Excess Length
If certain cords are excessively long, consider coiling the extra length rather than cutting it. Use figure-eight loops secured with Velcro straps to avoid kinks. - Install an Under-Desk Tray or Box
Mount a cable management tray or box beneath your desk. Position it near the back edge so it doesn’t interfere with legroom. Place your power strip inside. - Route Cables Through Braided Sleeves
Group similar cables (e.g., monitor, keyboard, mouse) and thread them through a braided sleeve. Secure the ends with Velcro wraps. - Use Magnetic Clips Along Metal Surfaces
Attach magnetic clips to your desk frame or CPU tower. Clip individual cords to maintain separation and reduce sagging. - Anchor Cords at Exit Points
Where cables leave the desk (to the wall or floor), use a raceway or corner channel secured with screws or non-marking putty to guide them cleanly. - Test and Adjust
Plug everything back in. Check for strain, overheating, or awkward bends. Adjust positioning as needed for airflow and accessibility.
Do’s and Don’ts of Non-Invasive Cable Management
| Do’s | Don’ts |
|---|---|
| Use Velcro straps instead of zip ties for bundling | Over-tighten any fastener, risking wire damage |
| Choose modular boxes that allow airflow | Block ventilation holes on power strips |
| Secure heavy bundles with trays, not clips | Let thick power cords dangle unsupported |
| Label all cables before disconnecting | Assume you’ll remember which cord goes where |
| Reposition magnetic clips as needs change | Use adhesive products on painted or delicate surfaces |
Real-World Example: A Home Office Transformation
Sarah, a freelance graphic designer in Portland, spent years battling a jungle of cords under her standing desk. Her dual monitors, drawing tablet, laptop dock, external hard drives, and lamp created a hazardous tangle. She’d used duct tape to anchor bundles, but it peeled off monthly, leaving black streaks on her desk’s underside.
Determined to fix it, she followed the steps above. First, she replaced all tape with wide Velcro straps and grouped her data and power cables separately. She installed a ventilated under-desk cable box to house her surge protector and bundled excess lengths with figure-eight coils. For her monitor cables, she used a braided sleeve routed through a corner raceway to the outlet behind her desk.
The result? A clean, professional-looking setup that took less than two hours to build—and only five minutes to modify when she added a second docking station. “I used to dread showing clients my screen-sharing background,” she said. “Now I don’t even think about the cables. Everything just works.”
Essential Checklist for a Clean Cable System
Use this checklist to ensure your cable organization project covers all bases:
- ✅ Unplugged all devices and sorted cables by type
- ✅ Discarded damaged or unused cords
- ✅ Labeled each cable for easy identification
- ✅ Measured and managed excess cord length
- ✅ Installed an under-desk tray or enclosure
- ✅ Used Velcro straps or braided sleeves for bundling
- ✅ Secured cables with magnetic or screw-mounted clips
- ✅ Routed wires through raceways or channels
- ✅ Verified all connections are secure and undamaged
- ✅ Tested equipment after reassembly
Frequently Asked Questions
Can I organize thick power cables without zip ties?
Yes. Thick cords should be managed with under-desk trays or rigid raceways that support their weight. Use wide Velcro straps to group them loosely, avoiding sharp bends. Never rely on clips alone for heavy-duty cables.
Are magnetic clips safe for all cable types?
Generally, yes. Magnets do not interfere with standard electrical or data signals. However, avoid placing strong magnets directly against mechanical hard drives or older CRT monitors. For modern USB, HDMI, or power cables, magnetic clips are perfectly safe.
How do I hide cables without drilling holes?
You can use raceways with non-residue adhesive backing, tension rods behind desks to hang cords, or fabric-covered cable sleeves that blend into your décor. Cord covers that stick to baseboards also route wires discreetly to outlets without permanent modification.
Final Thoughts: Build a Smarter, Sustainable System
Organizing cables without tape or zip ties isn’t just about aesthetics—it’s about building a workspace that evolves with you. Reusable, non-damaging solutions reduce waste, save time, and make daily tech interactions smoother. Whether you choose Velcro, magnetic clips, trays, or sleeves, the key is consistency and planning.
Your desk is more than a surface for typing or drawing—it’s a command center. Treat it like one. Invest a few focused hours in proper cable management, and you’ll gain back countless moments of frustration, distraction, and inefficiency. A clean setup promotes a clear mind, and a well-organized system reflects professionalism, care, and attention to detail.


 浙公网安备
33010002000092号
浙公网安备
33010002000092号 浙B2-20120091-4
Comments
No comments yet. Why don't you start the discussion?