
In every modern home or workspace, tangled cords are a constant frustration. Chargers, power strips, USB cables, HDMI lines—each device brings its own cord, and before long, they form an unruly nest behind your desk or entertainment center. While commercial cable organizers exist, many are overpriced or unnecessary. The truth is, you don’t need to spend money to gain control. With a few clever techniques and everyday household items, you can tame the chaos efficiently and affordably.
This guide walks through practical, no-cost or low-cost solutions that deliver real results. From repurposing common objects to establishing sustainable habits, these methods are tested in real environments and designed for lasting impact.
Assess Your Cable Situation
The first step in any organization project is understanding what you’re dealing with. Take time to unplug and lay out all your cables in one area. Label each one with its purpose (e.g., “Laptop Charger,” “Monitor Power,” “TV HDMI”) using masking tape or a sticky note. This process reveals duplicates, outdated cords, and forgotten devices that no longer serve a purpose.
Many people keep old chargers “just in case,” but clutter accumulates quickly when unused items aren’t removed. Be ruthless: if a cable hasn’t been used in six months and doesn’t belong to a current device, recycle it responsibly.
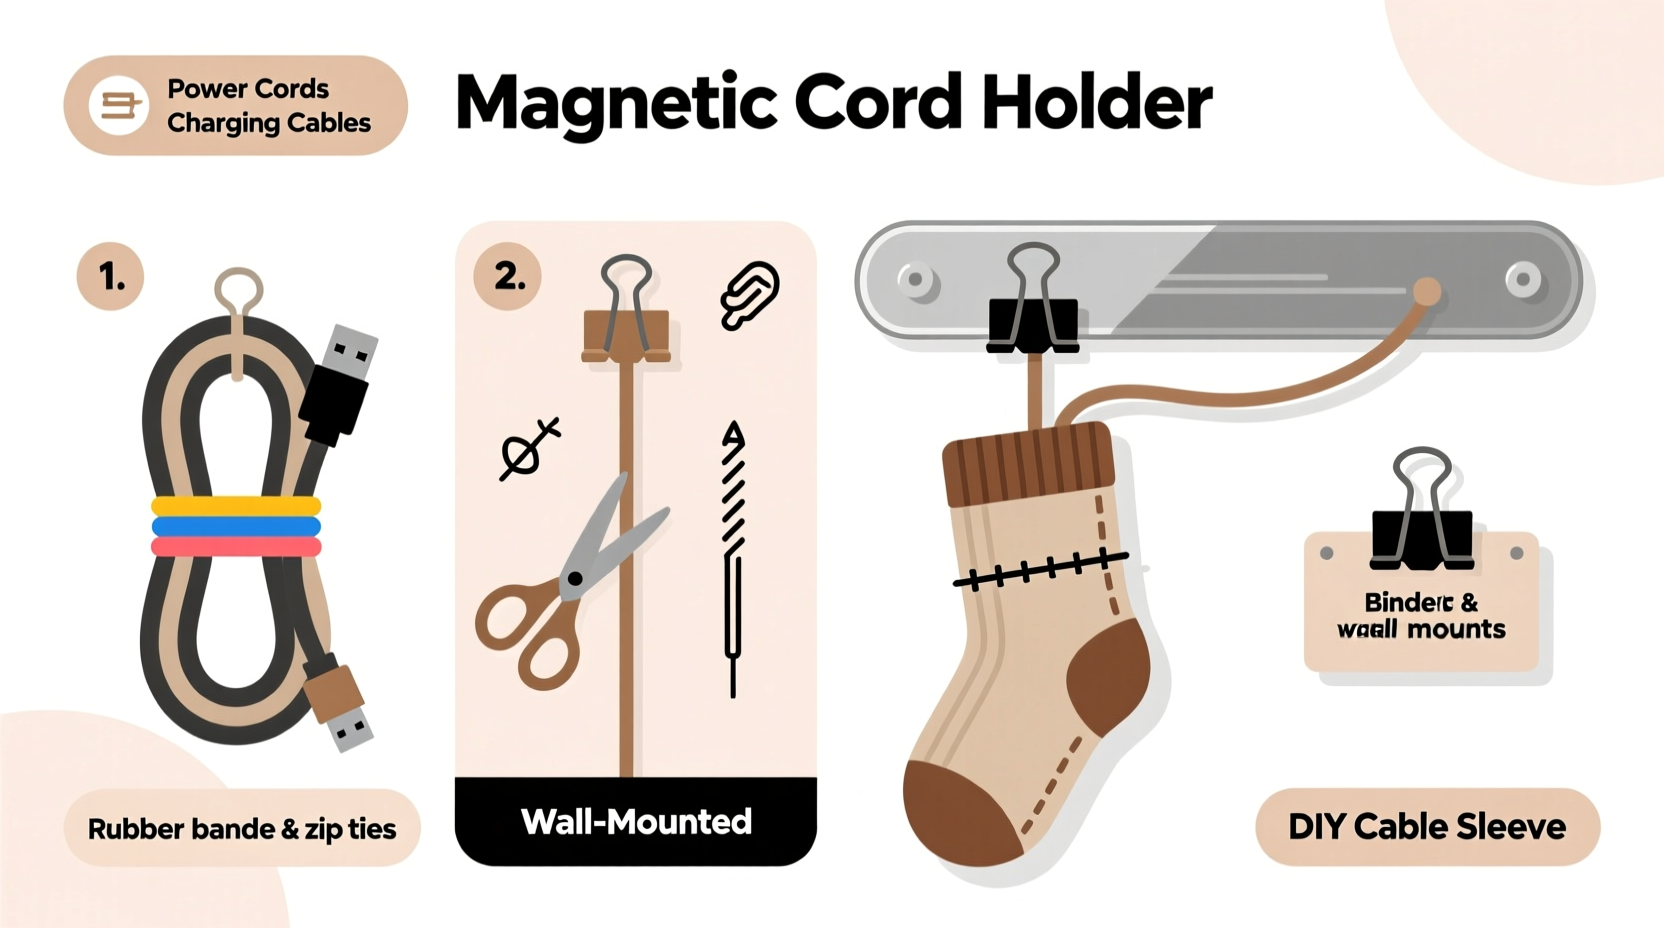
Repurpose Everyday Household Items
You likely already have effective cable organizers hiding in plain sight. Common household objects can be adapted to manage cords with minimal effort.
Cardboard Toilet Paper Rolls
Instead of tossing empty toilet paper rolls, use them to store coiled charging cables, headphones, or Ethernet cords. Wrap the cable neatly around the roll and tuck the ends into the center. Write the label on the outside for quick identification. Stack them vertically in a drawer or stand them upright on a shelf.
Old Forks as Cord Clips
Bent metal forks (especially stainless steel) can be flattened slightly and used as makeshift clips. Slide the prongs under a desk edge or shelf lip, then loop a cord over the handle to keep it in place. This works well for securing monitor or lamp cords from slipping down the back of a desk.
Binder Clips for Cable Routing
Binder clips are one of the most versatile and underrated tools for cable management. Clip them onto the edge of a desk and thread cords through the metal arms to prevent tangling and reduce strain on plugs. Larger binder clips can hold multiple cords together while keeping them accessible.
Muffin Tins for Drawer Organization
If you're organizing cords stored in a drawer, a clean muffin tin can act as a modular organizer. Place different types of cables in each cup—USB cords in one, audio cables in another. The raised edges keep them separated and visible. For a sturdier version, use a plastic container with dividers from a hardware store.
“Improvisation beats investment when it comes to basic cable management. A $0 solution using a binder clip often works better than a $20 branded sleeve.” — Jordan Lee, IT Support Specialist with 12 years of field experience
Use Knots and Wraps for Secure Coiling
How you coil a cable determines whether it stays neat or becomes a knot within minutes. Avoid the common mistake of wrapping cords tightly around your hand like yarn. This creates twists and stress points that degrade insulation over time.
The Over-Under Method
This professional-grade coiling technique prevents kinks and maintains flexibility:
- Hold one end of the cable in your non-dominant hand.
- With your other hand, form a loop by bringing a section of the cable over itself (over).
- Next, bring the following section under the previous loop (under).
- Repeat this alternating pattern until the entire cable is coiled.
- Secure the bundle with a twist tie, Velcro strip, or fabric hair tie.
This method allows the cable to lie flat when unwound and reduces internal wire fatigue.
Velcro or Fabric Ties from Old Devices
Don’t throw away the reusable straps that come with electronics. Save them for bundling cords. If you don’t have any, fabric hair ties or shoelaces cut in half work just as well. They’re gentle on insulation and easy to remove.
Smart Anchoring and Routing Techniques
Even perfectly coiled cables become messy if not anchored properly. Prevent cords from sliding behind furniture by creating fixed routing paths.
Furniture Edge Management
Use adhesive hooks (often sold for towels or robes) along the side or back edge of a desk or entertainment unit. These cost less than a dollar and allow you to route cords downward in an orderly fashion. Alternatively, attach small cup hooks with strong glue to wood surfaces for semi-permanent anchor points.
Door-Frame Cord Guides
If you run a cord across a doorway or along a wall, use a removable adhesive hook on the door frame to guide it safely out of foot traffic. This avoids tripping hazards and keeps the cord off the floor.
Power Strip Placement Strategy
Position your power strip so it faces upward or is mounted underneath a desk. This reduces gravitational pull on plugged-in cords and makes access easier. If mounting under a desk, use zip ties through pre-drilled holes or secure it with heavy-duty Velcro.
| Method | Cost | Effectiveness | Best For |
|---|---|---|---|
| Binder Clips | $0–$2 | High | Desk cable routing |
| Toilet Paper Rolls | $0 | Medium | Storage of coiled cords |
| Over-Under Coiling | $0 | Very High | All cable types |
| Adhesive Hooks | $1–$3 per pack | High | Wall/desk edge anchoring |
| Fabric Hair Ties | $0 (repurposed) | Medium | Bundling light-duty cords |
A Real-World Example: Organizing a Home Office Desk
Consider Mark, a freelance designer working from a small apartment. His desk was cluttered with a laptop charger, external hard drive, monitor, keyboard, mouse, phone charger, and speaker—all with separate cords. Behind the desk, cables were tangled, making it hard to unplug anything without disturbing everything else.
He spent 30 minutes implementing free solutions:
- Used two large binder clips to separate monitor and laptop power cords from data cables.
- Coiled excess lengths using the over-under method and secured them with old fabric ties.
- Mounted his power strip underneath the desk with Velcro from an old headset package.
- Labeled each plug with tape so he could identify them at a glance.
- Placed a muffin tin in a nearby drawer to store spare cords neatly.
The result? A clean, functional workspace where every cord had a designated path. More importantly, he did it all without spending a single dollar on new tools.
DIY Cable Management Checklist
Follow this checklist to systematically declutter and organize your cables:
- Unplug and gather all cables in one location
- Identify each cable’s purpose and current usefulness
- Discard frayed, damaged, or obsolete cords
- Group cables by function or room
- Coil each cable using the over-under method
- Secure coils with fabric ties or Velcro
- Label each cable with tape or tags
- Anchoring cords using binder clips, adhesive hooks, or repurposed clips
- Store spares in divided containers (muffin tin, egg carton, etc.)
- Route power cords behind furniture using edge guides
- Mount power strips strategically to minimize strain
- Review monthly to prevent re-cluttering
Frequently Asked Questions
Can I use duct tape to bundle cables?
No. Duct tape may seem strong, but it leaves a sticky residue and degrades over time. It can also damage cable insulation. Opt for fabric ties, Velcro, or reusable straps instead.
How do I keep pet-chewers away from cords?
For households with pets, route cords through PVC pipes, garden hoses (cut open), or braided sleeves made from old socks. You can also apply a bitter-tasting deterrent spray (pet-safe) to discourage chewing. Elevating cords using wall mounts or desk clips also helps.
What’s the best way to store long extension cords?
Use the over-under method to coil them, then hang them on a wall hook or store them in a bucket mounted under a shelf. Avoid tight wraps, which cause memory bends and internal wire damage.
Conclusion: Simplicity Is Sustainable
Organizing cables doesn’t require specialized gear or a big budget. What it demands is intention, consistency, and a willingness to rethink what you already own. By leveraging everyday items and adopting disciplined coiling and routing practices, you can eliminate cable chaos permanently.
The most effective systems aren’t those that look perfect in photos—they’re the ones you actually maintain. Start small: pick one area, apply these techniques, and build the habit. Once you see the difference, you’ll wonder why you ever paid for plastic sleeves or cord boxes.


 浙公网安备
33010002000092号
浙公网安备
33010002000092号 浙B2-20120091-4
Comments
No comments yet. Why don't you start the discussion?