
A clean, functional workspace begins with order—and one of the most overlooked yet impactful areas is what’s hiding behind your desk. Tangled cords from monitors, laptops, chargers, lamps, and peripherals don’t just look messy; they make troubleshooting harder, reduce airflow, and increase fire risk. The good news? You don’t need expensive cable management kits or a full office overhaul. With smart, budget-friendly solutions, you can transform that chaotic jungle of wires into a neat, accessible system in under an hour.
Whether you're working from home, gaming, or managing a hybrid setup, organized cables save time, reduce stress, and improve safety. This guide delivers real-world strategies tested by professionals and DIY enthusiasts alike—no gimmicks, no overpriced gadgets, just effective, low-cost methods that work.
Assess Your Cable Setup First
Before reaching for zip ties or Velcro, take stock of what you’re dealing with. Walk behind your desk and observe:
- Which devices are connected?
- Are there redundant or unused cables?
- Where do power strips and surge protectors sit?
- Is ventilation blocked?
Unplug everything safely and group cables by device: monitor, computer, printer, lamp, speakers, etc. Label each cable using masking tape and a pen. This step alone prevents confusion later and helps identify which cords can be removed permanently.
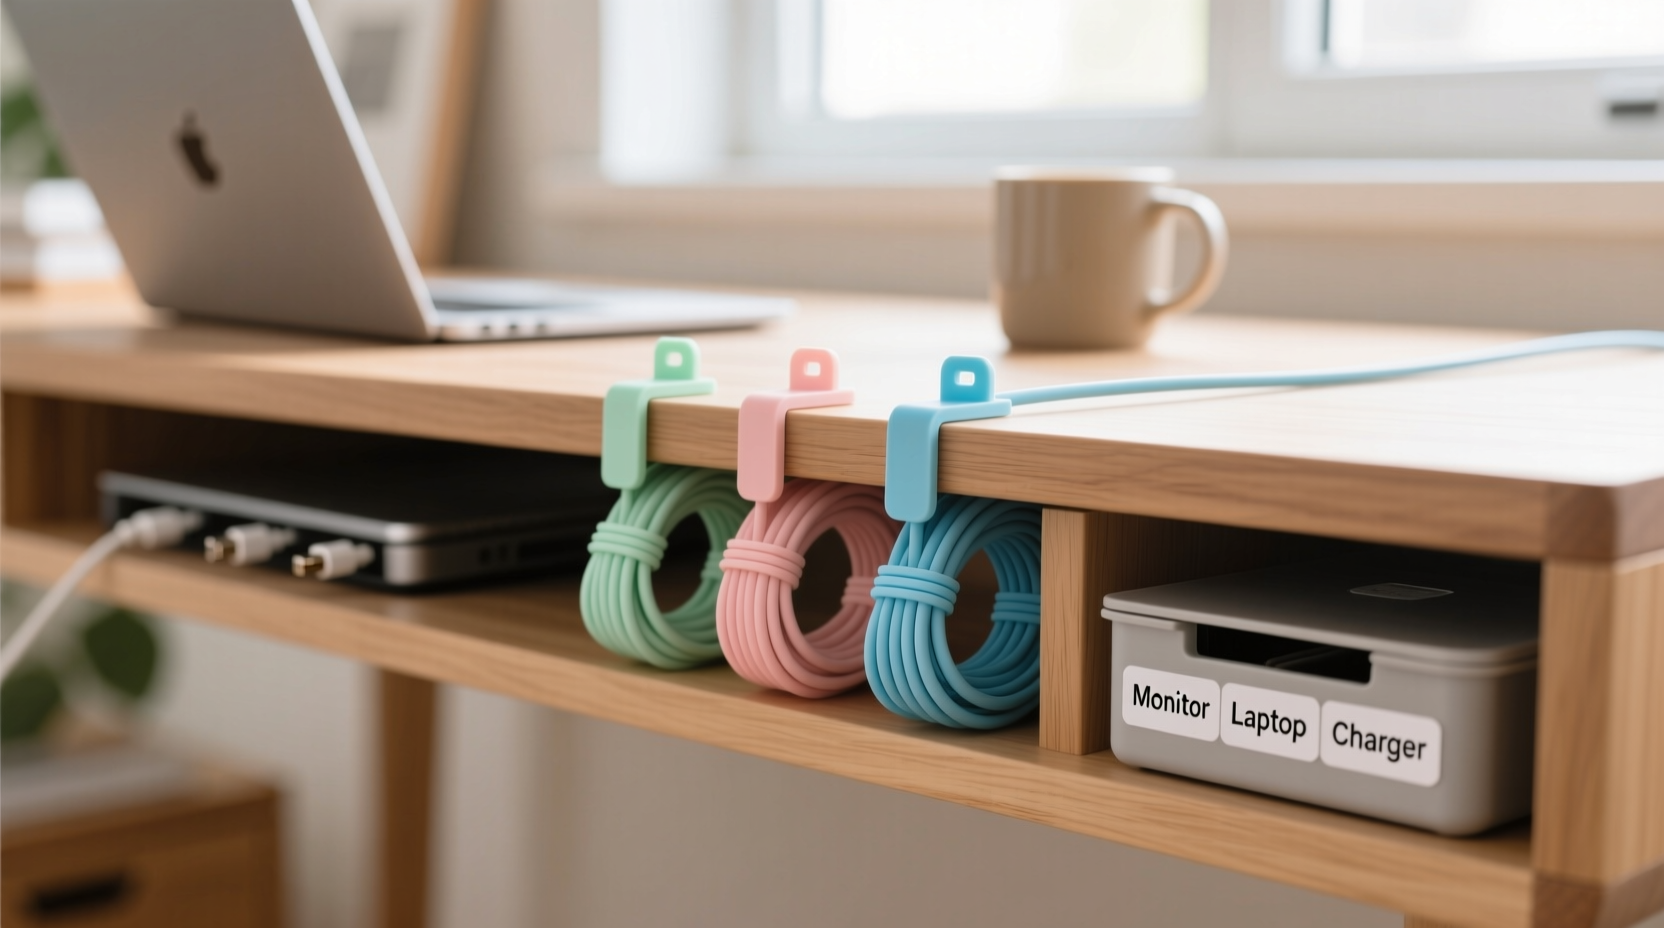
Budget-Friendly Tools That Actually Work
You don’t need specialized gear from a tech boutique. Most effective cable organizers are inexpensive and widely available. Here’s a breakdown of practical, low-cost tools:
| Tool | Cost Range | Best For | Why It Works |
|---|---|---|---|
| Velcro Cable Ties | $3–$8 (pack of 20) | Grouping similar cables | Reusable, adjustable, won’t damage insulation |
| Cable Sleeves (Braided or Fabric) | $5–$12 | Neatly bundling multiple cords | Flexible, looks professional, hides color chaos |
| Zip Ties (Nylon) | $2–$6 (100-pack) | Permanent grouping | Inexpensive and strong—but use carefully |
| Command Hooks (Small) | $5–$10 (set) | Routing cables along desk edges | No drilling, removable, holds moderate weight |
| PVC Pipe Insulation Tubing | $1 per foot | Protecting and organizing single cords | Soft, split down the side, easy to install |
While Velcro and sleeves offer flexibility, zip ties should be used sparingly. Once tightened, they can’t be reused, and cutting them risks damaging nearby wires. Reserve them for final bundling when you’re certain about cable placement.
“Most people overbuy cable management products. Start with $10 worth of Velcro and hooks—you’ll solve 80% of the problem.” — Jordan Lee, IT Support Specialist & Workspace Efficiency Consultant
Step-by-Step Guide: Organize Cables in Under 60 Minutes
Follow this realistic, actionable process to declutter your desk wiring efficiently:
- Power down and unplug all devices. Safety first—don’t skip this.
- Lay everything out on the floor or a table. Untangle completely.
- Remove dead weight: Discard frayed cables, old chargers, and duplicates.
- Label each cable with tape or sticky notes. Use abbreviations like “MTR” for monitor or “LPTP” for laptop charger.
- Group by function: Bundle monitor, USB hub, and speaker cables separately.
- Use Velcro ties to secure each bundle. Leave slack for movement.
- Install adhesive hooks along the back edge of your desk to route bundles downward neatly.
- Mount your power strip near the desk leg or underside using Velcro or a simple bracket.
- Run bundles through cable sleeves if aesthetics matter (e.g., visible areas).
- Reconnect everything, double-check labels, and test each device.
This sequence minimizes rework and ensures long-term usability. If you have a wall outlet behind the desk, consider a vertical cable raceway made from a repurposed plastic conduit ($7 at hardware stores) to conceal and protect wires running floor-to-desk.
Real-World Example: Sarah’s Home Office Transformation
Sarah, a freelance graphic designer in Portland, struggled with tripping over cords and losing USB cables in a rat’s nest behind her L-shaped desk. Her setup included two monitors, a desktop PC, external hard drives, a drawing tablet, lamp, and phone charger—all plugged into two overloaded power strips.
She spent $14: $5 on a pack of black Velcro ties, $6 on a braided cable sleeve, and $3 on small Command hooks. Over a Sunday morning, she followed the step-by-step method above. She labeled every cable, removed three outdated adapters, grouped peripherals, and routed bundles down the desk frame using hooks. The result? A clean, accessible layout where each cord had its place. She regained 10 minutes weekly from not untangling cables and reported fewer overheating issues with her PC.
“I thought I needed a new desk,” she said. “Turns out, I just needed ten bucks and an hour.”
Dos and Don’ts of Affordable Cable Management
To avoid common pitfalls, follow this quick-reference table:
| Do | Don’t |
|---|---|
| Leave slack in cables to prevent strain | Pull cables too tight—they can fray or disconnect |
| Use adhesive hooks to guide cords away from foot traffic | Let cables drape loosely where they can be kicked or pulled |
| Label both ends of long cables | Assume you’ll remember which cable goes where after a month |
| Group similar-length cables together | Mix short and long cords in one bundle—it creates uneven tension |
| Check connections monthly for looseness or heat | Forget maintenance—overheated outlets are a fire hazard |
One often-missed tip: Keep AC adapters (like laptop bricks) elevated off the floor. Stack them on a small shelf or use a mesh basket clipped under the desk. This improves airflow and reduces dust buildup.
DIY Hacks Using Household Items
You likely already own items that double as cable organizers. Get creative:
- Ribbon or Shoelaces: Replace zip ties with fabric strips. They’re reusable and gentler on insulation.
- Paper Clips: Unfold and twist around a bundle to keep it together temporarily.
- Toilet Paper Rolls: Cut vertically and wrap around grouped cables for a makeshift sleeve.
- Milk Jug Plastic: Cut into strips and punch holes to create custom cable ties.
- Old Hair Ties: Perfect for holding coiled charging cables or grouping earbuds.
For desks against walls, attach a shower curtain ring to a screw or drywall anchor. Loop cables through it to maintain a clean exit point from the outlet. These hacks aren’t permanent, but they’re ideal for renters or temporary setups.
Frequently Asked Questions
Can I use duct tape to bundle cables?
Absolutely not. Duct tape leaves a sticky residue, degrades over time, and can damage cable coatings. It also looks unprofessional and fails quickly. Use Velcro or reusable ties instead.
How do I manage cables if my desk has no back panel or grommets?
No grommets? No problem. Use adhesive-backed cable clips or raceways along the rear edge. Route wires down the desk leg and secure them with hook-and-loop tape. If possible, place a small rug or cord cover on the floor to hide trailing lines.
Is it safe to bundle power and data cables together?
Minimize bundling power cables (like AC adapters) with data cables (HDMI, Ethernet, USB). Electromagnetic interference can degrade signal quality, especially over long distances. Keep them separated by at least an inch when possible.
Final Checklist: Affordable Cable Organization in Action
Before you finish, run through this quick checklist to ensure lasting results:
- ✅ All unnecessary cables removed
- ✅ Each cable labeled at both ends
- ✅ Bundles secured with Velcro (not zip ties)
- ✅ Power strip mounted securely and ventilated
- ✅ Adhesive hooks or clips guiding cables safely
- ✅ No cables under tension or sharp bends
- ✅ Devices tested and functioning post-organization
- ✅ Maintenance schedule set (check every 6 weeks)
Repeat this audit every few months, especially if you add new devices. A little consistency keeps chaos at bay.
Take Control of Your Workspace Today
Organizing cables behind your desk isn’t about perfection—it’s about function, safety, and peace of mind. You don’t need a six-figure office or high-end accessories to achieve a tidy setup. With less than $15 and one focused hour, you can eliminate frustration, reduce hazards, and make your workspace genuinely enjoyable to use.
The best systems grow with your needs. Start small. Fix one bundle. Use what you have. Build habits, not dependencies on gadgets. When you walk up to your desk and see clean lines and accessible ports, you’ll realize how much mental clutter was tied to that mess of wires.


 浙公网安备
33010002000092号
浙公网安备
33010002000092号 浙B2-20120091-4
Comments
No comments yet. Why don't you start the discussion?