
A cluttered desk drawer filled with tangled cords is more than just an eyesore—it’s a daily frustration. Every time you need a charger, headset, or USB cable, you’re met with a knotted mess that wastes time and wears down your devices. The good news? You don’t need to spend money on specialized trays, plastic bins, or magnetic wraps to fix it. With a few clever techniques and common household items, you can transform chaos into order using what you already have.
Cable management isn’t about perfection; it’s about function. A well-organized drawer means faster access, less wear on your cords, and a cleaner workspace. Whether you're working from home, studying, or managing personal electronics, this guide delivers practical, budget-friendly solutions anyone can implement today.
Why Cable Clutter Happens—and Why It Matters
Most people accumulate cables over time: old phone chargers, spare HDMI cords, broken earbuds, forgotten adapters. Without a system, they end up tossed into drawers where friction, pressure, and moisture degrade them. Tangled wires also make it harder to identify the right cord quickly, leading to unnecessary stress and wasted minutes each day.
Beyond convenience, disorganization can shorten the lifespan of your electronics. Repeated bending at weak points—especially near connectors—leads to fraying and internal damage. According to the Consumer Technology Association, poorly stored cables account for nearly 30% of premature device failures related to connectivity issues.
“Cable care starts with storage. Even high-quality cords fail early when crushed under heavy objects or twisted repeatedly.” — David Lin, Electronics Durability Analyst
The solution isn’t buying more stuff. It’s rethinking how you use space and materials you likely already own. Let’s break down how to create a functional, low-cost cable organization system step by step.
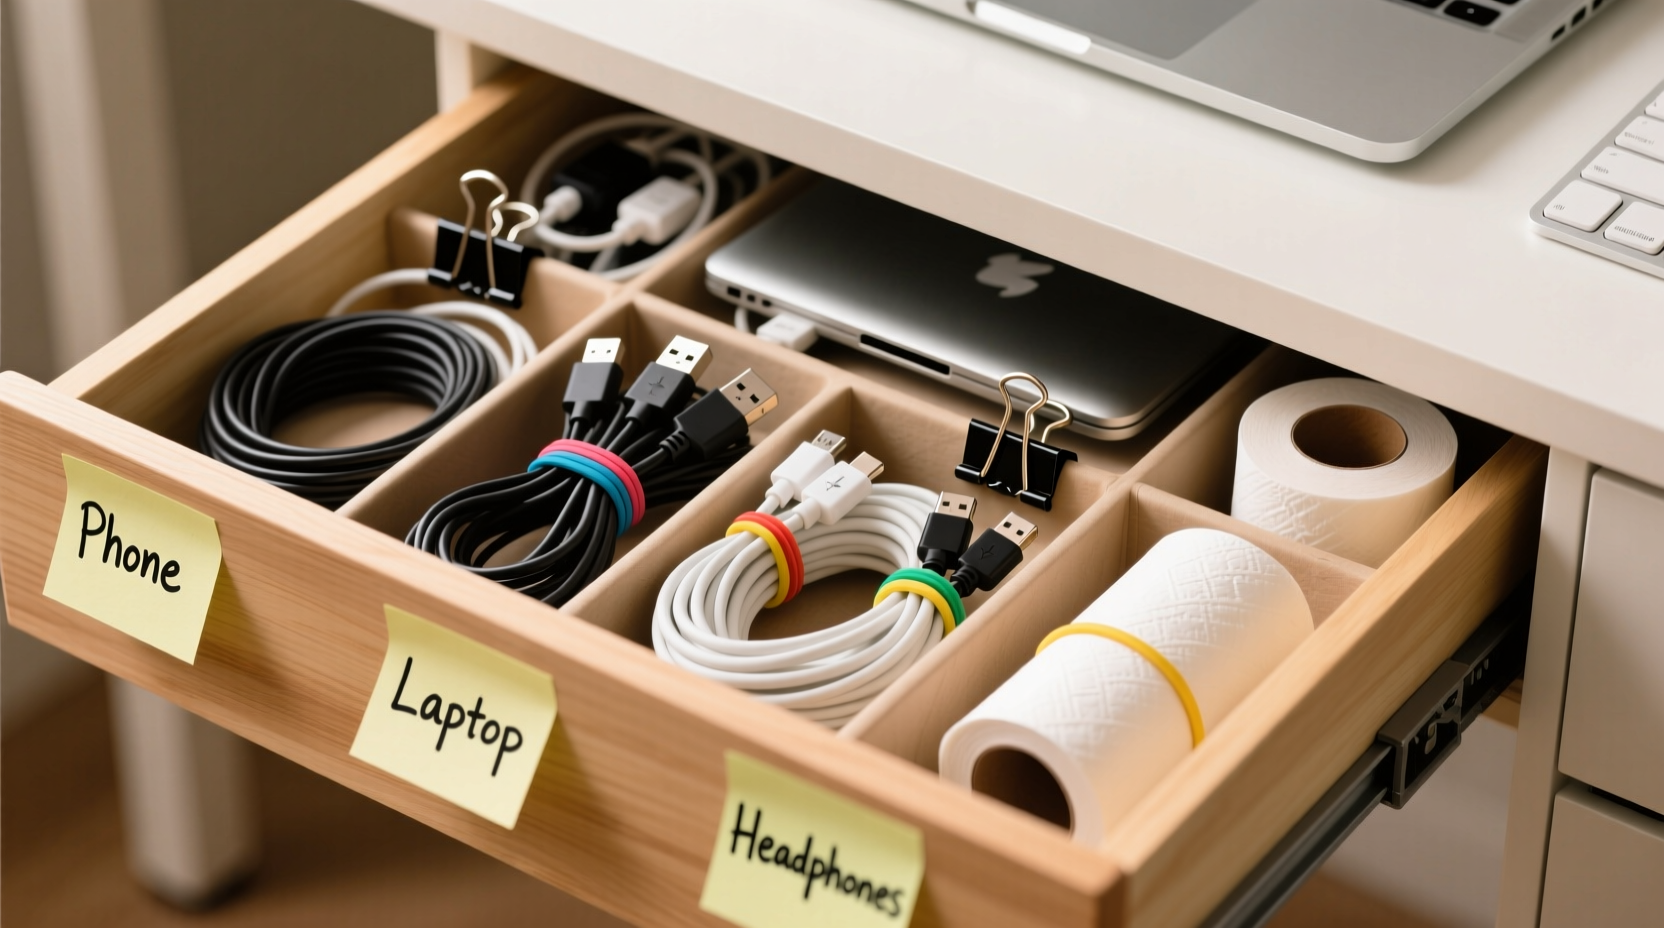
Step-by-Step Guide: Organizing Your Drawer for $0
You don’t need tools or purchases to get started. Follow these seven steps to declutter and organize your desk drawer using only everyday items.
- Empty the drawer completely. Remove everything, including paper clips, pens, and loose batteries. Lay all cables out on a flat surface so you can see exactly what you’re dealing with.
- Sort by category. Group similar items: phone chargers, laptop power supplies, audio cables, USB cords, etc. This makes it easier to assign zones later.
- Ditch the dead weight. Test each cable. If it doesn’t charge, sync, or connect reliably, recycle it responsibly. Keep only what works.
- Label if needed. Use small pieces of masking tape wrapped around each cord near the plug, writing a brief note like “iPad Charger” or “Monitor HDMI.” No labels? Use color-coded knots (more below).
- Coil each cable properly. Avoid wrapping tightly around your hand—that creates twists. Instead, use the over-under method: loop one side over, the next under, alternating to prevent kinks.
- Secure coils with household items. Use rubber bands, twist ties from produce, bread bag clips, or even old shoelaces to hold coils together.
- Arrange inside the drawer logically. Place frequently used cables toward the front. Stack grouped cords neatly, avoiding stacking heavy items on top.
DIY Cable Holders from Common Household Items
Before you consider buying drawer dividers, try repurposing items already in your home. These hacks are effective, silent upgrades that cost nothing but a few minutes of effort.
- Toilet paper or paper towel tubes: Cut vertically and flatten slightly to form rectangular compartments. Stand them upright to separate thick power bricks from thin USB cables.
- Egg cartons: Perfect for small drawers. Each cup holds a coiled cable, adapter, or dongle. Cardboard versions are lightweight and customizable—cut sections to fit your drawer size.
- Shoebox with dividers: Cut strips of cardboard and slide them through a flattened shoebox base to create adjustable partitions. Cover with duct tape for durability.
- PVC pipe scraps: If you have leftover plumbing parts, short sections of 2–3 inch diameter pipe work as vertical spools for larger cables like Ethernet or extension cords.
- Velcro strips from old electronics: Salvage adhesive-backed Velcro from packaging or worn gear. Stick one side to the drawer bottom, the other to a coiled cable for quick attachment.
These solutions aren’t just free—they’re often more adaptable than store-bought organizers. You control the size, layout, and materials based on your actual needs.
Smart Coiling & Storage Techniques
How you wrap a cable determines how long it lasts and how easily it unwinds. Avoid the classic “wrap-around-hand” technique, which introduces torsion and leads to internal wire breaks.
| Method | Best For | How-To | Pros | Cons |
|---|---|---|---|---|
| Over-Under Coil | All cables | Alternate loops over and under your hand as you wind | Prevents twisting, easy to unroll | Takes slightly longer |
| Rubber Band Wrap | Short-term storage | Coil loosely, secure with band at both ends | Quick, uses common item | Bands degrade and snap over time |
| Bread Clip Tagging | Thin cords (earbuds, USB-A) | Clip onto coiled wire after winding | Reusable, sturdy hold | Limited strength for heavy cables |
| Figure-Eight Loop | Long cables (Ethernet, power) | Form figure-eight shape, tie ends with soft string | Ideal for fiber-optic and network cables | Less compact than other methods |
For long-term storage, avoid tight bends smaller than a tennis ball’s diameter. Sharp folds stress insulation and conductors, especially in thicker cords like laptop chargers.
Real Example: Transforming a Home Office Drawer
Sarah, a freelance graphic designer in Portland, had a deep desk drawer she used for “all the tech stuff.” It contained nine cables, three broken adapters, two sets of headphones, and random screws. She spent an average of four minutes per day searching for the right charger.
She followed the steps above: emptied the drawer, tested every cable, and kept only five working ones. She used an old egg carton cut in half to create six compartments. Each coiled cable was labeled with colored tape—red for urgent-use items, blue for backups. She placed the most-used MacBook charger in the front left corner, easy to grab with either hand.
Result: Her daily search time dropped to under 15 seconds. After three months, she reported fewer frayed cords and said her workspace felt “less stressful.” Total cost: $0.
Checklist: Quick Setup in Under 20 Minutes
Use this checklist to organize your drawer efficiently:
- ⬜ Empty the entire drawer
- ⬜ Sort cables by type (charging, data, audio)
- ⬜ Discard or recycle non-functional cords
- ⬜ Test remaining cables for performance
- ⬜ Coil each using the over-under method
- ⬜ Secure with rubber bands, clips, or twist ties
- ⬜ Label if necessary (tape, colors, tags)
- ⬜ Build dividers from toilet paper tubes or egg cartons
- ⬜ Arrange by frequency of use
- ⬜ Store flat, avoid stacking heavy items on top
This routine takes less than one afternoon and pays off every single day afterward.
Frequently Asked Questions
Can I use binder clips to manage cables in a drawer?
Yes. Clip binder clips to the sides or back of the drawer and thread cables through the metal arms to keep them separated and prevent sliding. This works especially well for longer cords that tend to slip to the back.
What’s the best way to store charging cables for travel?
Wrap them around a credit card or use a small fabric sleeve made from an old sock. For multiple cords, place them in a mint tin with foam padding to prevent scratches and tangling.
How often should I reorganize my cable drawer?
Every 3–6 months. Tech changes fast—new devices arrive, old ones retire. Regular audits prevent clutter buildup and ensure your system stays functional.
Final Thoughts: Simplicity Beats Spending
Organizing cables doesn’t require fancy products or technical skills. It requires intention. By taking inventory, using what you have, and applying simple coiling and sorting principles, you can eliminate frustration and extend the life of your electronics—all without spending a dollar.
Think of your desk drawer not as a dumping ground, but as a tool kit. When every item has a place, your workflow becomes smoother, your space feels calmer, and your devices last longer. Start tonight: pull out that drawer, sort the mess, and build a system that works for you.


 浙公网安备
33010002000092号
浙公网安备
33010002000092号 浙B2-20120091-4
Comments
No comments yet. Why don't you start the discussion?