
Cables are essential to modern life—powering laptops, charging phones, connecting speakers, and linking peripherals. But when stored haphazardly in a drawer, they quickly become a knotted mess that wastes time and frustrates even the most organized person. Untangling cords before every use isn’t just annoying—it’s inefficient and can damage your equipment over time. The good news? With the right approach, you can organize cables in a drawer so nothing gets tangled ever again. This guide walks through proven methods, tools, and habits that keep cords accessible, labeled, and neatly coiled—without sacrificing function or aesthetics.
Why Cable Tangles Happen (And How to Stop Them)
Cable tangling is not random chaos—it's physics combined with poor storage habits. When multiple cords of varying lengths and stiffness are tossed into a confined space, movement causes them to loop around each other. Over time, friction and repeated opening/closing of the drawer tighten these loops into knots. The root causes include:
- Lack of separation: Mixing different types of cables increases contact points where tangles form.
- Inconsistent winding: Loose or irregular coiling invites snags.
- No labeling: Without identification, users pull blindly, disturbing adjacent cords.
- Overcrowding: A packed drawer restricts airflow and creates pressure that twists cords together.
The solution lies in structure: using consistent organization techniques that minimize motion, isolate individual cables, and make retrieval effortless.
A Step-by-Step Guide to Drawer Cable Organization
Follow this comprehensive process to transform a chaotic cable drawer into a streamlined system that lasts.
- Empty and Audit Your Drawer
Pull everything out. Lay all cables on a flat surface. Identify what you actually use versus what’s obsolete (old chargers, broken adapters, forgotten accessories). Discard anything frayed, non-functional, or no longer compatible. - Categorize by Type and Frequency of Use
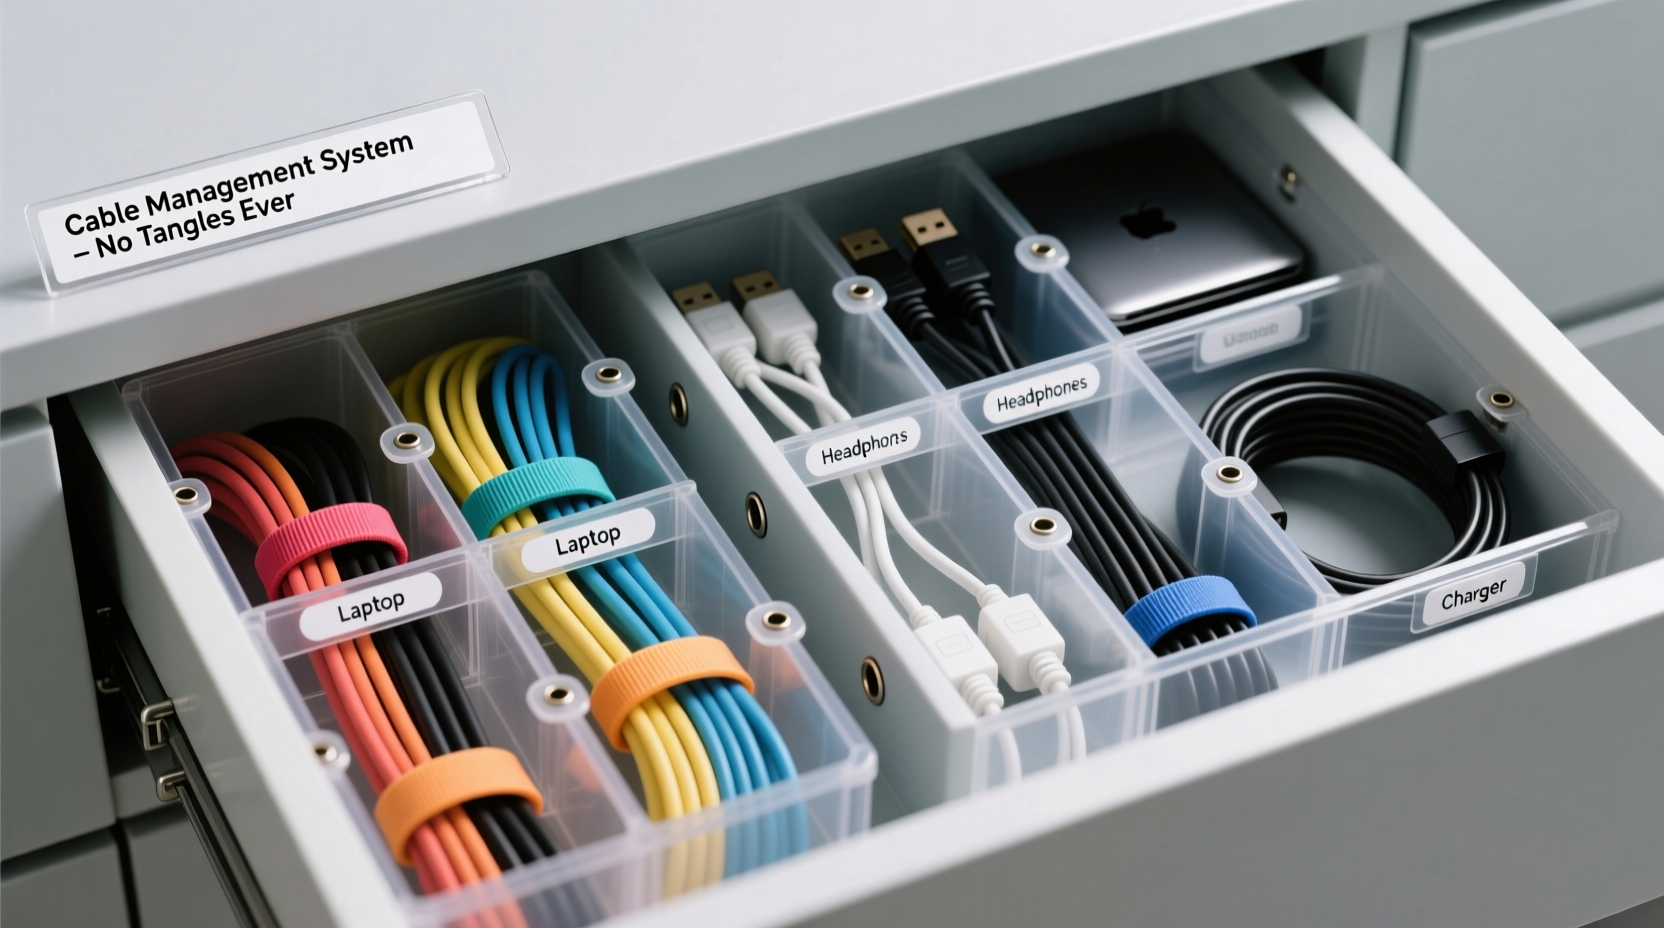
Group cables into categories: phone chargers, laptop power supplies, audio cables, USB hubs, HDMI cords, etc. Within each group, separate frequently used items from backups or seasonal gear. - Label Every Cable
Use adhesive labels, heat shrink tags, or colored tape to mark each cord. Write clear identifiers like “iPhone Charger,” “Monitor HDMI,” or “Work Laptop Adapter.” This eliminates guesswork during retrieval. - Coil Each Cable Properly
Use the over-under method: alternate loops above and below your hand as you wind. This preserves flexibility and prevents twist buildup. Secure with Velcro ties or reusable silicone bands—never twist ties or rubber bands, which degrade and snap. - Select the Right Storage System
Choose one of the organizational structures discussed below based on drawer size and cable volume. - Arrange Strategically in the Drawer
Place high-use cables toward the front. Store delicate or thick cords (like power bricks) upright or supported to avoid crushing thinner ones. - Maintain Monthly
Schedule a quick 5-minute review once a month to re-coil loose ends, update labels, and remove unused items.
Best Storage Solutions for Tangle-Free Cables
Not all drawer organizers work equally well for cables. The ideal setup combines compartmentalization with accessibility. Below are four effective systems, ranked by efficiency and ease of maintenance.
| Solution | Pros | Cons | Best For |
|---|---|---|---|
| Adjustable Drawer Dividers | Customizable layout; durable; keeps groups separated | Limited vertical space usage; may not fit small cables | Medium to large drawers with mixed cable types |
| Modular Cable Organizer Box | Stackable; includes built-in spools and label areas | Takes up more space; costlier upfront | Dedicated tech drawers or home offices |
| Felt Pouches with Drawstrings | Soft protection; portable; affordable | Less rigid structure; can shift in drawer | Travel cables or lightweight cords |
| DIY Toilet Paper Roll Holder Method | Zero cost; uses recycled materials; excellent for coiling | Not durable long-term; requires crafting effort | Budget organizers or temporary setups |
For maximum effectiveness, combine two approaches—such as using adjustable dividers with felt pouches inside each section. This adds both macro and micro-level control.
Real Example: From Chaos to Clarity
Consider Sarah, a freelance graphic designer working from home. Her desk drawer held over 20 cables: three laptop chargers, multiple USB-C and Lightning cords, an old VGA adapter, headphones, and camera batteries. Every morning, she wasted 5–10 minutes untangling her primary charger. After reading about cable management, she spent one Sunday organizing her drawer.
She started by discarding six unusable items. She grouped the rest into four categories: daily drivers, backup chargers, video/audio connectors, and specialty gear. Using a $12 adjustable divider set, she created zones. Each cable was coiled with Velcro straps and labeled with color-coded stickers. She placed the most-used items in front and stored bulky adapters upright in a small box.
Result? No more morning tangles. She now finds any cable in under 15 seconds. More importantly, her cables last longer—she hasn’t replaced a single one due to wear since the overhaul, saving money and reducing e-waste.
Pro Tips to Prevent Future Tangles
Even the best system fails without proper habits. These expert-backed strategies ensure longevity and usability.
- Use magnetic cable clips inside the drawer lid to anchor frequently used cords and prevent shifting.
- Store power bricks outside the drawer if possible—attach them to the wall behind your desk with adhesive mounts to reduce bulk.
- Limit drawer contents to 70% capacity to allow room for easy access and airflow.
- Rotate cables seasonally—swap out winter-only devices (like heaters) with summer gear to keep the drawer relevant and uncluttered.
“Cable management isn’t just about neatness—it’s about preserving device lifespan and improving workflow efficiency. A well-organized drawer saves hours per year.” — David Lin, Professional Tech Organizer & Founder of CordLogic Systems
Checklist: Your Cable Drawer Reset Plan
Use this checklist the next time you tackle cable clutter:
- ☐ Empty the entire drawer
- ☐ Test each cable for functionality
- ☐ Discard damaged or obsolete cords
- ☐ Group cables by type and frequency of use
- ☐ Label each cable clearly
- ☐ Coil each properly using the over-under method
- ☐ Choose and install a suitable drawer organizer
- ☐ Arrange cables with most-used at the front
- ☐ Add Velcro ties or reusable fasteners
- ☐ Schedule monthly maintenance reminders
Common Mistakes to Avoid
Even with good intentions, people often undermine their own efforts. Watch out for these pitfalls:
- Using zip ties permanently: They’re impossible to reuse and can cut into insulation over time.
- Storing cables while still warm: Heat from recent use softens insulation, making it prone to deformation when coiled.
- Ignoring cable length: Excessively long cords are more likely to tangle. Consider shorter replacements for stationary devices.
- Skipping labels: Without identification, even a neat drawer becomes frustrating after a few weeks.
- Letting kids or roommates reorganize freely: Without training, others may revert to tossing cords in randomly. Educate household members on the system.
FAQ: Your Cable Organization Questions Answered
How do I organize thick or stiff cables like power adapters?
Thick cables resist tight bends. Instead of forcing them into small loops, loosely coil them in wide arcs and secure with fabric-covered clamps or padded sleeves. Store them vertically in deep bins or side-mounted pockets to avoid compression.
Can I use binder clips to manage cables in a drawer?
Yes—but only on the interior walls or underside of the drawer lid. Clip the arms over the edge and thread cables through the metal loops. This anchors cords in place and prevents migration during drawer operation.
What’s the best way to store international travel adapters?
Keep them in a dedicated zippered pouch with their corresponding cables already attached. Label the outside with the destination country. This ensures you grab the complete set without last-minute scrambling.
Conclusion: A Tidy Drawer Is a Productive One
Organizing cables in a drawer isn’t just a cosmetic upgrade—it’s an investment in daily efficiency, equipment longevity, and mental clarity. By following structured sorting, proper coiling, smart labeling, and sustainable storage choices, you create a system that resists tangles for months or even years. The initial effort pays dividends every time you reach for a charger and find it exactly where it should be, ready to use.
Don’t wait for another frustrating knot to motivate you. Take one hour this week to reset your cable drawer using the steps outlined here. Once done, maintain it with simple monthly check-ins. You’ll wonder why you didn’t do it sooner.


 浙公网安备
33010002000092号
浙公网安备
33010002000092号 浙B2-20120091-4
Comments
No comments yet. Why don't you start the discussion?