
Cluttered cords snaking across floors, tangled behind desks, or spilling out of entertainment centers are more than just an eyesore—they’re a tripping hazard and a productivity killer. While zip ties and cable sleeves are common fixes, they’re often single-use, hard to adjust, and contribute to plastic waste. The good news? You don’t need specialized tools to tame the mess. With a few clever uses of everyday household items, you can organize your cables neatly, safely, and sustainably—all without reaching for a single zip tie.
This guide reveals practical, creative, and eco-friendly methods to manage cords using objects you likely already have at home. From toilet paper rolls to binder clips, clothespins to mason jars, these solutions are accessible, affordable, and surprisingly effective. Whether you're streamlining your home office, cleaning up behind your TV, or managing kitchen appliances, these techniques will help you regain control over cable chaos.
Why Ditch Zip Ties?
Zip ties are ubiquitous in cable management, but they come with significant drawbacks. Once fastened, they’re difficult to loosen or reuse. Cutting them off creates plastic waste, and their rigid structure can damage delicate wires over time. Over-tightening can compress insulation, leading to fraying or reduced conductivity. Moreover, they lack aesthetic appeal—plastic straps aren’t exactly interior design upgrades.
Using household alternatives promotes reusability, flexibility, and visual harmony. Items like cardboard tubes, fabric strips, or wooden clothespins blend into home environments while allowing easy access when you need to unplug or rearrange devices. These materials are also biodegradable or recyclable, aligning with sustainable living principles.
“Cable organization shouldn’t sacrifice accessibility or sustainability. Household items offer smarter, gentler ways to keep cords under control.” — Jordan Lee, Home Organization Consultant
Everyday Items That Work Wonders for Cable Management
The key to effective cable organization lies not in buying new products, but in reimagining what you already own. Below are eight common household items and how to repurpose them for cord control.
1. Toilet Paper and Paper Towel Rolls
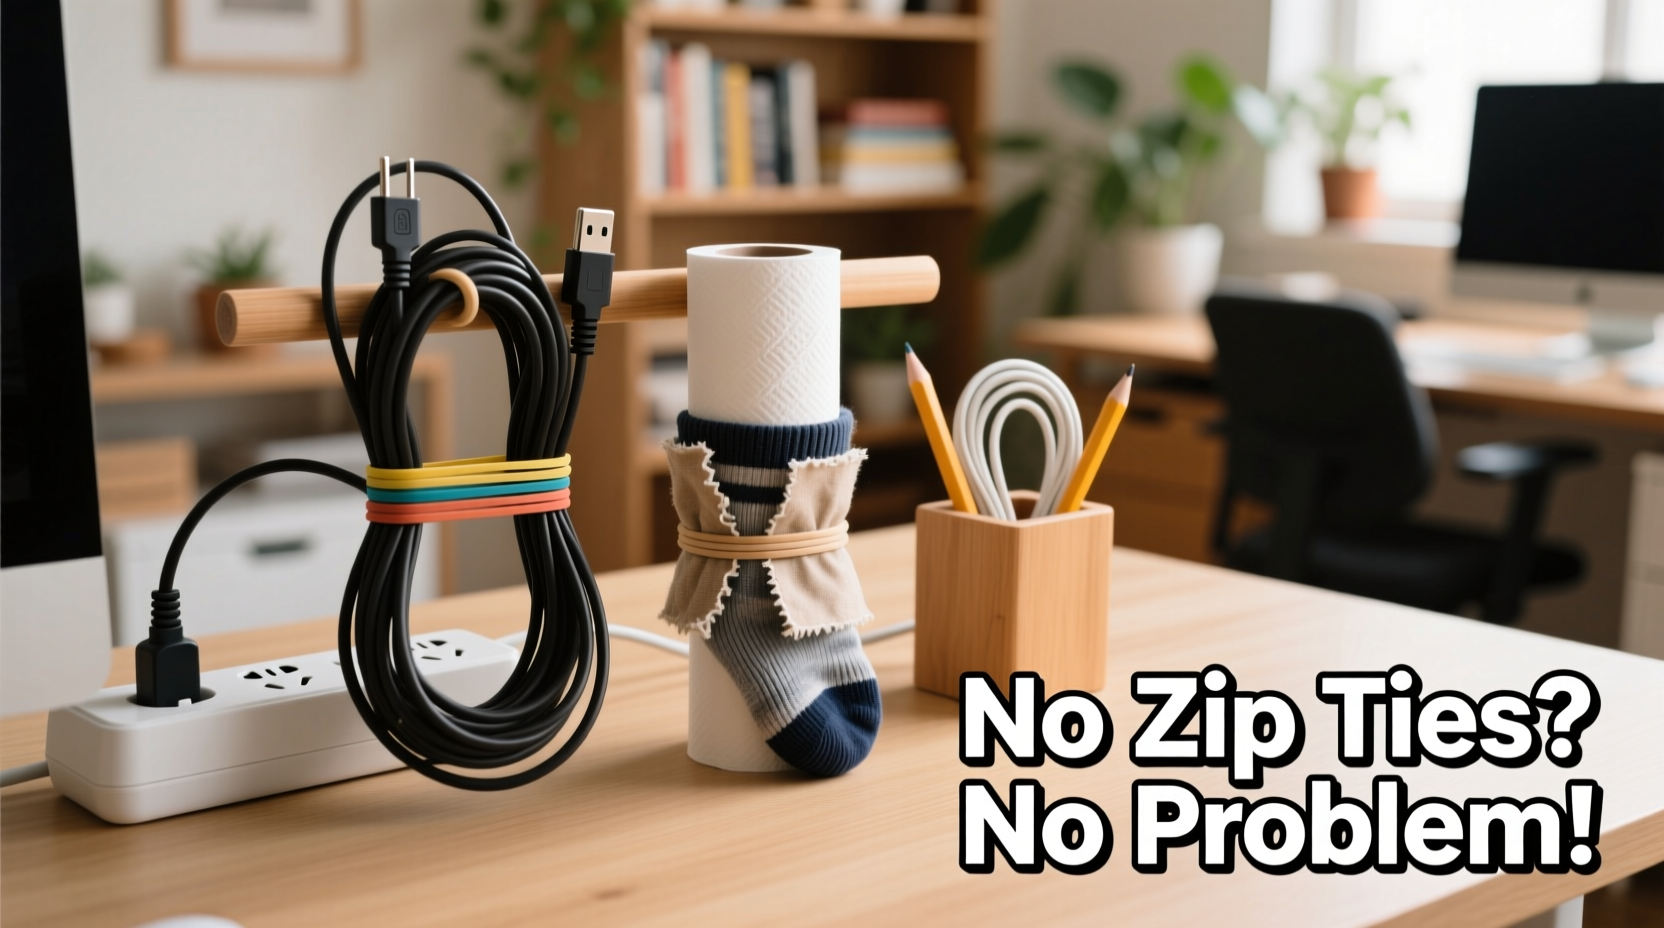
Cardboard tubes are ideal for bundling and storing coiled cords. Cut a toilet paper roll lengthwise to create a quick-release sleeve. Wrap your charger, headphones, or extension cord around the tube, then slide the slit open to release the end when needed. For longer cords, use a paper towel roll. Label each tube with the device type (e.g., “Laptop Charger”) using masking tape and a pen.
2. Binder Clips
Binder clips are one of the most versatile tools for desk cable management. Clip them onto the edge of your desk or table, then loop cords through the metal arms to prevent them from dangling. Use different sizes based on cord thickness—small clips for USB cables, large ones for power bricks. You can also clip multiple cords together by threading them through the same binder clip.
3. Clothespins
Wooden or plastic clothespins are perfect for attaching cords to furniture edges, bed frames, or shelves. Clip the cord in place to stop it from slipping or tangling. Paint or decorate them to match your decor. For heavier cords, use spring-loaded clothespins with strong grips.
4. Mason Jars and Glass Containers
Repurpose mason jars as hidden cable hubs. Drill a hole in the lid (use a glass or metal drill bit carefully), feed the main power cord through, and store adapters or excess wire inside the jar. This works especially well behind entertainment centers or in kitchens where multiple small appliances are used. The jar keeps dust off and adds a rustic-chic touch.
5. Old Belts or Fabric Scraps
Leather or cloth belts can be wrapped around bundled cords and secured with their buckles. Alternatively, cut old t-shirts or towels into long strips and tie them around groups of cables. Fabric ties are soft, adjustable, and won’t scratch surfaces. They’re also washable and reusable indefinitely.
6. Shoe Organizers (Over-the-Door Type)
Hang a clear shoe organizer on the back of a closet or door near your workspace. Each pocket can hold a different cable—phone charger, earbuds, HDMI, etc.—labeled with sticky notes or chalkboard labels. This system keeps cords visible, separated, and tangle-free.
7. Muffin Tins or Ice Cube Trays
Mount a muffin tin under a desk or shelf using screws or strong adhesive. Place small adapters, USB drives, or coiled cords into each cup. An ice cube tray works similarly for tiny items like charging tips or Bluetooth dongles. Both options provide compartmentalized storage that prevents loss and clutter.
8. Forks and Spoons (Yes, Really)
Metal forks can act as makeshift cord anchors. Slide a fork under a couch or desk leg, then wrap the cord around the tines to hold it in place. Spoons work too—the bowl holds the curve of the cord securely. While unconventional, this method is surprisingly effective for temporary setups.
Step-by-Step Guide: Transform Your Workspace in 30 Minutes
Follow this timeline to declutter your desk area using only household supplies. Total time: 30 minutes.
- Unplug everything (5 min): Disconnect all devices and pull cords out from behind the desk. Lay them on the floor for sorting.
- Sort and identify (5 min): Group cords by device (laptop, monitor, lamp, etc.). Discard any frayed or unused cables.
- Coil and secure (10 min): Use the over-under method to neatly coil each cord. Secure with fabric strips, toilet paper rolls, or clothespins.
- Anchoring (5 min): Attach binder clips to the desk edge. Thread cords through the clips to prevent slippage. Use forks or spoon anchors under furniture legs if needed.
- Store and label (5 min): Place labeled toilet paper rolls in a drawer or use a shoe organizer on the wall. Add notes like “Monitor Power” or “Phone Fast Charger.”
Real-Life Example: Sarah’s Home Office Makeover
Sarah, a freelance graphic designer, worked from a small corner of her living room. Her desk sat against the wall, with cords from her laptop, monitor, printer, and phone charger forming a chaotic nest behind it. She tripped twice in one week and dreaded showing her workspace during video calls.
She decided to try household solutions. Using three toilet paper rolls, she coiled and labeled each major cable. She clipped two large binder clips to the back of her desk and routed the cords through them. A repurposed muffin tin mounted underneath held her USB hubs and extra adapters. Finally, she tied loose ends together with strips of an old scarf.
The result? A clean, professional-looking setup that took less than 40 minutes and cost nothing. Sarah reported feeling more focused and confident during client meetings. “I didn’t think cardboard and clips could make such a difference,” she said. “Now my space feels intentional, not accidental.”
Do’s and Don’ts of DIY Cable Organization
| Do | Don’t |
|---|---|
| Use soft materials like fabric or cardboard to avoid damaging insulation | Over-tighten cords with rigid materials that can crush wiring |
| Label cords clearly for quick identification | Leave cords unlabeled and buried in tangles |
| Allow slack for easy unplugging and movement | Pull cords taut, which stresses connectors |
| Regularly inspect cords for wear and replace damaged ones | Ignore fraying or exposed wires |
| Reuse and repurpose household items sustainably | Rely on disposable plastic ties that can’t be adjusted |
Checklist: Quick Cable Cleanup Routine
- Unplug and untangle all cords in the area
- Discard broken or obsolete cables
- Coil each cord using the over-under method
- Secure with fabric strips, toilet paper rolls, or clothespins
- Anchor cords with binder clips or spoons to prevent slippage
- Store in labeled containers or pockets
- Test connections to ensure everything works post-organization
- Schedule a monthly 10-minute refresh to maintain order
Frequently Asked Questions
Can I use rubber bands to bundle cables?
Rubber bands may seem convenient, but they degrade over time, become brittle, and can snap unexpectedly. When they break, they might leave sticky residue or damage nearby surfaces. Opt for cloth strips, twist ties from produce, or reusable silicone bands instead.
How do I prevent pets from chewing on cords?
Use physical barriers like cardboard tubes or PVC pipe segments to cover exposed wires. Route cords along walls and secure them high off the ground using binder clips or tape. You can also apply pet-safe bitter sprays to deter chewing, but concealment is the safest long-term solution.
What’s the best way to label cords without buying special tags?
Use masking tape and a permanent marker to create custom labels. Wrap the tape around the plug or coil. Chalkboard stickers on mason jars or toilet paper rolls also allow for erasable labeling. For a decorative touch, write on washi tape with a fine-tip pen.
Final Thoughts: Simplicity Is Sustainable
Organizing cables doesn’t require expensive kits or permanent modifications. Often, the most effective solutions are the simplest—and already in your home. By repurposing everyday items, you reduce waste, save money, and create systems that are easy to adapt as your needs change.
The goal isn’t perfection; it’s progress. A few minutes spent coiling a charger around a cardboard tube or clipping a cord in place can prevent hours of frustration later. These small acts of organization add up to calmer spaces, safer homes, and more efficient workflows.


 浙公网安备
33010002000092号
浙公网安备
33010002000092号 浙B2-20120091-4
Comments
No comments yet. Why don't you start the discussion?