
Cable clutter is more than just an eyesore—it’s a tripping hazard, a dust magnet, and a frustration every time you need to unplug or identify a specific cord. While commercial cable organizers are widely available, they often come with unnecessary costs and limited versatility. The good news? You don’t need to spend a dime to achieve a clean, functional setup. With a little creativity and common household items, you can transform tangled messes into orderly systems that work smarter, not harder.
This guide explores practical, sustainable, and inexpensive ways to manage your cables using what you already have at home. From repurposed toilet paper rolls to binder clips and old mason jars, these DIY methods are as effective as they are accessible.
Why DIY Cable Management Makes Sense
Purchasing specialized cable ties, sleeves, or desktop trays may seem like the quick fix, but over time, those small expenses add up. More importantly, pre-made solutions aren't always adaptable to unique setups—like behind a desk with multiple monitors, entertainment centers with mixed-length cords, or travel kits for charging devices on the go.
DIY cable organization offers flexibility, sustainability, and customization. Instead of forcing your cables into rigid, one-size-fits-all products, you can tailor solutions to your exact needs. Plus, reusing materials reduces waste and supports eco-conscious living.
“Simple interventions, like bundling and labeling, reduce visual stress and improve efficiency in both home and office environments.” — Dr. Lena Patel, Environmental Psychologist
Everyday Household Items That Work as Cable Organizers
You likely already own several objects perfectly suited for cable management. The key is recognizing their potential beyond original use. Below are some of the most effective repurposed items and how to use them.
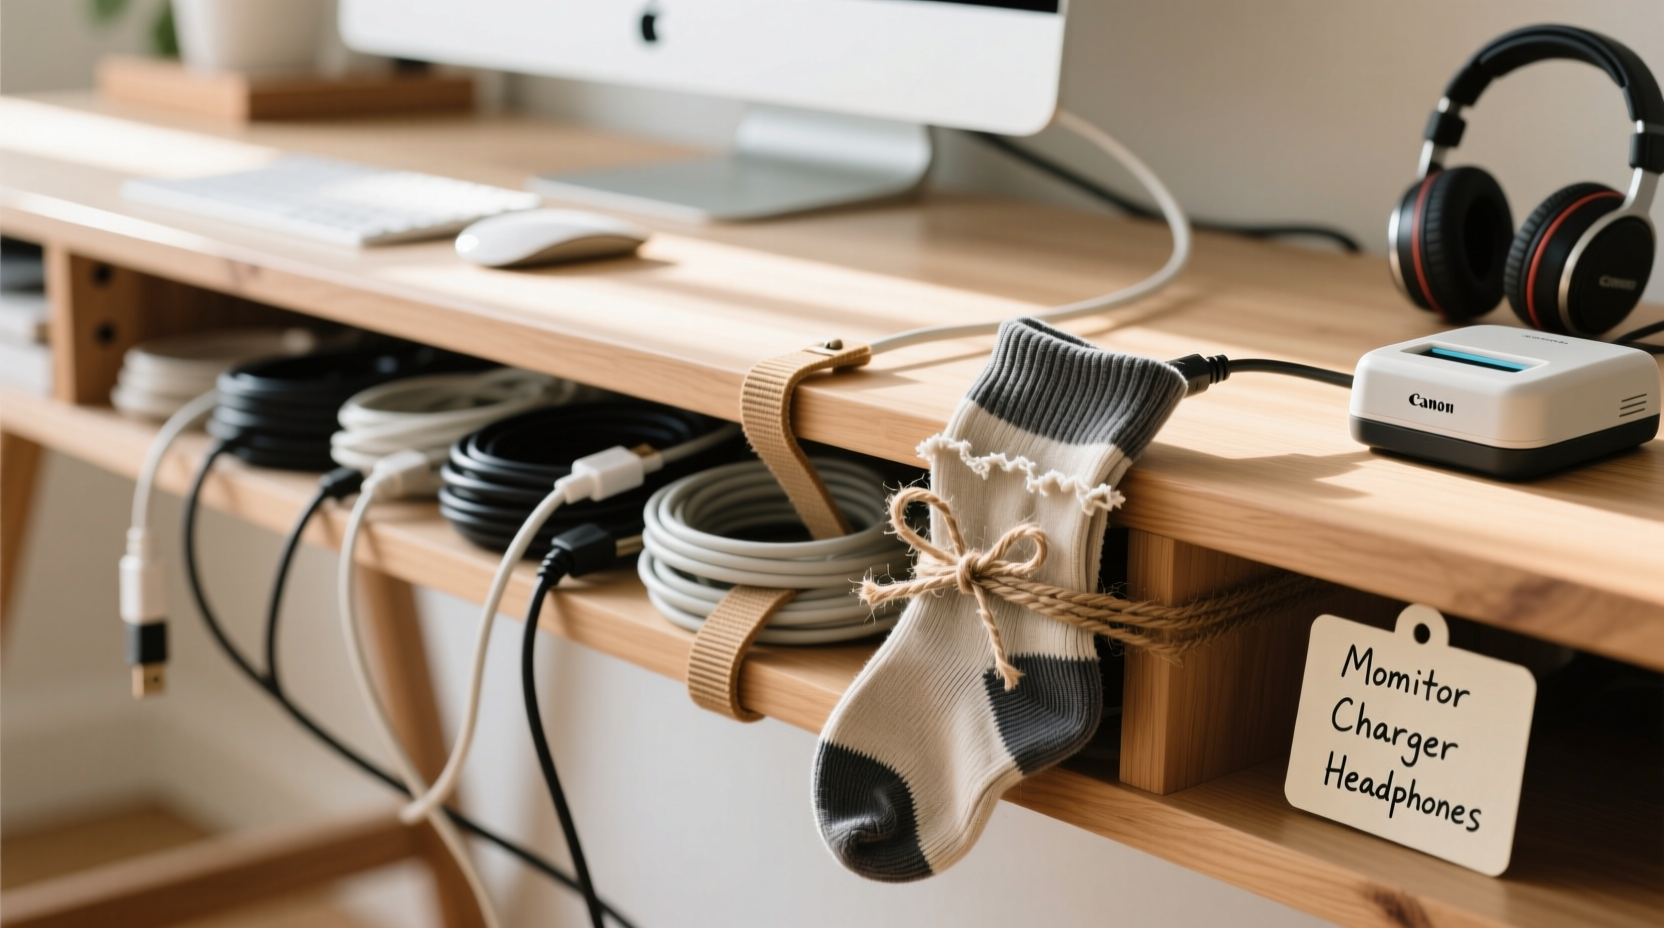
1. Toilet Paper and Paper Towel Rolls
Cardboard tubes from toilet paper or paper towels are ideal for storing coiled cords. Cut slits on one end to thread the plug through, then wrap the cable around the tube. Label with the device name (e.g., “Laptop Charger”) using a marker or sticky note.
2. Binder Clips
Binder clips are among the most versatile tools for cable control. Clip them onto the edge of a desk and loop excess cords through the metal arms to keep them off the floor and within reach. Larger clips can hold multiple cords together, while smaller ones work well for securing headphone wires to a nightstand.
3. Forks (Yes, Real Forks)
Repurpose an old fork by screwing it into the back of a shelf or wall near your electronics. The tines act as natural separators for different cords, preventing tangling and allowing each cable to hang freely. This works especially well behind entertainment centers or workbenches.
4. Milk Jug Handles
Cut the handle portion off a plastic milk jug to create a sturdy, U-shaped clip. Nail or screw it to the side of a desk or cabinet to route and secure cords. The smooth edges prevent fraying, and the plastic is strong enough to support heavier cables like power strips.
5. Bread Bag Clips
Those small plastic sliders from bread bags are perfect for labeling and grouping cords. Write the device name on a small piece of tape and attach it to the clip. Then fasten the clip around the cord near the plug. No more guessing which USB cable goes to your tablet.
Step-by-Step Guide to a Tangle-Free Workspace
Follow this five-step process to declutter and organize your cables using only household items.
- Unplug and Sort: Disconnect all cables from outlets and devices. Lay them out on a table and group them by function—chargers, audio cables, power cords, data cables, etc.
- Test and Discard: Plug each cable into its device to ensure it works. Throw away frayed, damaged, or obsolete cords (like old VGA or parallel printer cables).
- Measure and Coil: Neatly coil each usable cable using the over-under method (alternating loops) to prevent internal wire strain. Secure with a rubber band, twist tie, or bread clip.
- Label Clearly: Use masking tape and a pen to label each cord at the plug end. Include device name and voltage if relevant (e.g., “Monitor – 12V”).
- Install DIY Holders: Attach binder clips to desk edges, slide cords through toilet paper rolls, or mount fork hooks behind furniture. Route cords along walls using painter’s tape (gentle on surfaces) if needed.
“Over-under coiling preserves cable integrity far better than simple wrapping. It prevents twist buildup that leads to internal breakage.” — Mark Tran, Electronics Technician
Smart Storage Solutions for Different Areas
Cable chaos isn’t limited to desks. It spreads to kitchens, entertainment centers, and even cars. Here’s how to adapt DIY strategies to various spaces.
Home Office Desk
Use large binder clips to anchor cords under the desk. Place a shoebox lid upside down behind your monitor to serve as a base for grouped cables. Cut small slits in the sides to feed cords through and keep them aligned.
TV Entertainment Center
Create a cord hub using a mason jar. Drill or melt small holes in the lid, feed each cable through a hole, and screw the lid back on. Mount the jar underneath the TV stand using zip ties or adhesive strips. The jar hides the mess while allowing airflow and easy access.
Kitchen Countertop
Small appliances generate short cords that dangle dangerously. Use a cut plastic bottle (bottom half) as a cord wrap. Slide the plug through the neck, coil the cord inside, and place the unit on top. This keeps blenders, kettles, and toasters tidy and safe.
Travel and On-the-Go Kits
Store chargers and adapters in a pencil case or mint tin. Use cardboard toilet paper rolls inside the container to keep each cord separate. Add a small envelope with spare connectors or SIM eject tools.
Do’s and Don’ts of DIY Cable Management
| Do’s | Don’ts |
|---|---|
| Use soft ties like fabric strips or old shoelaces instead of tight zip ties that can damage insulation. | Avoid twisting cords tightly around sharp corners or furniture legs. |
| Label cords at the plug end so identification is easy when unplugged. | Don’t bundle power cables with data cables (e.g., HDMI or Ethernet), as this can cause interference. |
| Coil cords loosely using the over-under method to extend lifespan. | Never use nails or screws directly through cords—even if insulated, this risks internal damage. |
| Repurpose food containers with lids for portable cable storage. | Don’t ignore ventilation; avoid enclosing live power strips in sealed boxes. |
Real-Life Example: A Home Office Transformation
Sarah, a freelance graphic designer in Portland, struggled with a desk buried under a nest of cords from her dual monitors, drawing tablet, laptop charger, phone dock, and external hard drives. She avoided cleaning it because untangling took too long and she feared disconnecting something vital.
She decided to try DIY fixes over a weekend. She used six binder clips to secure cords under her desk, labeled each with colored tape (red for monitor, blue for laptop, green for tablet). She wrapped longer cords around toilet paper rolls and stored them upright in a reused coffee can. Behind her desk, she mounted two fork hooks to separate HDMI and USB cables.
The result? Her workspace looked cleaner, setup time dropped from 15 minutes to under 3, and she reported feeling less stressed during work sessions. “It cost me nothing,” she said, “and now I actually enjoy sitting at my desk.”
Essential Checklist for a Clutter-Free Cable System
- ☐ Unplug all cables and test functionality
- ☐ Discard broken or obsolete cords
- ☐ Group cables by device or room
- ☐ Label each cord clearly at the plug end
- ☐ Choose repurposed organizers (binder clips, tubes, jars, etc.)
- ☐ Coil cords using the over-under method
- ☐ Secure cords off the floor and away from foot traffic
- ☐ Maintain separation between power and data cables
- ☐ Create a portable kit for travel or backup
- ☐ Reassess every 3–6 months for wear or new additions
Frequently Asked Questions
Can I use duct tape for cable management?
Duct tape is not recommended for long-term use. While strong, it leaves sticky residue, degrades over time, and can damage cable insulation when removed. Opt for reusable options like Velcro strips made from old shoes or fabric tape.
How do I prevent pets from chewing cables?
Bundle cords tightly and route them through PVC pipes, garden hoses (cut lengthwise), or spring-loaded hose guides. Alternatively, use bitter apple spray on a cloth wrapped around the cord—never directly on the plastic. Elevate cords using wall clips or furniture barriers.
Are there fire risks with DIY cable setups?
Poor airflow and overloaded outlets are bigger risks than the organizer itself. Always ensure power strips are not covered, avoid daisy-chaining extensions, and never enclose active electronics in airtight containers. Use flame-resistant materials like metal binder clips or ceramic holders when possible.
Final Thoughts and Call to Action
Organizing cables doesn’t require a shopping trip or high-tech solutions. Some of the most effective tools are already in your recycling bin or junk drawer. By adopting a mindset of reuse and thoughtful design, you can eliminate clutter, protect your devices, and create spaces that feel intentional and calm.
Start small: pick one area—a desk, a charging station, or your car console—and apply one DIY method today. Once you see the difference, you’ll be motivated to tackle the rest. Share your before-and-after stories or creative hacks in the comments. Let’s build a community of smart, resourceful organizers who prove that simplicity often beats spending.


 浙公网安备
33010002000092号
浙公网安备
33010002000092号 浙B2-20120091-4
Comments
No comments yet. Why don't you start the discussion?