
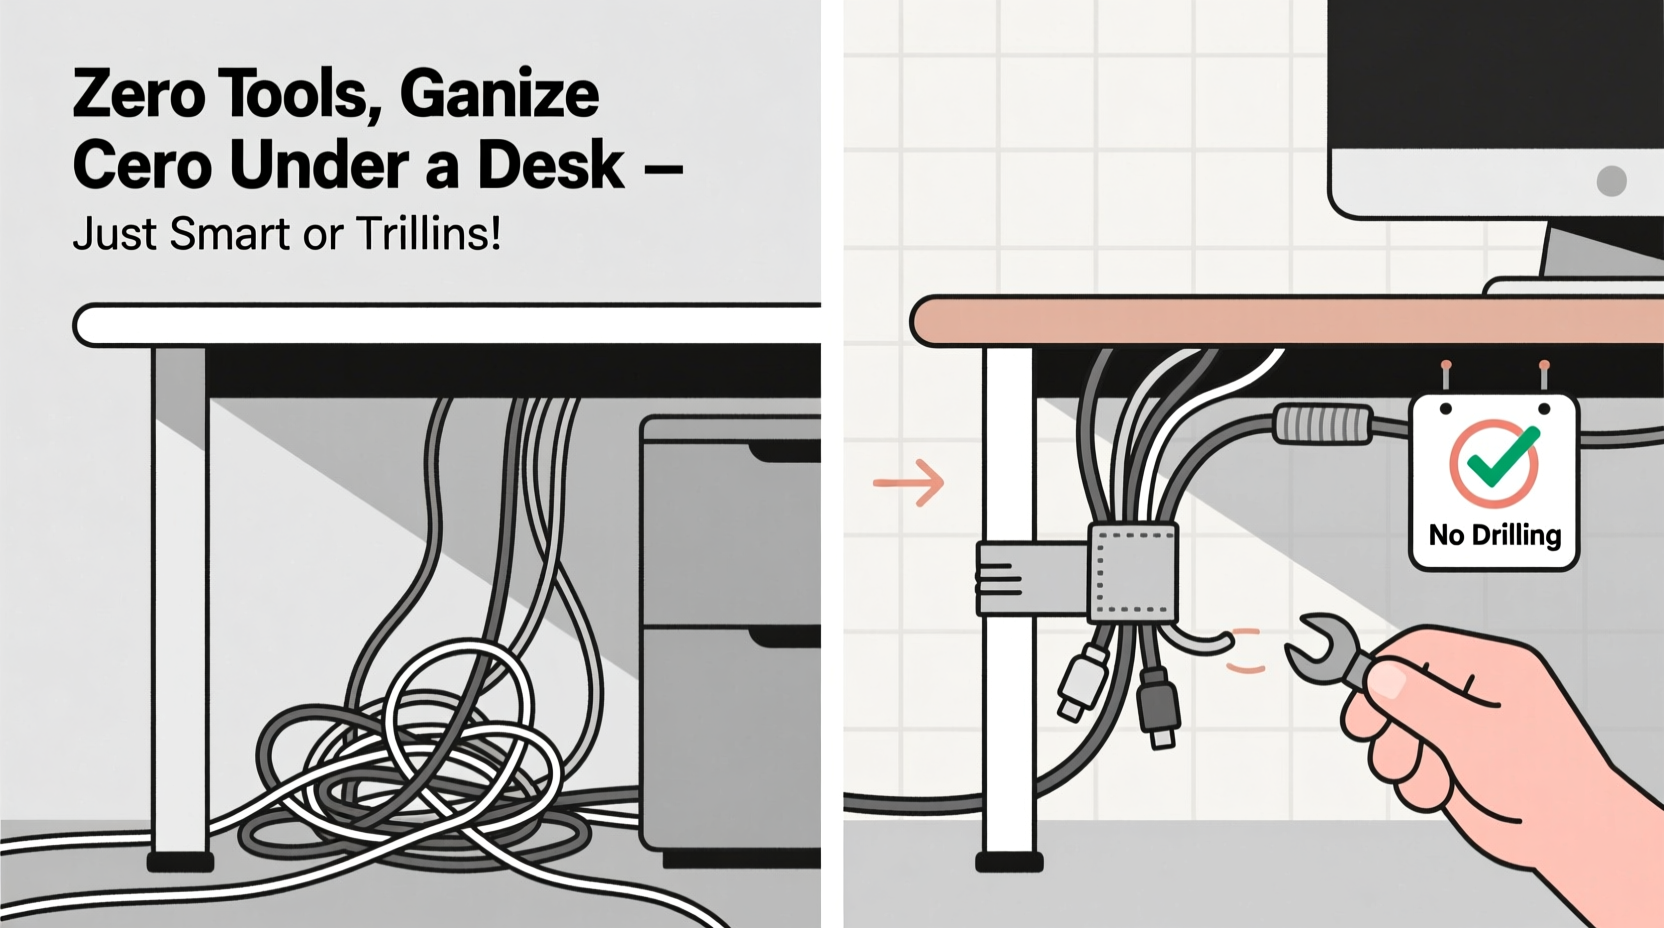
A cluttered workspace doesn’t just look unprofessional—it can sap your focus, slow you down, and even create safety hazards. Nowhere is this mess more hidden yet impactful than beneath your desk. Tangled power strips, loose charging cables, and dangling adapters form a chaotic web that’s frustrating to untangle and nearly impossible to maintain. The good news? You don’t need a toolbox, wall anchors, or permission from your landlord to fix it. With smart techniques and common household items, you can tame the cable jungle under your desk—no drilling, no tools, no damage.
Why cord clutter matters more than you think
Most people overlook the area under their desk until they’re unplugging a device and accidentally shut down their entire setup. But disorganized cords do more than inconvenience—they affect productivity, safety, and even equipment longevity. A 2023 ergonomic study by the Human Factors and Ergonomics Society found that workers in organized environments completed tasks up to 27% faster than those in cluttered ones. Cable tangles contribute significantly to mental fatigue, especially when troubleshooting becomes a daily obstacle.
Beyond performance, tangled cords increase wear and tear on insulation, raising the risk of fraying or short circuits. Tripping over cords remains one of the top causes of minor office injuries, according to OSHA data. And if you're renting, drilling into furniture or walls isn't an option—making tool-free solutions not just convenient, but essential.
Step-by-step guide: Transform chaos into order in under 30 minutes
You can achieve a clean, functional cable system in just a few simple steps. No expertise required—just patience and a few minutes.
- Unplug everything. Start fresh. Remove all devices from power sources and disconnect peripherals. Lay them out on your desk so you can see what you’re working with.
- Sort by function. Group cords into categories: computer, monitor, lamp, charger, speakers, etc. Discard any frayed or unused cables.
- Shorten slack strategically. Use gentle loops instead of tight knots. Wrap excess length into figure-eights and secure with reusable ties.
- Route cables along natural paths. Follow the back edge of your desk or use existing grooves. Avoid sharp bends near plugs.
- Anchor without adhesives. Use friction-based clips or bundling techniques to keep cords in place (more on these below).
- Test before finalizing. Plug everything back in. Ensure all devices work and cords aren’t stretched or pinched.
Creative, no-tools methods for securing and grouping cords
The key to a drill-free solution lies in leveraging tension, gravity, and clever bundling. These methods are reversible, discreet, and highly effective.
Use binder clips as cable guides
Large metal binder clips are ideal for routing cords along the back edge of your desk. Open the metal arms and clamp them over the desk lip. Feed cords through the curved metal loops to hold them vertically. One clip per major bundle keeps things separated and accessible.
Repurpose hair ties or rubber bands
Old fabric-covered hair ties or thick rubber bands make excellent soft cable organizers. Wrap them around grouped cords every 6–8 inches to prevent unraveling. Unlike zip ties, they can be removed and reused endlessly.
Make DIY cord sleeves with pool noodles
Cut a pool noodle lengthwise and slide it over a bundle of cords running from your desk to the floor. The foam protects wires, hides clutter, and adds structure. Use duct tape at the ends to secure if needed—but often, friction holds it in place.
Leverage tension rods for vertical management
Install a small adjustable tension rod vertically between the floor and underside of your desk. Loop cords around it or use velcro straps to attach bundles. Since it’s held by pressure, there’s no need for screws or glue. Ideal for deep desks where floor-to-desk clearance allows.
Stack books or boxes as cable weights
Place a heavy book or small storage box under your desk and wrap cords around it. This prevents pulling and keeps slack contained. Choose something with clean edges to avoid abrasion.
“Cable management isn’t about perfection—it’s about creating systems that reduce friction in your daily workflow.” — Jordan Lee, Workspace Optimization Consultant
Do’s and Don’ts of tool-free cord organization
| Do’s | Don’ts |
|---|---|
| Group cords by device or function | Bundle unrelated cords together |
| Use soft materials like fabric ties | Use metal twist ties that can cut insulation |
| Leave slight slack at connection points | Pull cords taut—this stresses internal wiring |
| Label each cord clearly | Rely on memory—labels save time later |
| Check monthly for wear or loosening | Set it and forget it—cables shift over time |
Real-world example: From disaster to order in one evening
Sarah, a freelance graphic designer in Portland, worked from a secondhand IKEA desk in her apartment living room. Her setup included a laptop, dual monitors, external hard drive, printer, phone charger, and LED lamp—all plugged into two daisy-chained power strips. Cords spilled onto the floor, tripping her nightly. She avoided drilling due to rental restrictions.
In one 45-minute session, she cleared the area, labeled each cord with colored tape, and used three large binder clips to route monitor, computer, and accessory cords separately along the desk back. Excess lengths were coiled into loose spirals and secured with old scrunchies. A small decorative basket tucked beneath the desk caught the power strips and created a visual barrier. The result? A clean, accessible layout that survived weekly vacuuming and occasional moves. “I didn’t spend a dime,” she said, “and now I don’t dread plugging anything in.”
Essential checklist: Tool-free cord organization in action
- ✅ Unplug and remove all devices from under the desk
- ✅ Sort cords by category (monitor, computer, accessories)
- ✅ Discard damaged or obsolete cables
- ✅ Label each cord near the plug end
- ✅ Coil excess length using the figure-eight method
- ✅ Secure coils with fabric hair ties or Velcro straps
- ✅ Route bundles using binder clips or tension rods
- ✅ Anchor power strips in a basket or tray
- ✅ Reconnect and test all devices
- ✅ Schedule a monthly check-in to adjust as needed
Frequently asked questions
Can I use tape to hold cords in place?
Masking or painter’s tape can be used temporarily, but avoid duct tape or electrical tape for long-term anchoring—they leave residue and can degrade insulation. Instead, opt for non-adhesive solutions like clips or wraps.
What if my desk has no back lip for clips?
If your desk is flush-backed or glass-topped, try horizontal bundling. Run cords along the side edge or behind a monitor stand. Use a stack of books or a small shelf riser to create a routing point.
How do I manage cords when sharing a desk?
Color-code cords using different colored ties or labels. Assign zones—one side for each user—and use separate power strips. A labeled cord map taped underneath the desk helps both parties stay organized.
Final thoughts: Small changes, lasting impact
Organizing cords under your desk without tools isn’t just possible—it’s surprisingly simple once you know the right techniques. By focusing on smart grouping, thoughtful routing, and reusable fasteners, you create a system that’s flexible, safe, and visually clean. The best part? These solutions are completely reversible, making them perfect for renters, remote workers, or anyone who values simplicity.
You don’t need expensive kits or permanent modifications to reclaim control of your workspace. In less time than it takes to watch a TV episode, you can eliminate one of the most persistent sources of daily frustration. And once you experience the ease of finding the right cord instantly, you’ll wonder why you waited so long.


 浙公网安备
33010002000092号
浙公网安备
33010002000092号 浙B2-20120091-4
Comments
No comments yet. Why don't you start the discussion?