
In an age where we take thousands of photos each year, managing them efficiently has become essential. Yet many people hesitate to rely on cloud services due to privacy concerns, subscription costs, or limited internet access. The good news is that you don’t need the cloud to maintain a well-organized, secure photo library. With thoughtful planning and straightforward local strategies, you can keep your memories safe, accessible, and neatly arranged—right from your own devices.
This guide walks through practical, sustainable ways to organize your digital photos using only local storage solutions. Whether you're using a laptop, external hard drive, or network-attached storage (NAS), these methods will help you build a resilient system that protects your data while keeping it easy to find.
Why Avoid Cloud Storage?
While cloud platforms like Google Photos, iCloud, or Dropbox offer convenience, they come with trade-offs. Monthly fees for large libraries, automatic facial recognition that raises privacy questions, and dependence on internet connectivity make some users uneasy. Additionally, long-term reliance on third-party services introduces risk—if a provider shuts down or changes its policies, your access could be compromised.
Local storage puts you in full control. You decide where your files live, who can access them, and how they’re backed up. When done correctly, a local-only system is not only more private but often more cost-effective over time.
Step-by-Step Guide to Organizing Digital Photos Locally
Organizing digital photos without the cloud requires consistency and structure. Follow this six-step process to create a clean, scalable system.
- Collect all existing photos: Begin by gathering every photo stored across devices—phones, cameras, old computers, USB drives. Use file transfer tools or direct connections to copy everything into a single temporary folder on your main computer.
- Remove duplicates and low-quality shots: Use software like Duplicate Photo Cleaner (Windows) or Gemini Photos (Mac) to identify and delete redundant files. Manually review blurry, poorly lit, or unintentional shots (like lens caps or partial screenshots).
- Create a consistent naming convention: Rename folders using a clear pattern such as
YYYY-MM-DD_EventName(e.g., 2024-06-15_BeachTrip). This makes sorting chronological and searchable. - Build a hierarchical folder structure: Organize your master photo library with top-level folders by year, then subfolders by month or event. Example:
- Photos/
- 2023/
- 2023-07-04_FourthOfJulyBBQ/
- 2023-08-10_MountainHike/
- 2024/
- 2024-03-22_SpringGarden/
- Add metadata and keywords: Use free tools like Adobe Bridge (with DNG support) or XnView MP to embed descriptive tags, locations, and people names into image files. This enables fast searches later without relying on filenames alone.
- Maintain regular imports: Set a weekly reminder to transfer new photos from your phone or camera. Treat it like digital housekeeping—small, frequent updates prevent overwhelming backlog.
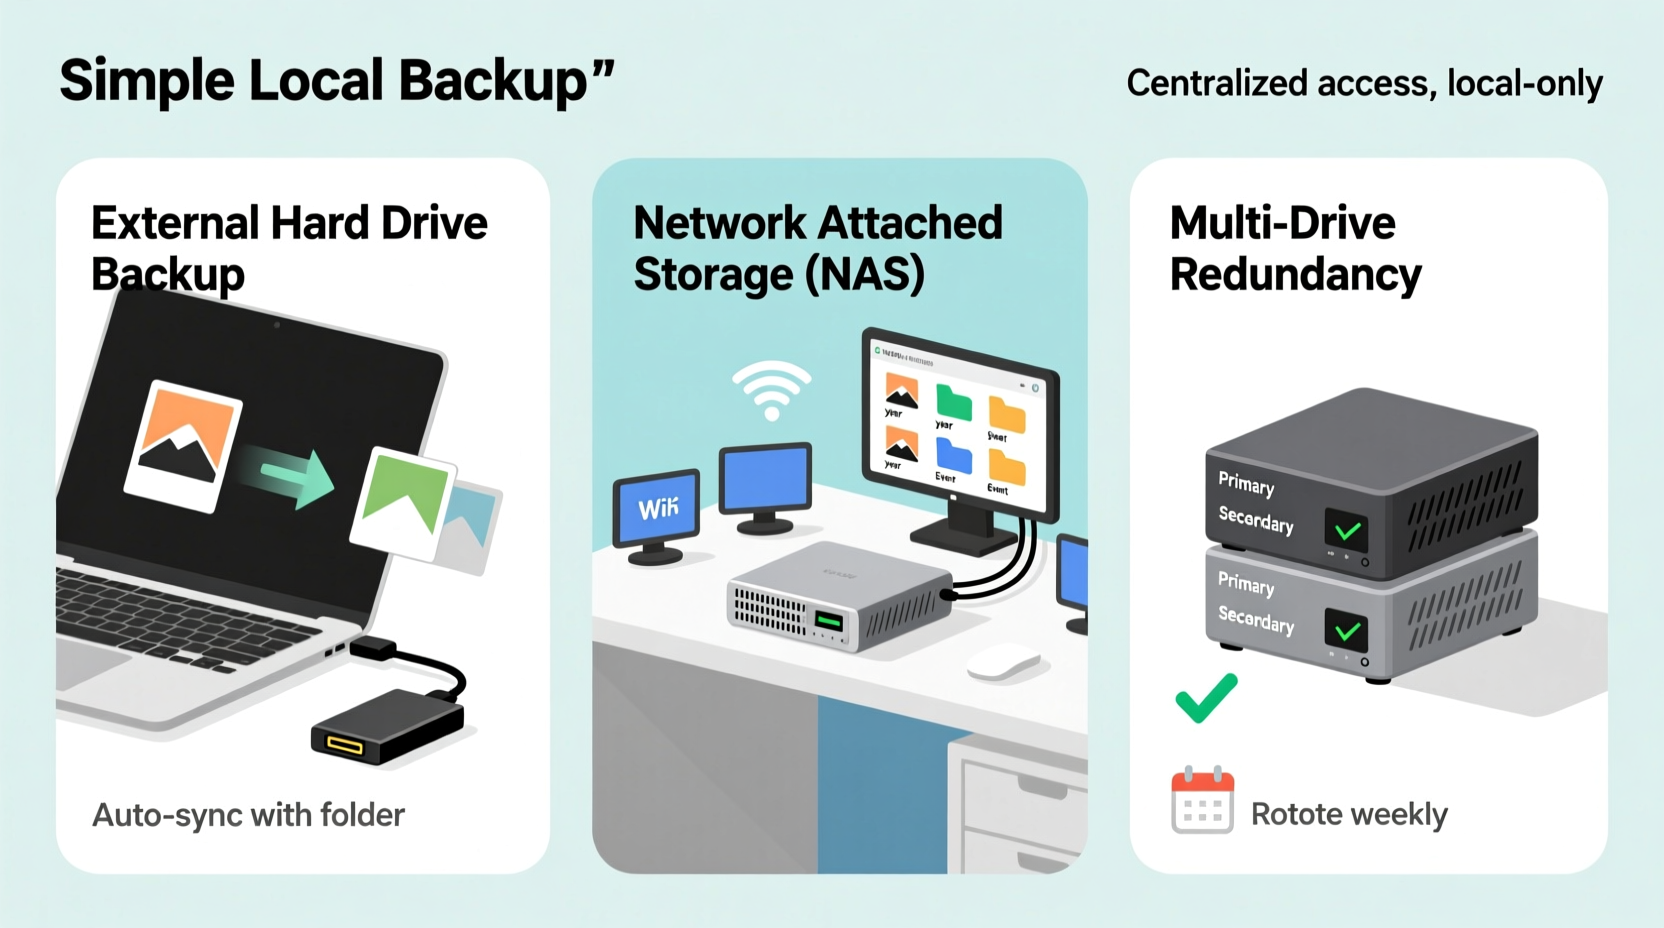
Simple Local Backup Methods That Work
Organization is only half the battle. Without backups, a single hardware failure can erase years of memories. Here are three reliable, non-cloud backup strategies suitable for home users.
1. External Hard Drives (3-2-1 Rule)
The foundation of any robust local backup strategy follows the “3-2-1” principle: keep three copies of your data, on two types of storage, with one offsite.
- Primary copy: Stored on your main computer’s internal drive.
- Secondary copy: Saved to an external USB hard drive kept at home.
- Tertiary (offsite) copy: A second external drive stored elsewhere—such as a relative’s house or a fireproof safe outside your home.
Rotate the offsite drive monthly. Bring it home, sync the latest updates, then return it. This protects against theft, fire, or flood.
2. Network-Attached Storage (NAS)
A NAS device is a dedicated file server connected to your home network. Units like Synology DS220+ or QNAP TS-251D allow multiple users to store and access photos from any device on the same Wi-Fi.
NAS systems support RAID configurations, which mirror data across two drives. If one fails, the other preserves your files. Many also offer snapshot features—point-in-time recovery options similar to Time Machine on Macs.
“Local redundancy matters most. A NAS with RAID 1 gives peace of mind comparable to cloud services—with none of the monthly fees.” — Daniel Reyes, Home IT Consultant
3. Optical Media Archiving (Blu-ray Discs)
For ultra-long-term preservation, consider burning photos to M-DISC Blu-ray discs. These specially engineered discs claim archival life spans of 100–200 years when stored properly.
Steps:
- Verify your optical drive supports M-DISC (look for logo on packaging).
- Burn folders in ISO format using software like ImgBurn (Windows) or Burn (Mac).
- Label each disc clearly (e.g., “Family Photos 2015–2017”).
- Store vertically in a cool, dark place away from humidity and UV light.
Comparison Table: Local Backup Options
| Method | Cost (Initial) | Lifespan | Portability | Best For |
|---|---|---|---|---|
| External HDD | $50–$150 | 3–5 years | High | Daily backups, large libraries |
| NAS Device | $300–$600+ | 5–7 years | Low (fixed location) | Families, shared access |
| Blu-ray M-DISC | $0.50–$2 per disc | 100+ years | Medium | Long-term archiving |
Mini Case Study: Sarah’s Photo Recovery Success
Sarah, a freelance photographer from Portland, avoided cloud storage due to client confidentiality agreements. She managed over 80,000 personal and professional images across several laptops. After her primary SSD failed unexpectedly, she realized she had no recent backup—and nearly lost five years of family events.
She rebuilt her system using two 4TB external drives: one synced weekly via FreeFileSync (free syncing software), the other stored at her sister’s apartment 20 miles away. Every quarter, she burns select albums to M-DISC Blu-rays labeled with dates and keywords. She now reviews her entire photo library every January, deleting duplicates and verifying backups.
“I used to think cloud was the only safe option,” she says. “But after learning how to use local tools properly, I feel more in control than ever.”
Essential Checklist: Building Your Local Photo System
Use this checklist to ensure your photo organization and backup plan covers all bases:
- ✅ Gather all photos into one central location
- ✅ Delete duplicates and poor-quality images
- ✅ Apply consistent folder naming (YYYY-MM-DD_Description)
- ✅ Add metadata (keywords, people, places) to key photos
- ✅ Purchase at least one external hard drive for backup
- ✅ Set up automated syncing using free tools (FreeFileSync, SyncBackFree)
- ✅ Store a second backup drive in a separate physical location
- ✅ Consider M-DISC for irreplaceable photos (weddings, newborns, etc.)
- ✅ Schedule quarterly verification of all backups
- ✅ Document your system in a text file (e.g., “BackupInstructions.txt”) and store it with your drives
Frequently Asked Questions
Can I organize photos without special software?
Yes. While photo management apps like Adobe Lightroom or Apple Photos offer advanced features, basic organization works perfectly with native file explorers (Windows File Explorer, macOS Finder). Use consistent folder names, manual sorting, and search functions to locate images. Metadata editing may require free tools like ExifTool or XnView, but isn't mandatory for simple setups.
How often should I back up my photos?
For active photographers, weekly backups are ideal. Casual users can manage with biweekly or monthly syncs. Critical events (e.g., weddings, vacations) should trigger immediate backups after import. Automate the process using task schedulers or syncing software to reduce effort.
What happens if my external drive fails?
If you follow the 3-2-1 rule, losing one drive won’t mean total data loss. Replace the failed drive immediately and restore from your secondary copy. Always monitor drive health using tools like CrystalDiskInfo (Windows) or DriveDx (Mac), which alert you to early signs of mechanical failure.
Final Thoughts: Take Control of Your Digital Memories
You don’t need a subscription or internet connection to safeguard your photos. By combining smart organization habits with redundant local backups, you create a system that’s both powerful and private. Start small—gather your files, delete the clutter, and set up one external drive. Then expand to include offsite storage or archival media as needed.
The goal isn’t perfection—it’s progress. Each step you take today builds resilience against tomorrow’s tech failures. Your future self will thank you when decades-old memories remain just a click away, preserved exactly as you intended.


 浙公网安备
33010002000092号
浙公网安备
33010002000092号 浙B2-20120091-4
Comments
No comments yet. Why don't you start the discussion?