
A clean gaming station enhances focus, reduces frustration, and elevates the overall experience. Yet one of the most common challenges gamers face—both casual and professional—is tangled cords and scattered controllers. A sleek organization system doesn’t just look good; it improves accessibility, prolongs device life, and minimizes wear on cables. Whether you're managing a single console or a multi-platform battlestation, thoughtful organization is essential. This guide delivers practical, tested strategies to keep your controllers and cords neatly stored, easily accessible, and visually harmonious with your space.
Assess Your Gaming Setup and Needs
Before purchasing organizers or rearranging shelves, take stock of what you’re working with. Different setups demand different solutions. Are you using wired or wireless controllers? Do you have multiple consoles, charging docks, or PC peripherals? How much space do you have near your entertainment center or desk?
Start by listing all your controllers and cables. Include:
- Primary and backup controllers (e.g., DualSense, Xbox Wireless, Joy-Cons)
- Charging cables (USB-A, USB-C, proprietary)
- Headset cords and adapters
- Dock stations or sync cradles
- Extension cables or power strips
Next, evaluate how often each item is used. Frequently used controllers should be within arm’s reach, while backups can be stored slightly out of the way. Understanding usage patterns helps prioritize placement and avoid overcomplicating the system.
Choose the Right Storage Solutions
The market offers a wide range of storage options, from minimalist wall mounts to multifunctional docking hubs. The key is selecting solutions that match your aesthetic and functional goals.
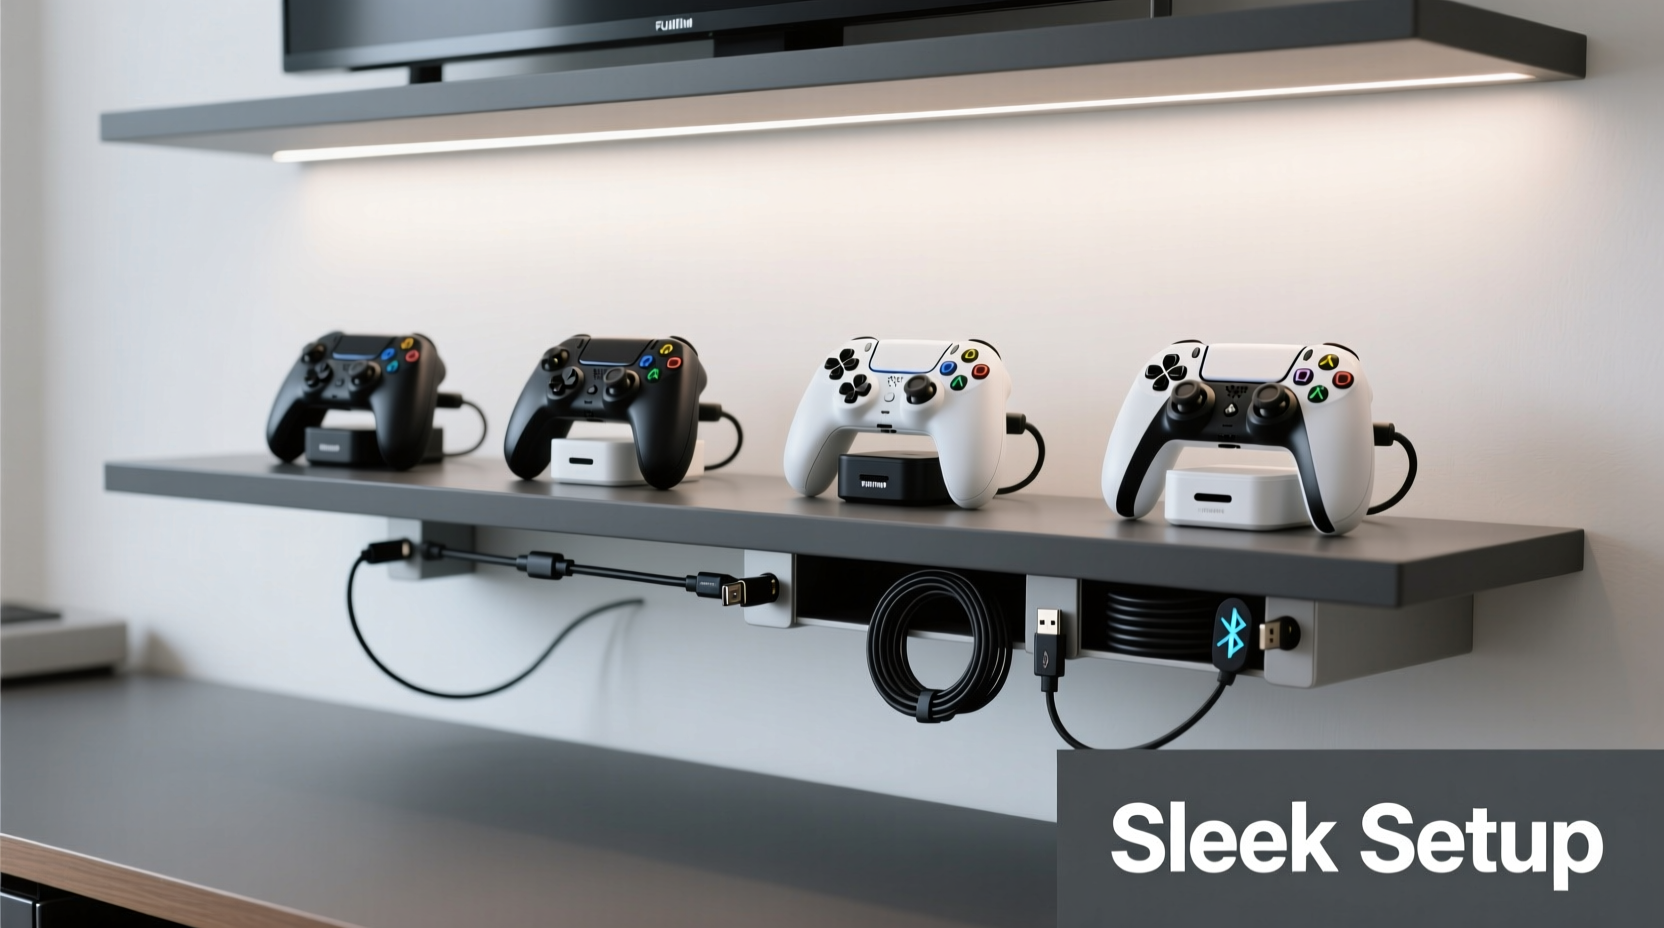
Controller Docks and Charging Stations
Dedicated charging docks serve dual purposes: they power up your controllers and act as display pieces. Most modern docks are designed to align with console branding—sleek black finishes, subtle LED indicators, and compact footprints. Look for models with built-in cable management channels so excess cord length can be tucked away cleanly.
For Nintendo Switch users, consider a dock that holds both Joy-Con pairs and the grip. For PlayStation or Xbox setups, vertical stands with magnetic alignment ensure secure placement without scratching surfaces.
Wall-Mounted Organizers
If desk or shelf space is limited, go vertical. Wall-mounted panels with peg hooks, mesh pockets, or modular rails allow you to hang controllers, headsets, and coiled cables. These are especially effective in home theaters or dedicated gaming rooms where aesthetics matter.
Use adhesive-backed cable clips or low-profile raceways to route cords along baseboards or behind furniture. This keeps them out of sight while maintaining easy access.
Drawer and Console Compartment Storage
For a minimalist look, store less-used controllers in drawers lined with soft fabric or foam inserts. Custom-cut dividers prevent devices from bumping into each other. If your entertainment cabinet has internal compartments, install small baskets or trays to group like items—controllers in one, cables in another.
“Cable clutter isn’t just unsightly—it increases tripping hazards and accelerates wear from constant tugging.” — Marcus Tran, Home Tech Integration Specialist
Cable Management Techniques That Work
No organization plan is complete without addressing the root of the mess: cords. Even wireless controllers need charging, and every wire left unattended becomes tomorrow’s knot.
Use Cable Ties and Sleeves
Velcro straps are reusable and gentle on insulation. Group similar-length cords together—like all USB charging cables—and secure them at regular intervals. Braided nylon sleeves take this further by bundling multiple wires into a single, smooth strand that looks more intentional than a spaghetti tangle.
Implement Cord Shorteners
Excess cable length invites tangling. Use adjustable cord reels or wrap-around spools to maintain only the necessary slack. Some charging stations come with integrated winders, but standalone retractable reels are affordable and effective.
Route Cables Behind Furniture
Leverage the backside of desks, TV stands, and walls. Adhesive-backed cable races adhere cleanly to surfaces and conceal multiple lines in one channel. For permanent setups, consider installing in-wall conduits (with proper safety precautions) to achieve a truly seamless appearance.
Step-by-Step: Building a Sleek Controller Organization System
Follow this sequence to transform a cluttered gaming area into an organized, efficient space.
- Clear and Clean: Remove everything from your gaming surface. Wipe down shelves, desks, and controller surfaces with a microfiber cloth.
- Sort Devices: Separate controllers by platform and frequency of use. Set aside any damaged or obsolete equipment.
- Select Docking Points: Choose a primary charging station or dock for each main controller. Position it within easy reach but not in high-traffic zones.
- Label Cords: Use color-coded stickers or heat-shrink labels to mark cables by device type (e.g., “PS5 Charge,” “Switch Sync”).
- Bundle and Route: Group charging cables by destination. Use Velcro ties every 6–8 inches and run bundles through cable sleeves or raceways toward power sources.
- Mount or Store: Install wall hooks for headsets or secondary controllers. Place backup units in padded trays or closed containers.
- Test Accessibility: Pick up each controller, plug in if needed, and verify smooth operation. Adjust positions if anything feels awkward.
- Maintain Weekly: Dedicate two minutes after each session to reposition controllers and untangle emerging snarls before they worsen.
Do’s and Don’ts of Controller and Cord Care
| Do’s | Don’ts |
|---|---|
| Use soft-lined docks to prevent scratches | Leave controllers on carpet or dusty surfaces |
| Coil cords loosely in figure-eights | Wrap cables tightly around sharp corners |
| Invest in surge-protected power strips | Overload outlets with daisy-chained extensions |
| Store spare controllers in climate-controlled areas | Expose devices to direct sunlight or moisture |
| Unplug chargers once devices are full | Leave batteries at 0% or 100% for extended periods |
Real Example: From Cluttered Shelf to Streamer-Ready Setup
Jamal, a part-time streamer and full-time office worker, struggled with a growing pile of controllers beneath his TV stand. He owned two Xbox pads, a PS5 DualSense, a Nintendo Switch Pro Controller, and three mismatched USB cables—all tangled in a heap. During live streams, he’d waste time untangling cords or fumbling for the right controller.
He implemented a four-part fix: First, he bought a magnetic vertical Xbox stand and a PS5 charging dock with a built-in cable winder. Second, he mounted a slim wooden panel behind his monitor and added brass hooks for hanging headsets and less-used gear. Third, he labeled each cable with colored heat-shrink tubing. Finally, he routed all cords through a white plastic raceway along the back of his desk, leading to a hidden power strip under the shelf.
The result? His setup now looks curated, not chaotic. Controllers charge securely, cords stay aligned, and he spends zero time searching during gameplay transitions. Viewers have complimented the clean backdrop, and Jamal reports feeling more focused during sessions.
Frequently Asked Questions
Can I organize wireless controllers the same way as wired ones?
Absolutely. While wireless controllers eliminate constant tethering, they still require charging and safe storage. Use charging docks as anchor points and treat their cables with the same care as wired setups. Storing them upright or on designated pads prevents accidental drops and maintains battery health.
How do I prevent my pet or kids from unplugging cords?
Use cord protectors or cable lock clips that screw into furniture to secure connections. Alternatively, route cords behind enclosed cabinets or use cord covers with locking mechanisms. For households with young children, consider placing the gaming area in a semi-restricted zone or using smart power strips that can be turned off remotely when not in use.
Are third-party charging docks safe for my controllers?
Many third-party docks are safe, but choose reputable brands with overcharge protection and proper voltage regulation. Avoid ultra-cheap models without certifications. When in doubt, stick to first-party accessories—they’re pricier but designed specifically for your hardware and often include firmware-level battery optimization.
Final Checklist: Achieve a Sleek Gaming Station
- ✅ Inventory all controllers and cables
- ✅ Invest in at least one dedicated charging dock
- ✅ Label each cord for quick identification
- ✅ Use Velcro ties or sleeves to bundle cables
- ✅ Route cords behind furniture using raceways
- ✅ Mount secondary gear on walls or inside cabinets
- ✅ Clean and reset the setup weekly
- ✅ Test accessibility and adjust as needed
Conclusion: Elevate Your Gaming Experience Through Order
A sleekly organized gaming environment isn’t about perfection—it’s about intention. Every neatly coiled cord and properly docked controller contributes to smoother sessions, longer-lasting gear, and a more enjoyable atmosphere. You don’t need expensive gear to start; even simple changes like labeling cables or using a $10 wall hook can make a dramatic difference. The goal is consistency, not complexity.


 浙公网安备
33010002000092号
浙公网安备
33010002000092号 浙B2-20120091-4
Comments
No comments yet. Why don't you start the discussion?