
For serious gamers and casual players alike, a cluttered collection of game controllers can quickly turn a sleek entertainment space into a tangled mess. With multiple consoles—each requiring its own style of controller—it’s easy for remotes, joysticks, and charging cables to pile up on shelves or vanish into drawers. A well-organized system not only improves accessibility but also protects your investment in gaming gear. The key is organizing by console type: grouping PlayStation, Xbox, Nintendo, and PC controllers separately while maintaining consistency in storage, charging, and labeling. This approach streamlines gameplay, reduces wear and tear, and enhances the overall aesthetic of your gaming environment.
Why Organizing by Console Type Matters
Grouping controllers by console isn’t just about tidiness—it’s a functional necessity. Each console brand uses proprietary designs, connection methods, and charging protocols. Mixing them haphazardly leads to confusion, misplaced accessories, and inefficient charging cycles. When controllers are sorted by console type, you eliminate wasted time searching for the right one and reduce the risk of using incompatible chargers or docks.
Beyond efficiency, organization contributes to longevity. Controllers left loose in drawers suffer from button wear, joystick drift, and cable fraying. Proper sorting ensures each device has a designated home, minimizing physical damage and preserving performance. It also simplifies inventory management—knowing exactly how many DualSense, Xbox Wireless, or Joy-Con controllers you own helps when replacing lost units or planning multiplayer sessions.
Step-by-Step Guide to Sorting Controllers by Console
Creating an effective organization system takes planning and consistency. Follow this step-by-step process to categorize and store your controllers efficiently.
- Inventory Your Collection: Gather all controllers from drawers, shelves, and charging stations. Identify which belong to PlayStation, Xbox, Nintendo Switch, and PC-compatible systems.
- Check Functionality: Test each controller for responsiveness, battery life, and connectivity. Set aside any that need repair or replacement.
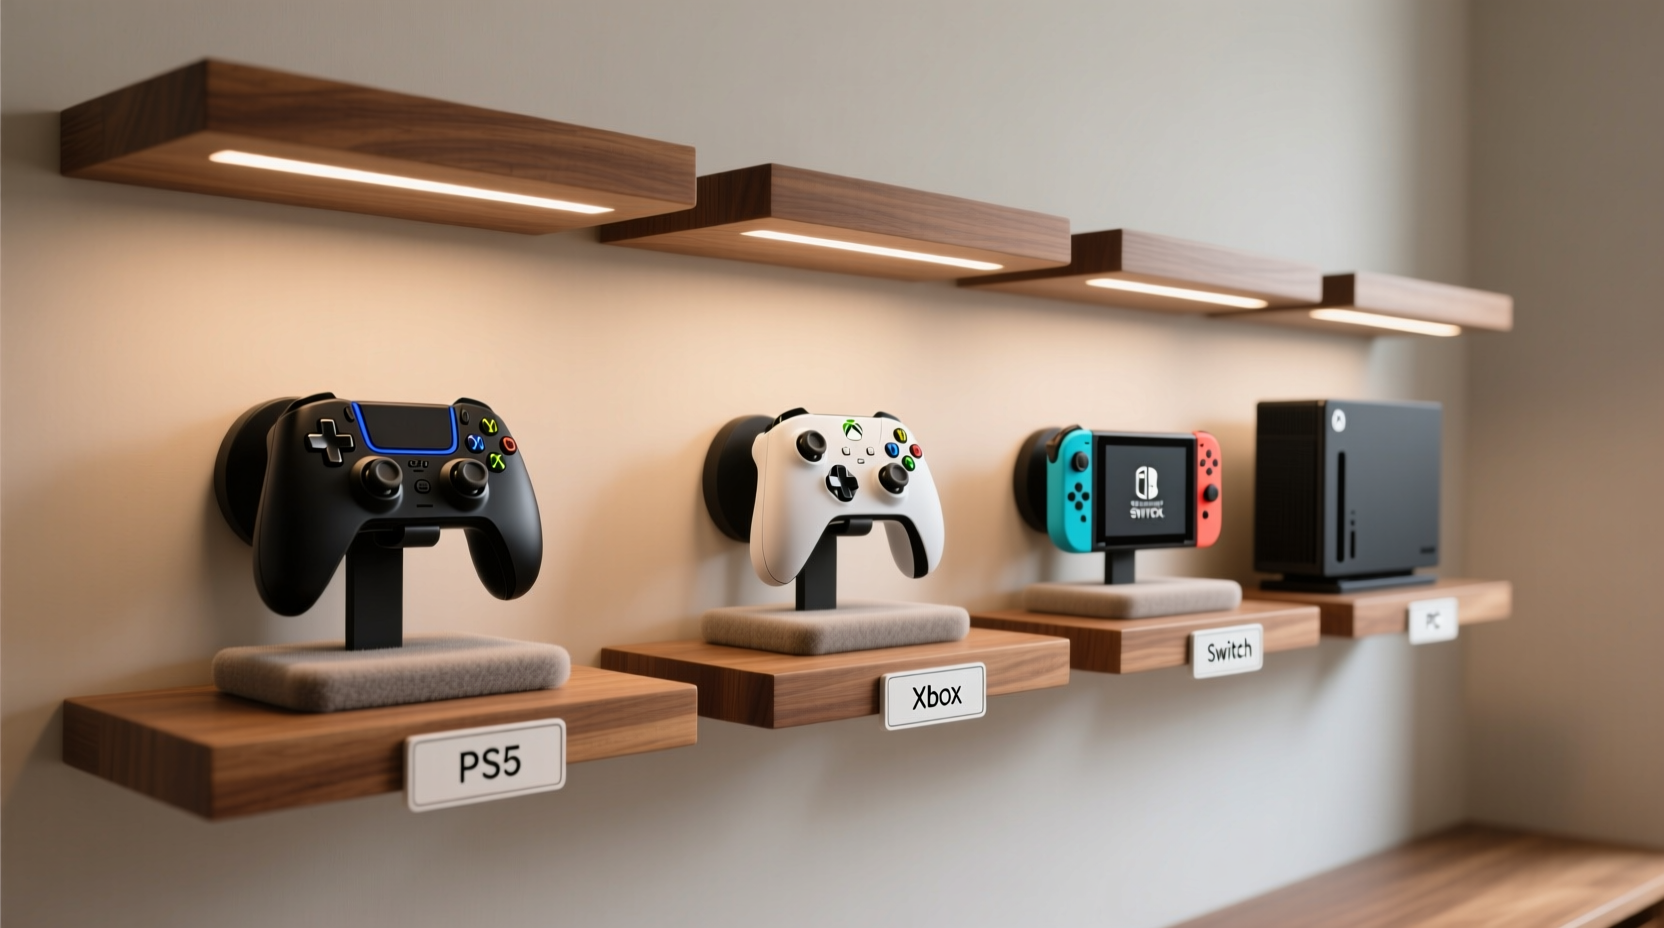
- Group by Console Type: Create four primary categories: Sony (PS4/PS5), Microsoft (Xbox One/Xbox Series), Nintendo (Switch Joy-Cons, Pro Controller), and PC (wireless/wired).
- Subdivide Within Categories: For example, separate PS4 DualShock 4 from PS5 DualSense; distinguish between left/right Joy-Con pairs; label Xbox controllers by user profile if applicable.
- Determine Storage Capacity Needs: Count how many units fall under each category to choose appropriately sized organizers.
- Assign a Physical Zone: Dedicate specific areas—such as shelves, drawers, or wall mounts—for each console group.
- Implement Charging Strategy: Use branded charging docks or multi-port hubs compatible with each console’s power requirements.
- Label Clearly: Use stickers, tags, or engraved labels so anyone in the household knows where each controller belongs.
This methodical breakdown prevents overlap and ensures long-term maintainability. Once established, the system becomes intuitive—even new users can return controllers to their correct spots without confusion.
Best Storage Solutions by Console Type
Different controllers have unique shapes, sizes, and charging needs. Choosing the right storage solution per console maximizes protection and convenience.
| Console Type | Controller Examples | Recommended Storage | Charging Solution |
|---|---|---|---|
| Sony (PS4/PS5) | DualShock 4, DualSense | Horizontal shelf slots or vertical stands with rubber grips | Official DualSense Charging Station or third-party docks with USB-C passthrough |
| Microsoft (Xbox) | Xbox Wireless Controller (various models) | Drawer dividers or modular bins with cutouts for triggers | Rechargeable battery packs + AA charger tray or plug-in dock |
| Nintendo Switch | Joy-Con (L/R), Pro Controller | Magnetic rail mounts or dedicated Switch dock organizer trays | Joy-Con charging grip or Pro Controller dock; avoid mixing L/R during charge |
| PC / Multiplatform | Xbox-compatible, Steam Controller, 8BitDo, etc. | Universal controller rack with adjustable arms or labeled pouches | USB-A/USB-C hub with individual ports and cable management clips |
Wall-mounted rails work exceptionally well for small spaces, especially when paired with magnetic backings or clip-on brackets. For families or shared gaming rooms, consider transparent acrylic boxes labeled by console—this keeps dust out while allowing quick visibility.
Real Example: The Multiplayer Household Setup
Consider the Martinez family: two parents, two teens, and a rotating cast of friends playing across PS5, Xbox Series X, and Nintendo Switch. Before organizing, controllers were scattered—often missing before movie night or multiplayer matches. After assessing their inventory, they found three DualSense, four Xbox controllers, two Pro Controllers, and six Joy-Cons (three pairs).
They installed a custom media cabinet with labeled zones: a pull-out drawer with foam-cut inserts for Xbox pads, a vertical stand for DualSense units near the PS5, and a magnetic strip beside the TV for Joy-Con pairs clipped onto mini-chargers. The Pro Controller hangs on a soft hook behind the cabinet door. Each child was assigned a color-coded controller (blue for daughter, red for son), further reducing mix-ups.
The result? Faster setup times, fewer lost controllers, and no more arguments over whose turn it is to charge a pad. The system even helped them realize they needed a second DualSense charging station—a discovery made possible through clear visibility of usage patterns.
“Organizing by console type reduced our pre-game prep time by nearly 70%. It’s not just about looks—it’s about seamless play.” — Daniel Martinez, avid gamer and father of two
Common Mistakes to Avoid
- Mixing charging cables across brands: Using non-OEM chargers may degrade battery health over time, especially with sensitive lithium-ion cells in modern controllers.
- Storing controllers face-down: This puts pressure on analog sticks and buttons, accelerating wear and potential stick drift.
- Ignoring ventilation: Sealing controllers in airtight containers traps moisture, which can corrode internal circuitry.
- Overcrowding storage units: Squeezing too many controllers into one bin causes scratches and makes retrieval difficult.
- Failing to update labels after upgrades: If you upgrade from PS4 to PS5, ensure old DualShock 4s aren't mistaken for newer models.
Avoid these pitfalls by auditing your setup quarterly and adjusting based on new purchases or changes in usage habits.
Checklist: Build Your Console-Based Controller System
Use this checklist to implement a clean, sustainable organization strategy tailored to your gaming ecosystem:
- ☐ Audit all current controllers by brand and model
- ☐ Discard or repair non-functional units
- ☐ Purchase or build storage solutions specific to each console type
- ☐ Install charging docks or hubs near respective consoles
- ☐ Label each storage area with console logos or color codes
- ☐ Designate a “loaner” section for guest controllers (if applicable)
- ☐ Implement a weekly reset routine: return all controllers to their homes after use
- ☐ Schedule monthly deep cleaning with microfiber cloths and isopropyl wipes
Completing this list establishes a foundation that scales with your growing library of games and hardware.
Expert Insight: Why Structure Enhances Gaming Experience
Professional game room designers emphasize that ergonomics extend beyond seating and lighting—they include accessory management. According to Lena Torres, interior designer specializing in entertainment spaces:
“A disorganized controller setup disrupts flow. Gamers shouldn’t spend valuable downtime untangling cords or hunting for a working pad. By clustering devices by console, you create zones of intention. That clarity translates directly into better focus and enjoyment during gameplay.” — Lena Torres, Home Entertainment Designer
Torres recommends placing high-use controllers within arm’s reach of their respective consoles, ideally at eye level or slightly below to prevent neck strain during retrieval.
Frequently Asked Questions
Can I use the same storage rack for different console types?
You can, but it's not ideal. Universal racks often lack precise fitment, leading to wobbling or inadequate support for curved grips like the DualSense. Dedicated organizers provide better protection and alignment.
How do I keep my controllers charged without overcharging?
Modern controllers stop charging once full, so leaving them docked overnight is generally safe. However, unplugging after 2–3 hours extends battery lifespan. Use smart docks with auto-shutoff when possible.
What’s the best way to store spare Joy-Con pairs?
Store them attached to a charging grip or in a protective case with padding around the rails. Keep them upright or horizontally aligned to prevent rail warping. Avoid stacking loose Joy-Cons.
Final Thoughts: Elevate Your Gaming Space Through Smart Organization
Organizing game controllers by console type transforms chaos into clarity. It’s not merely a cosmetic upgrade—it’s a strategic enhancement that supports better maintenance, faster access, and longer device life. Whether you’re managing a solo setup or a bustling family gaming corner, a structured system pays dividends in daily usability and peace of mind.
Start small: sort what you have, assign a home for each controller, and build outward as your collection grows. Over time, this discipline fosters respect for your equipment and elevates the entire gaming experience—from boot-up to shut-down.


 浙公网安备
33010002000092号
浙公网安备
33010002000092号 浙B2-20120091-4
Comments
No comments yet. Why don't you start the discussion?