
Every makeup enthusiast knows the frustration of digging through a cluttered cup full of tangled brushes, only to realize the one they need is buried at the bottom or still drying from last night’s foundation use. A disorganized brush collection doesn’t just slow you down—it can compromise hygiene, damage bristles, and disrupt your entire routine. The solution? Organizing your brushes not just by frequency of use, but by their specific function. When grouped logically by type, your tools become instantly accessible, your workflow smoother, and your results more consistent.
Whether you're a beginner building your first kit or a seasoned artist with dozens of specialized tools, organizing brushes by type transforms chaos into clarity. This method supports precision, reduces decision fatigue, and makes cleaning and maintenance far more manageable. More than just aesthetic order, it's a functional system that aligns with how makeup is actually applied—from base to detail work.
Why Brush Type Matters in Organization
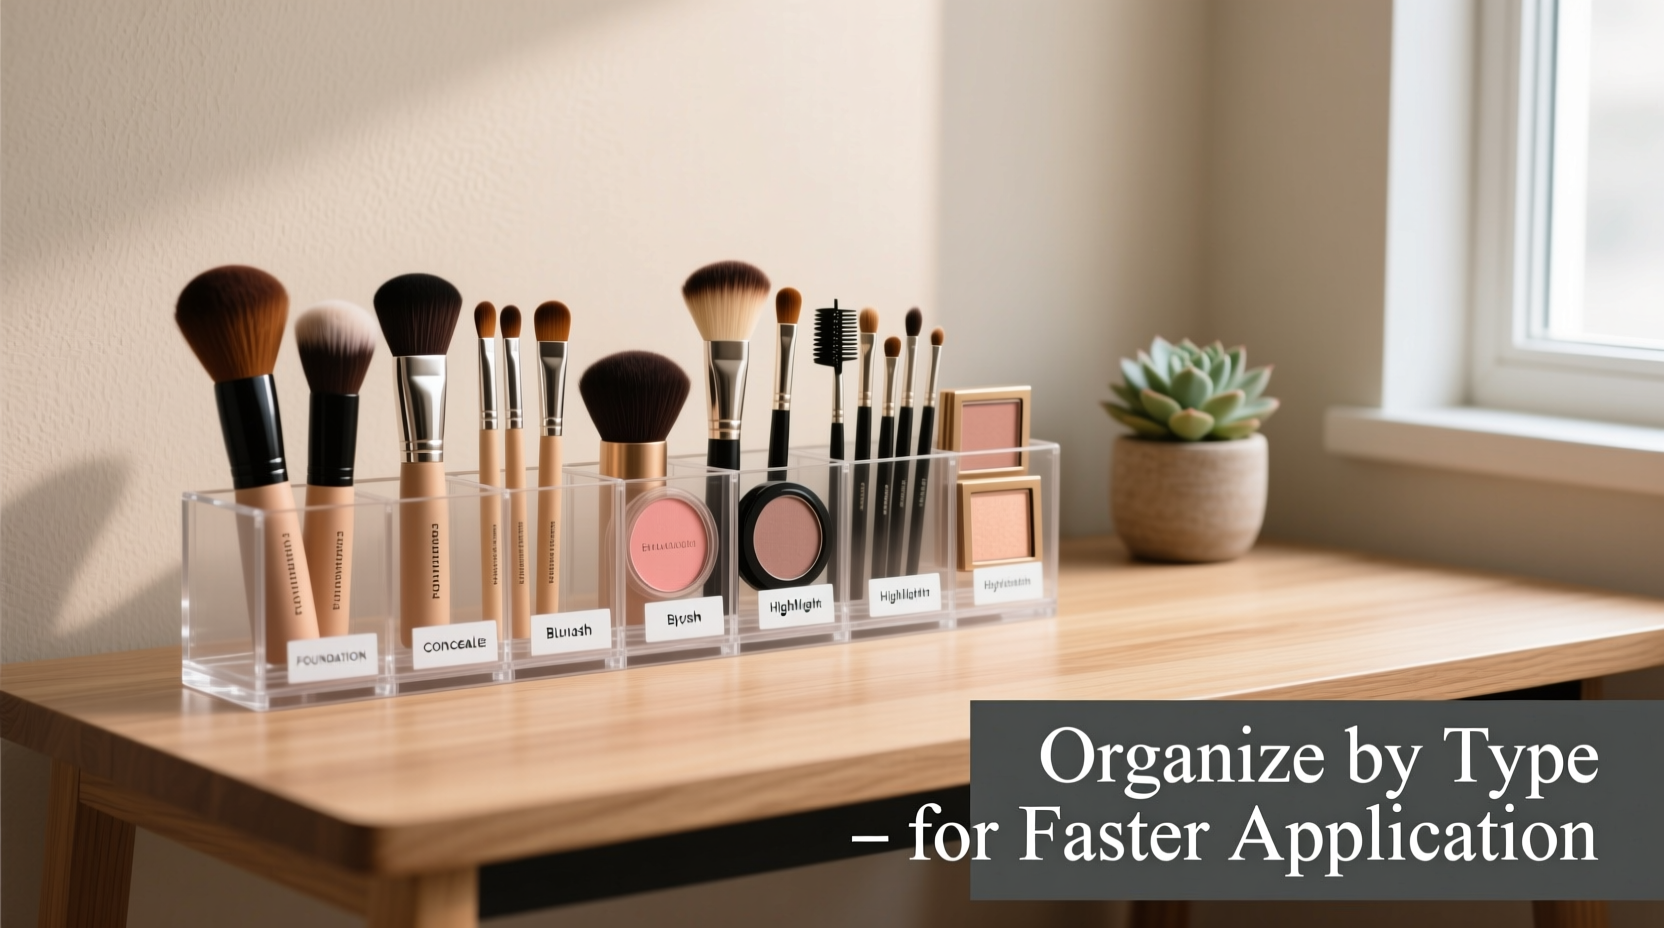
Makeup brushes are designed with specific shapes, sizes, densities, and bristle textures to perform unique tasks. Using a flat shader brush to blend eyeshadow into the crease may work in a pinch, but it won’t deliver the same seamless gradient as a tapered blending brush. Similarly, a dense foundation brush isn’t suited for dusting translucent powder—over-application and caking are likely outcomes.
When brushes are mixed indiscriminately, selecting the right tool becomes guesswork. But when sorted by category—face, eye, lip, specialty—you eliminate confusion. You see exactly what’s available for each step of your routine, reducing time spent searching and increasing time spent creating.
“Organization isn’t about perfection—it’s about efficiency. Grouping brushes by function cuts application time by nearly 30% for most clients I work with.” — Lila Torres, Professional Makeup Artist & Educator
Beyond speed, categorization improves hygiene. Brushes used on wet products (like foundation or cream blush) require more frequent cleaning than those used with powders. When stored separately, you avoid cross-contamination and can manage maintenance schedules effectively.
Step-by-Step Guide to Sorting Brushes by Type
Start with a clean workspace and lay out all your brushes. Remove any old or damaged ones before sorting. Follow this sequence to build a logical, sustainable system:
- Empty and Clean: Take every brush out of its current holder. Wipe down containers and allow them to dry completely.
- Wash and Dry: Clean all brushes according to their bristle type (synthetic for liquids, natural for powders). Allow them to air-dry fully before organizing.
- Categorize by Function: Sort brushes into primary groups based on where and how they’re used.
- Subdivide Within Categories: Break larger categories (especially eyes) into sub-types for finer control.
- Select Storage Solutions: Choose organizers that reflect your space and usage habits.
- Label if Needed: For shared spaces or complex kits, add small labels to compartments.
- Maintain Weekly: Reassess weekly to ensure brushes are returned correctly after cleaning or use.
Essential Makeup Brush Categories and Their Roles
To organize effectively, understand the standard types and their intended purposes. Here’s a breakdown of the most common categories:
- Face Brushes: Designed for foundation, concealer, blush, bronzer, and powder. Typically larger with broader heads.
- Eye Brushes: Smaller, precision tools for eyeshadow, liner, brows, and crease work.
- Lip Brushes: Fine-tipped, firm bristles for accurate lipstick and liner application.
- Specialty Brushes: Includes stippling, duo-fiber, angled, and sponge-tipped tools for unique effects.
- Sponges & Applicators: Though not brushes, these often coexist in kits and should be stored separately due to hygiene needs.
| Brush Type | Primary Use | Common Subtypes |
|---|---|---|
| Foundation Brush | Liquid or cream foundation | Flat paddle, buffing, stippling |
| Powder/Setting Brush | Translucent powder, SPF, setting spray | Dome-shaped, large fan |
| Blush/Bronzer Brush | Cream or powder color on cheeks | Angled, oval, domed |
| Eyeshadow Brush (Crease) | Blending shadow in the socket | Tapered, fluffy, dome |
| Eyeshadow Brush (Shader) | Packing pigment onto lid | Flat, square, tapered |
| Eyeliner Brush | Applying gel or cream liner | Angled, thin, spoolie |
| Brow Brush | Grooming and filling brows | Spoolie, angled, dual-ended |
| Lip Brush | Precise lipstick application | Slim, pointed, retractable |
Once sorted, store face brushes in one section, eye brushes in another. If you have multiple eyeshadow brushes, consider further division: blending brushes in one row, shaders in another, detail brushes in a smaller compartment. This micro-organization pays off when you're doing a smoky eye and need three different blending tools in succession.
Storage Solutions That Support Functional Access
The right container reinforces your organizational system. Avoid generic cups that encourage dumping. Instead, choose solutions that reflect your brush count and routine complexity.
- Acrylic Organizer with Compartments: Ideal for vanity setups. Assign each section to a brush type—left side for face, center for eyes, right for lips.
- Roll-Up Brush Case: Great for travel or minimalists. Roll cases often have labeled pockets by size and shape, naturally encouraging classification.
- Magnetic Strips: Mount inside cabinet doors or on walls. Attach metal-hooped brushes vertically by category for instant visibility.
- Drawer Inserts: Customizable foam or wood trays let you carve out spaces for each brush type, preventing shifting and tangling.
For professionals or heavy users, consider a tiered approach: daily-use brushes on the vanity, categorized by type; backup and specialty tools stored in closed cases to protect from dust.
Mini Case Study: From Cluttered Kit to Streamlined Routine
Jamie, a freelance makeup artist in Chicago, used to carry a large zipper pouch filled with over 40 brushes. While well-maintained, the lack of structure meant she often wasted time during client transitions searching for her favorite crease brush. After attending a workshop on kit efficiency, she reorganized her entire collection.
She began by washing all brushes and dividing them into five labeled sections: Foundation, Powder, Cheeks, Eyes (subdivided into Shader, Blender, Liner), and Lips. She invested in a zip-around roll with adjustable elastic loops and dedicated one panel per category.
The result? Her average setup time dropped from 7 minutes to under 2.5 minutes. Clients noticed fewer pauses during application, and Jamie reported feeling more confident and focused. “I’m not stressed about losing a brush mid-routine,” she said. “Knowing exactly where everything is lets me stay in the flow.”
Do’s and Don’ts of Brush Organization by Type
| Do’s | Don’ts |
|---|---|
| Group brushes by application area (face, eyes, lips) | Mix liquid and powder brushes in the same compartment |
| Subdivide eye brushes by function (blender vs. shader) | Store brushes bristle-down in a cup overnight |
| Use separate containers for clean and dirty brushes | Keep expired or frayed brushes “just in case” |
| Label sections if sharing space with others | Overcrowd compartments—allow space to prevent bending |
| Rotate brushes weekly to check for wear | Use damp brushes in closed containers (risk of mold) |
Frequently Asked Questions
How often should I reorganize my brush collection?
Perform a full audit every 3–4 months. This allows you to remove damaged brushes, reassess your categories as your routine evolves, and deep-clean storage containers. A quick weekly review ensures brushes return to their proper slots after washing.
Can I combine synthetic and natural bristle brushes in the same category?
You can group them by function, but store them separately if possible. Synthetic brushes (used for creams and liquids) absorb product differently and require distinct cleaning methods. Keeping them apart prevents cross-contamination and extends the life of natural hair brushes.
What if I only have a few brushes—does categorization still matter?
Absolutely. Even a 5-brush kit benefits from organization. Labeling or mentally assigning roles (e.g., “this is my powder brush”) builds good habits early. As your collection grows, the system scales seamlessly.
Checklist: Building Your Type-Based Brush System
- ☐ Gather all brushes and remove damaged or unused ones
- ☐ Wash and fully dry each brush
- ☐ Sort into main categories: Face, Eyes, Lips, Specialty
- ☐ Subdivide eye brushes into Blenders, Shaders, Liners, Brows
- ☐ Choose a storage solution that supports separation
- ☐ Assign physical zones or compartments for each type
- ☐ Store with bristles facing up
- ☐ Implement a weekly reset habit
- ☐ Label compartments if needed for clarity
- ☐ Keep a small tray for dirty brushes awaiting wash
Conclusion: Efficiency Starts with Intentional Design
Organizing makeup brushes by type isn’t a luxury—it’s a foundational practice for anyone serious about their beauty routine. It turns random selection into intentional application, reduces daily friction, and elevates both hygiene and performance. Whether you spend five minutes or fifty building your system, the return on time saved, stress reduced, and results improved is immediate and lasting.


 浙公网安备
33010002000092号
浙公网安备
33010002000092号 浙B2-20120091-4
Comments
No comments yet. Why don't you start the discussion?