
Keeping a well-organized pantry isn’t just about neatness—it’s about reducing food waste, saving money, and ensuring you always have safe, fresh ingredients on hand. While many guides recommend using labels and storage bins, not everyone has the budget, time, or space for those solutions. The good news? You can still manage your pantry effectively by expiration date using simple, intuitive methods that rely on observation, placement, and routine.
This guide walks through practical, no-frills techniques to organize your dry goods, canned foods, and packaged items based on freshness—without adding extra tools or clutter to your kitchen.
The Problem with Unmanaged Pantries
A disorganized pantry often leads to overlooked items, expired food, and repeated purchases of things already in stock. According to the USDA, the average American household wastes over 30% of its food supply annually—much of it due to poor visibility and tracking in storage areas like pantries.
Labels and bins are helpful, but they aren’t essential. In fact, relying too heavily on external tools can create dependency. If a label falls off or a bin gets misplaced, the system collapses. A more sustainable approach is building habits and spatial awareness into your pantry management.
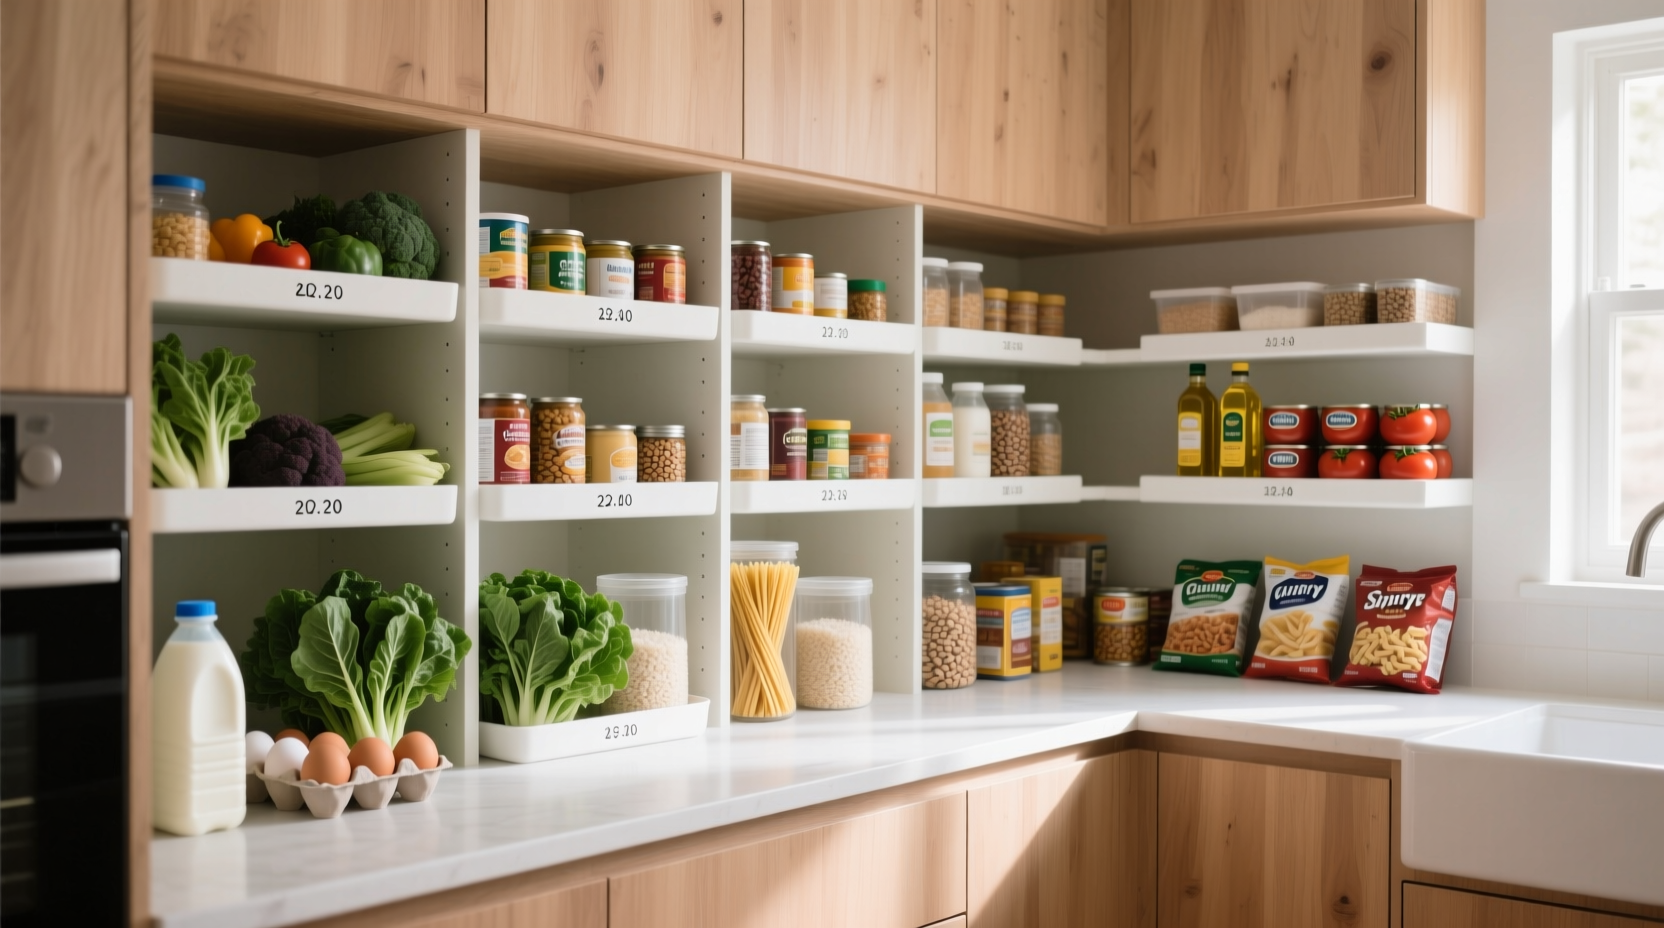
Step-by-Step: Organizing Without Labels or Bins
Follow this structured process to reorganize your pantry based on expiration dates using only positioning and observation.
- Empty and assess: Remove all items from your pantry. This allows you to see what you own, spot expired goods, and clean shelves thoroughly.
- Sort by category: Group similar items together—canned goods, pasta, cereal, snacks, baking supplies, etc. This makes it easier to compare dates later.
- Check every expiration date: Flip each package and note the “best by,” “use by,” or “sell by” date. No need to write anything down; just observe and remember which items are closest to expiring.
- Use the FIFO method (First In, First Out): Place older items toward the front or top of the shelf, and newer ones behind or below them. This ensures you use up the oldest stock first.
- Arrange by visibility: Store items with the soonest expiration dates at eye level or in the most accessible spots. Less urgent items go higher, lower, or farther back.
- Maintain weekly check-ins: Dedicate five minutes each week to scan your pantry. Look for approaching expiration dates and adjust placement as needed.
Smart Placement Strategies
Without labels or bins, spatial memory and consistent arrangement become your primary organizational tools. Here are proven methods to make the most of your pantry layout.
Front-to-Back Rotation
For shelf-stable boxes, bags, and jars, adopt a front-to-back system. When you bring home a new box of oatmeal, slide the old one forward and place the new one behind it. Over time, this creates a natural queue where the oldest item is always used first.
Top-to-Bottom Hierarchy
If your pantry has limited depth, use vertical stacking strategically. Place items with earlier expiration dates on the bottom shelf, where they’re harder to ignore. Save upper shelves for long-shelf-life goods like salt, sugar, or dried beans.
Zoning by Shelf Life
Divide your pantry mentally into zones:
- Red Zone (urgent): Items expiring within 1–4 weeks.
- Yellow Zone (medium): Expiring in 1–3 months.
- Green Zone (stable): Lasts 3+ months.
Real Example: Maria’s Pantry Turnaround
Maria, a busy mother of two in Portland, struggled with wasted snacks and forgotten spices. Her pantry was crammed with overlapping boxes, and she often bought duplicates because she couldn’t see what she already had. After reading about expiration-based organization, she decided to try the no-label method.
She started by clearing everything out. She found three expired granola bars, a can of tomatoes from 10 months ago, and two bags of stale crackers. She grouped items by type and placed the soonest-to-expire products at the front of each section.
Every Sunday, Maria spends five minutes scanning her shelves. If something is nearing its date, she adds it to the meal plan for the week. Within a month, her grocery bills dropped by nearly 20%, and her family ate fresher food. “I don’t need fancy containers,” she says. “Just knowing where things are and when they’ll go bad makes all the difference.”
Do’s and Don’ts: Table Summary
| Do | Don't |
|---|---|
| Place older items in front of newer ones | Stack identical items directly on top of each other without checking dates |
| Store perishable dry goods (like nuts or flours) at eye level | Keep items with approaching dates hidden on high or deep shelves |
| Group by category to simplify visual scanning | Mix different food types on the same shelf without separation |
| Check expiration dates during weekly grocery prep | Rely solely on memory without periodic reviews |
| Use shelf edges or corners as “priority zones” for urgent items | Assume packaging will last longer than stated—even if it looks fine |
Expert Insight on Food Safety and Organization
“Proper food rotation isn’t just about efficiency—it’s a critical part of food safety. Even shelf-stable items degrade over time, losing nutritional value and potentially developing off-flavors or contaminants. A well-managed pantry reduces risk and waste.” — Dr. Lena Patel, Food Safety Consultant, National Institute of Home Economics
Tips for Maximizing Success Without Tools
You don’t need color-coded stickers or plastic bins to stay organized. These tips help reinforce habit-based systems that work long-term.
- Leverage lighting: Ensure your pantry has adequate light so you can easily read dates without pulling items out.
- Limit stockpiling: Buying in bulk only saves money if you consume it in time. Avoid over-purchasing unless you’re certain of usage.
- Create a “use me first” corner: Designate one small area—like the lower left shelf—for any item approaching expiration. Move things here as their date nears.
- Involve household members: Teach everyone in the home the basic rule: “Older items go in front.” Consistency across users prevents system breakdown.
- Rotate during cooking: When you take an item out to cook, automatically place the older version forward before returning leftovers or unused portions.
Checklist: Your No-Label Pantry Action Plan
Follow this checklist monthly to maintain an efficient, expiration-aware pantry:
- ✅ Empty shelves completely once per month for deep review
- ✅ Discard any expired or spoiled items
- ✅ Sort remaining items by category (pasta, soup, snacks, etc.)
- ✅ Arrange each group with oldest in front or on top
- ✅ Assign a priority zone for items expiring within 30 days
- ✅ Perform a 5-minute visual scan every Sunday
- ✅ Adjust meal plans to include soon-to-expire ingredients
- ✅ Recheck after grocery day to ensure new items are placed correctly
Frequently Asked Questions
Can I really organize without any labels?
Yes. While labels help, they aren’t necessary. With consistent placement habits—like always putting older items in front—you build a reliable system through repetition and spatial awareness. Many professional kitchens use this method successfully.
What if my pantry is very deep and hard to see into?
Use shallow containers or turntables (even repurposed plates) to bring back items forward. Alternatively, limit deep shelves to long-lasting staples and reserve shallower areas for items with shorter shelf lives. Regular rotation becomes even more important in deep storage.
How do I handle unmarked or homemade items?
For items like bulk grains or homemade mixes, use a small piece of masking tape with a handwritten date. Since this guide focuses on avoiding permanent labels or bins, a temporary, removable solution keeps the spirit of minimalism while addressing practicality.
Conclusion: Build a Smarter Pantry, One Habit at a Time
Organizing your pantry by expiration date doesn’t require expensive organizers or complex systems. By using thoughtful placement, consistent routines, and a little discipline, you can dramatically reduce waste and improve your household’s food safety—all without labels or bins.
The key is turning organization into a habit rather than a project. Each time you return an item to the shelf, ask yourself: “Is the oldest one in front?” Over time, this small action compounds into lasting order.


 浙公网安备
33010002000092号
浙公网安备
33010002000092号 浙B2-20120091-4
Comments
No comments yet. Why don't you start the discussion?