
A cluttered pantry is more than just an eyesore—it leads to wasted food, duplicated purchases, and daily frustration when you’re trying to grab ingredients quickly. Grocery stores don’t rely on luck or magic to keep their shelves orderly; they use strategic layouts, clear labeling, and smart categorization to maximize accessibility and minimize waste. You can apply the same principles at home. By organizing your pantry like a grocery store, you gain instant visibility, streamline meal prep, and make restocking effortless. This guide breaks down exactly how to replicate professional retail organization in your own kitchen—no major renovations required.
Why Grocery Store Logic Works for Home Pantries
Grocery stores are designed for high turnover and quick navigation. Every aisle has a purpose, every shelf is labeled, and products are grouped by category, size, and usage frequency. These aren’t arbitrary choices—they’re rooted in behavioral psychology and supply chain logistics. When applied at home, these systems reduce decision fatigue, prevent overbuying, and extend the shelf life of perishable dry goods.
The key difference between a typical home pantry and a grocery-style one lies in consistency. Most pantries evolve haphazardly: new items get shoved in wherever space exists, expiration dates go unchecked, and duplicate purchases pile up behind forgotten boxes. A structured system eliminates that chaos.
“Retail environments optimize for speed and clarity. Translating those standards into the home reduces friction in everyday routines.” — Laura Simmons, Organizational Psychologist & Kitchen Design Consultant
Step-by-Step Guide to Transform Your Pantry
Turning your pantry into a model of efficiency doesn’t require perfection overnight. Follow this six-phase process to build a sustainable, grocery-style system.
- Empty and Audit: Remove everything from your pantry. Check expiration dates, consolidate partial containers, and discard anything stale or unidentifiable. Wipe down shelves thoroughly.
- Categorize Items: Group items into logical families—baking supplies, canned goods, snacks, grains, pasta, breakfast items, sauces, etc. Be specific enough to avoid overlap.
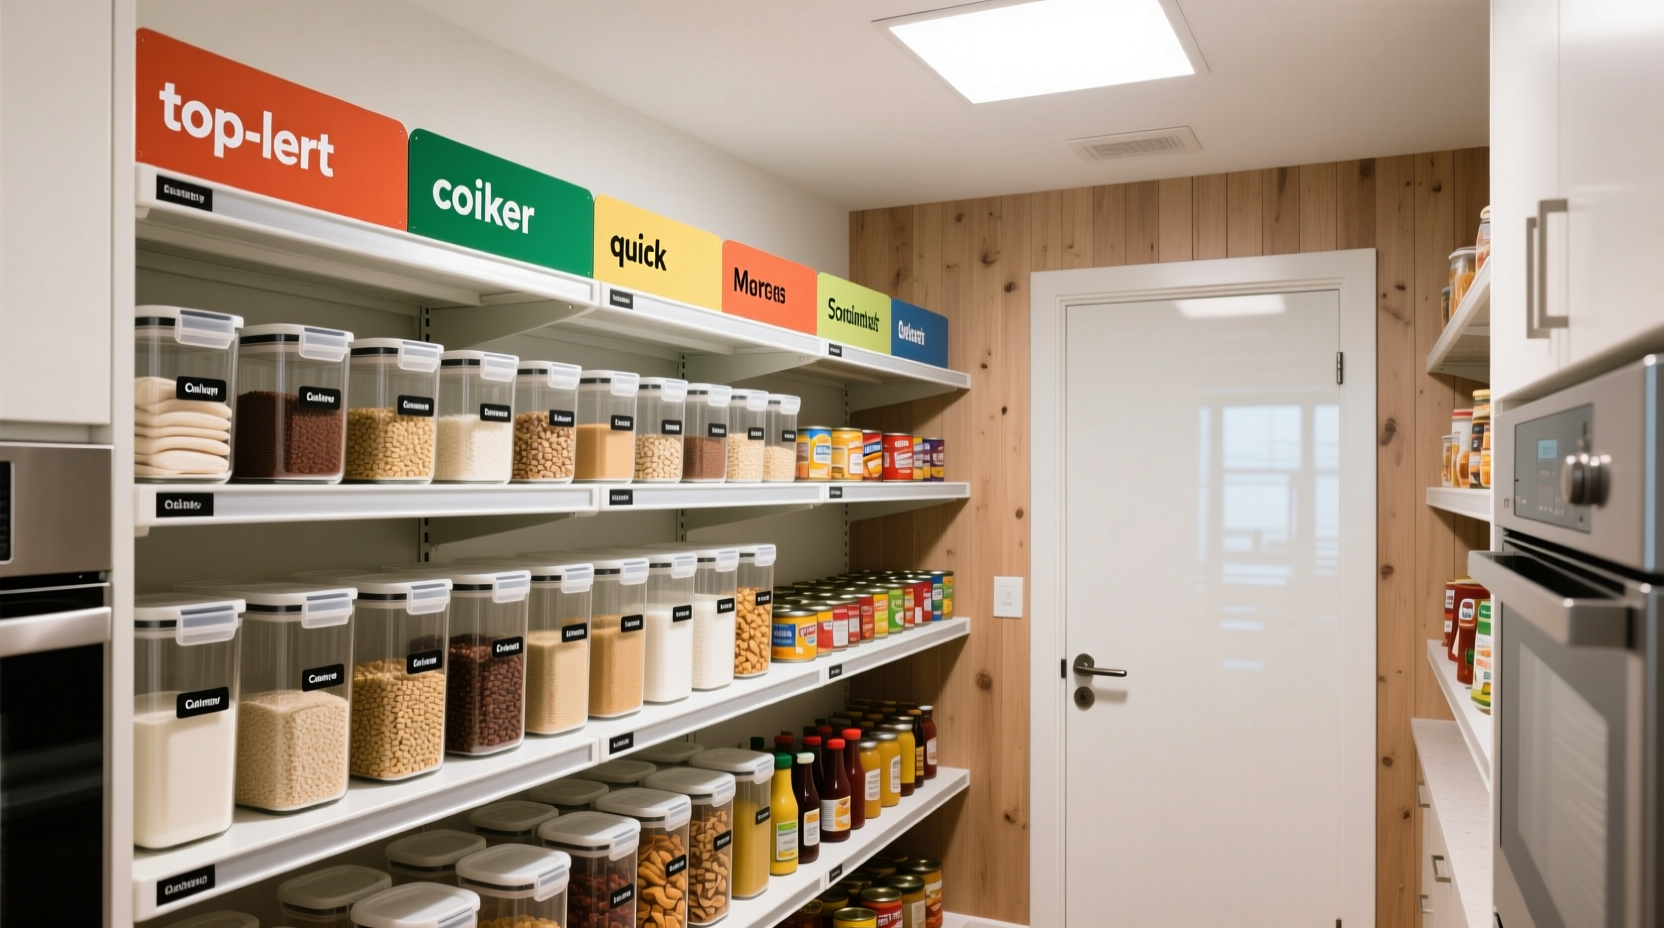
- Measure and Zone: Divide your pantry into zones based on item type and usage frequency. Reserve eye-level shelves for daily-use items (cereal, rice, spices), lower shelves for heavy or bulky goods (oils, pet food), and top shelves for backups or seasonal stock.
- Invest in Uniform Storage: Transfer contents into clear, airtight containers. Use consistent shapes and sizes where possible to create visual harmony and maximize space.
- Label Everything: Apply front-facing labels with product name and expiration date. Use a label maker or printable stickers for uniformity.
- Implement FIFO System: First In, First Out. Place newer items behind older ones to ensure nothing expires unnoticed.
Smart Shelving Strategies Used by Retailers
Grocery stores use several proven shelving tactics that translate seamlessly to residential pantries. Adopting even two or three of these can dramatically improve functionality.
- Face-Out Display: Instead of stacking boxes behind each other, arrange them so all labels face forward. This mimics supermarket endcaps and allows instant recognition.
- Shelf Risers: Stack vertically using tiered shelves to create “rows” within a single shelf. Ideal for spices, condiments, or snack packs.
- Basket Drawers: Install pull-out wire baskets for small items like tea bags, seasoning packets, or drink mixes. Keeps them contained but visible.
- Door Organization: Maximize door space with clear pocket organizers or magnetic spice strips. Avoid storing heavy items here to prevent hinge strain.
- Color-Coded Containers: Assign container colors by category—e.g., blue for baking, green for snacks, white for grains. Speeds up identification, especially for kids or partners helping in the kitchen.
Table: Grocery-Style vs. Traditional Pantry Features
| Feature | Grocery-Style Pantry | Traditional Pantry |
|---|---|---|
| Storage Containers | Uniform, clear, labeled | Mixed packaging, original boxes only |
| Item Visibility | Labels always visible (face-out) | Items often hidden behind others |
| Restocking Process | Systematic (FIFO), inventory-aware | Reactive, prone to duplicates |
| Shelf Utilization | Zoned by frequency and category | Random placement, overcrowded spots |
| Expiration Tracking | Dates marked on labels | Rarely monitored until found spoiled |
Essential Tools for Grocery-Grade Organization
You don’t need expensive gear, but a few well-chosen tools make a lasting difference. Prioritize durability, visibility, and modularity.
- Clear Airtight Containers: Opt for square or rectangular shapes—they stack better than round ones. Brands like OXO Pop or Rubbermaid Brilliance offer excellent seals and push-button lids.
- Adjustable Shelf Dividers: Prevent containers from sliding and keep rows neat. Useful for separating cereal types or snack bars.
- Chalkboard or Label Tags: Attach to containers for temporary labeling (e.g., “Quinoa – Open 3/15”) or rotating seasonal items.
- Inventory Notepad: Keep a small notepad inside the pantry door. List low-stock items as you use them. Review before shopping.
- Under-Shelf Baskets: Hang below upper shelves to double usable space for lightweight items like wraps, pouches, or spice refills.
Mini Case Study: From Chaos to Clarity in One Weekend
Sarah M., a working mother of two in Portland, struggled with nightly dinner delays because she couldn’t find ingredients. Her pantry was packed but disorganized—boxes stacked three deep, expired soup cans buried behind newer ones, and snacks scattered across three locations.
Over a single Saturday, she followed the grocery-store method: emptied the pantry, sorted into 10 categories, purchased 12 clear containers, and installed two shelf risers. She created zones—breakfast items on the middle shelf, kids’ snacks in low-accessible bins, and backup staples above.
Within a week, her family adapted effortlessly. Her 8-year-old could now pour his own oatmeal, and Sarah cut her weekly grocery bill by 22% due to fewer duplicate purchases. Six months later, she reports spending 70% less time searching for ingredients.
“It felt like installing a new operating system for my kitchen. The first hour was overwhelming, but now it runs itself.” — Sarah M.
Checklist: Build Your Grocery-Style Pantry in 7 Steps
Use this checklist to stay on track during your pantry overhaul:
- ☐ Remove all items and clean shelves
- ☐ Discard expired or unused products
- ☐ Sort remaining items into clear categories
- ☐ Purchase matching storage containers (start with top 5 categories)
- ☐ Label each container with name + purchase/expiry date
- ☐ Arrange by zone: daily use at eye level, heavy items below, backups above
- ☐ Install organizational tools (risers, baskets, dividers) as needed
Common Mistakes That Undermine Pantry Efficiency
Even well-intentioned efforts can backfire if common pitfalls aren’t avoided. Watch out for these issues:
- Over-Containerizing: Not everything needs a fancy jar. Keep items in original packaging if it’s already clear, resealable, and compact (e.g., broth boxes, spice blends).
- Poor Labeling: Vague labels like “grains” or “spices” defeat the purpose. Be specific: “Brown Rice,” “Paprika,” “Chia Seeds.”
- Ignoring Usage Frequency: Don’t put olive oil on the top shelf if you use it daily. Reserve prime real estate for high-turnover items.
- Skipping Maintenance: Set a monthly 10-minute “pantry scan” to check for expirations, refill containers, and reset zones.
- Forgetting the Kids: If children access snacks, place their items in colorful, easy-open bins at their height. Teach them to return things to the same spot.
Frequently Asked Questions
How do I maintain the system long-term?
Consistency is key. Always return items to their designated zone, restock using the FIFO method, and schedule a 10-minute tidy every Sunday. Involve household members by assigning simple tasks—e.g., “You’re in charge of the snack bin.”
What if I have a very small pantry?
Maximize vertical space with stackable bins and over-the-door organizers. Use wall-mounted racks for spices or oils. Focus on multi-functional zones—e.g., a single shelf holding both baking supplies and coffee essentials. Prioritize essentials and store overflow in under-bed bins or closets.
Should I organize by meal type (breakfast, dinner) instead of category?
It depends on your cooking style. Category-based grouping offers more flexibility and scalability. However, if you frequently prep full meals (e.g., backpack lunches), consider creating one “meal kit” bin with pre-measured ingredients. Just don’t let it become a catch-all.
Final Thoughts: Turn Your Pantry Into a Productivity Hub
Your pantry shouldn’t be a mystery box you rummage through under stress. By borrowing the operational logic of grocery stores—zoning, labeling, rotation, and visibility—you transform it into a precision tool for daily living. The upfront effort pays dividends in saved time, reduced waste, and greater culinary confidence. Start small: pick one shelf, implement one zone, and build momentum. Once you experience the ease of grabbing what you need in seconds, you’ll wonder why you waited so long.


 浙公网安备
33010002000092号
浙公网安备
33010002000092号 浙B2-20120091-4
Comments
No comments yet. Why don't you start the discussion?