
A well-organized pantry isn’t just visually pleasing—it’s a functional game-changer in the kitchen. When every ingredient has a place and is easy to identify, cooking becomes faster, grocery shopping more efficient, and food waste significantly lower. One of the most effective methods for achieving this level of order is transferring dry goods into clear containers and labeling them consistently. This approach not only protects contents from pests and moisture but also creates a streamlined system that makes inventory management effortless.
Done right, your pantry can become a model of efficiency—where flour doesn’t get mistaken for sugar, rice doesn’t expire unnoticed, and snacks are always within reach. The key lies in choosing the right containers, standardizing your labeling system, and organizing by category and frequency of use. Whether you're starting from scratch or revamping an existing setup, these professional-grade techniques will help you build a pantry that works as hard as you do.
Choose the Right Containers for Maximum Functionality
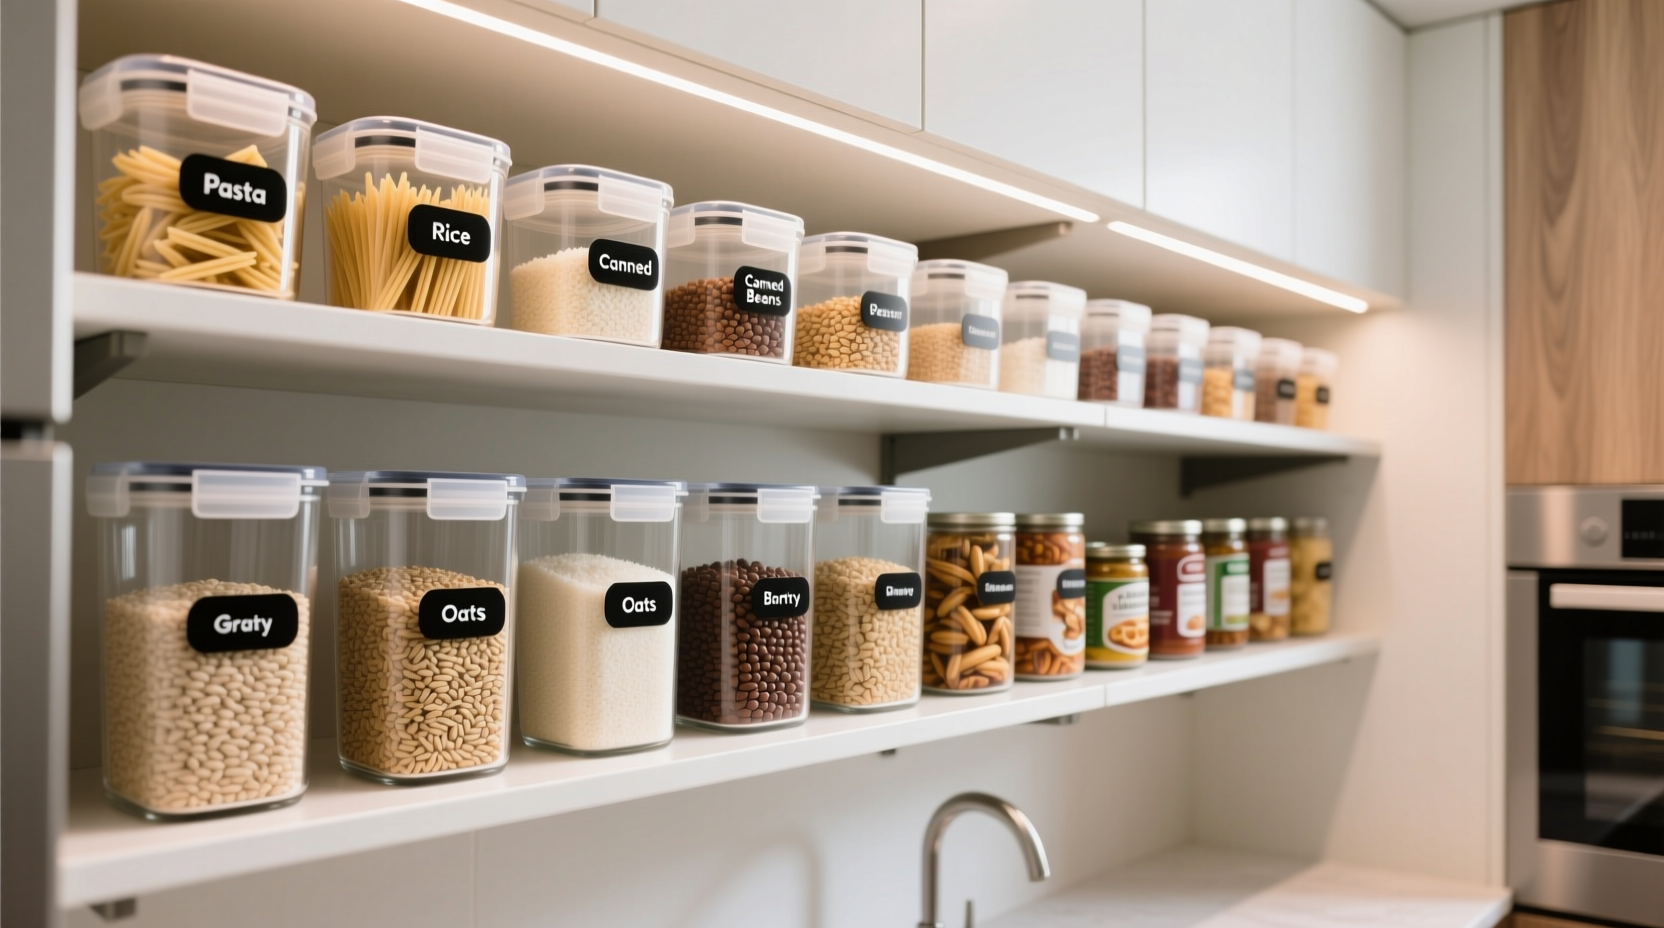
Not all storage containers are created equal. The best ones combine durability, airtight seals, stackability, and transparency. Glass and BPA-free plastic are the top choices, each with distinct advantages.
Glass containers offer superior durability and don’t absorb odors or stains. They’re ideal for long-term storage and look elegant on open shelves. However, they’re heavier and can break if dropped. On the other hand, high-quality plastic containers are lightweight, shatter-resistant, and often more affordable. Look for those made from crystallized PET (CPET) or Tritan, which resist clouding and cracking over time.
Regardless of material, ensure each container has a tight-sealing lid. O-rings or silicone gaskets prevent air and moisture from entering, preserving freshness and deterring pantry pests like weevils and ants. Square or rectangular containers maximize shelf space better than round ones—they fit snugly side-by-side without wasted gaps.
Container Types and Their Best Uses
| Type | Best For | Why It Works |
|---|---|---|
| Rectangular Airtight | Pasta, cereal, oats | Stackable and space-efficient; flat sides allow for easy labeling |
| Round Canisters with Lids | Flour, sugar, coffee beans | Smooth pour and wide mouth for scooping; great for countertop display |
| Scoop-Top Containers | Baking soda, salt, spices | One-handed access; prevents spills during use |
| Front-Loading Bins | Snacks, tea bags, small packets | Easy visibility and access; ideal for pull-out drawers or deep shelves |
| Canister Sets with Pour Spouts | Rice, lentils, grains | Controlled dispensing reduces mess and waste |
Create a Smart Labeling System That Lasts
Labels are the backbone of a professional pantry. Without them, even the clearest container becomes a guessing game. But labeling isn’t just about writing the contents—it’s about creating a consistent, informative system that includes product name, purchase date, and expiration date when applicable.
Use waterproof, smudge-proof labels. Chalkboard-style stickers may look charming, but they wear off quickly. Instead, opt for printable vinyl labels or write with permanent markers on matte-finish tape. For a uniform appearance, use a label maker with consistent font size and casing (e.g., all caps).
Include more than just the name. A complete label might read: “Brown Rice – 04/25/24 – Use By 10/25/24.” This helps track inventory and practice FIFO (First In, First Out), reducing the risk of expired items lingering at the back.
“Clear labeling cuts down decision fatigue in the kitchen. When you know exactly what you have and how fresh it is, meal planning becomes intuitive.” — Maria Tran, Professional Home Organizer & Kitchen Efficiency Consultant
Label Placement Tips
- Place labels on the front, near the top, so they’re visible even when containers are stacked.
- For square containers, consider labeling two adjacent sides for visibility from multiple angles.
- Use color-coding: green for baking, blue for breakfast items, red for snacks. This adds a visual cue for quick identification.
- Update labels immediately when refilling or replacing items.
Step-by-Step: Transform Your Pantry in One Afternoon
Organizing your pantry doesn’t require weeks of effort. With focus and the right plan, you can achieve pro-level results in under three hours. Follow this timeline to get it done efficiently.
- Empty Everything (30 minutes)
Remove all items from your pantry. Place them on a table or counter. This allows you to assess what you have, discard expired goods, and clean the shelves thoroughly. - Categorize Staples (20 minutes)
Group items into logical categories: baking essentials, grains, pasta, snacks, canned goods, breakfast foods, etc. Be specific—keep chocolate chips separate from other baking chips, and different rice types grouped together. - Transfer to Clear Containers (60 minutes)
Pour dry goods into appropriately sized airtight containers. Avoid overfilling; leave about an inch of headspace for easy scooping. Discard original packaging unless it contains useful cooking instructions or nutritional info. - Label Everything (20 minutes)
Apply consistent labels with item name, date purchased, and expiration date. Double-check spelling and dates for accuracy. - Reorganize Shelves Strategically (30 minutes)
Return containers in order of frequency and function. Place daily-use items at eye level, heavy containers on lower shelves, and rarely used specialty items up high. Use risers or tiered shelves to improve visibility.
Real Example: How Sarah Transformed Her Cluttered Pantry
Sarah, a busy mother of two in Austin, Texas, used to dread opening her pantry. Bags of rice spilled onto shelves, flour was buried behind soup cans, and her kids couldn’t find snacks without making a mess. After one too many trips to replace “lost” ingredients she later found expired, she decided to reorganize using clear containers and labels.
She started by clearing out expired items—nearly 12% of her stock was past its prime. She invested in a set of 15 modular, airtight containers and used a handheld label maker for consistency. She categorized everything: baking zone, breakfast station, dinner staples, and kid-friendly snacks.
The change was immediate. Her morning routine improved because oatmeal ingredients were now visible and accessible. Her grocery list became more accurate since she could quickly scan what needed replenishing. Most importantly, food waste dropped by half within two months. “I finally feel in control,” she said. “It’s not just organized—it’s actually usable every single day.”
Common Mistakes to Avoid
Even with good intentions, many people undermine their pantry organization through small but impactful errors. Recognizing these pitfalls ensures your system lasts.
- Using mismatched containers: Mixing shapes, sizes, and brands leads to inefficient stacking and visual clutter.
- Skipping the expiration date: Without dates, you lose the ability to rotate stock effectively, increasing waste.
- Overlooking accessibility: Placing frequently used items on high or low shelves forces unnecessary strain and discourages use.
- Ignoring container cleaning: Residue or moisture left inside can lead to mold or contamination. Wash containers thoroughly before refilling.
- Not adjusting over time: As eating habits change, so should your pantry layout. Reassess every 3–6 months.
“Organization isn’t a one-time event—it’s a habit. The most successful pantries are maintained weekly with simple checks and adjustments.” — Lena Patel, Certified Kitchen Space Planner
Essential Checklist for Pantry Success
Before you begin or after you finish, run through this checklist to ensure nothing is overlooked:
- ✅ Remove all items and wipe down shelves
- ✅ Discard expired or stale products
- ✅ Sort items into clear categories
- ✅ Choose uniform, airtight containers
- ✅ Transfer dry goods and seal tightly
- ✅ Label each container with name, purchase date, and expiration
- ✅ Organize by frequency of use and category
- ✅ Implement a FIFO system (older items in front)
- ✅ Take inventory and update shopping list
- ✅ Schedule a monthly pantry check-in
Frequently Asked Questions
Can I reuse old jars and bottles instead of buying new containers?
Yes, repurposed glass jars from pasta sauce, pickles, or jam can work well—if they’re cleaned thoroughly and have secure lids. However, they may vary in size and shape, making stacking and labeling less consistent. For a truly pro look and function, investing in a matching set is worth it.
How do I prevent bugs from getting into my containers?
Even sealed containers can be compromised if the original packaging had eggs or larvae. Freeze dry goods like flour, oats, and nuts for 48 hours before transferring to kill any hidden pests. Always inspect bulk-bin purchases carefully, and store containers away from heat sources, which attract insects.
What’s the best way to organize a small pantry?
Maximize vertical space with stackable bins and door-mounted racks. Use narrow, tall containers for items like spaghetti or granola. Group by meal type (e.g., “Overnight Oats Kit” with oats, chia seeds, and dried fruit together) to save space and simplify prep.
Take Control of Your Kitchen One Container at a Time
Organizing pantry staples using clear containers and labels isn’t just about aesthetics—it’s a practical investment in your daily life. From reducing food waste to saving time during meal prep, the benefits compound with every use. The initial effort pays off in smoother mornings, smarter shopping, and a kitchen that feels calm and intentional.
You don’t need a perfect pantry on the first try. Start small: pick one category, like baking supplies or breakfast items, and organize it completely. Once you see the difference, you’ll be motivated to continue. Over time, your pantry will evolve into a personalized system that reflects your lifestyle and supports your goals.


 浙公网安备
33010002000092号
浙公网安备
33010002000092号 浙B2-20120091-4
Comments
No comments yet. Why don't you start the discussion?