
A cluttered kitchen drawer is more than just an eyesore—it’s a daily inconvenience. Every time you open it, you’re met with jumbled utensils, mismatched cutlery, and the inevitable avalanche of spatulas and measuring spoons. In small kitchens, where every inch counts, inefficient drawer use wastes valuable real estate and slows down meal prep. The good news? With thoughtful planning and smart organization, even the tiniest drawers can be transformed into highly functional storage spaces. This guide provides actionable steps, proven strategies, and expert-backed insights to help you reclaim your kitchen drawers and make them work smarter, not harder.
Assess Your Drawer Contents and Usage Patterns
Before organizing, understand what you’re working with. Most people don’t realize how much dead weight they carry in their drawers—duplicate items, rarely used gadgets, or broken tools that linger out of habit. Start by emptying each drawer completely onto a clean surface. Sort items into categories: cooking utensils, cutlery, measuring tools, wraps, gadgets, etc.
Next, evaluate usage frequency. How often do you reach for that garlic press? Do you actually use both sets of steak knives? Be honest. Items used daily should be front and center; seasonal or occasional tools can be stored elsewhere or minimized. This step isn’t just about decluttering—it’s about aligning your storage with your actual habits.
Create Dedicated Zones Within Drawers
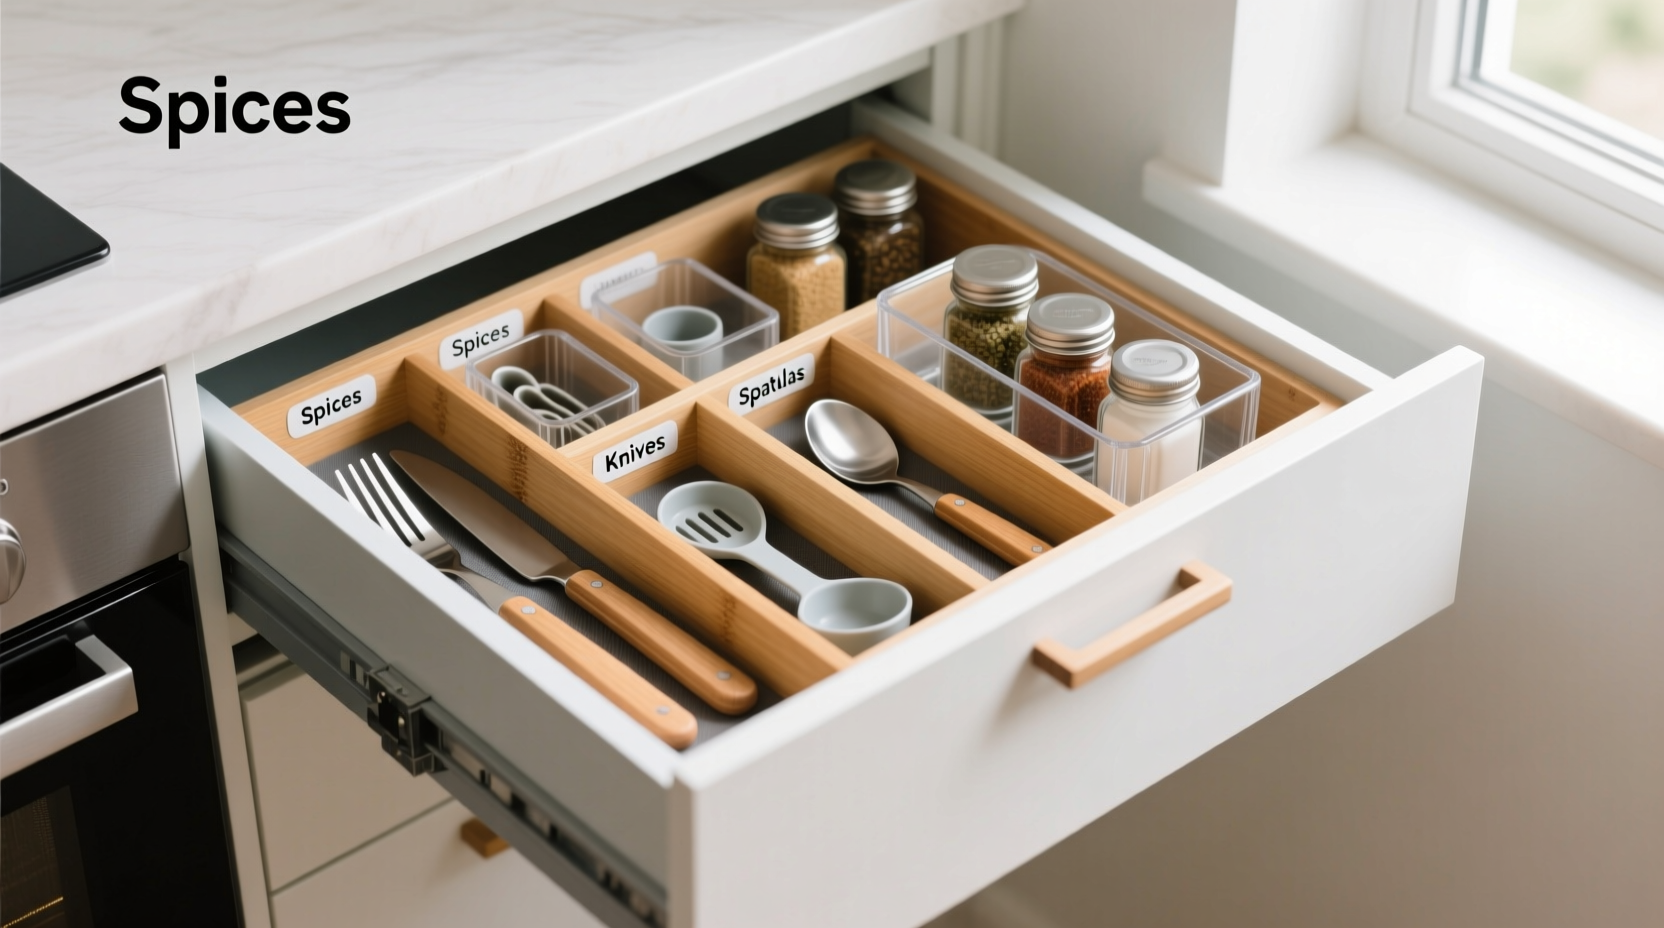
Efficient drawer organization relies on zoning—dividing space based on function and frequency. Think of each drawer as having micro-sections: one for everyday cutlery, another for cooking tools, and a third for frequently accessed wraps or packets.
For example, the top drawer near your stove might house spatulas, tongs, and ladles—items used during cooking. The drawer beside the sink could hold silverware and small prep tools like peelers or bottle openers. A deeper lower drawer may accommodate bulkier items like baking mats or foil rolls—but only if properly subdivided.
Zoning reduces decision fatigue. When everything has a designated place, you’re less likely to create clutter simply because “it was easier to toss it in.”
“Organization isn’t about perfection—it’s about creating systems that support your behavior.” — Sarah Chen, Home Efficiency Consultant
Choose the Right Organizers for Small Spaces
The key to maximizing small drawers lies in choosing organizers that fit the internal dimensions precisely and allow for vertical stacking or adjustable compartments. Off-the-shelf inserts are convenient, but custom-fit solutions often yield better results.
Consider these organizer types:
- Adjustable dividers: Ideal for cutlery drawers. You can customize slot sizes for spoons, forks, knives, and serving pieces.
- Stackable trays: Perfect for deep drawers. Place one tray for lids, another for containers, or separate layers for different tool types.
- Drawer risers: Create two levels in a single drawer. Use the lower tier for flat items (pot holders), and the upper for frequently used tools.
- Non-slip liners: Prevent contents from shifting and protect drawer surfaces. Choose textured rubber or felt over basic plastic.
Avoid oversized organizers that take up too much floor space. Measure your drawer interior (length, width, depth) before purchasing anything. Remember: the goal is to increase usable space, not fill it with bulky containers.
Recommended Drawer Organizers by Category
| Item Type | Best Organizer | Why It Works |
|---|---|---|
| Cutlery | Adjustable bamboo divider set | Customizable slots prevent tangling and wear |
| Cooking Utensils | Grid-style utensil tray with U-shaped cutouts | Holds ladles, whisks, and spoons upright and visible |
| Plastic Wrap & Foil | Vertical cardboard tube holder or tension rod | Unrolls cleanly and prevents tangling |
| Measuring Cups/Spoons | Magnetic strip or nesting ring organizer | Saves space and keeps sets together |
| Small Gadgets (peelers, openers) | Shallow divided tray with removable sections | Allows reconfiguration as needs change |
Step-by-Step Guide to Reorganizing Your Kitchen Drawers
Follow this clear sequence to transform disorganized drawers into streamlined storage hubs:
- Empty all contents. Remove every item from each drawer. Wipe down the interior with a damp cloth and let dry.
- Sort and purge. Group items by category and eliminate duplicates, broken tools, or unused gadgets.
- Measure each drawer. Note exact dimensions (L x W x D) to ensure organizers will fit without blocking closure.
- Determine primary function. Decide what each drawer will store—cutlery, utensils, wraps, etc.—based on proximity to point of use.
- Select appropriate organizers. Purchase or repurpose trays, dividers, or risers that match your layout and needs.
- Arrange items logically. Place frequently used tools at the front. Store heavier items at the back or bottom to maintain balance.
- Label if needed. For households with multiple users, small labels on divider fronts can reinforce consistency.
- Test and adjust. Use the drawer for a few days. If access feels awkward or items shift, tweak the layout.
Real-Life Example: Transforming a Crowded Cutlery Drawer
Maria, a home cook in a 500-square-foot apartment, struggled with a narrow top drawer filled with mixed cutlery, loose bottle caps, and rubber bands. Every morning, she fished through the mess to find a clean fork. After following the reorganization steps, she measured her drawer (14” x 10”) and purchased an adjustable bamboo insert with six customizable compartments.
She sorted her silverware, removed duplicate teaspoons, and donated an old fondue fork she hadn’t used in years. She added a slim silicone liner to prevent sliding and placed the most-used items—dinner forks and spoons—at the front. The result? Maria now opens the drawer and sees exactly what she needs. No more digging. No more frustration. The entire process took 25 minutes and cost under $20.
“It sounds minor,” she said, “but starting my day without that little annoyance makes everything feel smoother.”
Common Mistakes That Undermine Drawer Efficiency
Even well-intentioned efforts can fall short if common pitfalls aren’t avoided. Watch out for these issues:
- Overfilling organizers: Just because a tray has space doesn’t mean you need to fill it. Overcrowding leads to disarray.
- Ignoring drawer depth: Tall items in shallow drawers block access. Match organizer height to drawer clearance.
- Storing incompatible items together: Don’t mix sharp knives with wooden spoons—they damage each other over time.
- Forgetting accessibility: Heavy pots shouldn’t be stored in high pull-out drawers. Apply ergonomic logic.
- One-size-fits-all approach: Not every drawer needs dividers. Some benefit from open space for large items like trivets.
Do’s and Don’ts of Small Drawer Organization
| Do | Don’t |
|---|---|
| Use vertical space with risers or stackable trays | Stack heavy items on top of delicate ones |
| Group like items together (e.g., all peelers in one zone) | Mix cleaning tools with food prep utensils |
| Label zones in shared kitchens | Use flimsy foam inserts that compress over time |
| Reassess every 3–6 months | Assume your system is permanent—needs evolve |
| Keep a “donation bin” nearby during sorting | Leave decisions half-finished—commit to the process |
Frequently Asked Questions
How do I organize a deep drawer without losing items in the back?
Use a pull-out shelf or tiered organizer to bring rear items forward. Alternatively, install a slide-out tray or angled riser so nothing gets buried. Label the back edge of each section to identify contents at a glance.
What’s the best way to store plastic wrap, foil, and bags in a small drawer?
Install a tension rod across the drawer to hold roll handles, or use a vertical cardboard tube organizer. Another option is a magnetic strip inside the cabinet door above the drawer—mount metal clips to hold each roll. This frees up drawer space entirely.
Can I make my own drawer organizers instead of buying them?
Absolutely. Repurpose small boxes, ice cube trays, or yogurt cups to create custom compartments. Cardboard covered in contact paper works well for temporary dividers. For a sturdier DIY solution, cut craft wood or acrylic sheets to size and assemble with non-toxic glue.
Final Checklist: Achieve Drawer Efficiency in 7 Steps
- Remove all items and clean the drawer
- Sort into functional categories
- Discard duplicates, broken, or unused tools
- Measure drawer interior precisely
- Select or build organizers that maximize space
- Assign zones based on usage frequency
- Test the system for a week and refine as needed
Conclusion: Turn Chaos Into Calm, One Drawer at a Time
Organizing small kitchen drawers isn’t about achieving magazine-worthy perfection. It’s about creating a functional, stress-free environment that supports your daily routine. When your tools are easy to find, your workflow improves, your kitchen feels larger, and even simple tasks become more enjoyable.
You don’t need a renovation or expensive upgrades. Start with one drawer. Apply the principles of assessment, zoning, and smart containment. Notice the difference it makes. Then move to the next. Small changes compound into lasting order.


 浙公网安备
33010002000092号
浙公网安备
33010002000092号 浙B2-20120091-4
Comments
No comments yet. Why don't you start the discussion?