
In compact kitchens, every inch counts. Without the luxury of square footage, many homeowners feel trapped by clutter, inefficient layouts, and limited storage. But professional organization isn’t reserved for those with spacious galley kitchens or undergoing costly renovations. With strategic planning and smart solutions, even the tiniest kitchen can function like a chef’s dream workspace. The key lies not in knocking down walls but in rethinking how you use space, prioritize essentials, and maintain order daily.
This guide breaks down proven methods used by interior organizers and minimalist living experts to transform cramped kitchens into highly functional zones—all without a single hammer swing.
Assess Your Current Kitchen Workflow
Before rearranging cabinets or buying new organizers, evaluate how you actually use your kitchen. A well-organized space supports your routine, not disrupts it. Start by mapping out your “kitchen triangle”—the path between the sink, stove, and refrigerator. In small kitchens, this triangle should be tight and logical. If you're constantly stepping over items or reaching across counters, inefficiency is draining both time and energy.
Observe your habits for three days: Where do you prep food? Which utensils do you grab most often? Are frequently used appliances buried behind rarely used ones? This audit reveals patterns that inform smarter decisions about what stays, goes, or moves.
The Decluttering Priority Matrix
Not all kitchen items deserve equal real estate. Categorize everything using a simple matrix based on frequency of use and necessity:
| Category | Definition | Action |
|---|---|---|
| Daily Essentials | Coffee mug, cutting board, favorite knife, spatula | Keep within arm’s reach of prep/cooking zones |
| Weekly Use | Blender, measuring cups, baking sheets | Store nearby but not front-and-center |
| Occasional (Seasonal) | Turkey roaster, ice cream maker, fondue set | Relocate to high shelves, under-bed bins, or pantry overflow |
| Rarely Used / Duplicates | Extra serving platters, mismatched containers, broken gadgets | Donate, recycle, or discard |
Be ruthless. Studies show the average kitchen contains nearly twice the number of items needed for daily operation. Removing duplicates and expired goods instantly frees up usable space.
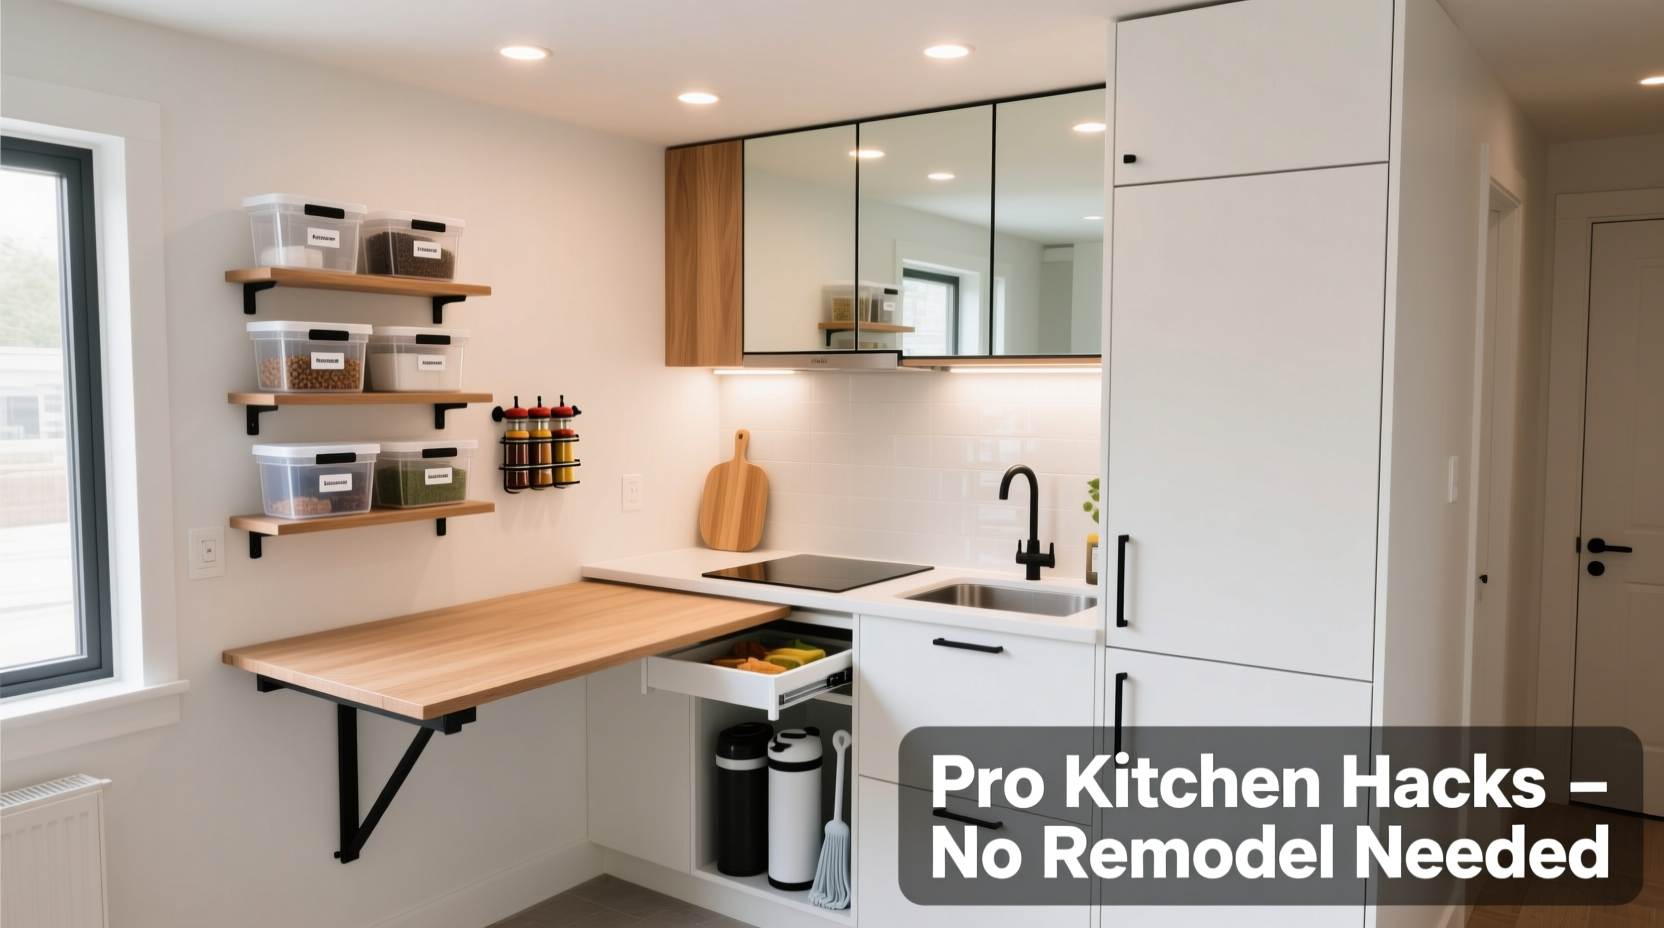
Maximize Vertical and Hidden Storage
Floor and counter space may be limited, but vertical real estate is often underutilized. Walls, cabinet interiors, and even the backs of doors offer untapped potential.
- Install wall-mounted rails or pegboards: These allow customizable hanging of pots, pans, utensils, and spice jars. Unlike fixed racks, they adapt as needs change.
- Use under-cabinet baskets: Magnetic or adhesive trays hold foil, parchment paper, or cleaning cloths—items usually crammed into drawers.
- Add shelf risers inside cabinets: Double the height efficiency in upper cabinets, especially useful for storing plates and bowls vertically.
- Exploit door backs: Slim organizers fit spices, tea bags, or oven mitts on the inside of pantry or cabinet doors.
“Small kitchens thrive on vertical layering. Think upward before outward.” — Lena Torres, Certified Home Organizing Consultant
Even the space above the refrigerator, often treated as a dumping ground, can become functional. Use it for storing infrequently used appliances in labeled bins, ensuring they’re covered to prevent dust buildup.
Drawer Optimization Techniques
Drawers are prime real estate but commonly misused. Instead of letting utensils jumble together, implement compartmentalization:
- Remove everything and wipe the drawer clean.
- Lay out all contents and sort by function: cooking tools, eating utensils, gadgets.
- Measure the drawer interior and purchase adjustable dividers or cut foam board to size.
- Assign zones: one section for spoons, another for peelers and scrapers.
- Label if shared with others to maintain consistency.
Create Zones for Efficiency
Professional kitchens operate on zoning principles—grouping tools and ingredients by task. Apply the same logic at home:
- Cooking Zone: Near the stove. Store pots, pans, oils, spices, and cooking utensils here.
- Prep Zone: Around the primary counter space. Keep cutting boards, knives, mixing bowls, and peelers close.
- Cleaning Zone: By the sink. Stock sponges, dish soap, trash bags, and scrub brushes.
- Beverage Zone: Dedicate a shelf or drawer to coffee, tea, mugs, and water bottles—especially helpful if mornings are chaotic.
- Storage Zone: Pantry or deep cabinets for dry goods, snacks, and backup supplies.
Zoning reduces movement, prevents cross-contamination, and makes cleanup intuitive. It also simplifies restocking—you know exactly where each category lives.
Mini Case Study: Maria’s Studio Apartment Kitchen
Maria lived in a 500-square-foot studio with a kitchen barely large enough for two people to stand side by side. Her countertops were buried under a toaster, blender, and pile of mail. After applying the zone method, she relocated appliances to a rolling cart that could be tucked beside the fridge when not in use. She installed a slim magnetic strip for her three essential knives and hung a wire rack above the sink for drying dishes. By grouping spices in a tiered turntable and moving seldom-used bakeware to a closet shelf, she reclaimed 70% of her counter space. Within a week, cooking felt less like an obstacle course and more like a ritual she enjoyed.
Smart Container Systems and Labeling
Uniform storage transforms visual chaos into calm. Transfer dry goods—pasta, rice, flour, sugar—into clear, airtight containers. Not only do they preserve freshness, but they also make inventory checks effortless.
Choose containers with wide mouths for easy scooping and stackable designs to conserve shelf space. Labels are non-negotiable: use a label maker or masking tape with neat handwriting to identify contents and expiration dates.
| Do | Don't |
|---|---|
| Use consistent container shapes and sizes | Mix various jar types haphazardly |
| Label everything—even similar-looking grains | Assume you’ll remember what’s inside |
| Store containers in order of use frequency | Bury everyday items behind rare ones |
| Group like items (baking supplies, breakfast foods) | Spread similar items across multiple shelves |
For refrigerated items, use shallow bins to corral condiments, cheeses, or produce. Clear-front bins let you see contents without opening every door compartment.
Step-by-Step: One Weekend Kitchen Reset
You don’t need weeks to reorganize. Follow this timeline to overhaul your kitchen efficiently:
- Friday Evening (30 mins): Empty one cabinet or drawer. Sort, discard expired items, and wipe surfaces.
- Saturday Morning (2 hours): Deep-clean appliances, declutter countertops, install one new organizer (e.g., drawer divider).
- Saturday Afternoon (1 hour): Transfer dry goods into containers and label them. Arrange by meal usage (breakfast, dinner staples).
- Sunday Morning (45 mins): Set up a wall rail or door organizer. Hang frequently used tools.
- Sunday Evening (15 mins): Take a photo of your newly organized kitchen. Use it as motivation to maintain the system.
Maintaining the System Long-Term
Organization isn’t a one-time fix—it’s a habit. Even the best systems fail without maintenance. Build sustainability into your routine:
- Adopt the “one in, one out” rule: For every new kitchen item brought in, remove an old or unused one.
- Implement a nightly reset: Spend five minutes returning items to their designated zones after dinner.
- Schedule monthly touch-ups: Re-evaluate storage efficiency, wipe shelves, and adjust as seasons or habits change.
- Involve household members: Clearly communicate zones and labeling so everyone contributes to order.
“The most organized kitchens aren’t perfect—they’re consistently cared for.” — Jordan Lee, Minimalist Lifestyle Coach
Essential Small Kitchen Organization Checklist
Use this checklist to track progress and ensure nothing is overlooked:
- ✅ Conduct a full inventory of kitchen items
- ✅ Remove expired food and duplicate tools
- ✅ Install at least one vertical storage solution (pegboard, rail, shelf riser)
- ✅ Group items into functional zones
- ✅ Transfer dry goods into labeled, airtight containers
- ✅ Optimize drawer layout with dividers
- ✅ Clear countertops of non-essential appliances
- ✅ Add under-cabinet or door-back organizers
- ✅ Establish a nightly 5-minute tidy-up routine
- ✅ Schedule a monthly review date on your calendar
Frequently Asked Questions
What if I rent and can’t install permanent fixtures?
No problem. Renters have excellent options: tension rods for hanging lightweight items, freestanding shelving units, rolling carts, and adhesive hooks designed for painted walls (which remove cleanly). Focus on portable, reversible solutions that move with you.
How do I organize a kitchen with no pantry?
Repurpose under-sink space with pull-out bins or stackable cabinets. Use a slim rolling cart as a mobile pantry. Wall-mounted floating shelves can display both decor and storage jars. Prioritize essentials and store bulk items elsewhere if needed.
Can open shelving work in a small kitchen?
Yes, but with discipline. Open shelves save space and create an airy feel, but they demand regular dusting and curated displays. Only place attractive, frequently used items on display. Hide less appealing items in closed cabinets or baskets.
Conclusion: Transform Your Space, One System at a Time
A small kitchen doesn’t have to mean compromise. By leveraging smart organization techniques, you gain more than just physical space—you reclaim time, reduce stress, and elevate your daily routines. The strategies outlined here require no construction, minimal spending, and deliver immediate results. Whether you live in a city apartment, a tiny home, or simply inherited a compact layout, professional-level organization is within reach.
Start small: pick one drawer, one shelf, or one habit to improve today. Momentum builds quickly once you see the difference clarity makes. Before long, your kitchen won’t just look better—it will work better, feel calmer, and invite you to cook more, connect more, and enjoy the heart of your home fully.


 浙公网安备
33010002000092号
浙公网安备
33010002000092号 浙B2-20120091-4
Comments
No comments yet. Why don't you start the discussion?