
A cluttered pantry doesn’t just make meal prep harder—it adds stress to daily life. The good news? You don’t need expensive organizing systems or a full remodel to transform your storage space. With thoughtful planning and smart use of affordable tools, you can create a streamlined, efficient pantry that makes cooking easier and grocery shopping more intentional. One of the most effective—and budget-friendly—strategies is using dollar store bins and labels. These simple tools, when used strategically, can turn chaos into clarity without costing more than a few dollars.
The key isn’t just buying containers; it’s about designing a system that works with your habits, food consumption patterns, and available space. Dollar store bins may seem basic, but their versatility, uniformity, and accessibility make them ideal for custom pantry organization. Paired with clear labeling, they help eliminate guesswork, reduce food waste, and keep everything visible and reachable.
Assess Your Pantry: The Foundation of Organization
Before purchasing a single bin or label, take time to evaluate your current pantry setup. This step is often skipped, but it’s critical to creating a lasting system. Start by removing everything from your shelves. Yes, everything. This allows you to see what you truly have, identify expired items, and assess the layout objectively.
As you pull items out, sort them into categories: baking supplies, canned goods, snacks, pasta and grains, breakfast foods, sauces, and so on. This categorization will inform how many bins you’ll need and what size works best. While sorting, check expiration dates and dispose of anything past its prime. Consider donating unopened, non-perishable items you know you won’t use.
Next, analyze your shelf dimensions. Measure the height, width, and depth of each shelf to ensure the bins you choose will fit properly. Dollar store bins come in various sizes—small square containers for spice packets, rectangular ones for cereal boxes, and deeper bins for bulk items. Knowing your measurements prevents wasted purchases and ensures optimal space usage.
Selecting the Right Bins from the Dollar Store
Dollar stores offer a surprisingly wide range of plastic bins, baskets, and containers—many of which are durable enough for long-term pantry use. While they may not be as sleek as specialty organizing brands, they perform the same function at a fraction of the cost. The trick is knowing what to look for.
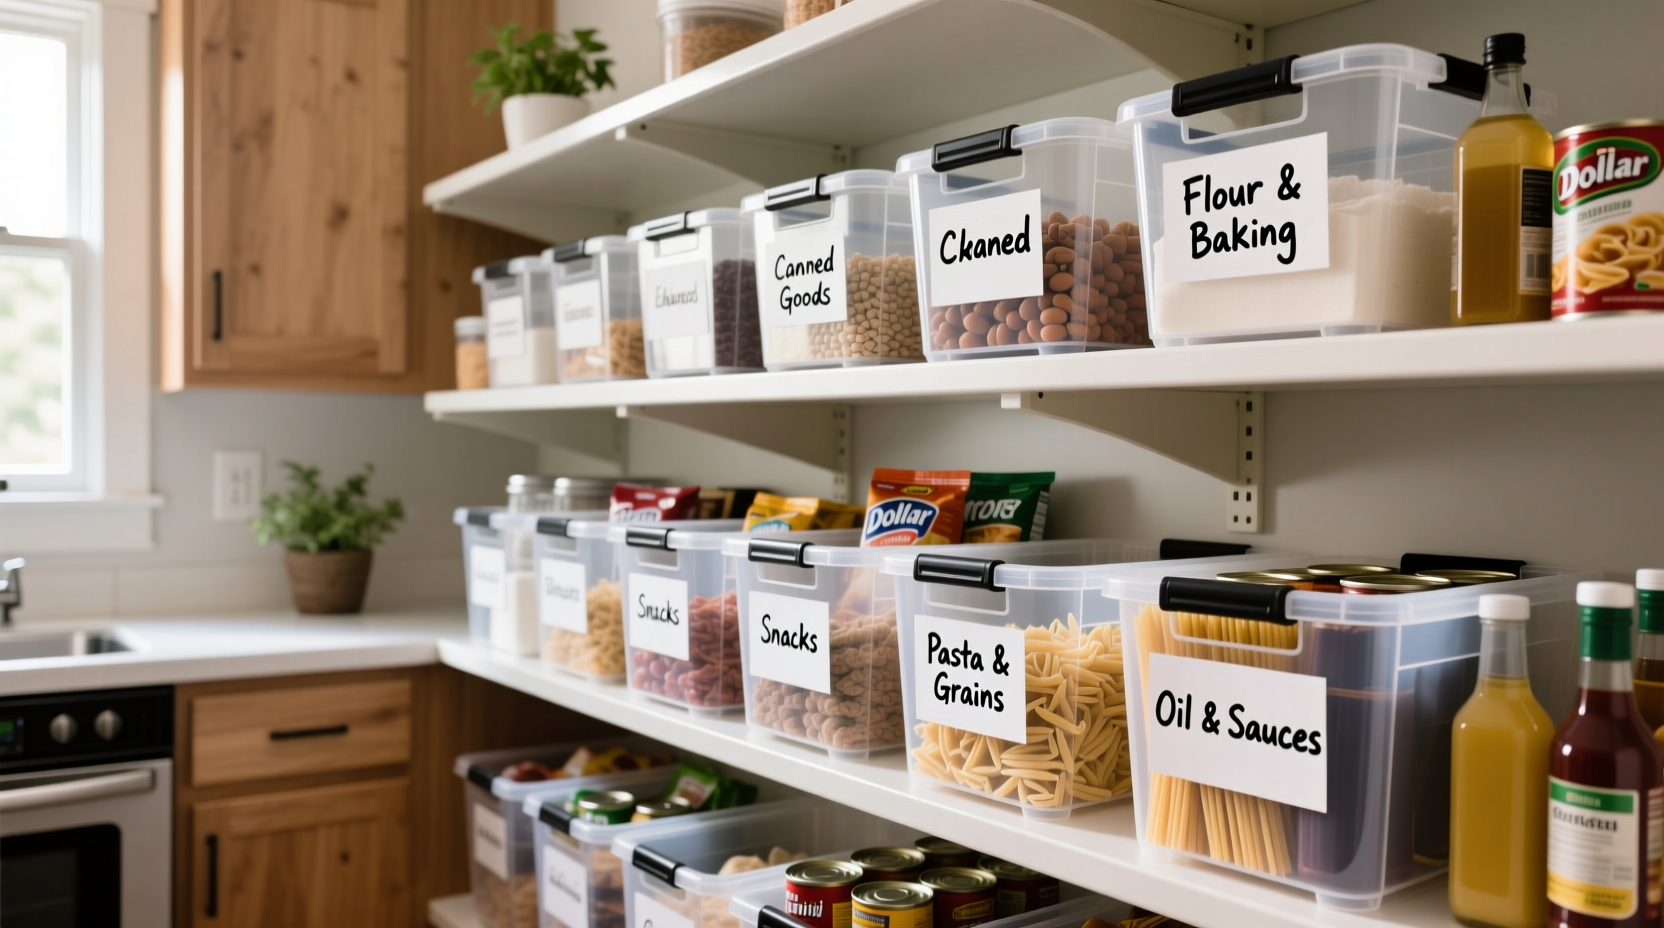
Clear bins are ideal because they allow you to see contents at a glance. Look for ones with low sides or open tops for easy access. Rectangular or square shapes maximize shelf space better than round ones. Avoid flimsy containers that bend under weight—test them by pressing on the sides before buying.
Consider multipurpose designs. Some bins come with handles, making them perfect for storing items you move frequently, like kids’ snacks or lunchbox staples. Others have dividers, useful for organizing tea bags, seasoning packets, or small spice jars. If you’re storing dry goods like flour or sugar, transfer them into reusable containers with tight lids—even if those aren’t from the dollar store—to maintain freshness.
For larger spaces, stackable bins are a game-changer. They let you double your vertical storage without sacrificing accessibility. Just make sure the bottom bin isn’t buried under too much weight. Label the front edge of each bin so you can read it even when stacked.
“Organization isn’t about perfection—it’s about function. A system that costs $15 but works every day is better than a $150 one that collects dust.” — Dana Richards, Home Efficiency Consultant
Create a Labeling System That Works
Labels are the secret weapon of professional organizers. Without them, even the neatest pantry can devolve into confusion. A well-labeled system saves time, reduces duplication (no more buying another bag of lentils because you forgot you had one), and helps everyone in the household participate in maintaining order.
At the dollar store, you’ll find pre-made label stickers, chalkboard tags, masking tape, and even small dry-erase boards. While permanent markers work in a pinch, consider using removable labels or chalkboard-style tags for flexibility. This way, if your needs change—say, you switch from quinoa to farro—you can update the label instead of replacing the entire bin.
When designing your labels, include both the item name and the expiration date if applicable. For example: “Brown Rice – Use by 03/2025.” This promotes first-in, first-out (FIFO) rotation, a method used in commercial kitchens to minimize waste. For families, consider adding icons or color-coding: green for snacks, blue for breakfast, red for baking. Kids can learn to identify zones quickly, fostering independence.
| Label Type | Best For | Pros | Cons |
|---|---|---|---|
| Chalkboard stickers | Frequently changing contents | Reusable, customizable | Can smudge, requires chalk |
| Pre-cut label stickers | Permanent categories (e.g., Pasta, Canned Tomatoes) | Clean, uniform look | Hard to remove or update |
| Masking tape + marker | Temporary or trial setups | Cheap, easy to replace | Less durable, can peel |
| Dry-erase tags | Bulk items or rotating stock | Highly flexible | Requires pen, may get lost |
Step-by-Step: Building Your Pantry System
Follow this practical sequence to implement a professional-grade pantry using only dollar store supplies and a bit of strategy.
- Empty and clean: Remove all items and wipe down shelves with a damp cloth and mild cleaner. Let dry completely.
- Categorize: Sort food into logical groups based on use and type. Be realistic—don’t create 20 categories if you only cook 10 ingredients regularly.
- Measure shelves: Note dimensions to guide bin selection. Bring a measuring tape to the dollar store.
- Purchase bins: Buy enough containers to hold your main categories. Stick to 3–5 sizes for visual consistency.
- Transfer and group: Place similar items into bins. Use smaller bins inside larger ones for subcategories (e.g., a small bin for taco seasonings inside a larger Mexican cuisine bin).
- Label everything: Apply labels clearly on the front of each bin. Include expiration dates where helpful.
- Arrange strategically: Place high-use items at eye level, heavy items on lower shelves, and light or infrequent items up top.
- Maintain weekly: Dedicate 5 minutes each week to straighten bins, check for expiring items, and re-label as needed.
Real-Life Example: From Chaos to Clarity
Sarah, a mother of three in Columbus, Ohio, struggled with a pantry that spilled over every time she opened the door. Cereal boxes toppled, snack bags vanished, and dinner prep often started with a 10-minute search for olive oil. She decided to try a dollar-store-only overhaul after seeing a friend’s organized kitchen online.
She spent $18 at her local discount store: six clear rectangular bins, two small square ones, a roll of masking tape, and a pack of colorful markers. Over a Saturday morning, she emptied the pantry, grouped items, and assigned each category a bin. She labeled everything with bold, handwritten tags—“Pasta & Sauce,” “Kid Snacks,” “Baking Essentials.”
The result? Her family adapted quickly. Her children could now find their own after-school snacks. She reduced duplicate grocery purchases by 40% in the first month. Most importantly, cooking became faster and less stressful. “I didn’t think $20 could make such a difference,” Sarah said. “Now I actually enjoy opening the pantry door.”
Common Mistakes to Avoid
- Overcomplicating categories: Don’t create a bin for every single ingredient. Group broadly unless usage demands separation.
- Ignoring container weight: Lightweight bins may buckle under heavy cans or bags. Reinforce with cardboard inserts if needed.
- Skipping the maintenance step: Even the best system fails without routine upkeep. Schedule a quick reset weekly.
- Using unclear labels: “Stuff” or “Misc” defeats the purpose. Be specific: “Oats & Granola” beats “Breakfast Things.”
- Blocking airflow: Avoid cramming bins too tightly. Leave a small gap between containers and the back wall for cleaning and ventilation.
Frequently Asked Questions
Can I wash dollar store bins in the dishwasher?
Most clear plastic bins from dollar stores are top-rack dishwasher safe, but check for heat resistance symbols. Hand washing with warm, soapy water is safer for longevity, especially if the plastic feels thin.
What if my bins don’t fit perfectly on the shelves?
Use shelf liners to prevent sliding, or arrange bins vertically instead of horizontally. You can also mix bin sizes creatively—taller bins on the bottom, shorter ones in front for visibility.
How do I handle bulky items like paper towels or large bags?
Store oversized items on lower shelves or behind bins. Use a single large bin to corral multiple bulky packages, like wrapping paper or pet food bags, and label it clearly.
Your Turn: Build a Pantry That Works for You
Organizing your pantry doesn’t require designer containers or a big budget. It requires intention, consistency, and the right tools—tools you can find for under $20 at your local dollar store. By using bins to group like items and labels to bring clarity, you create a system that simplifies daily life. The result isn’t just a tidy shelf—it’s more time, less waste, and greater confidence in the kitchen.
Start small if needed. Tackle one shelf today, then move to the next. Involve your family in labeling or sorting—it builds shared responsibility. Remember, the goal isn’t Pinterest perfection; it’s functionality that lasts. Every time you reach for an ingredient without digging, you’ll know the effort was worth it.


 浙公网安备
33010002000092号
浙公网安备
33010002000092号 浙B2-20120091-4
Comments
No comments yet. Why don't you start the discussion?