
A cluttered pantry doesn’t just make meal prep frustrating—it can lead to wasted food, duplicated grocery purchases, and a constant sense of disarray in the kitchen. Yet, many people assume that an organized pantry requires expensive custom shelving or specialty containers. The truth is, you don’t need to spend hundreds to create a functional, visually clean storage system. With thoughtful planning and smart use of affordable tools—like dollar store bins—you can transform even the most chaotic pantry into a model of efficiency.
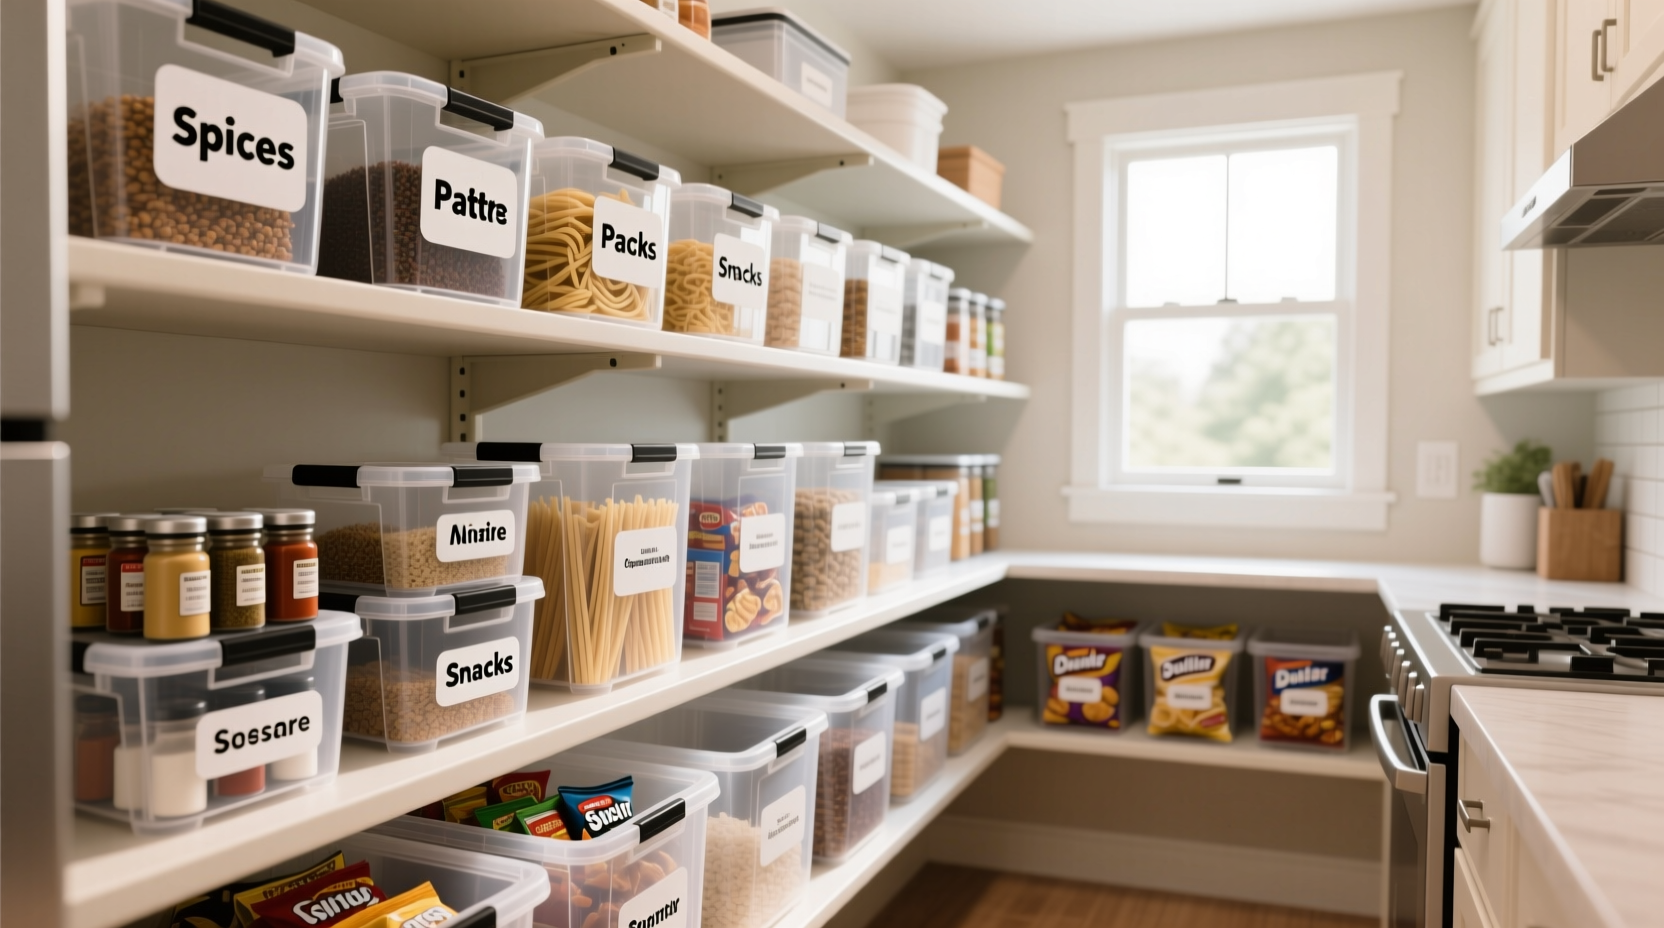
Dollar store bins are among the most underrated organizational tools available. They come in various sizes and shapes, are often stackable, and provide uniformity that instantly declutters shelves. When used strategically, they help group like items, protect food from pests and dust, and maximize vertical space. This guide walks through exactly how to use these inexpensive containers to create a pantry that’s not only neat but also easy to maintain and shop for.
Why Dollar Store Bins Work So Well
The appeal of dollar store bins lies in their accessibility and versatility. Unlike high-end organizers that may cost $15–$30 each, these bins typically range from $0.99 to $2.99 per unit, allowing you to stock up without overspending. But affordability isn’t the only advantage.
- Uniformity: Matching bins create visual cohesion, making it easier to scan contents at a glance.
- Portability: Most are lightweight and have handles, so you can pull them out to access back-row items or take them to the counter while cooking.
- Stackability: Many designs are made to nest or stack securely, helping you use vertical space efficiently.
- Transparency: Clear plastic versions let you see contents without opening them, reducing time spent searching.
- Customizability: You can label them, paint them, or modify their use based on your needs.
“Affordable organization isn’t about buying less—it’s about using what you have more intentionally. Dollar store bins, when paired with smart categorization, can rival any premium pantry system.” — Maria Tran, Home Efficiency Consultant
Step-by-Step Guide to Organizing Your Pantry with Dollar Store Bins
Transforming your pantry doesn’t require a weekend renovation. Follow this logical sequence to build a streamlined, efficient system in under three hours.
- Empty the pantry completely. Remove every item, placing them on a nearby table or countertop. This allows you to assess what you own and wipe down shelves.
- Sort items into categories. Group similar foods: baking supplies, snacks, canned goods, pasta/rice, breakfast items, condiments, etc. Discard expired products and consolidate duplicates.
- Measure your shelves. Use a tape measure to determine shelf depth, height between shelves, and width. This ensures bins will fit without crowding.
- Select appropriate bin sizes. Choose shallow bins for spice packets, deep rectangular ones for cereal boxes, and small square containers for tea bags or seasoning packets.
- Transfer contents into bins. Place grouped items inside designated containers. Avoid overfilling; leave room for easy access.
- Label everything clearly. Use a label maker or masking tape and marker to identify each bin’s contents. Include expiration dates if helpful.
- Arrange bins logically. Place frequently used items at eye level, heavier bins on lower shelves, and rarely used supplies higher up.
- Maintain the system weekly. Spend 5 minutes every Sunday checking for expired items, restocking labels, and returning stray packages to their bins.
Smart Categorization Strategies for Maximum Efficiency
Organization isn’t just about containers—it’s about how you group your food. Poor categorization leads to inefficiency, even with perfect bins. Consider these proven grouping methods:
- By Meal Type: Create bins for “Oatmeal Fixings,” “Lunchbox Snacks,” or “Pasta Night Essentials.” This reduces decision fatigue during meal prep.
- By Usage Frequency: Keep daily-use items (cereal, coffee pods) front and center; store holiday baking supplies or bulk rice in harder-to-reach areas.
- By Family Member: For households with kids or specific dietary needs, designate bins labeled “Kids’ Snacks” or “Gluten-Free Baking.”
- By Ingredient Type: Group all flours together, sugars together, baking powders and extracts in one container, etc.
One common mistake is mixing perishables with non-perishables. Never store fresh onions, garlic, or potatoes in sealed plastic bins—they need airflow. Reserve bins strictly for dry, shelf-stable goods.
Mini Case Study: The Johnson Family Pantry Overhaul
The Johnsons, a family of five in suburban Ohio, struggled with a walk-in pantry that had become a dumping ground for open snack bags, unsorted spices, and forgotten bulk purchases. After one too many instances of buying duplicate peanut butter because they couldn’t find the existing jar, they decided to reorganize.
They visited their local dollar store and purchased 18 clear rectangular bins ($1.25 each), two tiered shelf risers ($2 each), and a roll of removable labels. Over a Saturday morning, they emptied the pantry, discarded expired granola bars and stale crackers, and categorized everything into nine groups: breakfast items, kid-friendly snacks, adult snacks, baking essentials, canned vegetables, pasta/legumes, drink mixes, spices, and emergency dry meals.
By using medium-sized bins for cereal and oatmeal packets, tall narrow ones for spice jars, and large flat containers for bread bags, they freed up 40% more usable space. They added labels with both text and simple icons (a spoon for breakfast, a flame for spices) so even their youngest child could help put things away.
Within two weeks, they reported spending 15 minutes less per week on grocery planning and reduced food waste by nearly half. “It sounds silly,” said Sarah Johnson, “but seeing everything clearly made us actually *use* what we already had.”
Do’s and Don’ts: Using Dollar Store Bins Effectively
To get the most out of your investment, follow these best practices.
| Do | Don’t |
|---|---|
| Choose bins with smooth interiors to prevent snagging packaging | Use bins that are too deep—items get lost in the back |
| Opt for bins with handles or cutouts for easy pulling | Store sharp objects (like box cutters) with food items |
| Label both top and front for visibility from multiple angles | Overlook ventilation—don’t seal moisture-prone items like crackers airtight unless transferring to Mylar bags |
| Use smaller bins to subdivide larger shelves (e.g., separate brown sugar from white) | Buy mismatched styles that look chaotic—stick to one color or transparency level |
| Wipe bins down monthly to prevent dust buildup | Forget to reassess categories seasonally—your summer grilling rubs don’t need prime real estate in winter |
Maximizing Small Spaces and Odd-Shaped Pantries
Not everyone has a walk-in pantry. In cramped kitchens or awkward closets, space optimization becomes even more critical. Dollar store bins shine here because they’re adaptable.
For narrow pantries, use slim bins (about 6 inches wide) to hold spice bottles or tea boxes. Stack two vertically and label the front of the bottom one so both remain identifiable. On doors, install over-the-door shoe organizers—also available at dollar stores—and use pockets for single-serve items like applesauce pouches or instant soup cups.
If your pantry has staggered or uneven shelves, mix bin heights strategically. Use short bins on lower shelves to allow taller items behind them, and reserve deeper bins for base-level storage where you can reach easily. Corner spaces can be filled with triangular-cut foam inserts (available cheaply online or at craft stores) to hold standard bins snugly.
Frequently Asked Questions
Can I wash dollar store bins?
Yes, most plastic bins sold at dollar stores are dishwasher-safe on the top rack or can be hand-washed with warm, soapy water. Avoid abrasive scrubbers that can scratch surfaces and trap odors. Let them air dry completely before reuse.
What if my bins don’t fit on the shelves?
Measure twice before buying. If bins are slightly too wide, consider removing shelf dividers or adjusting shelf positions if your pantry allows. Alternatively, rotate bins 90 degrees to fit depth-wise instead of width-wise, depending on your layout.
Are there better alternatives to plastic bins?
While fabric bins or bamboo organizers look attractive, they’re often more expensive and harder to clean. For dry food storage, durable plastic remains the most practical and hygienic choice. If aesthetics matter, choose opaque bins in neutral colors or cover clear ones with removable vinyl wraps.
Pantry Organization Checklist
Follow this checklist to ensure no step is missed during your pantry transformation:
- ☐ Empty entire pantry and discard expired items
- ☐ Wipe down shelves and inspect for pests
- ☐ Sort food into logical categories
- ☐ Measure shelf dimensions (height, width, depth)
- ☐ Purchase appropriately sized dollar store bins (clear or solid color)
- ☐ Transfer grouped items into bins
- ☐ Label each bin clearly (include contents and date if needed)
- ☐ Arrange bins by frequency of use and weight
- ☐ Add shelf risers or door organizers if space allows
- ☐ Set a monthly maintenance reminder
Conclusion: A Smarter Pantry Starts Today
An organized pantry isn’t a luxury reserved for home influencers with designer kitchens. It’s a practical necessity that saves time, money, and stress. By leveraging the humble dollar store bin, you gain control over your kitchen inventory, reduce food waste, and make daily routines smoother. The system you build today can evolve with your household’s changing needs—whether that’s accommodating a new diet, adding baby food storage, or preparing for seasonal cooking.
You don’t need perfection to begin. Start with one shelf. Pick one category—maybe snacks or baking supplies—and apply the principles outlined here. Once you experience the clarity that comes from seeing everything clearly and knowing exactly where it belongs, you’ll wonder why you waited so long.


 浙公网安备
33010002000092号
浙公网安备
33010002000092号 浙B2-20120091-4
Comments
No comments yet. Why don't you start the discussion?