
A cluttered pantry doesn’t just make meal prep harder—it can lead to wasted food, duplicated purchases, and daily frustration. While many organization guides suggest buying matching bins and specialty containers, those solutions come with a price tag that not everyone can afford. The good news? You don’t need to spend a dime to transform your pantry into a functional, efficient space. With a little creativity and the containers you already have at home, you can build a streamlined system that works for your lifestyle.
Repurposing household containers is not only cost-effective but also environmentally responsible. Instead of contributing to landfill waste, you’re giving new life to jars, tubs, and boxes that would otherwise be discarded. This approach aligns with zero-waste principles while delivering real organizational benefits. Whether you live in a small apartment or manage a large family kitchen, this method scales to fit your needs.
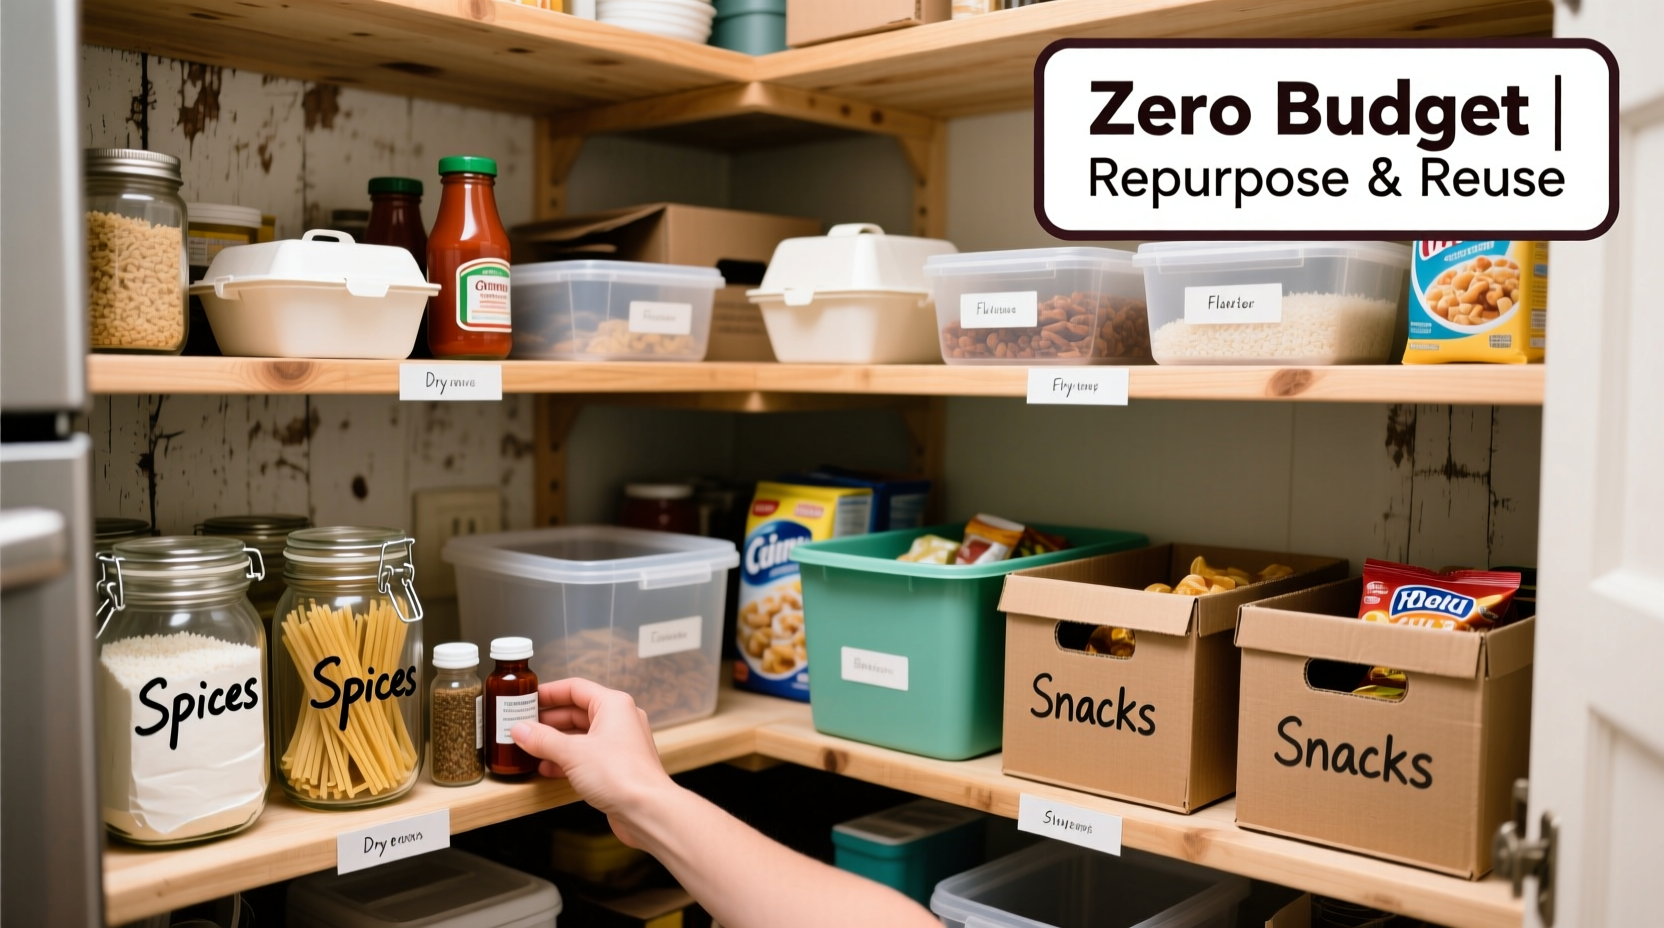
Why Repurposed Containers Work Better Than Store-Bought Bins
Off-the-shelf pantry organizers often promise uniformity and style, but they come with hidden drawbacks. Many are made from plastic that may leach chemicals over time, especially when exposed to heat or acidic foods. They also tend to be one-size-fits-all, which means they might not suit the unique dimensions of your shelves or the specific quantities you store.
In contrast, repurposed containers offer flexibility. Glass jars from pasta sauce or pickles provide excellent visibility and airtight seals. Yogurt tubs and ice cream pails are sturdy and stackable. Cereal boxes can be folded into upright dividers. Because these items were designed to hold food originally, they’re often safer and more practical than generic storage bins.
“Household containers are underrated tools. When cleaned and reused properly, they perform just as well as commercial organizers—and they’re already in your home.” — Lena Patel, Sustainable Living Consultant
Step-by-Step Guide to Organizing Your Pantry for Free
Transforming your pantry doesn’t require perfection on the first try. Follow this step-by-step process to build a system that’s both functional and sustainable.
- Empty the pantry completely. Take everything out and place it on a nearby counter or table. This allows you to assess what you own and identify expired or unused items.
- Sort by category. Group like items together: grains, canned goods, snacks, baking supplies, spices, etc. This reveals duplicates and helps you plan container use.
- Discard expired or spoiled items. Check best-by dates and inspect for pests or moisture damage. Compost what you can; recycle packaging responsibly.
- Gather clean containers from around the house. Look in recycling bins, under sinks, or in storage areas. Prioritize glass jars, plastic tubs with lids, and cardboard boxes.
- Wash and dry all containers thoroughly. Use hot water and mild detergent. Ensure no food residue remains, especially in crevices or under rims.
- Transfer dry goods into repurposed containers. Use jars for rice, beans, pasta, or oats. Reserve larger tubs for snacks or bulkier items.
- Label everything clearly. Use masking tape and a marker, or write directly on the lid if it's non-porous. Include contents and date stored.
- Arrange items by frequency of use. Place everyday staples at eye level. Store backups or seasonal items higher up or lower down.
- Create zones using containers as dividers. Stand cereal boxes vertically between categories to prevent shifting and maintain order.
- Evaluate and adjust weekly. After a few uses, notice what works and what doesn’t. Swap containers, re-label, or reposition as needed.
This process takes about 2–3 hours the first time, depending on pantry size. Once established, maintenance requires only minutes per week during grocery restocking.
Best Household Items to Repurpose (and What to Avoid)
Not every container is suitable for long-term food storage. Choose wisely based on material, seal quality, and durability. Below is a comparison of common household items and their effectiveness as pantry organizers.
| Container Type | Best For | Pros | Cons | Avoid If… |
|---|---|---|---|---|
| Glass jars (pasta sauce, pickles) | Rice, sugar, flour, lentils, spices | Airtight, reusable, transparent, microwave-safe | Heavy, breakable | You have young children accessing shelves |
| Plastic yogurt cups | Snacks, nuts, small portions | Lightweight, stackable, clear | Lids may not seal tightly, can scratch | Storing moist or oily foods long-term |
| Ice cream tubs | Bulk items, pet food, rolled tortillas | Durable, deep, secure lid | Opaque, bulky | You need visibility or limited shelf height |
| Cereal boxes | Dividers, paper towel cores, foil wraps | Free-standing, customizable height | Not waterproof, degrades over time | Humid environments or direct contact with food |
| Tin cans (cleaned) | Utensils, tea bags, spice packets | Sturdy, cylindrical shape saves space | Sharp edges, no lids unless modified | Storing loose grains or liquids |
Real Example: Maria’s Kitchen Turnaround
Maria, a single mother of two in Cleveland, struggled with a chaotic pantry. She often bought duplicate groceries because she couldn’t see what she already had. After watching a video on zero-cost organizing, she decided to try repurposing containers.
She started with six glass jars from spaghetti sauce and pickles, transferring rice, quinoa, brown sugar, and chocolate chips into them. She used three yogurt cups for snack packs—goldfish crackers, raisins, and almonds—and labeled each with colored tape. For her roll-up wraps and parchment paper, she cut down empty paper towel tubes and stood them upright in an ice cream pail.
The change was immediate. “I could finally see everything,” she said. “No more digging through piles. My kids even started helping themselves to snacks because they knew where things were.” Within two weeks, she reduced her grocery spending by 18% due to fewer accidental duplicates.
Maria now keeps a “container collection” bin under her sink, saving any usable jar or tub for future pantry upgrades. “It’s not fancy,” she says, “but it works better than anything I’ve bought before.”
Checklist: Build Your Zero-Budget Pantry System
Use this checklist to stay on track as you organize:
- ☐ Remove all items from the pantry
- ☐ Wipe down shelves and check for pests
- ☐ Sort food into logical categories
- ☐ Discard expired or damaged products
- ☐ Collect at least 5 clean, reusable containers
- ☐ Wash and dry all containers
- ☐ Transfer dry goods into repurposed containers
- ☐ Label each container with contents and date
- ☐ Group similar items together on shelves
- ☐ Use boxes or cans as vertical dividers
- ☐ Store heavy items on lower shelves
- ☐ Keep frequently used items at eye level
- ☐ Take a photo of your finished layout for reference
- ☐ Reassess after one week and adjust as needed
Frequently Asked Questions
Can I store flour and sugar in plastic containers from dairy products?
Yes, as long as the containers are thoroughly washed and dried. Residual fats or odors from yogurt or sour cream can affect taste if not cleaned properly. Rinse with hot water and let air dry completely before use.
How do I keep pests out without airtight commercial bins?
Glass jars with tight lids are your best defense. For added protection, place bay leaves or whole cloves in corners of the pantry—natural scents that deter ants and weevils. Regularly wipe shelves and avoid storing open bags of grain.
What if my containers don’t stack well?
Focus on stability over stacking. Arrange containers side by side rather than high towers. Use smaller items in front, larger ones behind. If space is tight, consider rotating stock instead of storing large volumes.
Conclusion: Start Small, Think Long-Term
Organizing your pantry without spending money isn’t just possible—it’s empowering. By using what you already have, you develop a deeper awareness of your consumption habits and reduce waste at multiple levels. There’s no need to wait for a sale or a budget boost to create a kitchen that supports your daily life.
The key is consistency, not perfection. Begin with one shelf or one category. Transfer your rice into a clean jar today. Label your sugar tomorrow. Each small action builds momentum toward a more functional, peaceful kitchen. Over time, your repurposed system will prove more durable and personalized than any store-bought solution.


 浙公网安备
33010002000092号
浙公网安备
33010002000092号 浙B2-20120091-4
Comments
No comments yet. Why don't you start the discussion?