
A cluttered vanity drawer isn’t just frustrating—it eats up time every morning, hides expired products, and makes it harder to maintain a consistent self-care routine. The good news? You don’t need hours or expensive organizers to fix it. With a focused strategy, you can transform your chaotic drawer into a streamlined, functional space in less than 20 minutes. This guide walks you through a proven method that combines speed, practicality, and long-term sustainability.
Step 1: Empty and Assess (3 Minutes)
The first rule of organizing any space is simple: start from nothing. Pull everything out of your vanity drawer and place it on a clean surface—your countertop or bed works perfectly. This visual audit forces you to confront what you actually own, not just what you think you have.
As items come out, separate them into broad categories: skincare, makeup, hair tools, nail care, and miscellaneous (like tweezers or cotton swabs). Don’t worry about perfection here—this is just to get a sense of volume and variety.
Take a moment to notice patterns. Are there three half-used serums? Makeup palettes you haven’t touched in months? Expired sunscreen hiding at the back? These observations are clues to future inefficiencies you’ll eliminate in the next steps.
Step 2: The 90-Second Purge (2 Minutes)
Time is short, so decision-making must be fast and ruthless. Set a timer for 90 seconds and go through each item with one question: “Have I used this in the past 90 days?” If the answer is no—and it’s not a seasonal or emergency backup—set it aside to donate, recycle, or discard.
Also toss anything that’s expired. Most skincare products last 6–12 months after opening; mascara should be replaced every 3 months. When in doubt, check for changes in smell, texture, or color. Expired products aren’t just ineffective—they can cause breakouts or infections.
| Product Type | Typical Shelf Life (After Opening) | Red Flags |
|---|---|---|
| Mascara | 3 months | Dryness, clumping, odd odor |
| Liquid Foundation | 6–12 months | Separation, change in scent |
| Cream Blush/Concealer | 12 months | Graininess, mold spots |
| Serums & Treatments | 6–12 months | Color change, irritation upon use |
| Powder Products | 2 years | Cracking, strange smell |
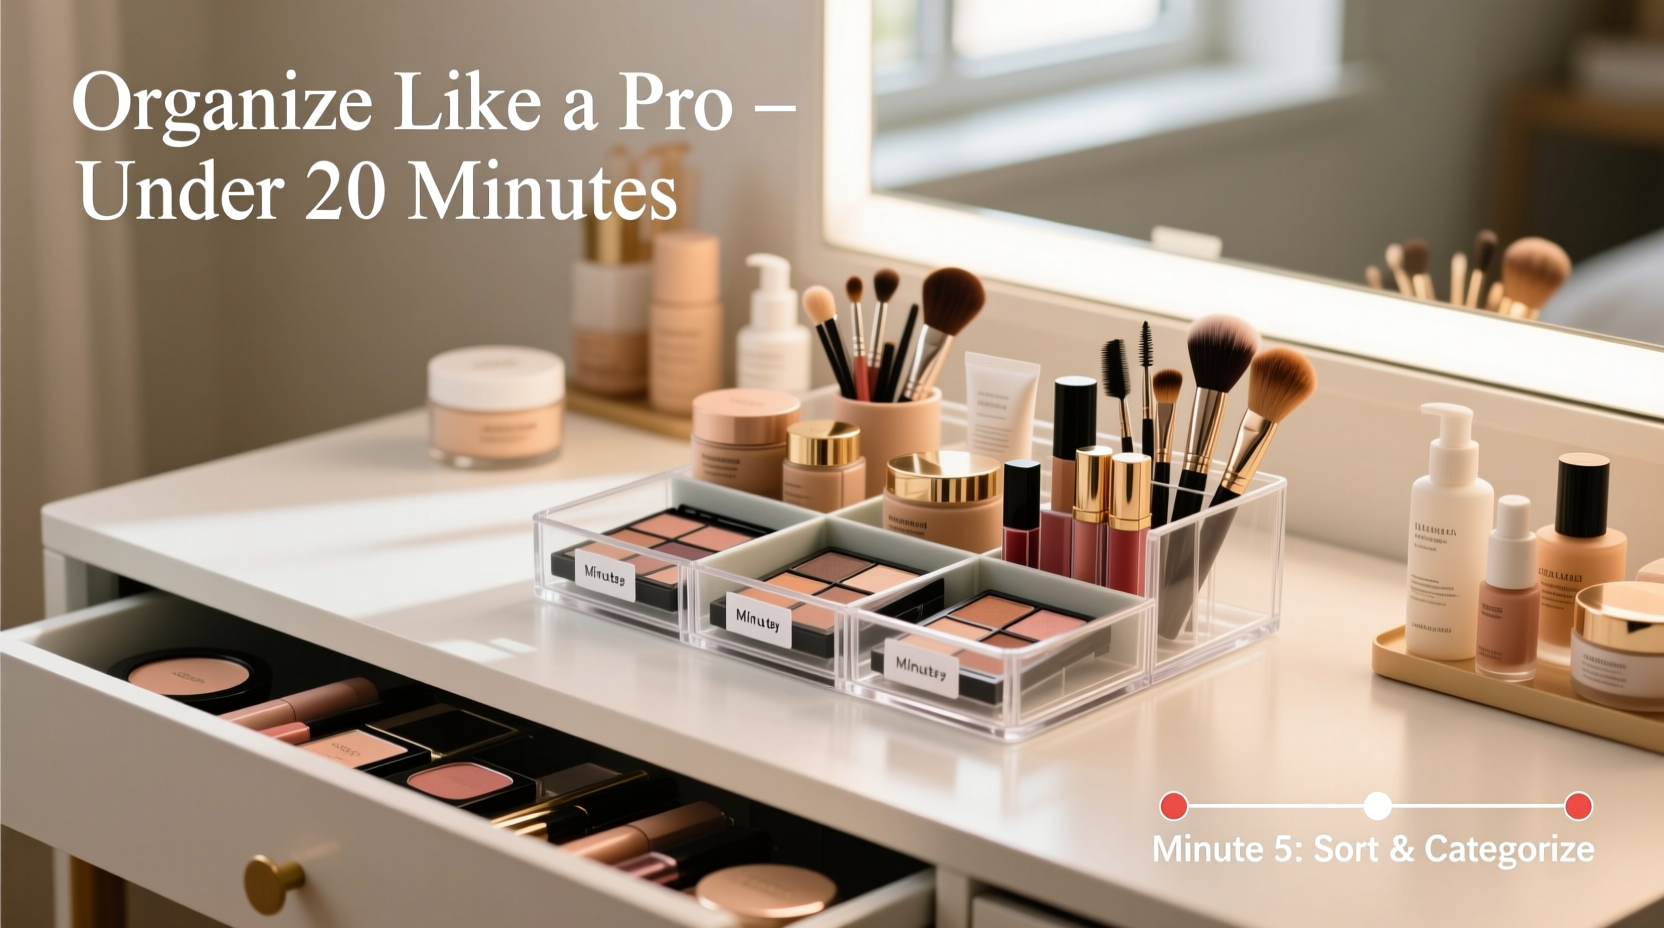
Step 3: Group by Frequency and Function (5 Minutes)
Now that you’ve removed the clutter, group your remaining items by both frequency of use and function. This dual approach ensures efficiency and prevents future disarray.
Start with frequency:
- Daily: Moisturizer, SPF, brow pencil, lip balm
- Weekly: Face masks, exfoliators
- Occasional: Special occasion makeup, travel-sized backups
Then refine by category:
- Skincare (cleansers, toners, serums)
- Makeup (foundation, blush, eyeshadow)
- Tools (brushes, sponges, eyelash curlers)
- Hair accessories (clips, bands)
- Nail care (files, polishes, cuticle oil)
This layered sorting creates natural zones. Items you reach for every morning should be front and center. Less-used products can go toward the back or sides.
“Organization isn’t about perfection—it’s about reducing friction. The fewer decisions you make in the morning, the better your routine will stick.” — Lena Torres, Professional Organizer & Founder of Clear Space Living
Step 4: Choose and Place Your Organizers (7 Minutes)
You don’t need custom inserts or luxury trays. Most effective vanity organizers are affordable, modular, and adaptable. Look for adjustable acrylic dividers, silicone trays, or even repurposed small containers like spice jars or mint tins.
Measure your drawer quickly (length x width) and choose organizers that fit snugly without forcing. Overfilling leads to chaos; underfilling wastes space. Aim for 80% coverage with room to grow.
Here’s a real-world example:
Mini Case Study: Sarah’s 18-Minute Transformation
Sarah, a nurse with early shifts, used to spend 10 minutes every morning digging through her jumbled vanity drawer. She had two makeup bags inside the drawer, plus loose bottles and broken compacts. After following these steps, she cleared out 37 expired or unused items. She reused an old silverware tray for brushes and pencils, added a $5 clear acrylic divider for skincare, and placed daily items in front. Total time: 18 minutes. Now, she reports her morning routine is faster and more enjoyable—she even applies sunscreen consistently for the first time.
When placing your organizers, follow this logic:
- Front row: Daily-use products (e.g., moisturizer, lipstick)
- Middle section: Core makeup (foundation, concealer, powders)
- Back zone: Tools and less-frequently used items
- Sides or corners: Small accessories (bobby pins, nail files)
Step 5: Maintain the System (Ongoing, 1 Minute Weekly)
The true mark of a professional-level system isn’t how it looks on day one—it’s how well it holds up over time. Maintenance should require minimal effort. Build in a 60-second weekly reset: after your Sunday night skincare, quickly scan the drawer. Return stray items to their zones, wipe spills, and check for anything nearing expiration.
To ensure longevity, avoid these common pitfalls:
| Do’s | Don’ts |
|---|---|
| Label sections if sharing the space with others | Let liquid products sit open—wipe caps and seal immediately |
| Use vertical dividers for flat items like sheet masks | Store heat-sensitive products (like retinol) in direct sunlight |
| Keep a mini inventory list on your phone for restocks | Overcrowd the drawer—leave breathing room for easy access |
| Group by routine (AM vs PM) if space allows | Ignore leaks—clean sticky residues immediately to prevent sticking |
Essential Checklist: Your 20-Minute Vanity Reset
Follow this concise checklist to stay on track and finish strong:
- Empty the entire drawer onto a clean surface
- Sort items into broad categories (skincare, makeup, tools, etc.)
- Discard expired, dried-out, or unused products (stick to the 90-day rule)
- Wipe down the empty drawer with a damp cloth
- Group remaining items by frequency and function
- Select organizers that fit your drawer dimensions
- Place daily-use items in the most accessible zone
- Assign homes for all categories using trays or dividers
- Secure organizers if they slide (use non-slip pads)
- Do a final sweep: return everything to its place and close the drawer
Frequently Asked Questions
What if my vanity drawer is too shallow for organizers?
Shallow drawers benefit from low-profile solutions. Use flat trays, foldable fabric bins, or stackable magnetic tins. You can also mount a slim organizer on the inside of the drawer door for small items like bobby pins or earrings.
How do I organize if I share the drawer with someone else?
Divide the space visually or physically using side-by-side trays. Assign zones by person or by product type (e.g., left side for skincare, right for makeup). Labeling helps prevent mix-ups and maintains accountability.
Can I use household items instead of buying organizers?
Absolutely. Repurpose mint tins for jewelry or bobby pins, use toilet paper rolls cut in half to hold brushes, or place small glass jars (like jam jars) for cotton rounds or swabs. The key is consistency—once you assign a purpose, stick to it.
Conclusion: A Smaller Space, Bigger Impact
Organizing your vanity drawer in under 20 minutes isn’t about achieving Pinterest-perfect symmetry—it’s about creating a system that saves time, reduces stress, and supports your daily habits. By purging what you don’t use, grouping by function, and assigning intentional homes, you turn chaos into calm with minimal effort.
The best part? This small win often sparks larger changes. Once you experience the clarity of an organized drawer, you might find yourself rethinking your closet, medicine cabinet, or even your digital files. But start here. Set a timer, trust the process, and reclaim those precious morning minutes.


 浙公网安备
33010002000092号
浙公网安备
33010002000092号 浙B2-20120091-4
Comments
No comments yet. Why don't you start the discussion?