
Painting furniture can transform an outdated or worn piece into a stunning centerpiece. However, one of the most common frustrations DIYers face is visible brush marks—ridges, streaks, and uneven texture that ruin an otherwise beautiful finish. While traditional brushes are reliable for detail work, they often leave behind telltale lines that compromise smoothness. The solution? A roller technique that delivers a flawlessly even coat with minimal effort. This method is especially effective on flat surfaces like tabletops, cabinet doors, and drawer fronts. With the right tools, preparation, and application approach, you can achieve a high-end, spray-like finish without investing in expensive equipment.
Why Roller Application Beats Brushing for Smooth Results
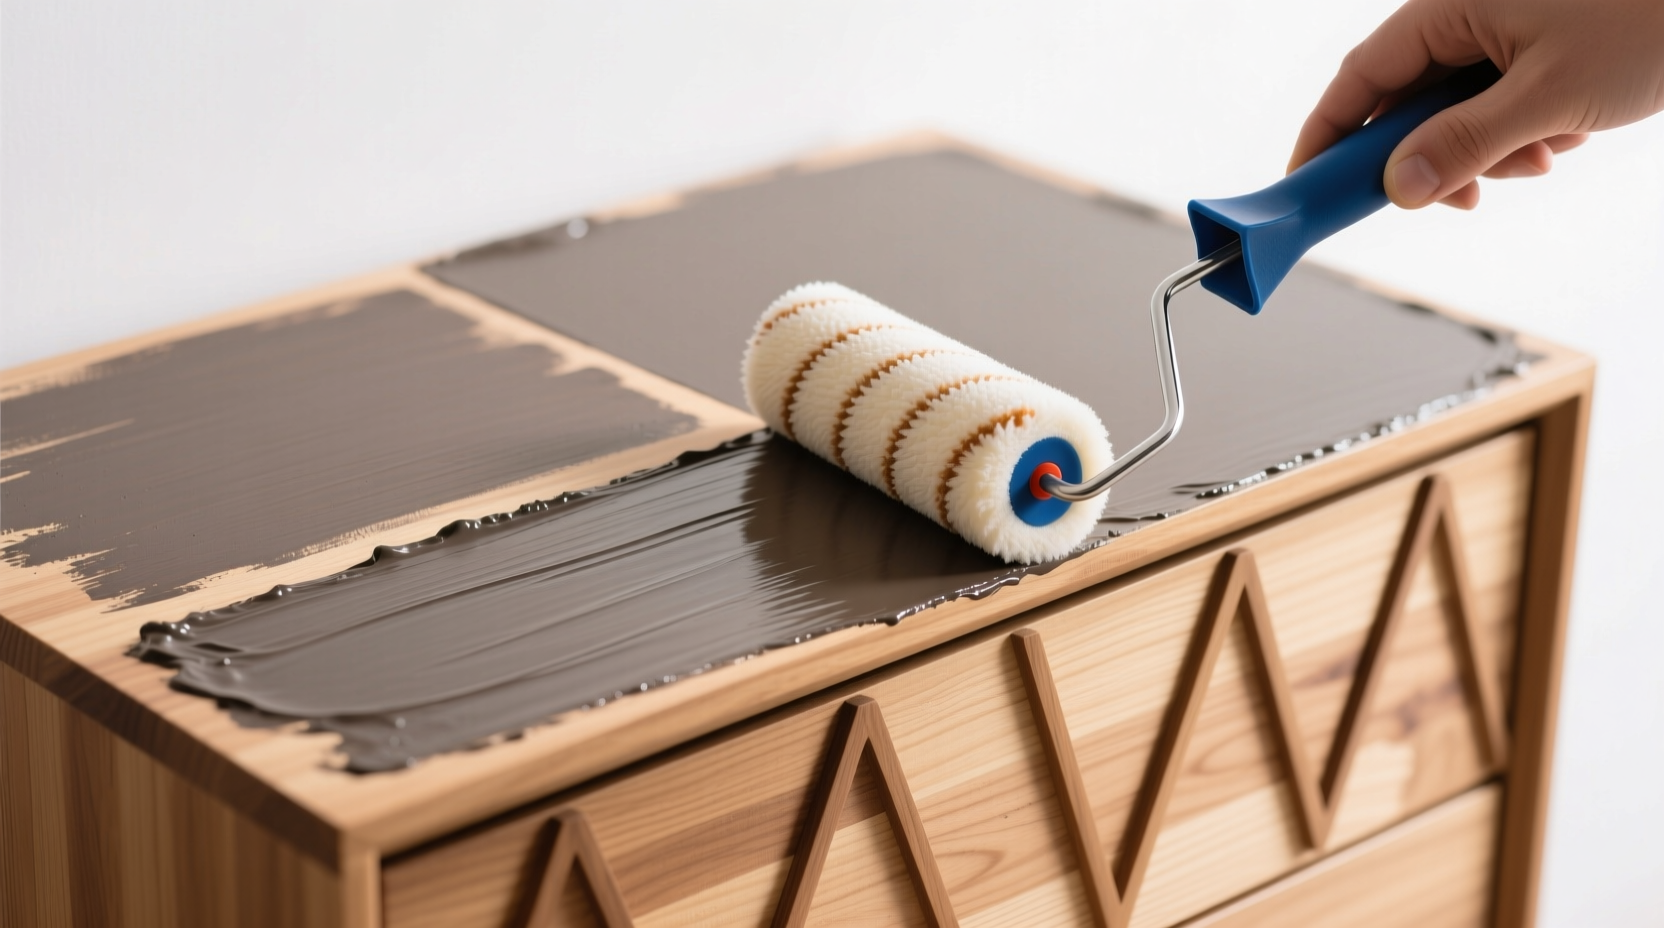
Rollers distribute paint more evenly than brushes by minimizing directional strokes and reducing the buildup of excess material along edges. Foam rollers, in particular, are designed to lay down ultra-thin, consistent layers of paint, eliminating the ridges caused by bristle imprinting. Unlike brushes, which drag paint across the surface and can create pooling at stroke ends, rollers glide smoothly and release paint under controlled pressure.
Professional refinishers have long favored mini foam rollers for cabinetry and furniture because they reduce orange-peel texture and allow for faster coverage. When paired with proper thinning and light sanding between coats, roller-applied paint dries with a glass-smooth surface that rivals factory finishes.
“Using a high-density foam roller with properly thinned paint is the single best way to avoid brush marks on large, flat furniture surfaces.” — Daniel Reeves, Furniture Restoration Specialist with 18 years of experience
Essential Tools and Materials for a Flawless Finish
The success of your roller technique hinges on selecting the right supplies. Not all rollers or paints are created equal, and using subpar materials will undermine even the most careful application.
| Tool/Material | Recommended Choice | Avoid |
|---|---|---|
| Roller Type | High-density microfoam roller (4\", 1/8\" nap) | Foam rollers with visible seams or thick naps |
| Paint Type | Water-based acrylic enamel (e.g., Benjamin Moore Advance) | Oil-based paints unless properly thinned and ventilated |
| Paint Conditioner | Penetrol or Floetrol (for water-based paints) | Mineral spirits with latex paint |
| Sanding Tools | Orbital sander (180–220 grit), sanding block | Coarse paper (below 150 grit) without dust extraction |
| Clean-Up Supplies | Lint-free cloths, denatured alcohol (for cleanup) | Old rags that shed fibers |
In addition to these items, keep a small paint grid or tray for efficient roller loading, blue painter’s tape for clean edges, and a tack cloth to remove fine dust before painting.
Step-by-Step Guide: Applying Paint with a Roller for Zero Brush Marks
Follow this detailed sequence to ensure each coat goes on smoothly and dries perfectly level.
- Disassemble and Clean Thoroughly
Remove hardware and separate components like doors or drawers. Wipe surfaces with a degreaser (TSP substitute works well) to eliminate oils, waxes, and grime that interfere with adhesion. - Sand to Create a Paint-Receptive Surface
Use 180-grit sandpaper to lightly scuff the existing finish. Focus on smoothing imperfections but avoid deep sanding unless stripping. Follow with 220-grit for a silky base. Wipe down with a tack cloth afterward. - Apply Primer (If Needed)
On raw wood, stained surfaces, or pieces with tannin bleed (like oak), use a bonding primer. Apply it with a brush in tight corners, then roll main surfaces. Let dry completely and lightly sand with 220-grit. - Thin Your Paint for Optimal Flow
Mix in a paint conditioner like Floetrol (10–15% by volume). This reduces surface tension, slows drying time, and enhances self-leveling. Stir gently—do not shake, as this creates bubbles. - Load the Roller Properly
Dip the roller into the tray and roll it across the grid to remove excess. A properly loaded roller should feel damp but not dripping. Overloading causes runs; underloading leads to patchiness. - Apply Paint in Thin, Overlapping Passes
Start from one corner and move in long, unbroken strokes. Use a “W” pattern to spread paint initially, then flatten with vertical or horizontal strokes in one direction. Maintain a wet edge—don’t let one section dry before blending into the next. - Tip Off with a Dry Foam Roller or Brush
Immediately after rolling, go over the surface with a dry microfoam roller or a high-quality synthetic brush using feather-light strokes. This eliminates roller stipple and levels minor ridges. - Sand Between Coats
After the first coat dries (typically 4–6 hours), lightly sand with 220–320 grit. Remove dust with a tack cloth. Two to three thin coats yield better results than one thick one. - Final Cure Time
Allow the final coat to cure for 72 hours before reassembly or heavy use. Full hardness may take up to 30 days, so handle gently during this period.
Real Example: Refinishing a Dresser Without Visible Streaks
Sarah, a DIY enthusiast in Portland, wanted to repaint her 1970s oak dresser white without the streaky look she’d seen in past attempts. She had used a brush previously and ended up with pronounced grain highlighting and lap marks. This time, she switched to a roller technique.
She began by cleaning the surface with TSP, then sanded with 180-grit followed by 220-grit. After applying a coat of shellac-based primer with a brush in crevices and rolling flat areas, she let it dry overnight. For the topcoat, she chose Benjamin Moore Advance in satin, mixing in 10% Floetrol. Using a 4-inch Purdy microfoam roller, she applied two thin coats, sanding lightly with 320-grit between them.
The result was a smooth, almost sprayed appearance. Friends assumed she’d used a sprayer, but Sarah achieved it with basic tools and patience. Her key takeaway: “Thinning the paint made all the difference. It flowed like silk and dried completely level.”
Common Mistakes That Lead to Imperfections
Even with a roller, mistakes can introduce flaws. Avoid these pitfalls:
- Using low-quality rollers – Cheap foam rollers shed, leave seams, or absorb too much paint, leading to inconsistent coverage.
- Applying thick coats – Thick paint doesn’t level well and increases drying time, raising the risk of dust contamination and sagging.
- Skipping sanding between coats – Tiny imperfections become magnified under subsequent layers. Light sanding ensures adhesion and smoothness.
- Rushing the process – Painting too soon after priming or before the previous coat fully dries traps air and causes wrinkling.
- Ignoring environmental conditions – High humidity slows drying; low humidity causes paint to skin over too quickly, preventing self-leveling.
Frequently Asked Questions
Can I use any paint with a roller technique?
You can, but not all paints perform equally. Water-based enamels like Benjamin Moore Advance, Sherwin-Williams Emerald Urethane Trim Enamel, or Farrow & Ball Modern Eggshell are formulated to self-level and resist brush marks. Avoid craft paints or basic flat latex—they lack durability and smoothness.
Do I still need a brush at all?
Yes—for cutting in around edges, grooves, and intricate details. Use a high-quality 1–2 inch synthetic brush to apply paint in recessed areas before rolling the flat surfaces. This hybrid method ensures full coverage without relying solely on the roller in tight spots.
How do I prevent roller lines or stippling?
Use a high-density foam roller, thin your paint slightly, and always \"tip off\" with a dry roller or light brush strokes. Also, maintain a wet edge and work in manageable sections to avoid lapping. Sanding between coats removes any residual texture.
Pro Checklist for a Brush-Mark-Free Finish
- ✅ Disassemble furniture and remove hardware
- ✅ Clean surface with degreaser
- ✅ Sand with 180–220 grit, then wipe with tack cloth
- ✅ Prime if necessary (especially on porous or dark surfaces)
- ✅ Choose a water-based enamel paint
- ✅ Mix in 10–15% paint conditioner (Floetrol)
- ✅ Use a 4-inch high-density microfoam roller
- ✅ Apply paint in thin, overlapping passes using a “W” pattern
- ✅ Tip off with a dry roller or light brush strokes
- ✅ Wait 4–6 hours, then lightly sand with 220–320 grit
- ✅ Repeat for 2–3 total topcoats
- ✅ Allow 72 hours of curing before use
Final Thoughts
Painting furniture without brush marks isn’t reserved for professionals with spray guns. By adopting a roller technique with the right materials and mindful execution, anyone can achieve a sleek, modern finish that elevates their space. The key lies in preparation, paint consistency, and patience—applying thin, even layers and allowing proper drying time between steps. This method saves money, reduces mess, and delivers impressive results with minimal tools.
Whether you’re updating a nightstand, reviving a kitchen cabinet, or giving new life to a thrift-store find, the roller technique offers a practical, accessible path to flawless finishes. Start small, refine your process, and soon you’ll be transforming furniture with confidence and precision.


 浙公网安备
33010002000092号
浙公网安备
33010002000092号 浙B2-20120091-4
Comments
No comments yet. Why don't you start the discussion?