
Textured walls are common in many homes, especially those built from the 1970s through the early 2000s. While texture can hide imperfections and add visual interest, it often becomes outdated or difficult to maintain. When you decide to repaint, the question arises: should you remove the texture first? The good news is, you don’t have to. With the right preparation, tools, and painting techniques, you can achieve a clean, attractive finish directly over bumpy walls—without the dust, time, and labor of sanding or scraping.
This guide walks you through every step of painting over textured walls effectively. Whether your walls feature popcorn, knockdown, orange peel, or slap brush finishes, these methods will help you get professional-looking results while preserving the existing surface.
Why You Might Want to Keep the Texture
Before reaching for a scraper, consider why the texture exists in the first place. It was likely applied to conceal drywall seams, uneven joints, or minor surface flaws. Removing it can expose these imperfections, requiring extensive mudding, sanding, and priming—adding days to your project. In some cases, especially with popcorn ceilings or deep slap textures, removal poses health risks due to potential asbestos exposure in older homes.
Painting over texture preserves structural integrity, reduces mess, and shortens project timelines. When done correctly, the result can be both durable and aesthetically pleasing—especially if you're aiming for a modern flat or matte finish that subtly softens the wall’s appearance.
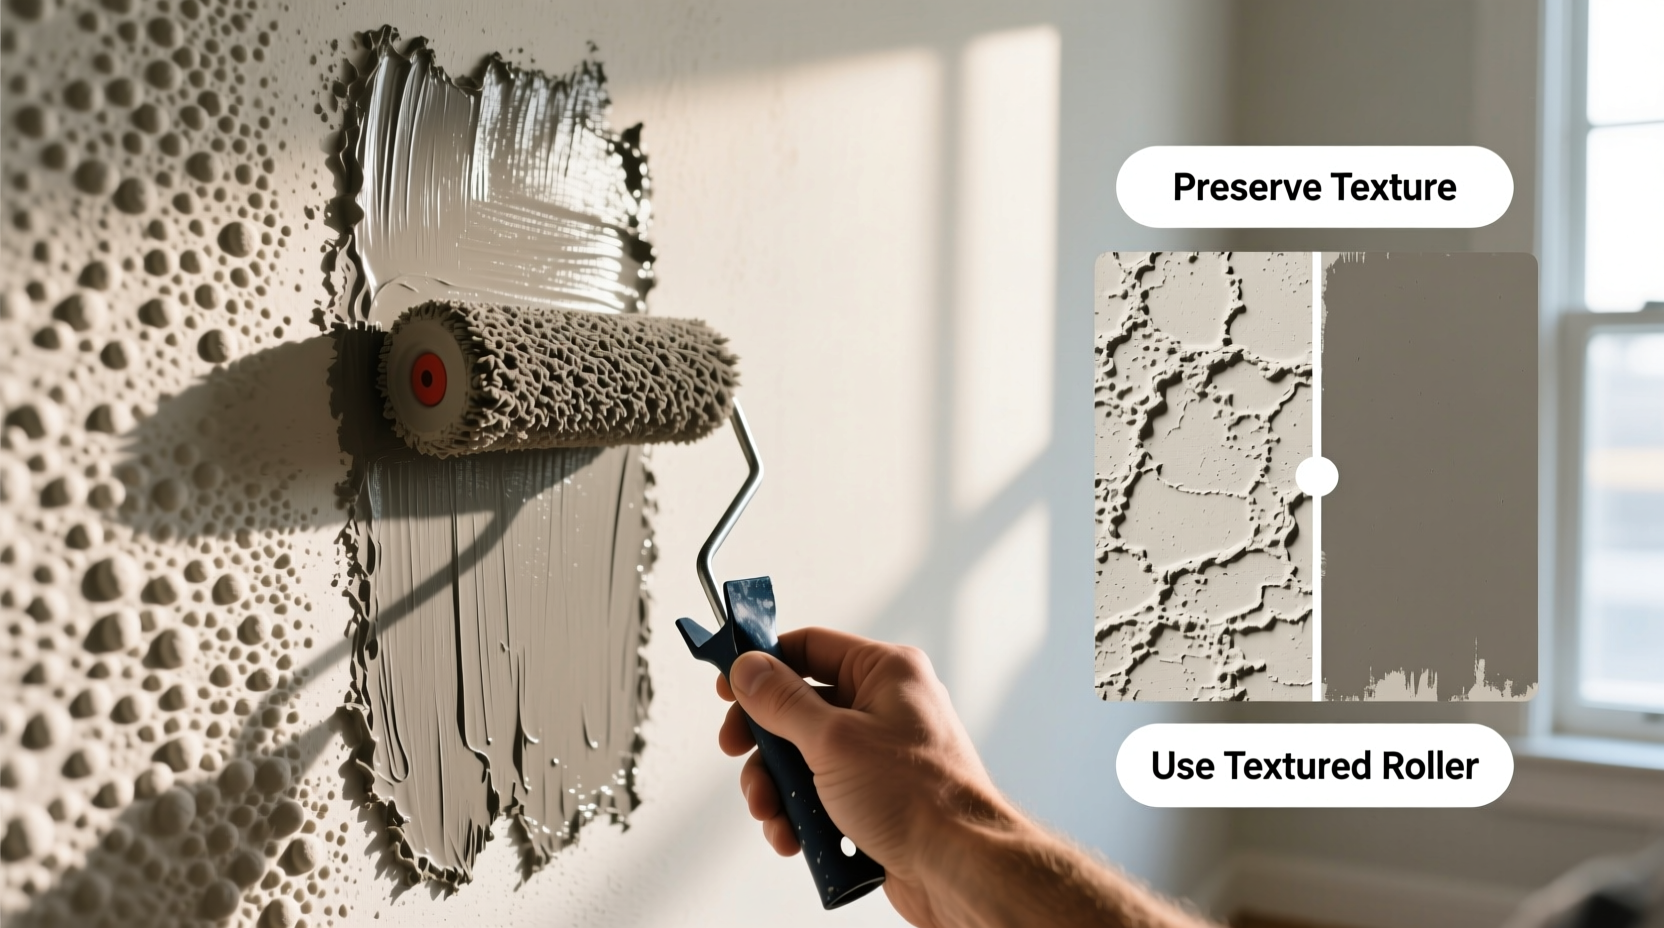
Essential Tools and Materials
Success starts with the right supplies. Using improper brushes or rollers can lead to uneven coverage, splattering, or excessive paint buildup in crevices. Here’s what you’ll need:
- Drop cloths or plastic sheeting
- Tape (painter’s tape, not masking tape)
- Spackle or lightweight joint compound
- Sanding block (fine grit, 120–220)
- Vacuum with brush attachment
- Tack cloth or microfiber rag
- Premium primer (oil-based or bonding primer recommended)
- High-quality latex paint (flat, eggshell, or satin finish)
- Thick-nap roller covers (3/4-inch to 1.5-inch nap)
- Roller extension pole
- Angle brush (2–3 inches) for cutting in
- Paint tray and liner
- Mist sprayer (optional, for dampening texture)
The key difference from standard wall painting lies in the roller nap. Standard 3/8-inch rollers won’t penetrate deep into textured grooves. A thick-nap roller holds more paint and pushes it into valleys, ensuring even coverage without overloading peaks.
Step-by-Step Guide to Painting Over Textured Walls
Follow this proven sequence for optimal results. Rushing any step compromises the final look and durability.
- Clean the Walls Thoroughly
Dust, grease, and cobwebs accumulate in textured surfaces. Use a vacuum with a soft brush attachment to remove loose debris. Then, wash walls with a mild detergent solution (e.g., TSP substitute or dish soap and warm water). Rinse with a damp sponge and let dry completely—this may take 24 hours depending on humidity. - Repair Damaged Areas
Patch cracks, holes, or flaking spots with joint compound. Apply with a putty knife, feather the edges smoothly, and let dry. Lightly sand until flush with surrounding texture. Avoid over-sanding, which creates noticeable flat patches. - Prime the Surface
Priming is non-negotiable. Textured walls absorb paint unevenly. Use a high-build bonding primer or oil-based primer for better adhesion and uniform porosity. Apply with a thick-nap roller, working in small sections. Cut in edges with a brush first. Let dry per manufacturer’s instructions (usually 6–8 hours). - Choose the Right Paint Finish
Flat or matte finishes are ideal—they minimize light reflection, helping to visually soften texture. Eggshell offers slight washability with low shine. Avoid semi-gloss or gloss; they highlight every bump and flaw. - Apply the First Coat
Use a premium interior latex paint. Pour paint into a tray. Load the thick-nap roller evenly—don’t oversaturate. Roll in a “W” or “M” pattern to distribute paint into recesses. Maintain a wet edge to prevent lap marks. Work top to bottom in manageable 3x3 foot sections. - Dry and Inspect
Let the first coat dry fully (overnight is safest). View the wall at an angle under natural and artificial light. Look for thin spots, missed valleys, or patchiness. These are common in deeper textures. - Apply a Second Coat
Repeat the rolling process. A second coat evens out color and opacity. For very deep textures, a third coat may be necessary. Do not rush recoats—premature application causes bubbling or peeling. - Clean Up and Final Check
Remove tape carefully while paint is still slightly tacky to avoid peeling. Clean brushes and rollers immediately. Walk around the room under different lighting conditions to ensure consistency.
Do’s and Don’ts When Painting Textured Walls
| Do’s | Don’ts |
|---|---|
| Use a 3/4-inch or thicker roller nap | Use short-nap rollers (they skip valleys) |
| Prime with a high-adhesion formula | Skimp on primer or use cheap alternatives |
| Apply multiple thin coats instead of one thick one | Overload the roller, causing drips and sagging |
| Inspect under angled light after each coat | Rely only on overhead lighting to check coverage |
| Allow full drying time between coats | Recoat too soon, risking poor adhesion |
Real-World Example: Reviving a 1990s Living Room
Mark and Lena purchased a 1990s ranch home with heavy slap-brush texture throughout the main living areas. They disliked the dated look but were deterred by estimates of $2,500 to skim-coat all walls. Instead, they opted to paint over the texture using the method described here.
After cleaning and spot-repairing, they used Zinsser Bulls Eye 1-2-3 (a water-based bonding primer) and applied two coats of Sherwin-Williams Duration Home in Flat finish with a 1.5-inch lambswool roller. The result? A subtle, modern appearance that softened the texture without erasing it entirely. Neighbors assumed they had re-drywalled. Total cost: under $300. Time invested: three weekends.
“We didn’t want to tear into the walls,” Lena said. “But we also didn’t want to live with that rough, speckled look forever. Painting over it gave us the refresh we needed—without the renovation chaos.”
“Painting over texture isn’t about hiding it completely—it’s about controlling how light interacts with it. A well-executed paint job can transform a bumpy wall into a sophisticated backdrop.” — Daniel Ruiz, Residential Painting Contractor with 18 years of experience
Expert Tips for Challenging Textures
Some textures are more demanding than others. Here’s how to handle the most common types:
- Popcorn Texture: Extremely porous and fragile. Mist lightly before priming to reduce dust and improve adhesion. Use an oil-based primer to seal. Consider painting with a sprayer for even coverage, though this requires masking everything nearby.
- Orange Peel: Moderate texture. A 3/4-inch roller nap works well. Two coats of paint typically suffice. Prime with a mist coat (diluted primer) if absorption is uneven.
- Knockdown: Flattened but still dimensional. Sand high ridges gently if they cast harsh shadows. Use flat paint to mute contrast between peaks and valleys.
- Slap Brush or Heavy Splatter: Deep crevices require high-viscosity paint and a thick roller. Apply paint slowly, allowing it to settle into lows. Back-roll lightly after initial pass to smooth peaks.
Frequently Asked Questions
Can I use a paint sprayer on textured walls?
Yes, airless sprayers provide excellent coverage on textured surfaces, getting paint into every nook. However, they require careful masking, proper ventilation, and skill to avoid overspray. Always back-roll sprayed paint with a dry roller to ensure adhesion and even film formation.
Will painting make the texture look worse?
It depends on technique and finish. High-gloss paint or insufficient coats will emphasize bumps. But using flat paint, proper priming, and multiple thin layers typically results in a balanced, updated appearance. The goal isn’t elimination—it’s refinement.
How do I prevent roller marks on bumpy walls?
Use the correct nap length, maintain a wet edge, and avoid going over semi-dry areas. Roll in consistent patterns (like overlapping “W” shapes), and don’t press too hard. Let each coat dry fully before inspecting and deciding on additional layers.
Final Checklist Before You Begin
- ✅ Inspect walls for loose or damaged texture
- ✅ Clean walls with mild detergent and rinse
- ✅ Repair holes and cracks with joint compound
- ✅ Sand repairs lightly and wipe dust away
- ✅ Tape edges, outlets, and trim
- ✅ Choose a thick-nap roller (3/4\" to 1.5\")
- ✅ Select flat or eggshell paint and high-adhesion primer
- ✅ Prime entire surface and let dry completely
- ✅ Apply first paint coat using a “W” rolling pattern
- ✅ Wait 12+ hours, then apply second coat
- ✅ Inspect under angled light and touch up if needed
Conclusion: Transform Your Space Without Demolition
You don’t need to strip or flatten textured walls to give your home a fresh, modern look. With careful preparation and the right painting strategy, you can achieve a clean, cohesive finish that respects the existing architecture while elevating the space. This approach saves time, reduces dust and disposal issues, and avoids the risk of damaging drywall underneath.
Whether you’re updating a single room or repainting your entire house, mastering the art of painting over texture empowers you to work smarter—not harder. Armed with the right tools, patience, and attention to detail, you can turn bumpy, outdated walls into a polished, inviting backdrop for your life.


 浙公网安备
33010002000092号
浙公网安备
33010002000092号 浙B2-20120091-4
Comments
No comments yet. Why don't you start the discussion?