
Painting walls is one of the most cost-effective ways to transform a room. But nothing ruins the look faster than visible roller marks—streaks, lap lines, or textured patches that make a wall appear uneven and amateurish. The good news? With the right tools, materials, and method, you can achieve a perfectly smooth finish that looks professionally done, even if it’s your first time holding a paint roller.
The key isn’t just in the paint or the roller—it’s in the technique. Professional painters don’t rely on magic; they use repeatable processes that eliminate flaws. This guide breaks down those methods into simple, actionable steps so you can paint with confidence and precision.
Why Roller Marks Happen (And How to Prevent Them)
Roller marks occur when paint dries too quickly before it can level out, or when inconsistent pressure, overlapping strokes, or improper tools create texture variations. Common causes include:
- Using low-quality rollers that shed fibers or hold too much paint
- Applying paint too thickly in some areas and too thinly in others
- Not maintaining a wet edge, leading to lap marks
- Using the wrong nap thickness for your wall surface
- Rushing through sections without proper blending
Understanding these root causes allows you to adjust your approach. Prevention starts before the first roll of paint hits the wall.
Choosing the Right Tools and Materials
Professional results begin with professional-grade supplies. Investing in quality tools pays off in both ease of application and final appearance.
1. Select the Correct Roller Nap
The “nap” refers to the thickness of the roller cover’s fabric. Choosing the right one depends on your wall’s texture:
| Wall Surface | Recommended Nap Thickness | Why It Matters |
|---|---|---|
| Smooth drywall | 1/4 inch or 3/8 inch | Minimizes texture and prevents excess paint buildup |
| Slightly textured | 1/2 inch | Balances coverage and smoothness |
| Heavily textured or stucco | 3/4 inch or thicker | Reaches into crevices without leaving voids |
For most interior walls, a high-quality microfiber or lambswool roller cover with a 3/8-inch nap delivers the smoothest finish.
2. Use a Quality Roller Frame and Tray
A sturdy roller frame with sealed bearings ensures even rotation and reduces splatter. Pair it with a stainless steel or reusable plastic tray that allows for controlled loading of paint.
3. Pick the Right Paint Sheen and Type
Flat and matte finishes hide imperfections well but are harder to clean. Eggshell and satin offer a balance of durability and subtle sheen, making flaws less noticeable. For smooth results, avoid ultra-flat paints unless your walls are already flawless.
“Pros don’t skip prep, and they never underestimate the roller. A $5 roller can undo a $50 gallon of paint.” — Carlos Mendez, Master Painter & Contractor
Step-by-Step Guide to Flawless Wall Painting
Follow this proven sequence to eliminate roller marks and achieve a uniform, professional-looking finish.
- Prep the Walls Thoroughly
Clean walls with a mild detergent solution to remove dust, grease, and grime. Repair holes and cracks with spackle, then sand smooth. Wipe away sanding residue with a damp cloth. Proper prep ensures paint adheres evenly and doesn’t highlight flaws. - Tape and Protect
Use painter’s tape on baseboards, trim, windows, and ceilings. Press edges firmly to prevent bleed-through. Lay drop cloths to protect flooring. - Prime When Necessary
Apply primer to new drywall, stained areas, or patched spots. Primer creates a consistent surface for paint to bond to, reducing the risk of uneven absorption that leads to lap marks. - Cut In First with a Brush
Use a high-quality 2–3 inch angled brush to paint along edges, corners, and around fixtures. Cut in about 2–3 inches from each edge. Do not cut in an entire room at once—only prepare the section you’ll roll immediately after. - Load the Roller Correctly
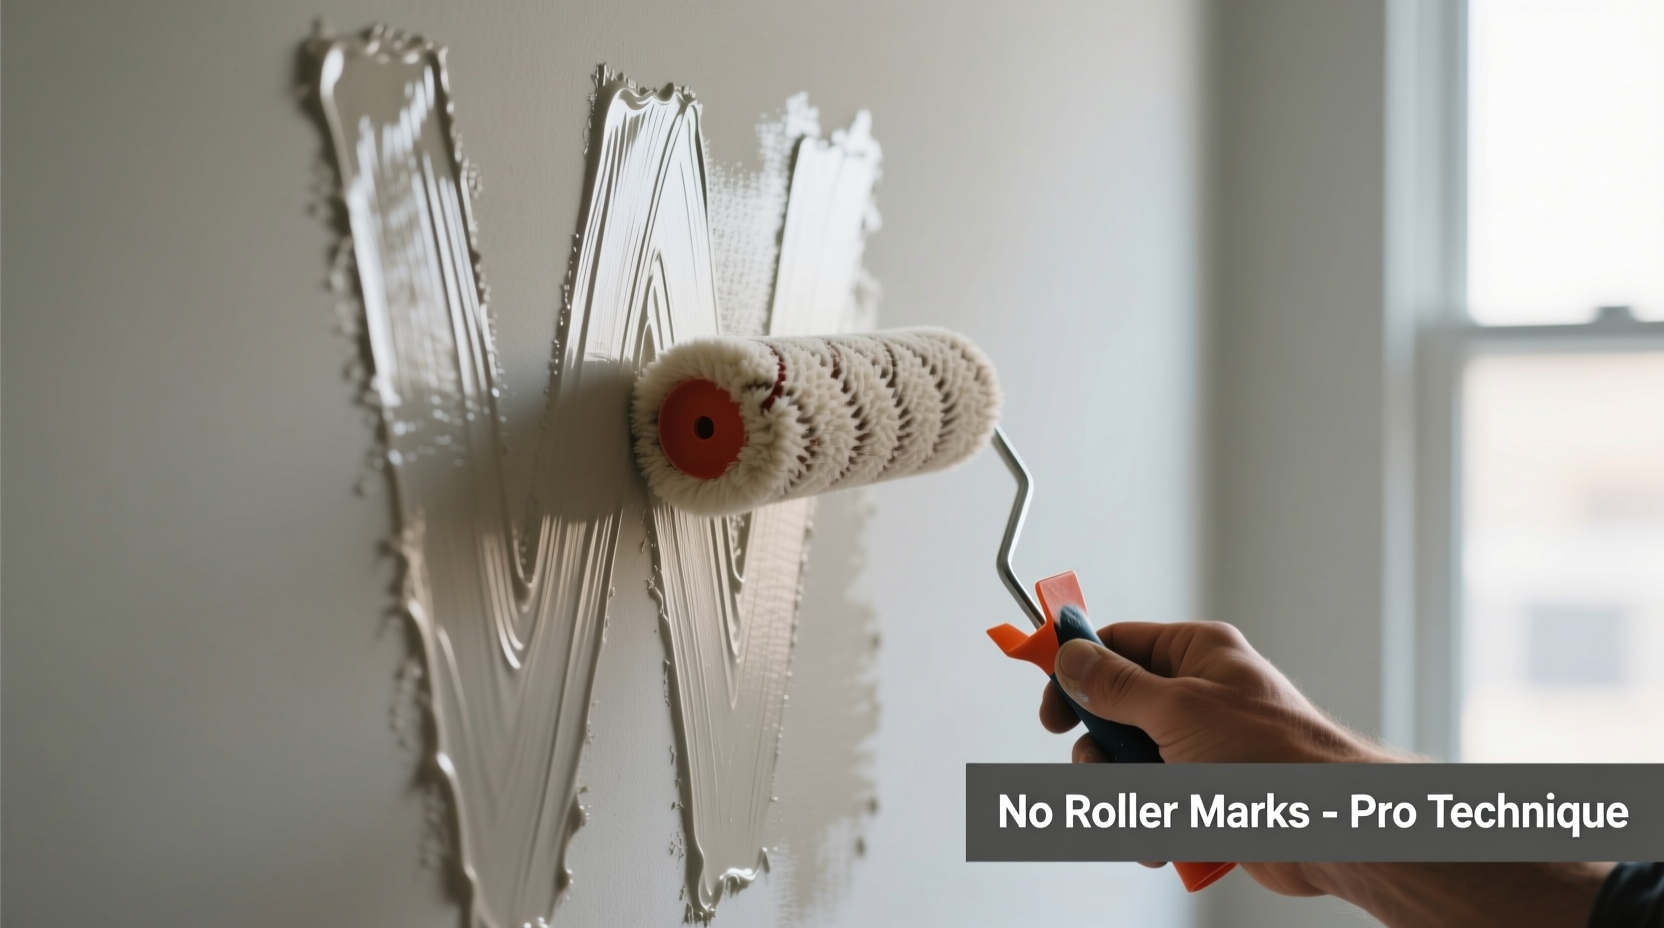
Pour paint into the tray. Roll the roller back and forth in the well, then up the ramp, applying gentle pressure. Avoid overloading—excess paint causes drips and puddling. A properly loaded roller should feel moist but not dripping. - Roll in a “W” Pattern
Start in a corner near your cut-in area. Begin by rolling a small “W” shape about 2 feet wide. Then fill in the center without lifting the roller. This distributes paint evenly and avoids heavy buildup at the start. - Maintain a Wet Edge
This is critical. Never let a painted section dry before blending into it. Work in manageable sections—about 3x3 feet at a time. Overlap each new stroke slightly into the previous wet area, using light, even pressure to feather the edge seamlessly. - Use Light Pressure and Multiple Thin Coats
Pressing too hard forces excess paint into the roller’s core and leaves ridges. Let the roller do the work. Apply two thin coats instead of one thick one. Allow the first coat to dry completely (usually 2–4 hours) before applying the second. - Finish with a Dry Roll (Optional but Effective)
After applying a section, go back over it with a clean, dry roller using very light pressure. This helps flatten any minor stipple and evens out the texture. Do this only if your paint is still workable—not tacky. - Clean Up Immediately
Remove tape while the paint is still slightly tacky (not fully cured) to avoid peeling. Clean brushes and rollers according to manufacturer instructions.
Common Mistakes That Lead to Roller Marks
Even experienced DIYers fall into traps that compromise their finish. Avoid these pitfalls:
- Skipping the primer on porous surfaces – New drywall or patchwork absorbs paint unevenly, creating dark spots and lap lines.
- Using a worn-out or cheap roller – Low-cost rollers leave lint, apply paint inconsistently, and develop flat spots.
- Painting in direct sunlight or hot rooms – Heat accelerates drying, reducing your window to blend edges.
- Rolling over dry sections – Going back into dried paint creates visible overlaps and texture differences.
- Changing roller types mid-wall – Even slight differences in nap or brand affect finish texture.
Real-World Example: Fixing a Problem Wall
Sarah had repainted her living room using a budget roller and eggshell paint. After the first coat, she noticed distinct horizontal streaks and darker patches near the ceiling. Frustrated, she consulted a local painting contractor who diagnosed the issue: she’d used a 3/4-inch nap roller on smooth drywall, overloaded the roller, and didn’t maintain a wet edge.
The fix? He advised her to sand the wall lightly, switch to a 3/8-inch microfiber roller, and repaint using the “W” method with thinner coats. She also adjusted her schedule to paint in the morning when the room was cooler. The second attempt resulted in a seamless, smooth finish that looked like it was sprayed.
This case shows that technique often matters more than talent. With the right adjustments, anyone can correct mistakes and achieve pro-level results.
Checklist for Mark-Free Painting
Use this checklist before and during your project to ensure success:
- ✅ Inspect walls and repair damage
- ✅ Clean surfaces and let dry completely
- ✅ Prime bare patches or new drywall
- ✅ Choose the correct roller nap for your wall type
- ✅ Use high-quality paint and tools
- ✅ Cut in edges just before rolling each section
- ✅ Work in small, manageable sections (3x3 ft)
- ✅ Maintain a wet edge at all times
- ✅ Apply two thin coats instead of one thick one
- ✅ Let paint dry fully between coats
- ✅ Remove tape at the right time (when slightly tacky)
Frequently Asked Questions
Can I use a paint sprayer to avoid roller marks entirely?
Yes, sprayers provide the smoothest finish and eliminate roller texture altogether. However, they require more prep (masking everything), skill to operate evenly, and cleanup effort. For most homeowners, mastering the roller technique is faster and more practical for interior walls.
Why does my second coat still show roller marks?
If marks persist after the second coat, the issue may be tool-related or technique-based. Check that you’re using the same roller type and pressure throughout. Also, ensure the first coat was fully dry before applying the second. Sometimes, excessive rolling over semi-dry paint disturbs the film and creates texture.
Is there a way to fix roller marks after the paint has dried?
Minor marks can be reduced by lightly sanding with 220-grit sandpaper, then applying another thin coat. For severe texture, spot-prime the area, sand smooth, and repaint the entire wall section to maintain consistency. Blending into adjacent areas is easier when the whole wall is freshly painted.
Final Tips for a Seamless Finish
Achieving a mark-free wall isn’t about speed—it’s about patience and precision. Work slowly, focus on overlap and even pressure, and resist the urge to rush. Keep your tools clean and consistent. And remember: lighting reveals everything. Once the paint dries, view the wall under natural and artificial light to catch any inconsistencies.
Consistency across all walls in a room is just as important as perfection on a single surface. Use the same roller, paint batch, and technique from start to finish. If you need to stop mid-wall, do so at a corner or natural break, and resume with a fresh wet edge blended carefully into the existing paint.
“The difference between a DIY job and a pro job isn’t the paint—it’s the process.” — Lena Patel, Interior Painting Specialist
Conclusion: Paint Like a Pro, One Smooth Wall at a Time
You don’t need years of experience to paint walls without roller marks. You need the right knowledge, the right tools, and the discipline to follow a reliable method. By understanding how paint behaves, selecting appropriate materials, and applying paint in thin, overlapping sections while maintaining a wet edge, you can achieve results that rival those of seasoned professionals.
Next time you pick up a roller, remember: smooth walls aren’t magic—they’re method. Take your time, trust the process, and enjoy the transformation a flawless finish brings to your space.


 浙公网安备
33010002000092号
浙公网安备
33010002000092号 浙B2-20120091-4
Comments
No comments yet. Why don't you start the discussion?