
Reverse image search is a powerful tool that allows you to find the source of an image, discover similar visuals, or uncover where else a photo has appeared online. On an iPhone, performing a reverse image search via Google is straightforward once you know the correct method—though Apple’s native integration doesn’t make it as obvious as on desktop. Whether you're verifying authenticity, tracking down high-resolution versions, or identifying unknown objects, this guide walks through every practical way to use Google’s reverse image search directly from your iPhone.
Why Use Reverse Image Search?
Reverse image search goes beyond simple curiosity. It's used by journalists to verify photos, shoppers to find products, students to source academic images, and travelers to identify landmarks. The ability to upload or reference an image and receive contextual results opens up a new dimension of digital investigation.
Google Images remains one of the most accurate platforms for reverse searches due to its vast index and advanced visual recognition algorithms. While Safari and iOS don't have a built-in “Search Image” right-click option like desktop browsers, there are multiple workarounds that deliver the same outcome efficiently.
Step-by-Step Guide: Reverse Image Search Using Google in Safari
The most reliable method uses Google’s mobile website through Safari. Follow these steps carefully:
- Open Safari and go to images.google.com.
- Tap the AA icon in the address bar and select Request Desktop Website. This enables full functionality.
- Once the desktop version loads, tap the camera icon inside the search bar.
- You’ll see two options: paste an image URL or upload an image from your device.
- If searching from your photo library, tap Upload an image, then choose the photo.
- Wait for Google to process the image. Results will include visually similar images, websites where the image appears, and related information.
This method works whether the image is stored locally, shared via Messages, or saved from social media. For screenshots or downloaded images, they must first be saved to your Photos app before uploading.
“Reverse image search is increasingly vital in combating misinformation. A single verification can prevent the spread of false narratives.” — Dr. Lena Patel, Digital Literacy Researcher at Stanford University
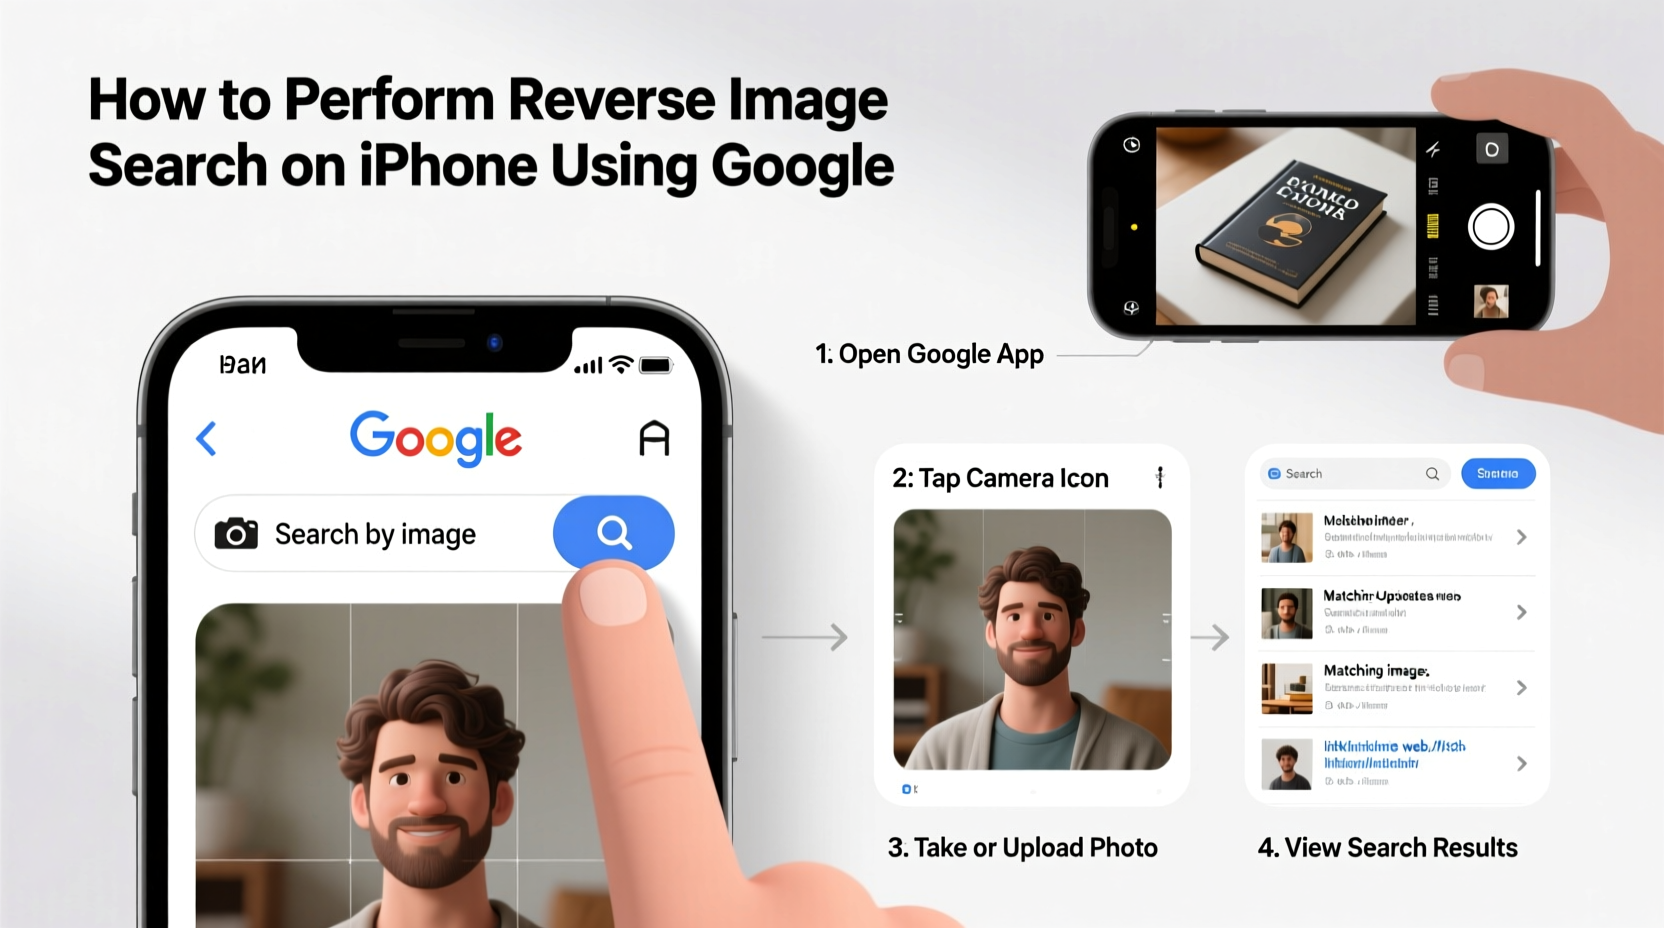
Alternative Method: Using the Google App
If you prefer not to switch browser modes, the Google app offers a streamlined alternative:
- Install or open the Google app from the App Store.
- Tap the search bar and then the camera icon to the right.
- You can now either take a new photo or select one from your gallery.
- Choose an image from your library, and Google Lens will analyze it instantly.
- Scroll down to the Pages that include this image section for reverse search results.
This method leverages Google Lens technology, which combines optical character recognition and image matching. While primarily designed for object identification, it often surfaces reverse search data when relevant.
When Reverse Image Search Fails: Troubleshooting Tips
Sometimes, results may be limited or irrelevant. Consider these factors:
| Issue | Possible Cause | Solution |
|---|---|---|
| No results found | Image is too obscure or recently created | Try cropping to key elements or searching by description |
| Irrelevant matches | Low resolution or cluttered background | Use Google Lens to isolate the subject first |
| Can’t upload image | Desktop mode not enabled | Ensure “Request Desktop Website” is toggled on in Safari |
| Blurry preview after upload | Compression during upload | Re-upload a higher-quality version if available |
Also, avoid using heavily edited or filtered images. Filters, overlays, and watermarks can interfere with pattern recognition, reducing match accuracy.
Real-World Example: Identifying a Vintage Dress Online
Sophia received a vintage dress as a gift but couldn’t find details about its origin. She took a clear photo and followed the Safari desktop method. After uploading the image, Google returned several e-commerce listings and a fashion blog post from the 1980s featuring the same design. By tracing one of the links, she discovered the original designer and learned how to properly care for the fabric. This not only satisfied her curiosity but helped preserve the garment.
In another case, a student used reverse search to verify a historical photo cited in a research paper. The image was attributed to World War II, but reverse results showed it was actually from a reenactment event in 2015. This prevented unintentional misrepresentation in their work.
Best Practices Checklist
To maximize success when performing reverse image searches on your iPhone:
- ✅ Save the image to your Photos app before attempting upload
- ✅ Use Safari and enable “Request Desktop Website”
- ✅ Crop unnecessary background elements for clearer results
- ✅ Try both Google Images (via browser) and the Google app for cross-verification
- ✅ Check multiple result pages—sometimes relevant matches appear beyond the first few
- ✅ Avoid screenshots with UI elements (like app borders or notifications)
- ✅ Be patient; complex images may take longer to process
Frequently Asked Questions
Can I reverse search an image from WhatsApp or Instagram on iPhone?
Yes. First save the image to your camera roll by long-pressing it and selecting “Save Image.” Then follow the standard upload process via Google Images in Safari or the Google app.
Is reverse image search private? Will the photo be stored?
Google temporarily processes the image to generate results. Uploaded images are not permanently stored or associated with your account unless you’re signed into services like Google Photos. However, avoid uploading sensitive personal photos like IDs or private family moments.
Does reverse image search work for faces?
It can, but with limitations. Google restricts facial recognition in public search to protect privacy. You may find publicly posted versions of a face (e.g., celebrities), but it won’t identify unknown individuals. For personal use, consider dedicated people-search tools instead.
Conclusion: Take Control of Visual Information
Knowing how to perform a reverse image search on your iPhone empowers you to navigate the digital world more critically and effectively. From verifying facts to rediscovering lost details, this skill bridges the gap between passive viewing and active understanding. With just a few taps, you transform a static photo into a gateway for discovery.


 浙公网安备
33010002000092号
浙公网安备
33010002000092号 浙B2-20120091-4
Comments
No comments yet. Why don't you start the discussion?