
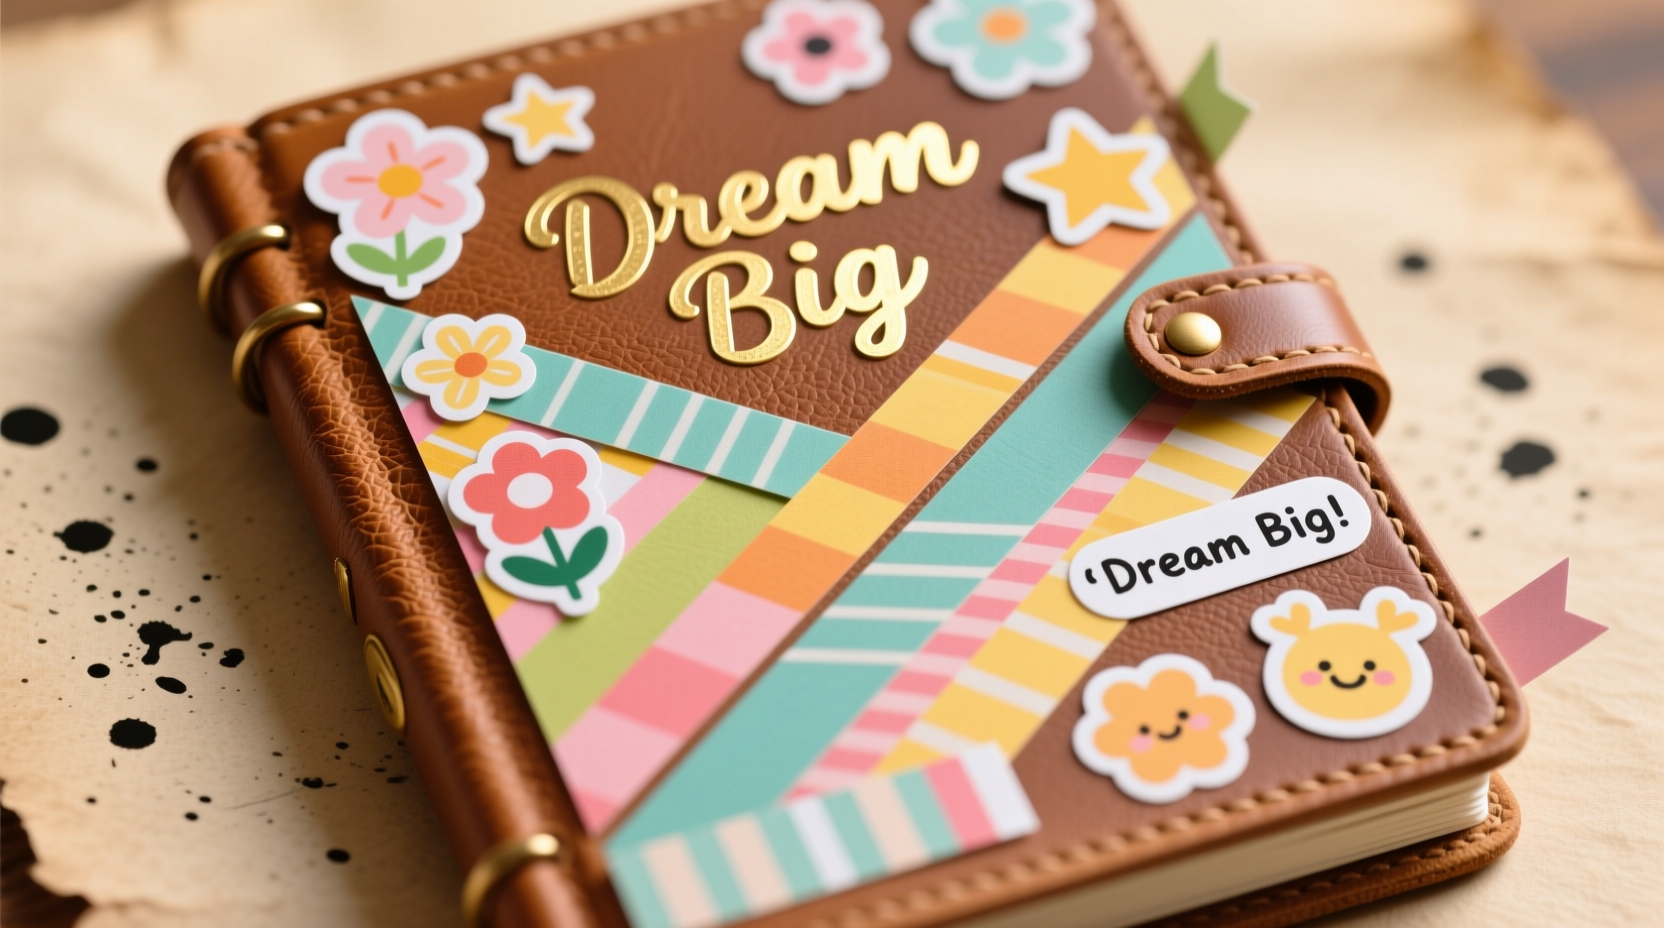
Personalizing a journal cover transforms an ordinary notebook into a meaningful extension of your personality. Whether it's a daily planner, bullet journal, or creative sketchbook, customizing its exterior with washi tape and stickers adds both visual appeal and emotional connection. These simple materials—lightweight, repositionable, and endlessly versatile—allow for experimentation without permanent commitment. With thoughtful design choices, you can create a cover that reflects your mood, interests, or seasonal inspiration while protecting the surface from wear.
Unlike paint or permanent adhesives, washi tape and stickers offer flexibility. If you change your mind, you can remove or rearrange them easily. This makes them ideal for beginners and seasoned crafters alike. More than just decoration, personalized covers encourage consistent journaling by making the act feel more intentional and enjoyable.
Selecting the Right Materials
The foundation of a successful customization lies in choosing quality supplies. Not all washi tapes and stickers perform equally, especially when applied to book covers that are frequently handled.
- Washi Tape: Opt for Japanese-made tapes, which tend to be more durable and less prone to fraying. Look for widths between 0.5 and 2 cm for versatility. Pattern variety is vast—florals, geometric shapes, quotes, and minimalist lines—but consider balance. Mixing bold prints with solid colors prevents visual clutter.
- Stickers: Choose vinyl or laminated paper stickers for longevity. They resist smudging and peeling better than standard paper stickers. Themed sticker sets (travel, seasons, hobbies) help maintain a cohesive look. Clear outline stickers work well as accents without overwhelming the design.
- Journals: Covers made of cardstock, kraft paper, or fabric respond best to adhesive embellishments. Avoid heavily textured or glossy surfaces, which may reduce adhesion.
Step-by-Step Guide to Customization
Creating a polished, personalized cover doesn't require artistic expertise—just patience and planning. Follow this sequence to achieve professional-looking results.
- Clean the Surface: Wipe the journal cover with a dry microfiber cloth to remove dust and oils. A clean base ensures better adhesion.
- Plan Your Layout: Before applying anything, lay out your washi tape strips and stickers on the cover to experiment with composition. Take a photo with your phone to remember promising arrangements.
- Apply Washi Tape Borders: Start with edges. Use horizontal or vertical bands along the spine, top, or bottom for framing. Overlap corners neatly by folding tape like gift wrap for a seamless finish.
- Create Patterns: Crisscross tapes diagonally for dynamic movement, or layer parallel strips with slight spacing for rhythm. Leave negative space to avoid overcrowding.
- Place Stickers Strategically: Position larger stickers as focal points—near corners or centered. Use smaller ones to fill gaps or highlight tape intersections. Avoid placing stickers over tape seams to prevent lifting.
- Seal (Optional): For extra durability, apply a thin layer of clear Mod Podge or decoupage glue over the entire design. Let dry completely before use.
Timeline for Best Results
| Step | Time Required | Notes |
|---|---|---|
| Surface Prep | 2–3 minutes | Dry thoroughly before proceeding |
| Layout Planning | 10–15 minutes | Take photos of different options |
| Tape Application | 15–20 minutes | Work slowly to avoid bubbles |
| Sticker Placement | 10 minutes | Press firmly after placement |
| Finishing/Sealing | 20–30 minutes | Allow full drying time |
Design Principles for Cohesive Style
A visually appealing cover balances creativity with clarity. Consider these principles to elevate your design beyond random placement.
- Color Harmony: Stick to a palette of 3–4 complementary colors. For example, pair pastel pinks with mint green and gold foil accents for a soft aesthetic. Use a color wheel to identify analogous or complementary schemes.
- Visual Hierarchy: Establish a focal point—such as a large floral sticker or a title made from letter stickers—and build around it. Surrounding elements should guide the eye toward this center.
- Rhythm and Repetition: Repeat a motif (e.g., tiny stars or arrows) at regular intervals to create flow. This unifies disparate elements and gives structure.
- Balance: Distribute visual weight evenly. If you place a cluster of stickers in one corner, counter it with a wide washi band on the opposite side.
“Design isn’t about filling every inch—it’s about knowing where to let the eye rest.” — Lena Torres, Paper Craft Designer and Educator
Common Mistakes and How to Avoid Them
Even simple projects can go awry without awareness of common pitfalls. Learn from others’ errors to save time and materials.
| Mistake | Why It Happens | Solution |
|---|---|---|
| Tape peeling at corners | Poor adhesion or sharp bends | Fold tape like a present corner; press firmly with fingernail |
| Stickers lifting over time | Applied over uneven surfaces or dust | Clean surface thoroughly; apply directly to journal, not tape |
| Overcrowded design | Too many patterns competing | Use the “rule of three”—limit dominant elements to three per cover |
| Residue upon removal | Low-quality adhesive or prolonged exposure | Choose reputable brands; avoid leaving designs longer than 6 months |
Mini Case Study: Reviving a Dated Journal
Sophie, a college student, had a plain black notebook she used for lecture notes. After two semesters, it looked worn and uninspiring. She decided to refresh it before her final year. Using navy, coral, and cream washi tapes, she created diagonal stripes across the front, anchoring them with a central circular sticker that read “Semester Goals.” She added small motivational stickers—like clocks, lightbulbs, and checkmarks—near the spine. The result transformed the journal into something she was excited to carry. More importantly, she reported feeling more motivated to keep up with note-taking and goal tracking simply because interacting with the journal felt more personal and intentional.
Checklist: Personalize Your Journal Cover in One Sitting
Follow this concise checklist to complete your project efficiently and effectively.
- ☐ Gather your journal, washi tapes, stickers, scissors, and ruler
- ☐ Clean the cover surface with a lint-free cloth
- ☐ Lay out design elements without sticking them down
- ☐ Capture layout ideas with your phone camera
- ☐ Apply washi tape starting from edges or borders
- ☐ Press down firmly with fingers or a flat tool
- ☐ Place stickers, beginning with largest or most central
- ☐ Step back and assess balance and spacing
- ☐ Seal with decoupage medium if desired
- ☐ Let dry completely before using the journal
Frequently Asked Questions
Can I remove washi tape later without damaging the cover?
Yes, high-quality washi tape is designed to be removable. Gently peel from a corner at a 45-degree angle. Residue is rare but can be wiped with a slightly damp cloth if needed. Avoid leaving tape on for more than several months, especially in warm environments.
What if my stickers start curling at the edges?
Curling usually occurs due to humidity or weak adhesive. To fix it, gently lift the edge, apply a tiny drop of glue stick or double-sided tape underneath, then press flat. For prevention, choose thicker, laminated stickers and store journals in dry conditions.
Can I combine markers or drawings with washi tape and stickers?
Absolutely. Hand-drawn doodles, titles, or borders complement adhesive elements beautifully. Write or draw first, then add tape and stickers around your artwork. If writing over tape, use gel pens or fine liners that won’t bleed.
Advanced Techniques for Seasonal Updates
Your journal doesn’t need a single permanent design. Embrace change by rotating themes seasonally or with life phases.
- Seasonal Swaps: Create interchangeable panels using index cards or thick paper trimmed to fit the cover. Decorate each with themed tape and stickers (pumpkins for fall, snowflakes for winter). Slide them inside a transparent cover or secure lightly with clips.
- Modular Design: Divide the cover into zones—left third for tape patterns, center for a rotating sticker message, right for doodles. Change only one section at a time to refresh the look quickly.
- Interactive Elements: Add flaps made from folded washi tape rectangles. Underneath, place a hidden quote or date. Lift to reveal—a playful detail that enhances engagement.
Conclusion: Make It Yours, Then Use It Fully
Personalizing a journal cover with washi tape and stickers is more than a craft—it’s an invitation to engage deeply with your thoughts, goals, and creativity. A beautiful cover doesn’t exist to sit on a shelf; it exists to be opened, written in, and lived with. When you take pride in your journal’s appearance, you’re more likely to reach for it during quiet mornings, brainstorming sessions, or moments of reflection.
Don’t wait for the “perfect” moment or the “right” supplies. Start with what you have. Experiment boldly. Even a simple strip of tape and one meaningful sticker can shift your relationship with the notebook. Over time, your journal will become a visual timeline of evolving tastes, moods, and milestones.


 浙公网安备
33010002000092号
浙公网安备
33010002000092号 浙B2-20120091-4
Comments
No comments yet. Why don't you start the discussion?