
Reusable grocery bags are more than just eco-friendly carriers—they’re an extension of personal style. While many come in plain colors or basic designs, customizing them with iron on patches offers a quick, creative way to transform a utilitarian item into a statement piece. Whether you want to express your personality, commemorate a trip, or simply cover a stain, iron on patches provide a no-sew solution that’s accessible to crafters of all skill levels. With the right materials and technique, your bag can become a unique canvas that reflects your identity while still serving its practical purpose.
Choosing the Right Bag for Patch Application
Not all reusable bags respond equally well to heat-based customization. The success of your iron on patch depends largely on the fabric composition of the bag. Most reusable grocery bags are made from cotton, polyester, polypropylene, canvas, or a blend. Each material reacts differently to heat, so selecting a compatible base is crucial.
Cotton and canvas bags are ideal candidates. They withstand high heat without melting and absorb adhesive evenly, ensuring strong patch adhesion. Polyester and polypropylene, commonly found in lightweight foldable bags, are more sensitive to heat. Excessive temperature can cause these synthetic fibers to warp, shrink, or even melt—ruining both the patch and the bag.
If your favorite lightweight bag is made from synthetic material, consider using fabric glue instead of heat application, or choose a cotton-blend tote specifically for iron-on projects. Look for bags labeled as “100% cotton” or “heavy-duty canvas” at grocery stores, thrift shops, or online retailers. These not only accept patches better but also offer a sturdier surface for detailed designs.
Materials and Tools You’ll Need
Personalizing your bag doesn’t require advanced crafting skills or expensive equipment. Most of what you need can be found at local craft stores or already exists in your home. Here’s a complete list of essentials:
- Iron on patches – Choose designs that resonate with your style: floral motifs, animals, travel icons, or humorous slogans.
- A clean cotton or canvas reusable bag – Ensure it’s washed and completely dry before starting.
- An iron – A standard household iron with adjustable temperature settings works best.
- Ironing board or heat-resistant surface – Provides a stable, flat platform for even pressure.
- Parchment paper or thin cotton cloth – Acts as a protective barrier between the iron and patch.
- Tape or pins – To temporarily secure the patch in place before ironing.
- Measuring tape or ruler – For precise placement, especially when using multiple patches.
Optional additions include a seam ripper (to remove unwanted logos), fabric marker (for sketching layout ideas), and a pressing cloth (a thin cotton square used in professional garment care).
Do’s and Don’ts When Selecting Materials
| Do’s | Don’ts |
|---|---|
| Use 100% cotton or canvas bags for best results | Apply patches to wet or damp fabric |
| Select patches with heat-activated adhesive backing | Use steam setting during ironing unless specified by patch instructions |
| Pre-wash the bag to remove sizing or residue | Iron directly on the patch without a protective layer |
| Test iron temperature on a hidden area first | Place patches near seams or folds where stress may weaken adhesion |
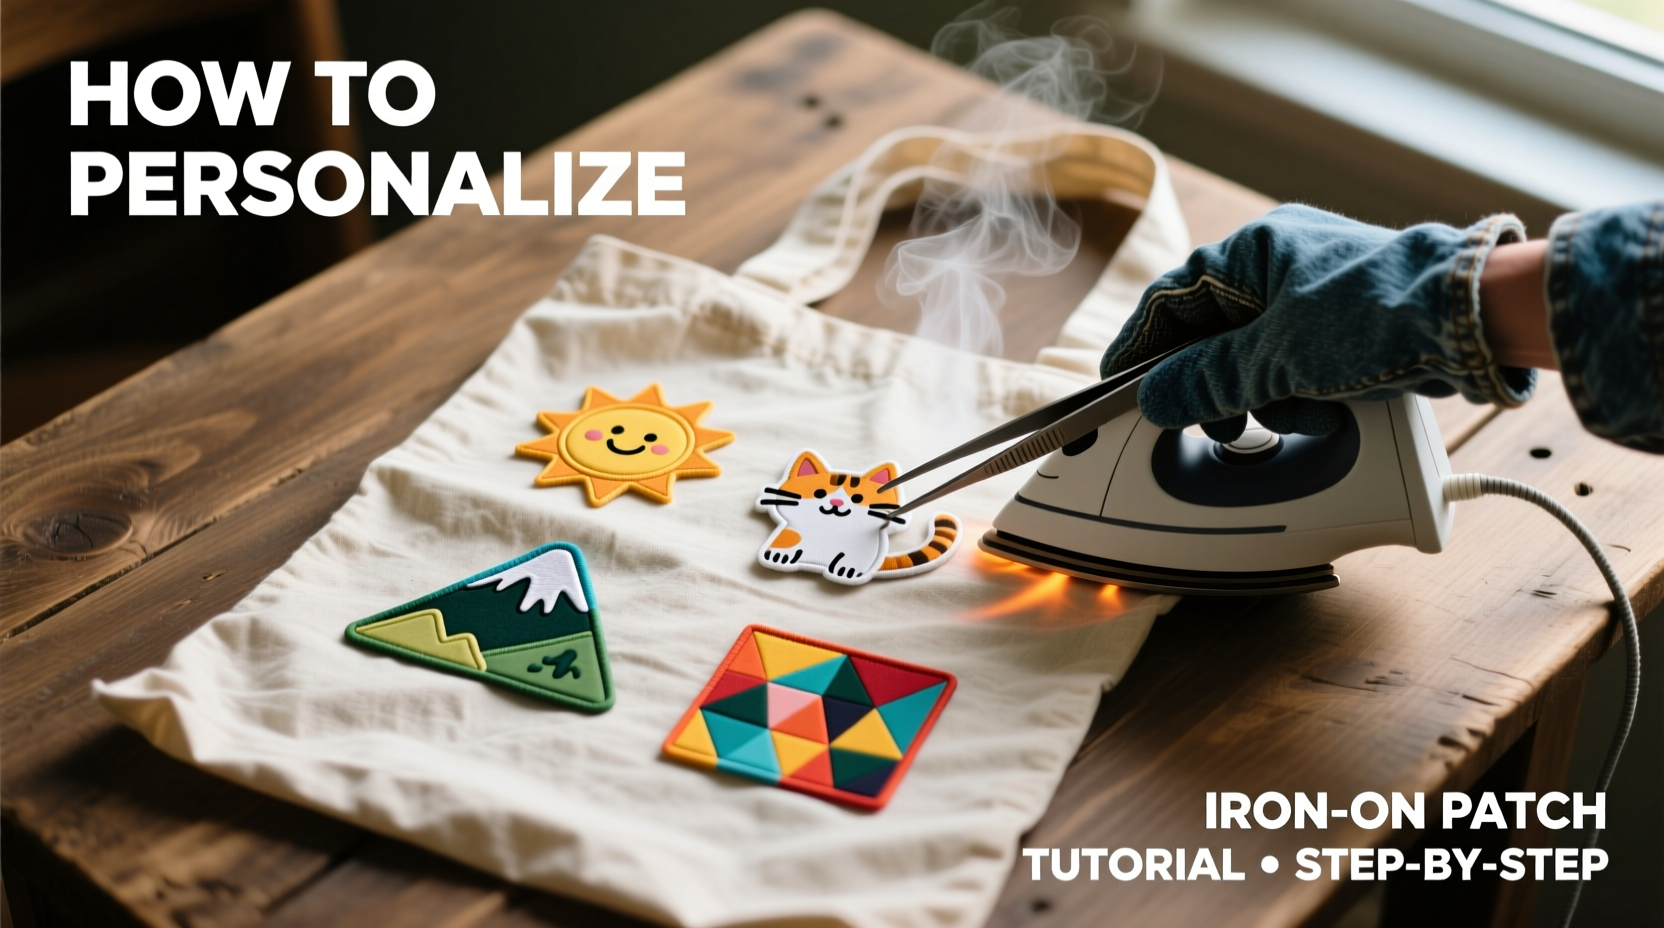
Step-by-Step Guide to Applying Iron On Patches
Applying an iron on patch correctly ensures durability through repeated use and washing. Follow this detailed sequence for optimal results:
- Wash and dry the bag. This removes any manufacturing residues or oils that could interfere with adhesion. Use mild detergent and air-dry or tumble dry on low.
- Choose your design placement. Lay the bag flat and decide where you want the patch. Popular spots include the front center panel, lower corner, or along the side seam. Use a fabric marker or removable tape to outline the position.
- Preheat the iron. Set it to the cotton/linen setting (around 375°F / 190°C). Avoid steam unless the patch manufacturer specifically recommends it.
- Position the patch. Peel off any backing (if applicable) and place the patch adhesive-side down. Secure it with masking tape or pins to prevent shifting.
- Protect the patch. Cover it with parchment paper or a thin cotton cloth. This prevents direct contact with the iron and helps distribute heat evenly.
- Apply heat and pressure. Press the iron firmly over the patch for 20–30 seconds. Move the iron in small circles to ensure full coverage, especially around edges.
- Cool completely. Let the patch sit undisturbed for at least two minutes. This allows the adhesive to set properly.
- Peel off the protective layer (if needed). Some patches have a clear film that must be removed after cooling.
- Reinforce if necessary. For extra durability, flip the bag inside out and apply heat to the backside of the patch area for 15–20 seconds.
- Wait before use. Allow 24 hours before carrying groceries to ensure maximum bond strength.
Ensuring Longevity and Durability
A well-applied patch should last through dozens of shopping trips, but proper care extends its lifespan. Over time, repeated folding, heavy loads, and washing can weaken the bond. To preserve your customized bag:
- Turn the bag inside out before machine washing to protect the patch.
- Use cold water and a gentle cycle. High temperatures can degrade adhesive over time.
- Air dry whenever possible. Tumble drying generates excessive heat and friction.
- Avoid overloading the bag, especially near the patched area, to reduce strain.
- Store the bag unfolded in a drawer or on a shelf to prevent creasing over the patch.
“Patches applied with proper heat and allowed to cure fully can last longer than screen-printed designs, especially on natural fiber bags.” — Lena Torres, Textile Designer and Sustainable Fashion Educator
For added security, some crafters reinforce patches with a few discreet stitches around the edge using a matching thread. While not required, this hybrid method combines the speed of iron-on application with the resilience of sewing—ideal for bags used frequently or carried heavily.
Real-Life Example: Transforming a Bland Bag into a Conversation Starter
Sophie, a teacher from Portland, Oregon, collects souvenirs from her weekend farmers market visits. She noticed her plain blue canvas bag looked identical to several others in the checkout line. Wanting to make hers stand out—and avoid mix-ups—she purchased a set of iron on patches featuring local produce: strawberries, kale, and heirloom tomatoes.
Using a household iron and parchment paper, she arranged the patches diagonally across the front panel. After following the heating instructions carefully, the patches adhered smoothly. Within days, fellow shoppers began complimenting her bag. One vendor even recognized the tomato design as his farm’s logo and offered her a discount.
What started as a simple identification tactic turned into a joyful ritual. Now, Sophie adds a new patch each season—a pumpkin in autumn, a snowflake in winter—turning her grocery bag into a visual journal of her sustainable lifestyle.
Frequently Asked Questions
Can I remove an iron on patch if I change my mind?
Yes, though it requires caution. Place a cloth over the patch and apply high heat for 20–30 seconds to reactivate the adhesive. Then, gently peel it off with tweezers or a seam ripper. Residual glue can be removed with rubbing alcohol or a commercial adhesive remover. Be aware that this process may leave faint marks or discoloration on the fabric.
Are iron on patches waterproof?
Most are water-resistant but not fully waterproof. The fabric and stitching of the patch can absorb moisture if submerged. However, brief exposure to rain or spills won’t damage a properly applied patch. For outdoor use, consider sealing the edges with a fabric sealant spray.
Can I layer multiple patches on one bag?
Absolutely. Layering adds depth and creativity. Just ensure each patch is fully cooled before placing another nearby. Avoid overlapping patches directly unless they’re designed for stacking, as excess thickness can cause peeling under stress.
Design Ideas and Creative Possibilities
The appeal of iron on patches lies in their versatility. Beyond aesthetics, they can serve functional or sentimental purposes:
- Brand replacement: Cover old logos or stains with bold, artistic patches.
- Themed bags: Create seasonal totes—butterflies for spring, sunflowers for summer.
- Educational tools: Parents can add alphabet or animal patches for young children learning to identify objects.
- Gift personalization: Customize a bag with a friend’s favorite band, quote, or hobby and present it as a thoughtful handmade gift.
- Activism and awareness: Promote causes like ocean conservation or mental health with symbolic patches.
Consider symmetry, balance, and color harmony when planning your layout. Sketch ideas on paper first. Some prefer minimalist single-patch designs; others enjoy eclectic collages. There are no rules—only personal expression.
Final Checklist Before You Begin
- Bag is clean, dry, and made of suitable fabric (cotton/canvas preferred)
- Patches selected and backing removed (if applicable)
- Iron set to correct temperature (no steam)
- Parchment paper or pressing cloth ready
- Placement marked and secured with tape
- Work area is flat, stable, and heat-safe
- You’ve tested heat on a hidden spot
Conclusion: Make Your Mark, One Bag at a Time
Personalizing a reusable grocery bag with iron on patches is more than a craft project—it’s a small act of sustainability with a personal touch. In a world of mass-produced goods, taking the time to customize an everyday item fosters connection, creativity, and pride in ownership. These bags accompany us through errands, adventures, and routines; they deserve to reflect who we are.
With minimal effort and inexpensive supplies, you can turn a generic tote into something meaningful and memorable. Whether you're covering a flaw, supporting a cause, or just having fun, the process is accessible, rewarding, and environmentally sound. So gather your patches, fire up the iron, and start transforming your reusable bags today. Your next shopping trip might just spark a conversation—or inspire someone else to personalize theirs.


 浙公网安备
33010002000092号
浙公网安备
33010002000092号 浙B2-20120091-4
Comments
No comments yet. Why don't you start the discussion?