
A sketchbook is more than just a collection of blank pages—it’s a vessel for imagination, memory, and expression. When given as a gift, especially one that has been thoughtfully personalized, it transforms from a simple notebook into a cherished keepsake. Unlike mass-produced presents, a hand-customized sketchbook reflects time, care, and emotional investment. Whether the recipient is an artist, a writer, or someone who simply enjoys jotting down ideas, a personalized sketchbook speaks directly to their identity. The act of personalization turns the gift into a conversation—between giver and receiver, between creativity and intention.
Personalizing a sketchbook doesn’t require advanced artistic skills or expensive materials. What matters most is authenticity. A few carefully chosen elements—a favorite quote, a painted cover, a hidden message inside the back cover—can elevate a standard sketchbook into something deeply meaningful. This guide explores practical, creative, and emotionally resonant ways to craft a one-of-a-kind gift that honors the person receiving it.
Selecting the Right Sketchbook Foundation
The first step in creating a personalized sketchbook is choosing the right base. Not all sketchbooks are created equal, and your selection should align with the recipient’s habits and preferences. Consider the paper weight, binding style, size, and texture. For instance, someone who works primarily with ink might prefer a smooth, heavyweight paper (160–200 gsm) to prevent bleed-through. A watercolor artist will benefit from cold-pressed, textured paper designed to absorb moisture without warping.
Binding also plays a role. Spiral-bound books lay flat when open, making them ideal for drawing or writing across both pages. Hardcover sketchbooks offer durability and a premium feel, while softcover versions are lightweight and portable. Size is another consideration: A pocket-sized book suits daily journaling, whereas an A4 format gives ample space for detailed illustrations.
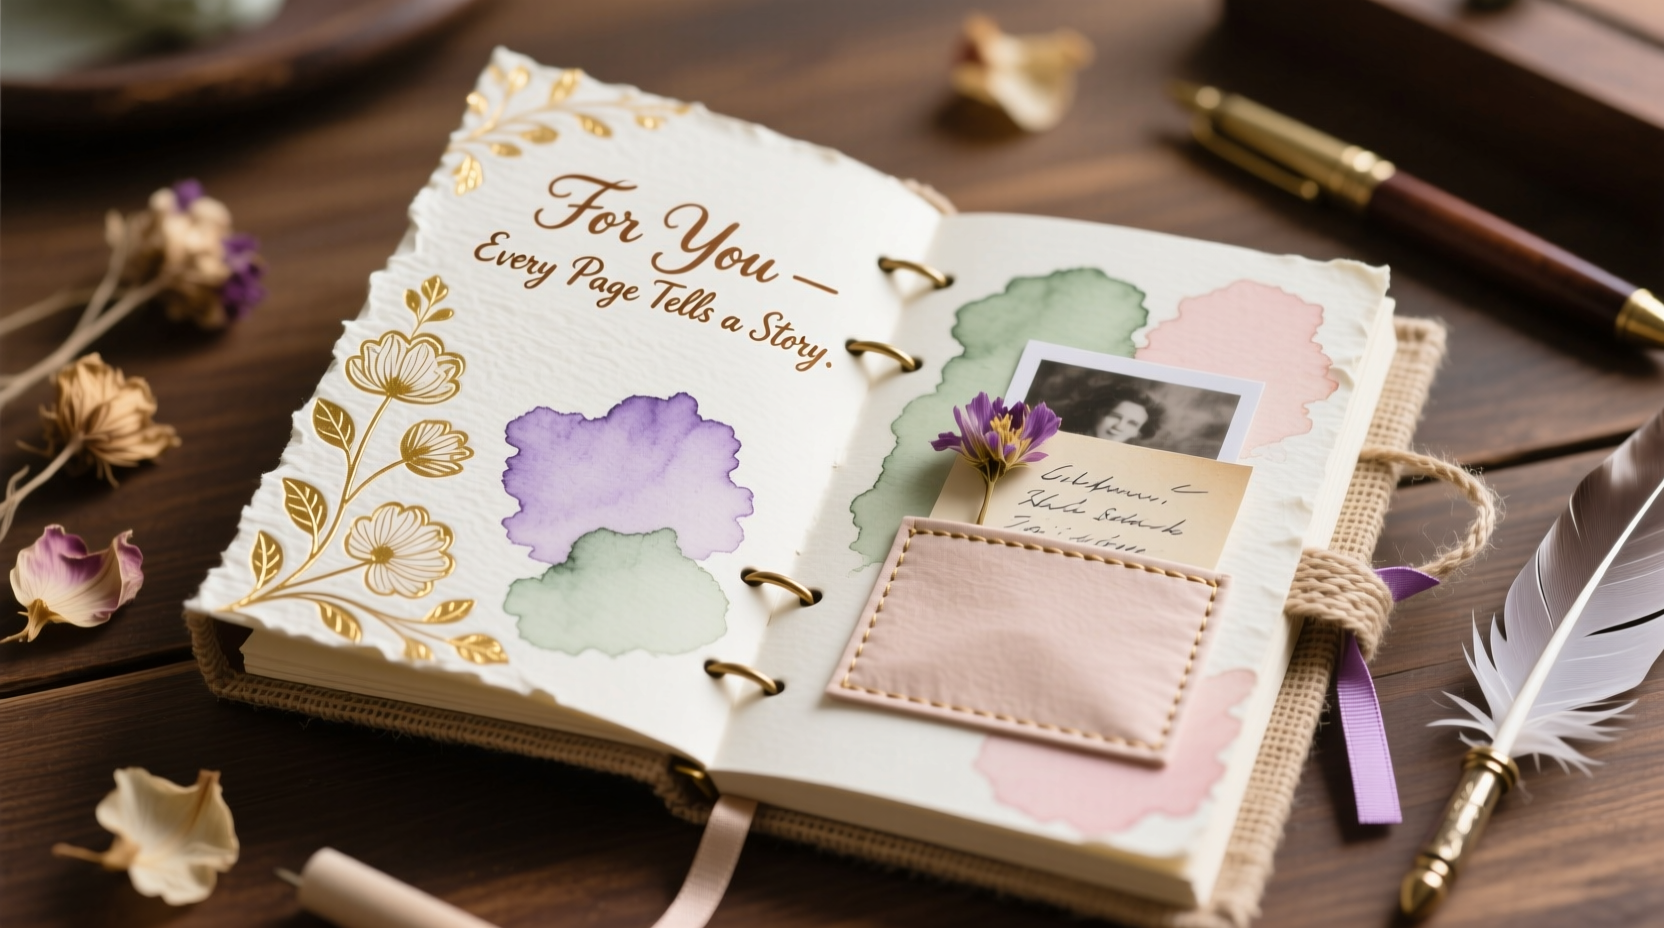
Designing a Meaningful Cover
The cover is the face of the sketchbook. It sets the tone before a single page is turned. Personalization begins here. Instead of leaving it plain, transform it into a visual representation of the recipient’s personality, interests, or shared memories.
Start by gathering inspiration. Think about their favorite colors, symbols, hobbies, or even inside jokes. If they love botany, consider painting delicate ferns or pressed flower outlines. For a music enthusiast, incorporate musical notes spelling out their name or a significant date in Morse code. You can use acrylic paints, fabric scraps, washi tape, decoupage, or even embroidery (on canvas-covered books) to add dimension.
One powerful approach is to include their name in a custom typographic style. Hand-lettering adds warmth and uniqueness. Use a pencil to lightly sketch the layout first, then trace over it with paint pens or fine liners. Let the design evolve organically—sometimes asymmetry feels more human and intimate than perfect symmetry.
“Handmade gifts carry emotional resonance because they reflect time and presence. A personalized sketchbook isn’t just useful—it’s a gesture of being seen.” — Lila Monroe, Art Therapist & Gift Design Consultant
Step-by-Step Guide to Customizing the Interior
While the exterior makes the first impression, the interior holds the potential for deeper connection. Thoughtful touches inside turn the sketchbook into a companion rather than just a tool. Follow this timeline to build layers of meaning:
- Day 1 – Plan the theme: Decide on a unifying concept—nostalgia, encouragement, nature, travel, etc. This will guide your choices in imagery and text.
- Day 2 – Decorate initial pages: Begin with the title page. Add a dedication like “For Maya – May these pages hold every idea that dares to bloom.” Include the date and your initials.
- Day 3 – Insert meaningful ephemera: Glue in small items such as ticket stubs from a concert you attended together, a pressed leaf from a memorable hike, or a snippet of fabric from an old shirt they once loved.
- Day 4 – Create interactive prompts: On random pages, leave gentle invitations: “Draw what happiness looks like today,” or “List 5 things that made you smile this week.” These encourage engagement without pressure.
- Day 5 – Add hidden messages: Tuck tiny notes behind pockets or beneath flaps. Phrases like “I believe in your vision” or “This page is yours to reinvent” can become quiet sources of strength.
- Day 6 – Finalize protection: Seal painted or glued areas with a matte varnish or Mod Podge to prevent smudging and wear.
This gradual process ensures attention to detail and allows room for reflection. Rushing diminishes the emotional weight; taking time amplifies it.
Materials and Techniques: Do’s and Don’ts
The longevity and aesthetic quality of your customization depend on using appropriate materials. Some adhesives warp paper, while certain paints crack over time. Refer to the table below for best practices.
| Material | Do’s | Don’ts |
|---|---|---|
| Acrylic Paint | Mix with gel medium for flexibility; apply thin layers | Apply thickly without priming—can cause cracking |
| Glue | Use acid-free glue sticks or PVA for paper and fabric | Use school glue—it yellows and weakens over time |
| Ink Pens | Choose archival-quality ink (e.g., Micron, Uni-ball) | Use ballpoint pens—they smear and fade |
| Washi Tape | Layer for borders or frames; easy to remove if needed | Overload pages—can damage paper upon removal |
| Fabric or Paper Collage | Seal with decoupage medium for durability | Use glossy magazine paper—it degrades faster |
Incorporating Shared Memories: A Real Example
Sophie wanted to honor her best friend Elena, who had just started art school. Rather than buying a generic notebook, she spent two weekends crafting a sketchbook rooted in their decade-long friendship. She began with a navy-blue hardcover book and stenciled constellations matching the night sky on the day they met. Inside, she included a map of their hometown with hand-drawn icons marking key spots: the library where they studied, the park bench where they shared secrets, the diner booth where they celebrated graduations.
On page 17—Elena’s lucky number—Sophie pasted a scan of an old Polaroid of them laughing at a music festival, bordered with gold foil accents. She also wrote short affirmations in Elena’s handwriting style, based on journal entries she’d seen during sleepovers. When Elena opened the gift, she cried. “It’s not just a sketchbook,” she said later. “It’s proof that someone remembers everything.”
This example illustrates how specificity breeds significance. Generic well-wishes are kind, but precise references—dates, places, inside language—transform a gift into a mirror of the relationship.
Checklist: Creating Your Personalized Sketchbook
- ☐ Choose a sketchbook suited to the recipient’s creative needs
- ☐ Define a theme (e.g., growth, adventure, mindfulness)
- ☐ Gather materials: acid-free glue, archival pens, paints, ephemera
- ☐ Design and paint or decorate the cover with meaningful visuals
- ☐ Personalize the title page with a handwritten note
- ☐ Insert 3–5 memory-based items (photos, tickets, fabric swatches)
- ☐ Add creative prompts or inspirational quotes on random pages
- ☐ Include at least one hidden message or surprise element
- ☐ Seal decorated surfaces to protect against wear
- ☐ Wrap thoughtfully—consider recycled paper with a sprig of dried lavender
This checklist ensures no detail is overlooked. Completing each item systematically helps maintain focus while preserving the emotional core of the project.
Frequently Asked Questions
Can I personalize a sketchbook without artistic skills?
Absolutely. Personalization isn’t about technical mastery—it’s about intention. Use printed photos, stickers, typed quotes, or collaged magazine cutouts. Even arranging meaningful words in a collage format creates impact. The recipient will value the thought behind it far more than the precision of lines or shading.
How do I avoid damaging the sketchbook during customization?
Work gently and allow drying time between layers. Use minimal adhesive to prevent warping. For painted covers, place wax paper between the front cover and the first page to avoid sticking. If adding bulk (like fabric or multiple photos), reinforce the spine with ribbon or tape to maintain structural integrity.
What if the person doesn’t draw? Is a sketchbook still a good gift?
Yes. A sketchbook can serve many purposes: bullet journaling, poetry, brainstorming, gratitude lists, or collecting pressed flowers. By including diverse prompts and leaving space for freeform use, you invite exploration beyond traditional drawing. Frame it as a “creative companion” rather than an “art book,” and its appeal broadens significantly.
Conclusion: Turn Pages Into Presence
A personalized sketchbook transcends utility. It becomes a tactile archive of care—a physical manifestation of “I see you, I remember you, I believe in what you create.” In an age of digital overload and disposable goods, such a gift stands apart. It resists haste. It invites slowness, reflection, and return.
The techniques outlined here are not rigid formulas but invitations to connect. Whether you paint a galaxy on the cover or tuck a note that says “You’ve always had a brave heart,” your effort communicates something words alone cannot: that this person occupies space in your inner world. And when they open the sketchbook months later, perhaps during a moment of doubt or inspiration, they’ll feel that presence again.


 浙公网安备
33010002000092号
浙公网安备
33010002000092号 浙B2-20120091-4
Comments
No comments yet. Why don't you start the discussion?