
Tablet cases are functional, but they don’t have to be boring. Most come in neutral tones or generic designs that blend into the background. With a few craft supplies and some creativity, you can transform your plain case into a unique expression of your personality. Whether you're looking to add flair, protect against wear, or simply make your device stand out in a classroom or meeting, personalizing your tablet case is an accessible, low-cost way to do it. The best part? You don’t need advanced crafting skills—just a little time and imagination.
This guide walks through practical, beginner-friendly methods to customize any tablet case using materials you likely already have at home. From fabric wraps to hand-drawn designs, these hacks are designed for durability, ease, and visual impact. Let’s explore how to turn an ordinary accessory into something truly yours.
Why Personalize Your Tablet Case?
A personalized tablet case does more than look good—it serves practical and emotional purposes. First, customization makes your device instantly recognizable. In shared environments like schools, offices, or co-working spaces, a distinct case prevents mix-ups and reduces stress when grabbing your tablet in a hurry.
Beyond functionality, personalization fosters connection. When you invest time in designing your case, you form a stronger attachment to the object. This can lead to better care and maintenance, ultimately extending the life of both the case and the tablet inside. According to design psychologist Dr. Lila Monroe, “Objects we personalize become extensions of our identity. That emotional investment increases how carefully we treat them.”
“Personalization transforms utilitarian objects into meaningful possessions. It’s not just about aesthetics—it’s about ownership and identity.” — Dr. Lila Monroe, Design Psychologist
Additionally, crafting itself has proven cognitive benefits. Studies show that engaging in small creative projects reduces stress and improves focus. So, while you’re decorating your case, you’re also giving your mind a healthy break.
Materials You’ll Need (And Where to Find Them)
The beauty of this project lies in accessibility. Most materials required for personalizing a tablet case are affordable and widely available—or may already be sitting in a drawer at home. Below is a checklist of common supplies categorized by technique type.
Basic Crafting Toolkit
- Scissors (fabric-safe if cutting cloth)
- Glue stick or double-sided tape
- Pencil or washable marker for sketching
- Ruler for measuring patterns
- Clear contact paper or laminating sheet (for sealing)
Decoration Supplies
- Fabric scraps or felt pieces
- Washi tape or decorative duct tape
- Stickers (waterproof ones last longer)
- Acrylic paint and fine brushes
- Permanent markers (e.g., Sharpie)
- Iron-on patches or heat-transfer vinyl
- Glitter, sequins, or rhinestones (use sparingly)
Optional Upgrades
- Sewing needle and thread (for fabric-wrapped cases)
- Hot glue gun (for 3D embellishments)
- Cricut or cutting machine (for precision designs)
- Laminator (to seal paper or photo inserts)
Thrift stores, dollar shops, and school supply aisles are excellent sources for discounted materials. Leftover fabric from old clothes, unused gift wrap, or even worn-out jeans can be repurposed into standout design elements.
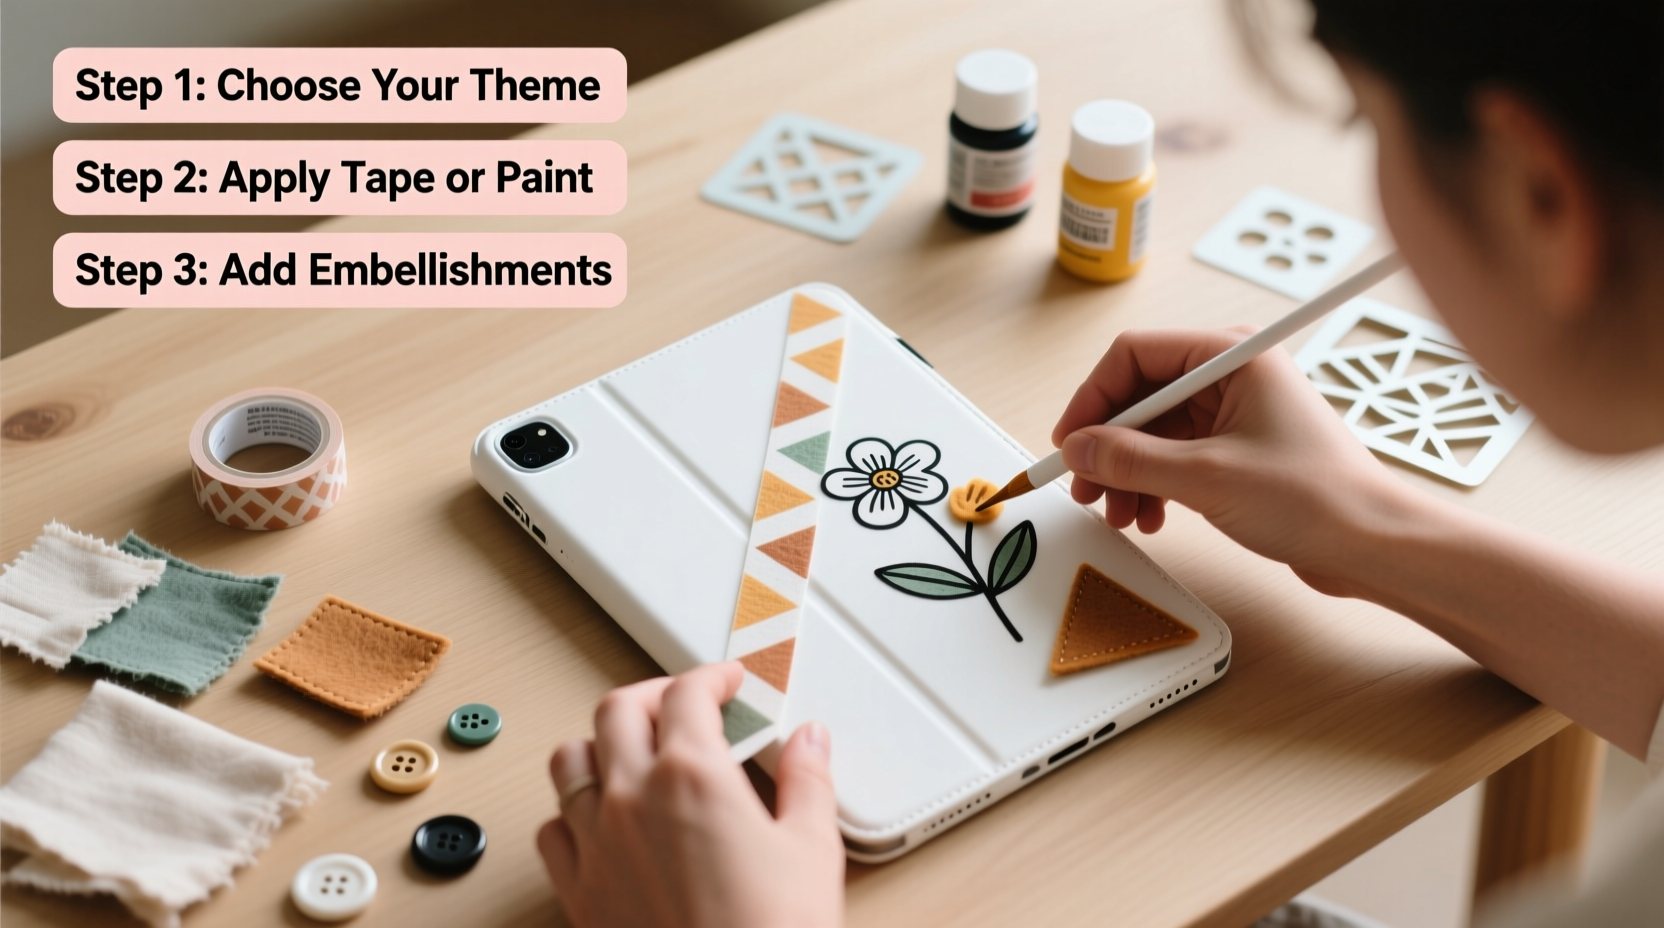
Step-by-Step Guide to 5 Easy Personalization Hacks
Below are five proven, low-effort methods to personalize your tablet case. Each method includes clear instructions, estimated time, and suitability based on case material (plastic, silicone, leather, or fabric-covered).
1. Decorative Tape Wrap
Best for: Hard-shell cases | Time: 15–20 minutes | Skill level: Beginner
- Clean the case surface with a dry cloth to remove dust.
- Measure the width and height of each side.
- Cut strips of washi or duct tape slightly longer than needed.
- Apply tape smoothly, pressing out air bubbles as you go.
- Overlap edges neatly at corners for a clean finish.
- Seal with a layer of clear contact paper to prevent peeling.
2. Fabric Cover Sleeve
Best for: Cases without built-in stands | Time: 30–40 minutes | Skill level: Intermediate
- Trace the outline of your tablet case onto fabric, adding ½ inch on all sides for seam allowance.
- Cut two identical pieces: one for the front, one for the back.
- Place right sides together and sew around three edges.
- Turn inside out, insert the case, then fold excess fabric inward and hand-stitch the opening closed.
- Add a button or ribbon closure if desired.
3. Hand-Drawn Artwork
Best for: Smooth plastic or silicone | Time: 20–60 minutes | Skill level: All levels
- Sketch your design lightly in pencil.
- Trace over it with permanent markers or acrylic paint pens.
- Allow ink to dry completely (at least 30 minutes).
- Outline key areas with a black marker for definition.
- Seal the artwork with 2–3 coats of clear nail polish or Mod Podge.
4. Photo or Print Insert
Best for: Cases with inner lining or removable backing | Time: 10 minutes | Skill level: Beginner
- Print a favorite photo, quote, or digital illustration to match case dimensions.
- Laminate it or cover with clear packing tape for protection.
- If the case has a transparent inner pocket, slide the print inside.
- If not, use double-sided tape to affix it beneath a removable back panel.
5. Sticker & Patch Collage
Best for: Any flat-surfaced case | Time: 15–30 minutes | Skill level: Beginner
- Plan your layout by arranging stickers and patches on a table first.
- Leave space between items to avoid bulkiness.
- Peel and stick, starting from the center outward.
- For iron-ons, place a thin cloth over the patch and press with a warm iron for 10–15 seconds.
- Seal edges with clear adhesive spray to prevent lifting.
Do’s and Don’ts: Avoiding Common Mistakes
Even simple crafts can go wrong without proper technique. The following table outlines key practices to follow—and those to avoid—for lasting results.
| Do | Don’t |
|---|---|
| Clean the surface before applying anything | Apply stickers or paint to a dusty or greasy case |
| Use sealants on exposed artwork or paper | Skip protective layers—ink smudges and paper tears easily |
| Test adhesives on a small hidden area first | Assume all glues are safe for plastic—some cause warping |
| Keep designs flat near hinges or folding edges | Add bulky items where the case bends—this causes cracking |
| Let paints and glues dry fully before handling | Rush the process; trapped moisture weakens adhesion |
One often-overlooked issue is weight distribution. Adding too many heavy embellishments—especially along the top edge—can make the case unbalanced, causing the tablet to tip forward when propped up. Keep decorations light and centered for optimal function.
Real Example: A Student’s Transformation Project
Maria, a high school junior from Portland, used to lose her tablet case weekly. “Everyone had the same black one,” she said. “I’d leave it in the library and never find it again.” After reading about DIY case customization online, she decided to try a fabric sleeve made from an old band T-shirt.
Using scissors and fabric glue (she didn’t know how to sew), Maria cut the shirt’s graphic section to size, wrapped it around her case, and sealed the edges with extra-strong tape. She added a painted guitar doodle in the corner with fabric markers. The entire project took less than an hour.
“Now I never lose it,” Maria shared. “My friends started asking how to make their own. Two of them now have matching designs—we call them our ‘study squad skins.’” Her teacher even allowed a five-minute presentation on the project during art class, sparking a mini trend across the grade.
This example shows how a small creative act can yield social, organizational, and confidence-building benefits far beyond appearance.
Frequently Asked Questions
Can I remove decorations later without damaging the case?
Yes, in most cases. Washi tape, stickers, and fabric sleeves can usually be peeled or unzipped without residue. For stubborn adhesive, use a tiny amount of rubbing alcohol on a cotton swab. Avoid scraping with sharp tools, which can scratch surfaces.
Will painting my case void the warranty?
Typically, no—cosmetic modifications like exterior painting or贴纸 don’t affect manufacturer warranties unless they cause structural damage. However, check your brand’s policy if the case is under official protection. Focus on non-invasive methods when in doubt.
How do I clean a decorated case without ruining the design?
Use a slightly damp microfiber cloth and mild soap. Avoid soaking the case or using abrasive cleaners. For sealed designs (with Mod Podge or laminate), quick wipes are safe. Never submerge a customized case in water, especially if it contains paper or fabric elements.
Final Checklist Before You Start
Before picking up scissors or paint, run through this quick verification list to ensure success:
- ✅ Measure your tablet case accurately (length, width, thickness)
- ✅ Choose a decoration method compatible with your case material
- ✅ Gather all supplies in one workspace
- ✅ Test colors, adhesives, or heat settings on scrap material first
- ✅ Allow ample drying time—don’t rush sealing or assembly
- ✅ Consider how the design affects usability (e.g., camera access, port clearance)
Skipping prep steps might save minutes now but could lead to frustration later. Taking the time to plan ensures your personalized case looks great and lasts.
Make It Yours—And Share the Inspiration
Personalizing a tablet case isn’t just about standing out—it’s about claiming ownership in a world full of mass-produced accessories. These craft hacks prove that creativity doesn’t require expensive tools or years of training. With patience and playfulness, anyone can turn a generic case into a conversation starter, a memory keeper, or a daily dose of joy.
Once your case is complete, consider sharing your design online. Post a photo on social media with tips for others, or bring it to a craft circle at school or work. Inspiration spreads quickly when people see what’s possible with simple materials and bold ideas.


 浙公网安备
33010002000092号
浙公网安备
33010002000092号 浙B2-20120091-4
Comments
No comments yet. Why don't you start the discussion?