
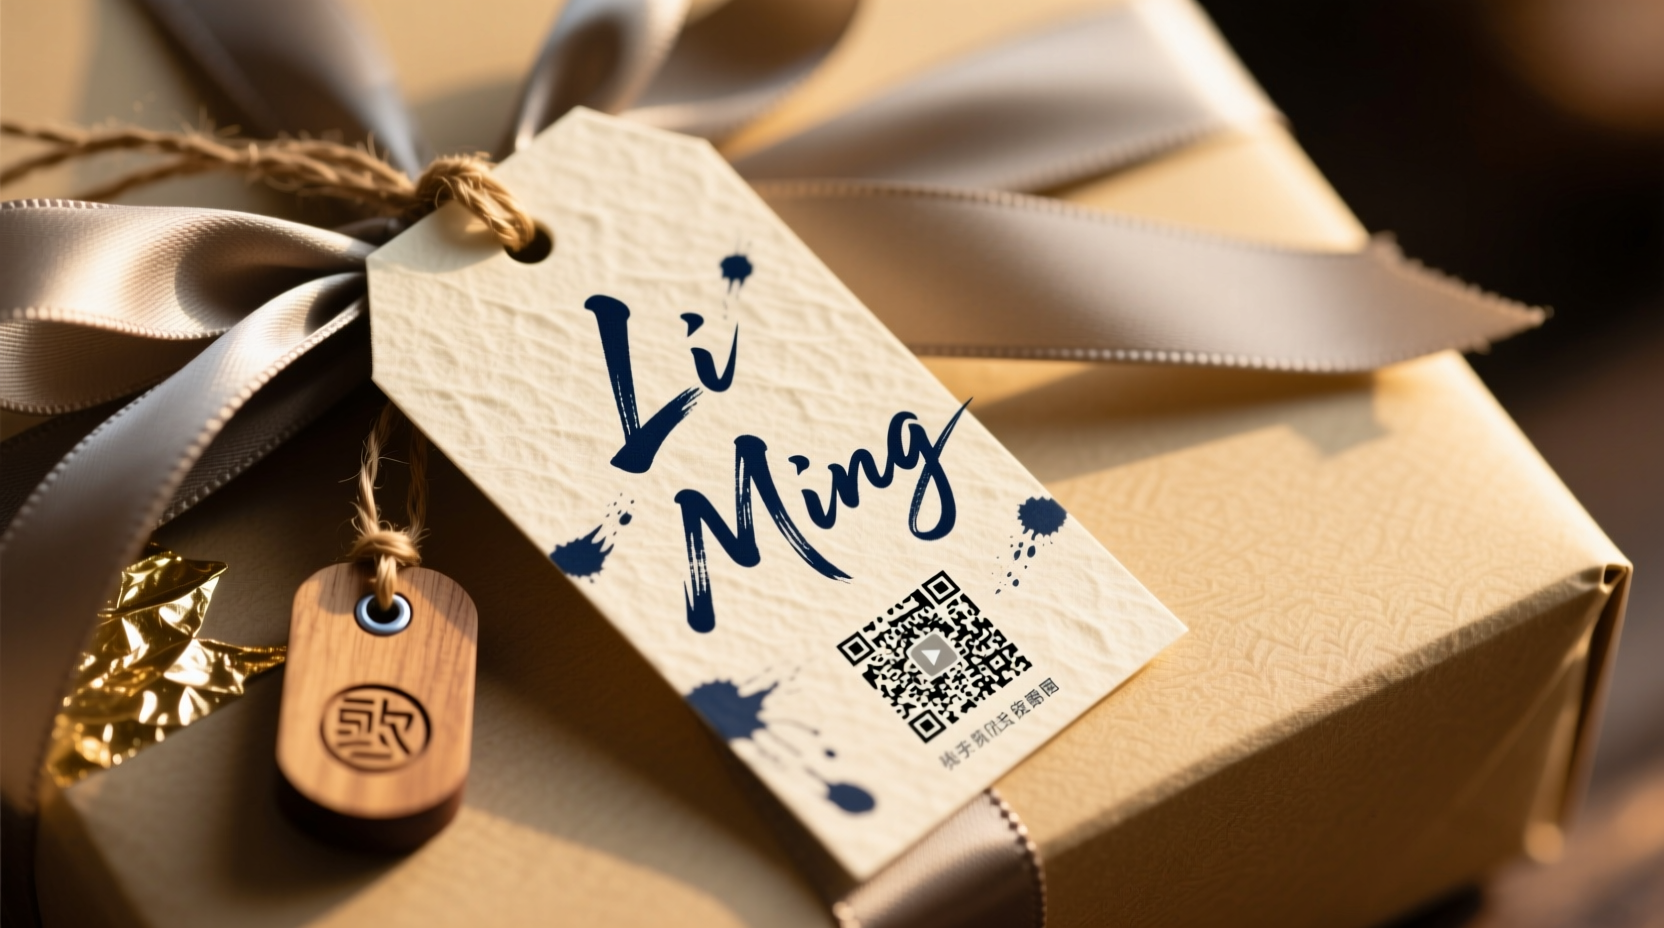
Personalized name tags transform ordinary gifts into meaningful keepsakes. Whether it’s a wedding favor, a corporate welcome kit, or a handmade birthday present, a thoughtfully inscribed name signals care, attention, and intention. Yet many gift-givers hesitate—not because they lack creativity, but because they’re unsure how to merge the warmth of hand-lettered artistry with the consistency and scalability modern tools offer. This isn’t about choosing between analog charm and digital efficiency. It’s about integrating them: using calligraphy to define voice and character, and technology to refine, reproduce, and adapt that voice across materials, volumes, and timelines.
The most effective personalized name tags balance legibility with personality, durability with delicacy, and uniqueness with reproducibility. They avoid looking mass-produced—but also never appear rushed or inconsistent. Achieving this requires understanding both foundational lettering principles and practical tool workflows. Below is a field-tested approach used by stationers, event designers, and boutique gift curators who deliver hundreds of custom tags annually without sacrificing authenticity.
Why Hand Calligraphy Still Matters in a Digital Age
Calligraphy remains irreplaceable—not as nostalgia, but as functional design intelligence. A skilled hand-letterer doesn’t just write names; they interpret rhythm, weight, spacing, and context. The curve of an “S”, the angle of a crossbar on “t”, the subtle lift before a terminal stroke—all communicate tone. A delicate copperplate script conveys elegance for a bridal shower tag; a bold, grounded brush script suits a children’s birthday gift box; a minimalist sans-serif flourish adds quiet confidence to a premium skincare set.
Digital fonts mimic these qualities, but rarely replicate their responsiveness. When you draw each letter, you adjust automatically: tightening spacing for shorter names (“May”), opening it for longer ones (“Christopher”), lowering a descender to avoid clipping on a narrow tag edge, or thickening a downstroke to compensate for porous paper. These micro-decisions are what make handwriting feel human—and why recipients remember not just the gift, but the feeling behind its presentation.
“People don’t remember typefaces—they remember the pause before the first stroke, the slight tilt of the pen, the way the ink catches light. That’s where meaning lives.” — Lena Torres, award-winning calligrapher and founder of Ink & Anchor Studio
Essential Calligraphy Tools (and What to Skip)
Start simple. You don’t need 17 nibs or a $300 oblique holder to begin. Focus on control, consistency, and clean lines—not gear accumulation.
Core Starter Kit:
- Nib: Nikko G (ideal for beginners—flexible yet forgiving, holds ink well)
- Holder: Straight wooden or acrylic holder (no oblique needed until you master basic slant and pressure)
- Ink: Higgins Eternal Black or Walnut Ink (waterproof, archival, rich saturation)
- Practice Paper: Rhodia Dot Pad (5mm dots guide consistent x-height and slant)
- Ruler & Pencil: For light baseline and margin guides—never skip layout planning
Avoid these common pitfalls early:
- Using India ink on absorbent paper—it feathers and obscures stroke control
- Skipping baseline guidelines—even experienced calligraphers use them for uniformity across multiple tags
- Pressing too hard on downstrokes, causing nib splay or paper puncture (especially on thin kraft tags)
Integrating Tech Tools Without Losing the Human Touch
Technology doesn’t replace calligraphy—it extends it. The smartest practitioners use digital tools for three precise purposes: refinement, reproduction, and adaptation. Here’s how:
- Digitize Your Originals: Scan your best hand-lettered name at 600 DPI grayscale. Use Adobe Photoshop or free alternatives like GIMP to clean edges, adjust contrast, and isolate the lettering from paper texture.
- Vectorize Thoughtfully: Import into Illustrator or Inkscape and use Image Trace—but do not auto-trace and accept defaults. Manually refine anchor points to preserve stroke taper, join angles, and intentional irregularities (e.g., a slightly uneven crossbar on “e” that gives warmth).
- Create a Hybrid Font: Use Glyphs Mini or BirdFont to turn your vectorized letters into a lightweight, OpenType-compliant font. Name it something personal—e.g., “Elena-Regular-HandRefined”. This lets you type any name while retaining your unique letterforms.
- Prep for Output: Export final files as SVG for laser cutting, PDF/X-1a for professional printing, or PNG with transparent background for digital overlays on gift wrap mockups.
This workflow turns one hour of calligraphy practice into a reusable, scalable asset—without outsourcing your aesthetic voice.
Step-by-Step: From Blank Tag to Finished Personalization
Follow this exact sequence for consistent, professional results—whether doing 5 tags or 500.
- Define Tag Specifications: Note dimensions, material (kraft, linen, acrylic, wood), and attachment method (string hole, adhesive backing, magnet). This determines line thickness, minimum font size, and ink compatibility.
- Choose Script & Test Scale: Sketch three name variations (e.g., “Sam”, “Alexandra”, “Ji-Hoon”) at 80%, 100%, and 120% of intended size. Hold them 12 inches from your eyes—does spacing read clearly? Does the longest name crowd margins?
- Prepare Physical Surface: Lightly rule baselines with pencil and ruler. For curved surfaces (e.g., ceramic mugs), use a flexible curve ruler or print a template on freezer paper, iron it on, then trace through.
- Execute Calligraphy: Work left-to-right, holding nib at consistent 55° angle. Apply pressure only on downstrokes. Let ink dry fully (2–3 minutes) before handling.
- Digitize & Refine: Scan, clean, vectorize, and test-print on matching paper stock. Hold printed version beside hand-lettered original—do weight, rhythm, and spacing match intent?
- Final Output: For hand-done batches: use a fine-tip archival pen (e.g., Sakura Pigma Micron 01) for touch-ups. For digital batches: run test cuts/prints, verify alignment on actual gift packaging, then proceed.
Do’s and Don’ts of Name Tag Personalization
| Action | Do | Don’t |
|---|---|---|
| Spacing | Maintain consistent word spacing; use optical spacing over mechanical spacing (e.g., tighten space before “A”, loosen before “W”) | Apply rigid equal spacing between all letters—ignores letter shape and creates visual gaps |
| Capitalization | Capitalize only the first letter unless the name is traditionally all-caps (e.g., “McDonald”, “O’Connor”) | Use ALL CAPS for every name—it sacrifices rhythm and feels institutional |
| Ink Choice | Select pigment-based inks for porous surfaces (kraft, cotton); alcohol-based markers for non-porous (acrylic, glass) | Use water-based markers on untreated wood—they bleed unpredictably |
| Digital Scaling | Rescale vector files proportionally; never stretch horizontally or vertically | Stretch a scanned calligraphy sample to fit width—distorts stroke weight and ruins rhythm |
| Proofing | Verify spelling with the recipient directly—not just against an invitation list | Assume “Jennifer” is spelled correctly because it appears that way on a wedding RSVP card |
Real-World Example: The Bookstore Launch Gift Set
When The Marlowe Press launched its indie author series, they commissioned 120 gift boxes—each containing a signed novel, artisan chocolate, and a linen bookmark. Each bookmark required a hand-lettered name tag affixed to the front. Their initial plan: hire a calligrapher for all 120. Budget and timeline made that impractical.
Instead, they collaborated with calligrapher Diego Ruiz to create a refined Spencerian-style script optimized for 1.25\" x 2.5\" linen tags. Diego lettered five representative names (“Maya”, “Tariq”, “Elara”, “Kenji”, “Rosa”) on actual linen stock. These were scanned, vectorized, and turned into a custom font. The team then used Mail Merge in Illustrator to generate individual PDFs—each preserving Diego’s stroke weight and spacing logic. Final output went to a local laser engraver for precise fabric-burned tags. Result: Every tag retained Diego’s expressive hand, scaled perfectly, and arrived two days ahead of schedule. Recipients consistently cited the name tag as the “most thoughtful detail”.
FAQ
Can I use my smartphone to capture calligraphy for digitizing?
Yes—if you follow strict conditions: shoot in direct, even daylight (no flash), place phone perpendicular to paper on a stable surface (use a book stack as a tripod), and use a scanning app like Adobe Scan or Microsoft Lens (not standard camera mode). Avoid shadows, glare, or keystoning—these distort stroke weight and spacing accuracy.
What’s the fastest way to personalize 30+ tags without losing quality?
Hybrid batch processing: hand-letter 5–7 diverse names (short, medium, long, with varied characters), digitize and vectorize them, then use those as templates in Canva or Illustrator to auto-generate the rest via text replacement. Always manually review spacing and kerning on the first three generated versions before exporting the full batch.
How do I choose between calligraphy and digital-only for high-volume orders?
Use this threshold: under 25 tags, hand-letter all. 25–100 tags, hybrid (hand-letter key samples + digital scaling). Over 100, invest in a custom vector font—but commission a calligrapher to build it. Never rely solely on free downloadable “calligraphy fonts”—they lack authentic stroke logic and often break at small sizes.
Conclusion: Your Hand, Amplified
Personalizing name tags isn’t about perfection—it’s about presence. It’s the difference between a gift that sits on a shelf and one that gets placed on a desk, framed, or tucked into a journal. Calligraphy grounds that gesture in human intention; technology ensures it reaches every recipient with clarity and care. You don’t need to master every tool at once. Start with one name, one nib, one sheet of paper. Measure the space. Rule the baseline. Feel the ink flow. Then scan it. Refine it. Reproduce it—faithfully, not mechanically. Let your hand lead, and let your tools listen.
Every personalized tag is a quiet promise: *I saw you. I chose you. This was made with you in mind.* That promise doesn’t scale with automation—it scales with intention, refined by practice and extended by thoughtful tools. Pick up your pen today. Then open your design software tomorrow. The most memorable gifts begin where analog meets digital—and stay unforgettable because of both.


 浙公网安备
33010002000092号
浙公网安备
33010002000092号 浙B2-20120091-4
Comments
No comments yet. Why don't you start the discussion?