
In a world where technology blends into daily life, personal expression often takes a backseat. Your tablet is likely one of the most-used devices you own, yet its case probably looks just like everyone else’s. Why settle for generic when a few simple craft hacks can transform your tablet case into a reflection of your personality, style, or creativity? With minimal supplies and no prior crafting experience, you can turn an ordinary case into a statement piece. Whether you're aiming for elegance, humor, or bold artistry, this guide walks you through practical, budget-friendly methods to customize your tablet case with confidence.
Why Personalize Your Tablet Case?
A personalized tablet case does more than look good—it enhances usability and emotional connection. When your device stands out, it's easier to identify in public spaces like cafes or classrooms. It also reduces the risk of mix-ups in shared environments. Beyond function, customization fosters a sense of ownership. A case that reflects your interests—be it favorite colors, quotes, or artistic flair—makes using your tablet feel more intimate and enjoyable.
According to design psychologist Dr. Lena Torres, “Personalizing everyday objects reinforces identity and boosts mood. Small creative acts like decorating a tech accessory can increase feelings of control and satisfaction.” This isn’t just about aesthetics; it’s about making your digital tools feel truly yours.
“Personalization turns functional items into meaningful ones. A decorated tablet case becomes more than protection—it becomes self-expression.” — Dr. Lena Torres, Design Psychologist
Materials You’ll Need (And Where to Find Them)
The beauty of these craft hacks lies in their accessibility. Most materials are affordable and available at craft stores, dollar shops, or even around your home. Here’s a basic toolkit to get started:
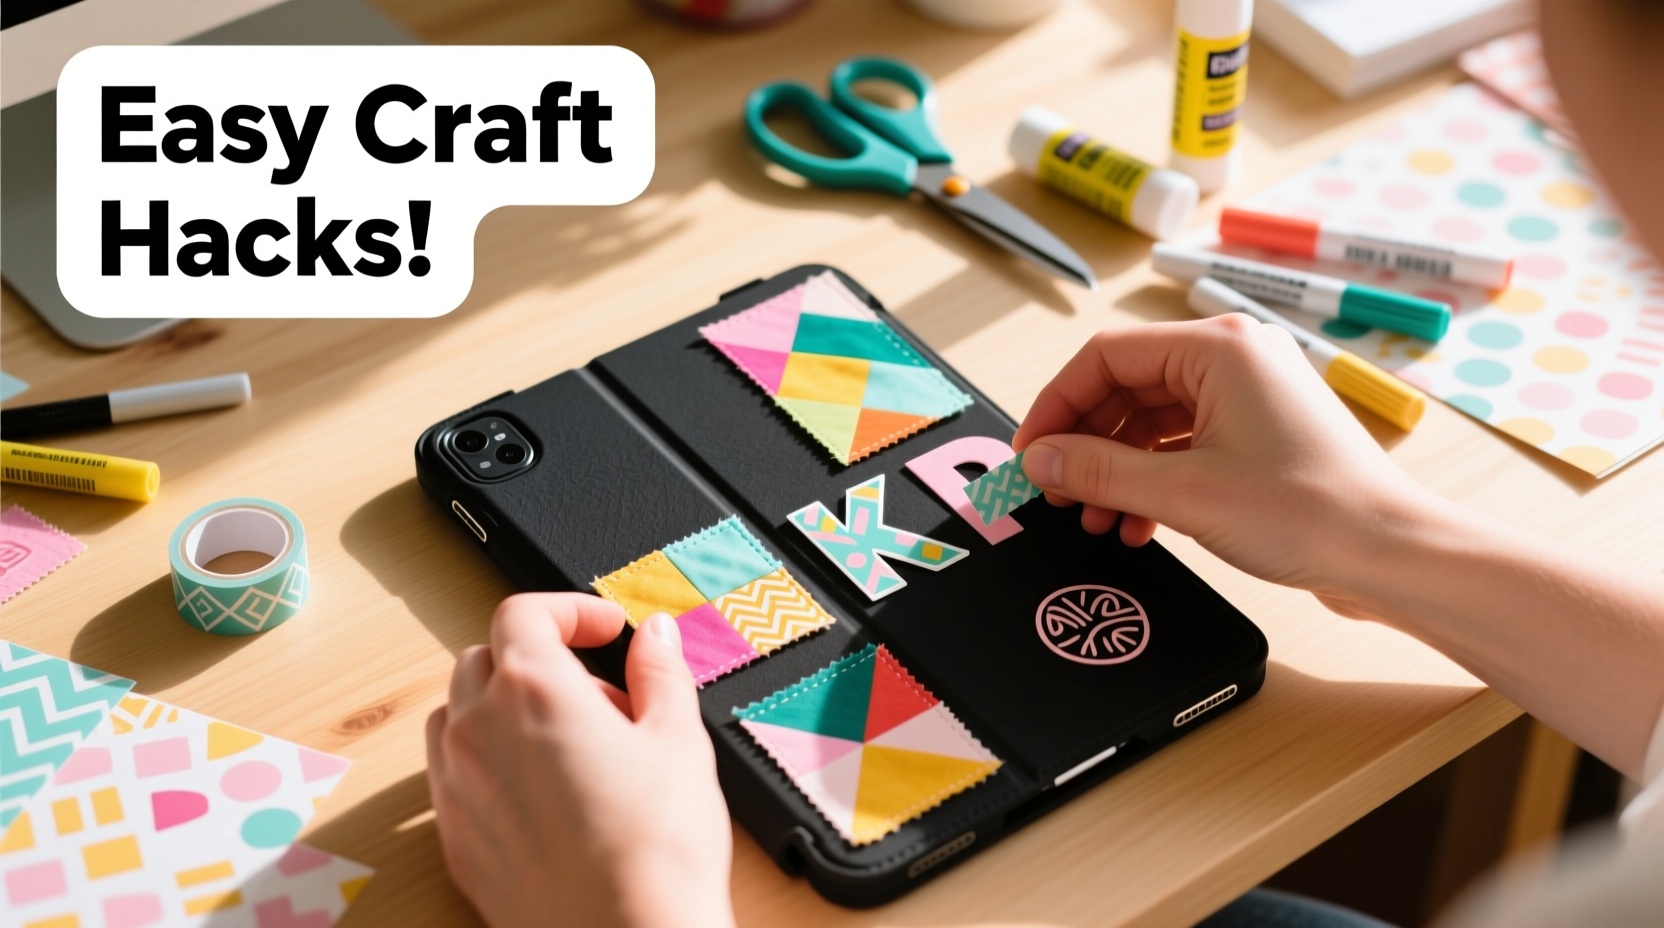
- Base case: Preferably a plain silicone, plastic, or fabric-covered case. Avoid glossy or textured surfaces if you plan to paint or glue.
- Adhesives: Craft glue (like Mod Podge), double-sided tape, or glue dots.
- Paper & prints: Scrapbook paper, washi tape, magazine cutouts, or printed photos.
- Art supplies: Acrylic paints, paint pens, markers, stencils.
- Embellishments: Stickers, rhinestones, fabric patches, pom-poms, or pressed flowers.
- Tools: Scissors, ruler, pencil, clear sealant spray (optional).
5 Easy Craft Hacks to Try Today
You don’t need advanced skills to create something unique. These five hacks are beginner-friendly, quick to execute, and deliver impressive results.
1. Washi Tape Geometric Design
Washi tape is repositionable, colorful, and comes in endless patterns. Use it to create clean lines, borders, or abstract shapes. Measure and cut strips to form chevrons, grids, or frames around the edges. Overlap tapes for layered effects. The best part? If you change your mind, simply peel it off and start over.
2. Photo Collage Overlay
Print small photos—travel memories, pets, or inspirational quotes—and arrange them on the back of your case. Secure each with a drop of craft glue. Once dry, apply a thin layer of Mod Podge over the entire surface to seal and protect the images. This method works especially well on matte-finish cases.
3. Painted Ombré Effect
Dip a sponge in two coordinating acrylic paint colors. Lightly dab from the bottom to the top of the case to blend them seamlessly. Allow to dry completely between layers. For precision, use painter’s tape to mask off areas you want to keep clean. Finish with a clear sealant to prevent chipping.
4. Fabric Wrap Upgrade
Cut a piece of lightweight fabric slightly larger than your case. Apply even layers of Mod Podge to the case, press the fabric on smoothly, and wrap the excess to the inside. Trim any frayed edges and seal with another coat. Choose cotton prints, denim scraps, or even lace for texture.
5. Sticker Storytelling
Use themed stickers—music notes, plants, anime characters, or motivational words—to tell a story about who you are. Layer them thoughtfully instead of clustering randomly. Outline some with a fine-tip marker to make them pop. Bonus: removable vinyl stickers allow for seasonal changes.
| Hack | Time Required | Skill Level | Reversibility |
|---|---|---|---|
| Washi Tape Design | 10–15 minutes | Beginner | High (peel off anytime) |
| Photo Collage | 30–45 minutes | Intermediate | Low (permanent once sealed) |
| Painted Ombré | 1 hour (including drying) | Beginner/Intermediate | Low |
| Fabric Wrap | 45 minutes | Intermediate | Medium (can be removed with effort) |
| Sticker Storytelling | 20 minutes | Beginner | High (especially with vinyl) |
Step-by-Step: Creating a Custom Quote Case
Want to carry inspiration with you? Follow this timeline to design a quote-based tablet case using printable letter stickers or hand-lettering.
- Choose your quote – Pick something short and meaningful, like “Create Daily” or “Stay Curious.” Keep it under 3 words for visual balance.
- Select font style – Search free fonts online (e.g., Google Fonts) that match the tone. Playful? Elegant? Bold?
- Print and cut – Print the quote on sticker paper using a home printer. Carefully cut around each letter or word block.
- Arrange layout – Place the letters on the case without sticking them down first. Experiment with alignment—centered, diagonal, or stacked.
- Apply slowly – Peel backing one section at a time and press firmly. Use a credit card edge to smooth out air bubbles.
- Seal for durability – Spray with a clear acrylic sealer to protect against scratches and oils from hands.
Real Example: Maya’s Classroom Companion
Maya, a middle school teacher in Portland, wanted her tablet to stand out during group activities and reflect her vibrant teaching style. She used a plain black case as her canvas. With colorful washi tapes, she created a rainbow border along the edges. On the back, she glued on small fabric patches shaped like apples, books, and stars—symbols of education and joy.
To add interactivity, she attached tiny Velcro dots and interchangeable felt icons: a smiley face on Mondays, a coffee cup on Fridays. Her students loved guessing the day’s icon, and colleagues began asking for tutorials. What started as a simple craft became a conversation starter and classroom tradition.
“It’s not just my tablet anymore,” Maya says. “It’s part of how I connect with my kids.”
Avoiding Common Mistakes
Even simple projects can go wrong without proper planning. Here are key pitfalls to avoid:
- Overloading the case: Too many layers or thick embellishments can interfere with portability or docking.
- Using non-durable materials: Tissue paper or flimsy stickers may tear quickly. Opt for weather-resistant options.
- Ignoring fit: After decorating, test that the case still fits snugly on your tablet and allows access to ports and buttons.
- Skipping the sealant: Unsealed paint or paper will wear off faster due to handling and cleaning.
“Less is often more with tech accessories. Focus on one standout feature rather than cluttering every inch.” — Jordan Lee, DIY Lifestyle Blogger
Checklist: Preparing Your Case for Customization
Before you begin, run through this checklist to ensure success:
- ☐ Clean the case thoroughly with a damp cloth and let it dry.
- ☐ Choose a design theme (minimalist, artsy, motivational, etc.).
- ☐ Gather all materials and tools within reach.
- ☐ Test adhesives or paints on a small area.
- ☐ Work on a flat, protected surface (use newspaper or scrap paper).
- ☐ Allow ample drying time between steps.
- ☐ Seal the final product if using paint, paper, or fabric.
Frequently Asked Questions
Can I remove decorations later without damaging the case?
Yes, depending on the method. Washi tape, removable stickers, and magnet-backed accessories come off cleanly. Paint, glued paper, or permanent vinyl are harder to reverse. If reversibility matters, stick to non-adhesive or low-tack solutions.
Will decorating affect my tablet’s warranty?
No. As long as you’re only modifying the case and not altering the device itself, your warranty remains intact. Always check manufacturer guidelines, but external customization is generally safe.
How do I clean a decorated case without ruining it?
For sealed designs, wipe gently with a microfiber cloth dampened with water or mild soap. Avoid soaking or scrubbing vigorously. If unsealed, spot-clean only and avoid direct moisture on decorated areas.
Final Thoughts and Creative Inspiration
Personalizing your tablet case isn’t just a craft project—it’s an act of reclaiming individuality in a standardized world. Each brushstroke, sticker, or fabric choice tells a story. And the process itself can be meditative, rewarding, and surprisingly empowering.
Don’t wait for the perfect moment or the ideal supplies. Start small: a single strip of washi tape, one meaningful word, or a favorite color swatch. Build from there. Rotate designs with the seasons, moods, or life events. Let your case evolve as you do.


 浙公网安备
33010002000092号
浙公网安备
33010002000092号 浙B2-20120091-4
Comments
No comments yet. Why don't you start the discussion?