
Every year, homeowners across the country rush into stores or online marketplaces to buy strings of Christmas lights, only to discover halfway through installation that they’ve purchased too many, too few, or the wrong type for their vision. The result? Wasted money, tangled cords, and a display that falls short of expectations. A better approach begins long before the first bulb is plugged in: thoughtful, deliberate planning of your Christmas light display layout. By mapping out your design in advance, you gain clarity, control costs, and dramatically improve the final outcome.
Assess Your Space and Structure
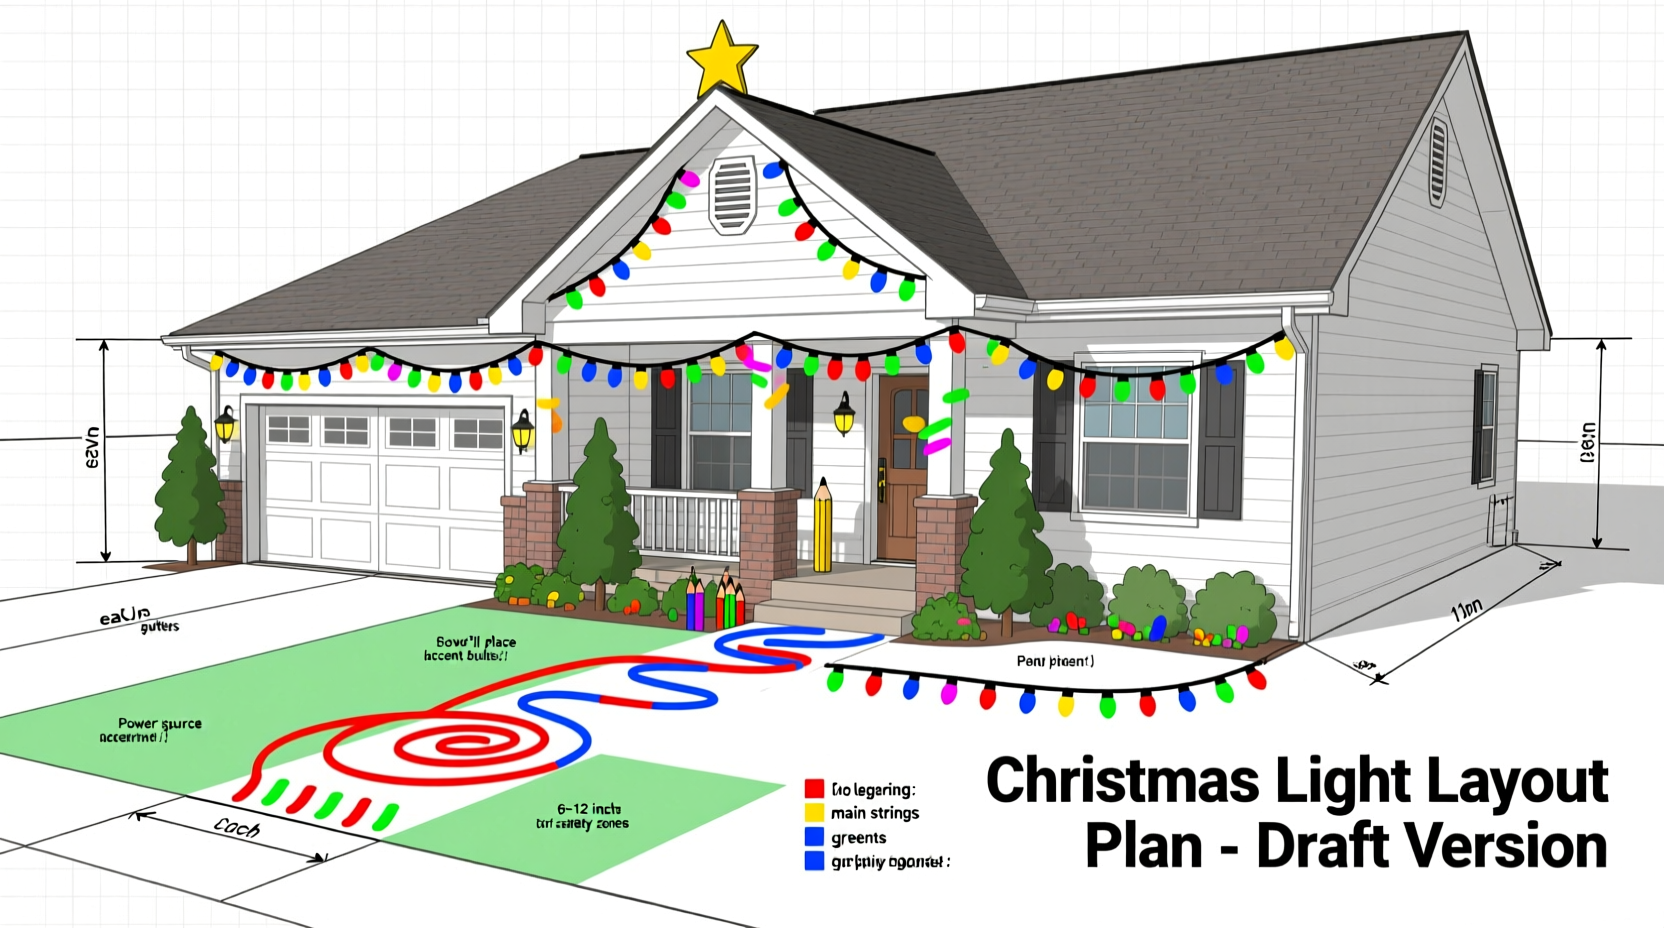
The foundation of any successful light display is understanding the physical space you’re working with. Begin by walking around your home’s exterior with a notepad or voice recorder. Take note of architectural features—rooflines, eaves, windows, doors, columns, and trees. These elements can serve as anchors for your lighting design and help guide where light will have the most visual impact.
Measure key areas. Use a retractable tape measure or estimate distances using pacing (one average step ≈ 2.5 feet). Record the length of roof ridges, gutter lines, porches, and tree trunks. Knowing these dimensions helps determine how many strands you’ll need and whether you should opt for shorter 16-light sets or longer commercial-grade strings.
Consider visibility from the street. If your home sits back from the road, brighter, denser lighting may be necessary. Homes on corners benefit from wrapping lights around multiple sides to maximize exposure. Also, take note of power sources. Identify outdoor outlets and assess whether extension cords will be needed—and if so, how many, and of what length.
Create a Lighting Design Concept
Before choosing colors or bulb types, decide on a theme or mood. Are you aiming for classic elegance with warm white lights along clean rooflines? A festive carnival vibe with multicolored clusters and animated sequences? Or perhaps a wintry wonderland using cool whites and blue-tinted bulbs?
Theme influences every decision—from spacing to strand density. A minimalist look might use single rows along gutters and accent windows sparingly. A maximalist display could include layered outlines, net lights on bushes, and illuminated figures. Write down your desired effect in one sentence. For example: “A cozy, inviting glow highlighting architectural details with warm white mini lights.” This becomes your design North Star.
“Planning transforms chaos into cohesion. The best displays aren’t the brightest—they’re the most intentional.” — Marcus Tran, Holiday Lighting Designer & Founder of Luminaryscapes Inc.
Next, categorize areas of your property into zones:
- Roofline: Ridges, gables, dormers
- Facade: Windows, doors, columns
- Landscaping: Trees, shrubs, walkways
- Accents: Mailboxes, railings, signs
Assign a lighting strategy to each zone. For instance, C9 bulbs may suit wide rooflines, while fairy lights enhance delicate window frames. Trees can be wrapped trunk-to-tip or lit with ground-up spot-style strings.
Choose the Right Lights Based on Layout Needs
Not all Christmas lights are interchangeable. Bulb type, size, color temperature, and string length dictate how well they fit your planned layout. Making informed choices prevents mismatched aesthetics and logistical headaches.
Bulb Types:
- Mini lights (2–3” apart): Best for detailed outlining and dense coverage. Ideal for eaves, windows, and bushes.
- C7/C9 bulbs (4–12” apart): Larger, more visible from a distance. Suitable for roof ridges, fences, and large trees.
- Rope lights: Diffused glow; good for railings and curved surfaces but less bright than individual bulbs.
- Net lights: Pre-spaced grids perfect for covering shrubs or flat surfaces quickly.
Color Temperature: Warm white (2700K) mimics candlelight and feels traditional. Cool white (5000K+) gives a crisp, modern, icy effect. Multicolor offers playful energy but can clash if overused.
Decide between incandescent and LED. LEDs use up to 90% less energy, last longer (25,000+ hours), and remain cool to the touch. While slightly more expensive upfront, they save money over time. Most modern controllers and timers are designed for LED compatibility.
Lighting Selection Guide
| Area | Recommended Light Type | Spacing Strategy | Notes |
|---|---|---|---|
| Roofline (long straight runs) | C9 LEDs | 6–8 inches apart | High visibility; consider steady or slow twinkle |
| Eaves & Gutter Lines | Mini lights (LED) | 3–4 inches apart | Dense coverage creates smooth line |
| Windows & Doors | Mini or micro LED strings | Follow frame contour | Avoid blocking open paths |
| Trees (medium to large) | String wraps or C7s | Spiral from base to top | Use 100–200 lights per foot of trunk diameter |
| Shrubs & Bushes | Net lights or short strands | Even coverage | Prevents patchy appearance |
Step-by-Step Planning Timeline
Effective planning unfolds over weeks, not days. Follow this timeline to stay organized and stress-free.
- 6–8 Weeks Before Installation: Walk your property, sketch layouts, take measurements, and define your theme.
- 4–6 Weeks Out: Research products. Compare lumens, wattage, and customer reviews. Create a shopping list with quantities based on measured lengths.
- 3 Weeks Out: Order lights and accessories (clips, timers, surge protectors). Confirm delivery dates.
- 2 Weeks Out: Unbox and test all strands. Replace defective ones immediately. Organize by zone and store in labeled bins.
- 1 Week Out: Finalize power plan. Map outlet usage and cord routes. Check ladder safety and tool availability.
- Installation Week: Work section by section. Start high (roof), then move to mid-level (windows), then ground (trees, walkways).
This phased approach prevents last-minute scrambles and ensures quality control. Testing lights in advance avoids discovering dead strands on cold installation nights.
Real Example: The Johnson Family’s Front Yard Transformation
The Johnsons had always wanted a standout holiday display but struggled with mismatched colors and inconsistent spacing. In past years, they bought red and green lights impulsively, only to realize they didn’t coordinate with their blue-tinted porch light. Their tree looked sparse because they underestimated how many strands it would take to wrap a 12-foot pine.
This year, they committed to planning first. They sketched their home’s front elevation, measured every edge, and decided on a “Winter Forest” theme using cool white and soft blue LEDs. They calculated needing 18 strands of mini lights for the roofline, 6 for window accents, and 12 for tree wrapping. They ordered everything early, tested each set, and used adhesive clips to maintain even spacing.
The result was a cohesive, professional-looking display that neighbors photographed and passersby complimented. More importantly, they spent 15% less than the previous year by avoiding impulse buys and returns.
Essential Checklist: Pre-Purchase Planning Steps
Use this checklist to ensure nothing is overlooked before buying a single string of lights:
- Walk around your property and identify key lighting zones
- Measure total linear feet for rooflines, gutters, and trim
- Count trees, bushes, and decorative structures
- Determine available power outlets and circuit capacity
- Define your theme (e.g., classic, modern, whimsical)
- Choose primary color scheme and bulb types
- Research LED vs. incandescent trade-offs
- Calculate number of strings needed per zone
- Check product specifications (length, bulb count, plug type)
- Order samples or test existing lights at night
- Create a labeled storage system for new purchases
- Verify return policy for unopened items
Frequently Asked Questions
How many Christmas lights do I need per foot of roofline?
For mini lights, plan for one 25-light strand (approximately 25 feet long) per 25 linear feet. For denser coverage, use two strands side by side. For C9 bulbs (typically 25 per 25 feet), one strand usually suffices for bold visibility.
Can I mix different types of lights in one display?
Yes, but with caution. Mixing bulb sizes (e.g., mini and C9) can work if they share the same color temperature and are placed in distinct zones. Avoid mixing warm and cool whites in adjacent areas, as the contrast can look jarring. Always check voltage compatibility when connecting different strings.
What’s the best way to power a large display?
Use heavy-duty outdoor-rated extension cords and multi-outlet surge protectors. Never daisy-chain more than three standard light strings unless labeled for it. Consider installing temporary power poles or consulting an electrician for high-load setups. Timers and smart plugs help manage energy use and automate on/off cycles.
Finalize, Install, and Enjoy
Planning a Christmas light display before purchasing strings isn’t just practical—it’s transformative. It shifts the experience from reactive scrambling to creative expression. With a clear layout, accurate measurements, and a defined aesthetic, you invest not just in lights, but in lasting holiday joy.
The most memorable displays aren’t those with the most bulbs, but those with purpose behind every strand. When your neighbor pauses to admire your evenly spaced roofline or the gentle spiral glow of your tree, they’re responding to intention—not accident.
Start today. Grab a notebook, walk your yard, and begin sketching. By the time the first snow falls, you won’t be wrestling with tangled cords—you’ll be flipping the switch on a display that reflects vision, care, and the spirit of the season.


 浙公网安备
33010002000092号
浙公网安备
33010002000092号 浙B2-20120091-4
Comments
No comments yet. Why don't you start the discussion?