
Applying a screen protector should be a simple task—protect your device’s display from scratches and impacts without altering its appearance or responsiveness. Yet, one of the most common frustrations users face is the formation of air bubbles shortly after installation. These unsightly imperfections not only detract from the look of your device but can also interfere with touch sensitivity and clarity. The good news is that most bubbling issues are preventable with the right preparation, tools, and technique. Whether you're using a tempered glass or film-based protector, understanding the root causes of bubbles and how to avoid them ensures a flawless finish every time.
Understanding Why Bubbles Form
Air bubbles occur when pockets of air become trapped between the screen protector and the device’s display during application. This typically happens due to improper cleaning, static interference, dust particles, or uneven pressure during installation. While small bubbles may disappear over time as the adhesive settles, larger or persistent ones usually indicate a flawed process. Humidity, temperature fluctuations, and even the angle at which you apply the protector can influence adhesion. Recognizing these factors is the first step toward achieving a bubble-free result.
Beyond aesthetics, bubbles can compromise the structural integrity of the protector. A lifted edge caused by trapped air creates an entry point for moisture and debris, increasing the risk of peeling and reduced protection. In touchscreen devices, bubbles under the protector may lead to inconsistent touch response, especially in gaming or precision tasks.
“Over 70% of screen protector failures stem from inadequate surface preparation—not product quality.” — David Lin, Mobile Device Accessories Engineer
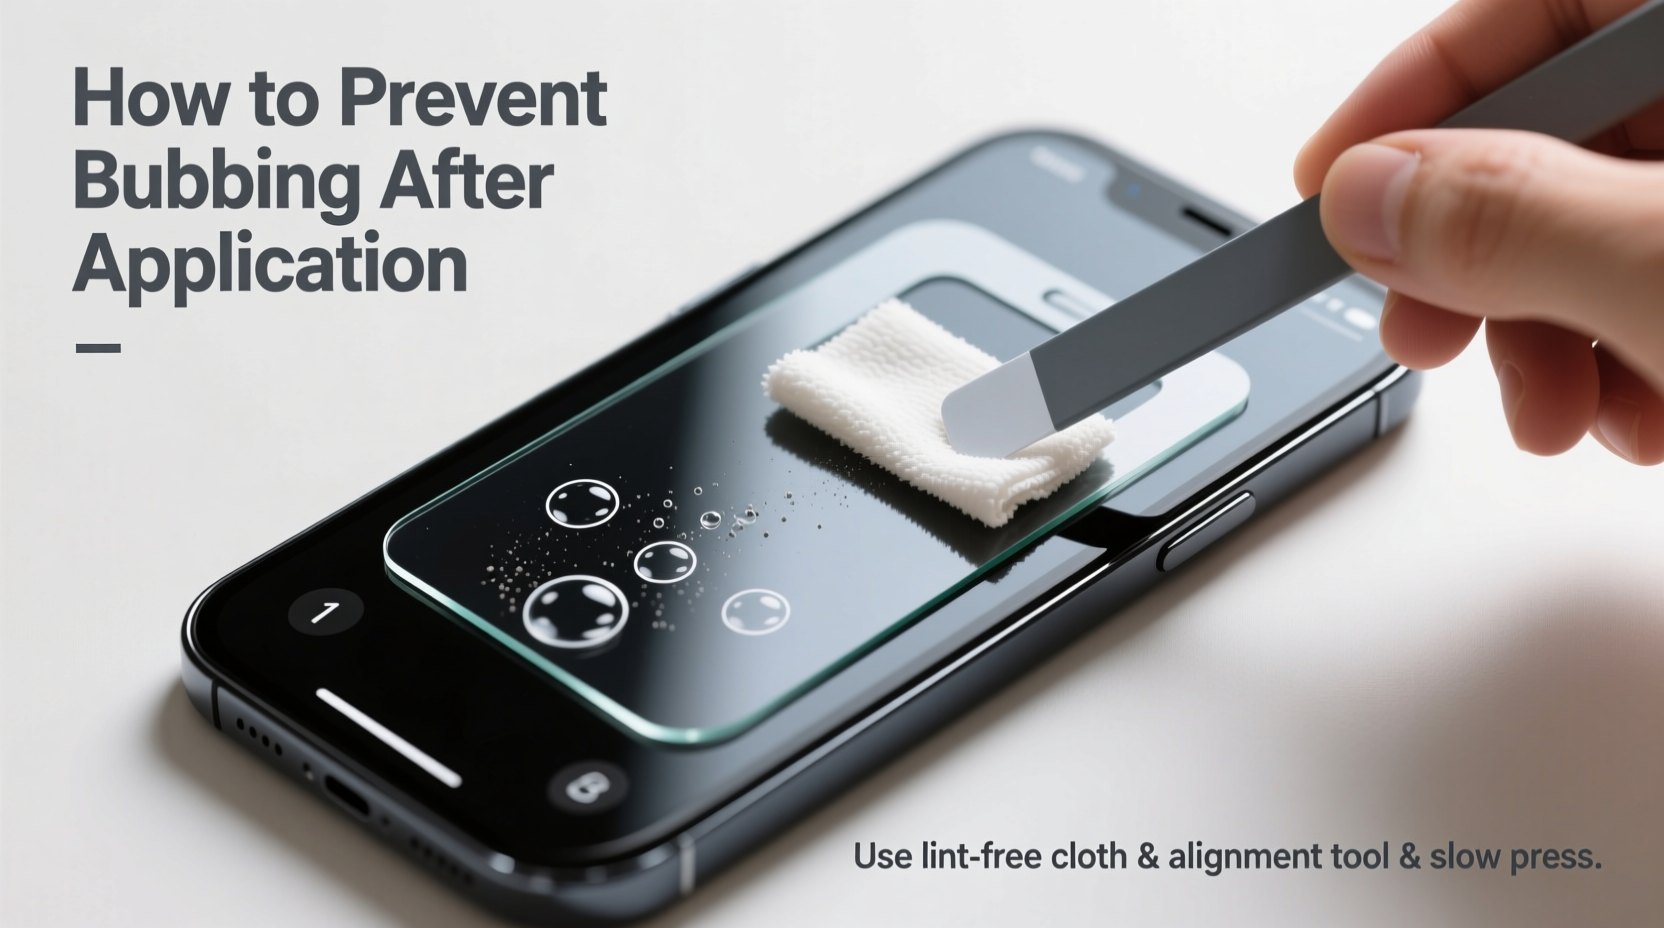
Step-by-Step Guide to Bubble-Free Application
The key to avoiding bubbles lies in meticulous execution. Follow this detailed timeline to ensure a clean, secure fit:
- Wash your hands thoroughly. Oils and dirt from your fingers can transfer to the screen or protector, creating contamination points.
- Power off your device. This minimizes static charge on the screen and prevents accidental inputs during installation.
- Clean the screen with the included alcohol wipe. Wipe in straight lines—never circular motions—to avoid spreading oils. Let it dry completely (about 30 seconds).
- Use the microfiber cloth to remove any residue. Buff gently until no streaks remain.
- Peel the backing from the protector slowly. Hold it by the edges to prevent fingerprints. Avoid touching the adhesive side.
- Align the protector carefully using the alignment frame (if provided). Start from one edge and slowly lower it down, like closing a book, to push air outward.
- Press gently from the center outward. Use a soft card (like a credit card wrapped in cloth) to smooth out any remaining micro-bubbles.
- Inspect under bright light. Look for missed dust particles or lifting edges. If needed, carefully lift and reseat the protector—do not stretch or slide it.
- Let it cure for 15–30 minutes. During this time, the adhesive bonds fully, and minor bubbles often dissipate.
Essential Tools and Materials Checklist
Having the right supplies significantly increases your chances of success. Here's what you should have before starting:
- Screen protector kit (includes protector, wipes, cloth, applicator card)
- Isopropyl alcohol wipe or solution (at least 70%)
- Microfiber cleaning cloth (lint-free)
- Dust removal stickers or tape (optional but helpful)
- Alignment frame or tray (included in premium kits)
- Soft-edged squeegee or credit card
- Well-lit workspace with minimal airflow
Do not skip any components in the kit. Even the tiny sticker used to pick up dust plays a critical role. Using substitutes like paper towels or tap water can introduce fibers or minerals that hinder adhesion.
Do’s and Don’ts: Common Mistakes That Cause Bubbling
Many users unknowingly sabotage their application through avoidable errors. The table below outlines best practices versus common pitfalls.
| Do’s | Don’ts |
|---|---|
| Wipe the screen in straight, overlapping strokes | Use circular wiping motions that spread grime |
| Apply the protector in one smooth motion once aligned | Peel, reposition, and readjust multiple times |
| Use a lint-free cloth for final polishing | Use tissues or cotton balls that shed fibers |
| Wait for the alcohol to evaporate before applying | Apply the protector while the screen is still damp |
| Press from center to edges to force air out | Tap randomly or press too hard, risking cracks |
| Work in a room with closed doors and windows | Install near vents, fans, or laundry areas |
One frequently overlooked mistake is failing to remove all micro-dust particles. Even specks invisible to the naked eye can create gaps in adhesion. Using a piece of sticky tape or a dedicated dust remover tool before the final wipe can eliminate this issue.
Real-World Example: Fixing a Repeated Bubbling Issue
Consider the case of Maya, a graphic designer who replaced her tablet’s screen protector three times in two weeks. Each time, large bubbles formed near the top left corner within hours. Frustrated, she assumed the product was defective. However, upon closer inspection, she realized her workspace—a shared desk near an open window—allowed fine dust to settle continuously. Additionally, she was using a kitchen towel instead of the microfiber cloth, leaving behind lint.
After switching to a controlled environment, using proper tools, and following a strict cleaning protocol, Maya successfully applied a new protector without a single bubble. She now keeps a sealed container with her application kit and performs installations only in her home office with the AC off. Her experience underscores that environmental control and material choices are just as important as the application method itself.
Choosing the Right Type of Screen Protector
Not all screen protectors are created equal. Your choice of material affects both the likelihood of bubbling and ease of correction:
- Tempered Glass: Offers superior durability and feel but requires perfect alignment due to rigid structure. Once misaligned, it cannot be repositioned without breaking the seal. Best for users confident in their application skills.
- TPU (Thermoplastic Polyurethane) Film: Slightly flexible, self-healing against minor scratches, and more forgiving during installation. Small bubbles often migrate to the edge and disappear over 24–48 hours.
- PET Film: Thinner and cheaper, commonly found in budget kits. More prone to bubbling due to weaker adhesive and susceptibility to static.
Hydrophobic and oleophobic coatings on higher-end models help repel fingerprints and improve wet adhesion, reducing the chance of bubbles forming post-application. For curved screens, opt for liquid or hybrid protectors designed specifically for edge coverage.
“Flexible TPU protectors have a 30% higher bubble recovery rate compared to rigid glass due to their ability to conform gradually.” — TechGear Lab, 2023 Durability Report
FAQ: Common Questions About Screen Protector Bubbling
Can I fix bubbles after the screen protector is applied?
Yes, depending on the size and type. Small bubbles (under 2mm) often vanish within a day as the adhesive spreads. For larger ones, use a soft card to gently push the air toward the nearest edge. If that fails, lift the protector slightly at the bubble site and re-smooth it. Avoid full removal unless necessary, as repeated peeling weakens adhesion.
Why do bubbles keep coming back even after I remove them?
Recurring bubbles usually indicate residual dust or oil on the screen. Clean again with alcohol, then use a sticky dust remover. Also check if the protector’s adhesive layer is compromised—exposure to air for more than a few minutes reduces stickiness.
Should I use water or spray methods for installation?
Some advanced users apply a fine mist of distilled water before placing the protector, allowing temporary sliding for perfect alignment. This “wet install” method is common with full-coverage film protectors. However, it requires careful drying and isn’t recommended for tempered glass unless specified by the manufacturer.
Final Tips for Long-Term Protection
Preventing bubbles isn’t just about the initial application—it’s also about ongoing care. Avoid placing your device face-down on surfaces where grit can accumulate. Regularly clean around the screen edges with a dry brush to prevent debris from creeping underneath. If you use a case, ensure it doesn’t press against the protector’s edges, which can cause lifting and air infiltration over time.
Store unused protectors in their original packaging in a cool, dry place. Heat and humidity degrade the adhesive layer, making future applications more prone to failure. Always check expiration dates on older kits; adhesives lose effectiveness after 12–18 months.
Conclusion
Installing a screen protector without bubbles is entirely achievable with attention to detail and the right approach. From thorough cleaning to precise alignment and proper tools, each step plays a vital role in ensuring a seamless finish. By understanding the science behind adhesion and learning from real-world mistakes, you can protect your device effectively and maintain its pristine look. Take your time, follow the process meticulously, and don’t rush the results. A flawless application today means lasting protection tomorrow.


 浙公网安备
33010002000092号
浙公网安备
33010002000092号 浙B2-20120091-4
Comments
No comments yet. Why don't you start the discussion?