
Reviving tired, outdated furniture doesn’t require hours of sanding or stripping. Many people avoid painting their old pieces simply because they dread the labor-intensive prep work. The good news: modern materials and smart techniques make it possible to achieve a beautiful, long-lasting finish without sanding down to bare wood. Whether it’s a 1970s dresser, a chipped nightstand, or a laminate bookshelf, you can breathe new life into worn furniture using simple, effective methods that skip the dust and elbow grease.
This guide walks through practical strategies, product recommendations, and real-world applications for painting furniture without sanding—helping you save time while still achieving professional-looking results.
Why Skip Sanding? The Case for Low-Prep Painting
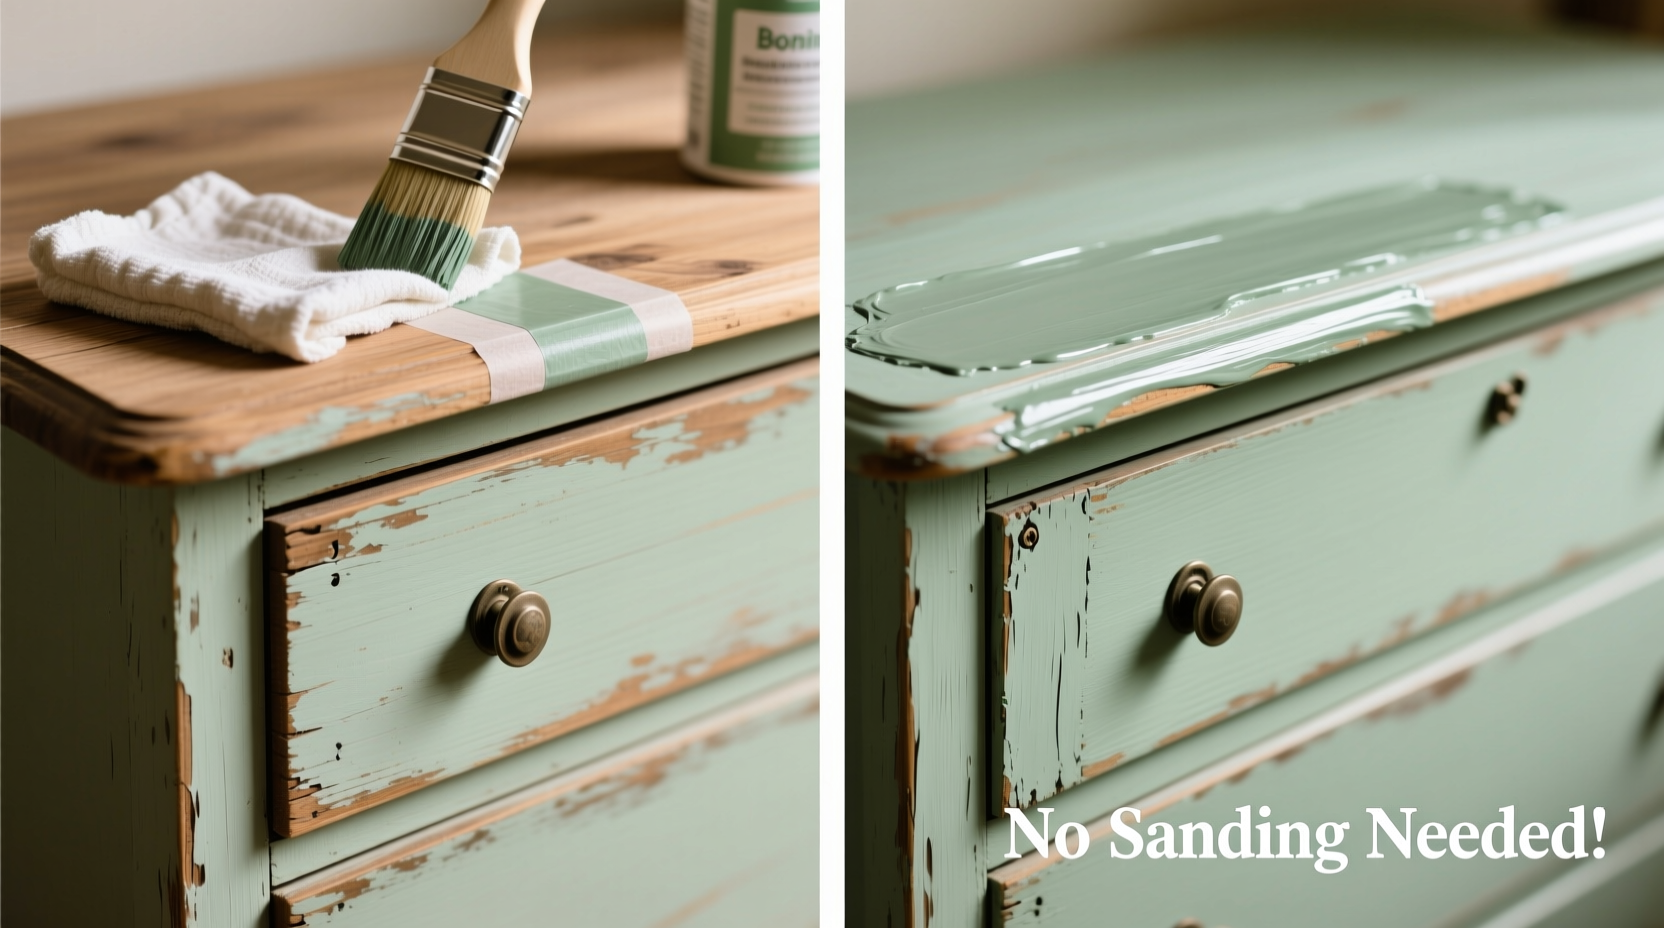
Sanding has long been considered essential in furniture refinishing. It creates a rough surface for paint adhesion and removes contaminants like wax, polish, or glossy finishes. But traditional sanding is messy, time-consuming, and not always necessary—especially when working with certain substrates or using advanced primers and paints.
Modern bonding primers and liquid deglossers have changed the game. These products chemically prepare surfaces by breaking down slick finishes and promoting adhesion, eliminating the need for physical abrasion in many cases. This is particularly useful for:
- Laminate or veneer surfaces (which sand poorly)
- Furniture with intricate carvings (where sanding is difficult)
- Large items like dressers or wardrobes
- People with limited mobility or tools
“With the right primer and surface prep, you can achieve excellent paint adhesion on previously finished wood—even without sanding.” — Rebecca Lin, Interior Refinishing Specialist with 15 years of restoration experience
Step-by-Step Guide: Paint Old Furniture Without Sanding
Follow this detailed process to successfully paint your furniture without lifting a sander.
- Clean the Surface Thoroughly
Start by removing all dirt, grease, wax, and grime. Use a mixture of warm water and mild dish soap or a dedicated degreaser. For stubborn buildup, mix 1 part white vinegar with 4 parts water. Wipe down every inch, including crevices and hardware areas. Let dry completely. - Repair Major Damage
Fill dents, cracks, or chips with wood filler or putty. Sand only the filled spots lightly with fine-grit paper (220 grit) to smooth them—no full-surface sanding needed. Allow drying per manufacturer instructions. - Apply a Liquid Deglosser (Optional but Recommended)
A deglosser (also called a de-glossing agent or chemical sandpaper) dissolves the shiny top layer, creating a “tooth” for paint to grip. Apply with a clean cloth, following grain direction. Let sit for 5–10 minutes, then wipe off residue with a dry cloth. Ventilate well and wear gloves. - Prime with a Bonding Primer
Choose a high-adhesion primer designed for slick surfaces. Options include:- Zinsser B-I-N Shellac-Based Primer (excellent for blocking stains and sealing)
- Kilz Adhesion High-Bonding Primer (latex-based, low odor)
- INSL-X Waterborne Bonding Primer
- Paint with Quality Finish Paint
Use a durable paint formulated for furniture. Chalk-style paints (like Annie Sloan or Rust-Oleum Chalked) adhere well to non-porous surfaces with minimal prep. Alternatively, use acrylic enamel or satin latex paint. Apply two thin coats, allowing proper drying time between layers. - Seal for Durability
Protect your work with a clear topcoat. Water-based polyurethane (matte or satin) is ideal. Apply 1–2 coats with a foam brush or lint-free cloth. Let cure for at least 48 hours before heavy use.
Best Paints and Primers for No-Sand Projects
Not all paints stick well to glossy or sealed surfaces. Choosing the right products makes the difference between a lasting finish and one that chips within weeks.
| Product Type | Recommended Brands | Best For | Notes |
|---|---|---|---|
| Bonding Primer | Kilz Adhesion, Zinsser B-I-N | Glossy wood, laminate, metal | Shellac-based primers block tannins and odors; latex-based are easier to clean up |
| Chalk-Style Paint | Annie Sloan Chalk Paint, Rust-Oleum Chalked | Veneer, painted furniture, cabinets | Adheres well with minimal prep; often requires no primer |
| Acrylic Enamel | Behr Premium Plus Ultra, Sherwin-Williams ProClassic | Durability and washability | Hard finish resists scratches and moisture |
| Clear Topcoat | Minwax Polycrylic, Varathane Water-Based Polyurethane | Protecting painted surfaces | Avoid oil-based poly on chalk paint—it may yellow |
Real Example: Reviving a Laminate Dresser Without Sanding
Sarah from Portland inherited her grandmother’s 1980s oak-look laminate dresser. It was structurally sound but visually dated, with a sticky, shiny surface. She wanted to transform it into a modern navy-blue statement piece—but didn’t own a sander and feared damaging the thin veneer.
She followed these steps:
- Washed the entire piece with TSP substitute and rinsed with a damp cloth.
- Used Krud Kutter Liquid Deglosser on all surfaces, letting it sit for 8 minutes before wiping clean.
- Applied one coat of Kilz Adhesion primer with a small foam roller, focusing on edges.
- Painted two coats of Sherwin-Williams Navy Blue (latex enamel) using a high-quality angled brush.
- Finished with two coats of Minwax Polycrylic for protection.
The result? A smooth, richly colored dresser that looked professionally refinished. After six months of daily use, there’s no chipping or peeling—even on drawer fronts. Sarah saved over three hours she would have spent sanding and avoided inhaling fine particles.
Common Mistakes to Avoid
Skipping sanding doesn’t mean skipping care. Poor results usually stem from rushing or using the wrong materials.
- Skipping cleaning: Dust, oils, and residues prevent adhesion. Never paint over a dirty surface.
- Using regular primer: Standard primers won’t bond to glossy finishes. Always use a bonding or shellac-based formula.
- Applying thick coats: Thick paint leads to drips and longer drying times. Thin, even layers are key.
- Not allowing cure time: Paint may feel dry in hours but takes days to fully harden. Wait at least 72 hours before heavy use.
- Ignoring hardware: Remove knobs and pulls. Clean or replace them to complete the transformation.
Checklist: Paint Furniture Without Sanding
Use this quick-reference checklist before starting your project:
- ✅ Remove all hardware (knobs, hinges, etc.)
- ✅ Clean surface with soapy water or degreaser
- ✅ Dry thoroughly (wait at least 1–2 hours)
- ✅ Repair deep scratches or dents with filler
- ✅ Apply liquid deglosser (optional but recommended)
- ✅ Prime with high-adhesion or shellac-based primer
- ✅ Lightly sand filled areas only (if needed)
- ✅ Apply first coat of paint; let dry
- ✅ Apply second coat for full coverage
- ✅ Seal with water-based polyurethane
- ✅ Allow 48–72 hours cure time before reassembling
Frequently Asked Questions
Can I paint varnished wood without sanding?
Yes, as long as you clean the surface and use a bonding primer or liquid deglosser. Varnish creates a hard, glossy barrier, but modern primers can adhere to it effectively when prepped chemically.
Will paint peel if I don’t sand?
It might—if you skip cleaning or use the wrong primer. However, with proper deglossing and high-adhesion products, paint can last for years without sanding. The key is surface compatibility and quality materials.
Is chalk paint really effective without sanding?
Yes, chalk-style paints are specifically formulated to bond to slick surfaces with little to no prep. They’re porous and grab onto surfaces well, especially when paired with a compatible topcoat like wax or polycrylic.
When You Should Still Sand
While no-sand methods work for most projects, some situations still require light sanding:
- Flaking or peeling existing paint: Remove loose material and feather edges.
- Very glossy finishes (e.g., piano lacquer): Even deglossers may struggle; light scuff-sanding helps.
- Water damage or stains: Sanding may be needed to remove compromised material before priming.
- Desire for ultra-smooth finish: A light pass with 220-grit paper evens out imperfections.
In these cases, focus only on problem areas. Full sanding isn’t required—just enough to stabilize the surface.
Conclusion: Transform Furniture Faster and Smarter
Refreshing old furniture with paint doesn’t have to be a weekend-long, dusty ordeal. With the right approach, you can achieve stunning results without sanding everything. By prioritizing thorough cleaning, using chemical deglossers, and selecting high-performance primers and paints, you’ll save time and effort while still protecting your investment.
Whether you're updating a hand-me-down or giving new life to a thrift store find, these techniques empower you to create beautiful, personalized pieces with confidence. The tools are in your hands—now go reclaim that forgotten dresser, side table, or bookshelf and turn it into something you love.


 浙公网安备
33010002000092号
浙公网安备
33010002000092号 浙B2-20120091-4
Comments
No comments yet. Why don't you start the discussion?