
Nothing ruins a snack session faster than reaching into a bag of chips or crackers only to find them soft, limp, and lacking that satisfying crunch. Humidity, improper storage, or simply time can cause once-crisp snacks to go stale. While tossing them may seem like the easiest solution, there’s a smarter, waste-reducing alternative: reviving them in your oven. With just a few minutes and basic kitchen tools, you can restore their texture and enjoy them as if they were fresh from the package.
This guide walks through the science behind staleness, the best oven techniques for different types of snacks, and practical tips to keep your favorites crispy longer. Whether it's tortilla chips, saltines, or gourmet crackers, you’ll learn how to bring back their crunch reliably and safely.
The Science Behind Stale Snacks
Staleness isn’t about spoilage—it’s a textural issue caused by moisture migration. When dry snacks like chips and crackers are exposed to air, especially humid environments, they absorb moisture from the atmosphere. This softens their structure and dulls their flavor. Conversely, in overly dry conditions, some snacks may lose internal moisture too quickly, becoming brittle and less palatable.
Chips and crackers are engineered to be low-moisture foods. Their crispness comes from starches that have been gelatinized during frying or baking and then rapidly dried. Once moisture re-enters the matrix, those starches begin to retrograde, leading to sogginess. The good news? This process is reversible through controlled reheating.
Applying gentle, dry heat drives out excess moisture without burning the food. The oven, with its even temperature distribution, is ideal for this task—far more reliable than a microwave, which can create hot spots and uneven textures.
“Reviving stale snacks with an oven isn’t just about convenience—it’s food science in action. By removing absorbed moisture, you’re resetting the physical structure of the starch, restoring both texture and mouthfeel.” — Dr. Lena Torres, Food Scientist at the Culinary Research Institute
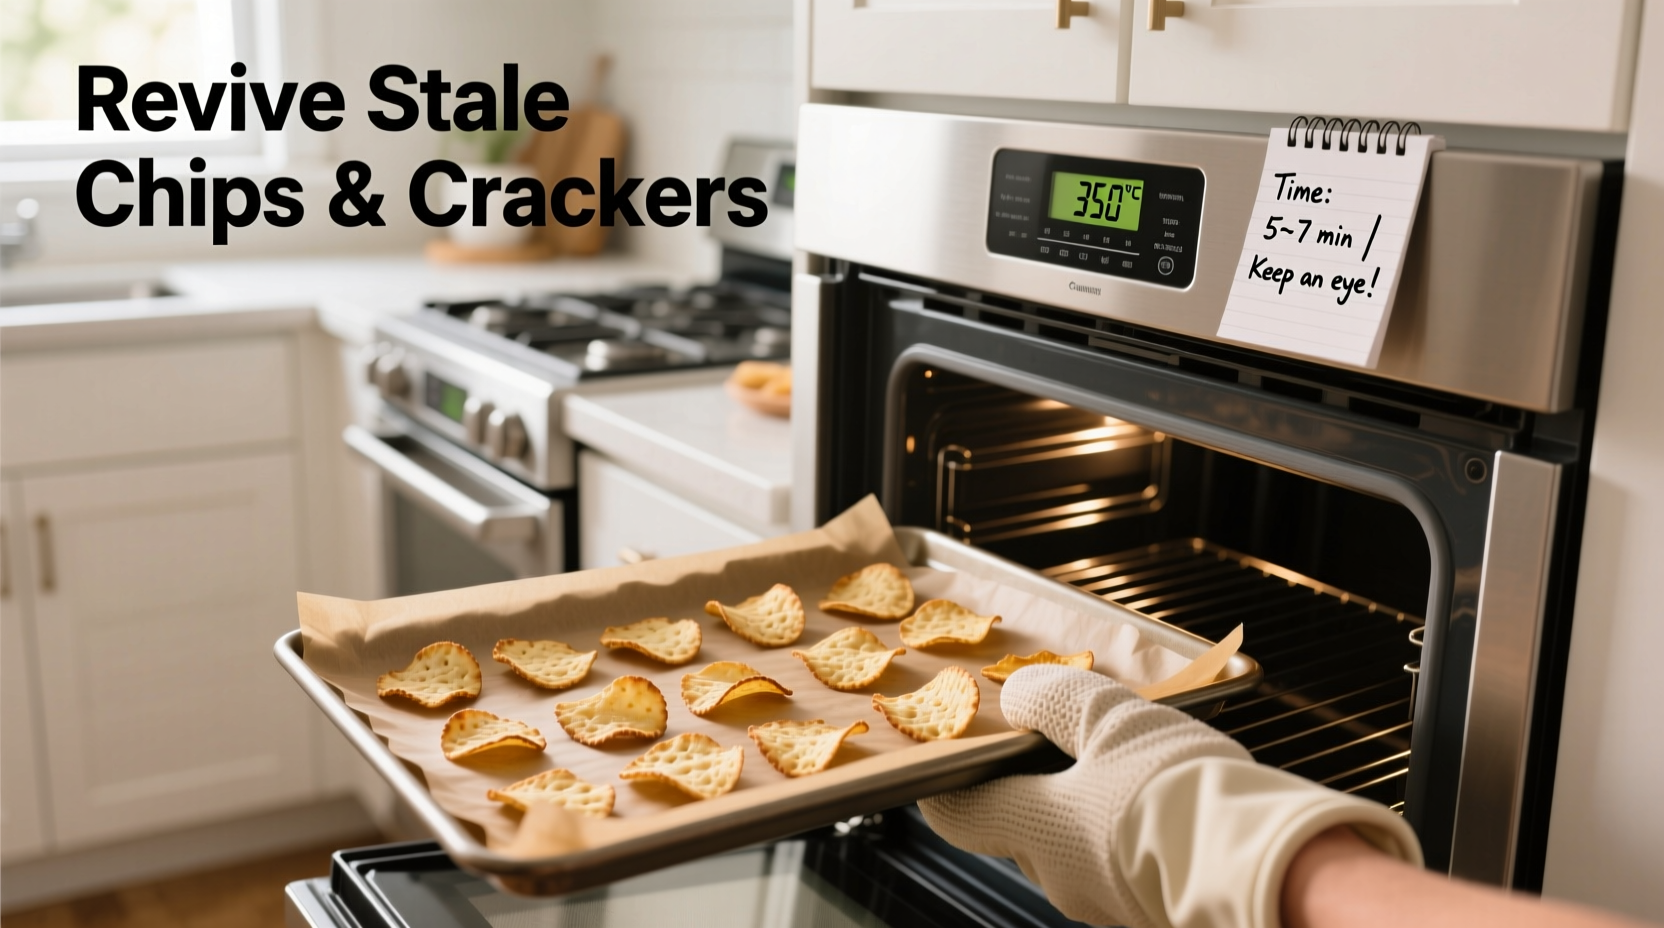
Step-by-Step Guide to Refreshing Chips and Crackers
Follow this detailed process to revive your stale snacks effectively and consistently.
- Preheat the oven to 300°F (150°C). A moderate temperature ensures slow, even drying without scorching. High heat can burn delicate snacks before they fully re-crisp.
- Spread the chips or crackers in a single layer on a baking sheet. Overlapping leads to uneven heating. Use parchment paper for easy cleanup and to prevent sticking.
- Bake for 5–10 minutes. Start checking at the 5-minute mark. Thinner snacks like potato chips need less time; thicker ones like multigrain crackers may take closer to 10.
- Flip halfway through (optional but recommended for thick items). This ensures both sides are evenly exposed to heat, especially useful for hearty crackers or homemade-style chips.
- Remove and cool completely. Crispness sets as the snacks cool. Taste one after 2–3 minutes of cooling to assess texture.
- Store properly post-refresh. Transfer to an airtight container immediately to prevent re-absorption of moisture.
Best Practices by Snack Type
Not all snacks respond the same way to oven revival. Adjust your method based on the type and composition of the item.
| Snack Type | Oven Temp | Time | Special Notes |
|---|---|---|---|
| Potato Chips | 300°F (150°C) | 5–7 minutes | Thin and fragile—avoid flipping. Watch closely to prevent burning. |
| Tortilla Chips | 300°F (150°C) | 6–8 minutes | Slightly thicker; flip halfway for even crisping. |
| Saltine Crackers | 300°F (150°C) | 5–6 minutes | Very dry already—short bake time prevents over-drying. |
| Whole Grain/Seeded Crackers | 275°F (135°C) | 8–10 minutes | Lower temp prevents seeds from burning; flip once. |
| Cheese Crackers (e.g., Goldfish) | 250°F (120°C) | 4–6 minutes | Low heat avoids melting cheese components. |
Fatty or cheese-coated snacks require extra caution. High heat can cause oils to separate or cheese to melt and stick to the pan. When in doubt, opt for lower temperatures and slightly longer times.
Common Mistakes to Avoid
Even simple processes can go wrong without proper attention. Here are frequent errors people make when trying to refresh stale snacks—and how to avoid them.
- Using too high a temperature. Many assume “hotter = faster,” but ovens above 325°F often burn edges before the center dries out.
- Overcrowding the pan. Stacking or overlapping traps steam, preventing effective moisture removal.
- Skipping the cooling phase. Snacks may feel soft right out of the oven but crisp up as they cool. Don’t judge results prematurely.
- Reheating multiple times. Each cycle degrades texture slightly. Only refresh what you plan to eat soon after.
- Leaving them exposed after revival. Without proper storage, revived snacks can become stale again within hours.
Real Example: Reviving a Bag of Festival Leftovers
Sarah attended a summer street fair and brought home a large bag of handmade kettle-cooked chips, excited to enjoy them later. By the third day, the humidity had turned them leathery and unappetizing. Instead of discarding them, she decided to try the oven method.
She preheated her oven to 300°F, spread the chips in a single layer on a parchment-lined tray, and baked them for 6 minutes, flipping gently halfway through. After cooling for 5 minutes, she tasted one—crisp, golden, and full of flavor, nearly indistinguishable from fresh. She stored the rest in a glass jar with a tight seal and enjoyed them over the next week without further issues.
“I was skeptical,” Sarah said, “but it worked better than I expected. Now I do this anytime my chips lose their snap.”
Do’s and Don’ts Summary
To help reinforce best practices, here’s a quick-reference table outlining key dos and don’ts.
| Action | Do | Don’t |
|---|---|---|
| Temperature | Use 250–300°F for most snacks | Exceed 325°F unless recipe specifies |
| Lay Out | Single layer, no overlap | Pile or stack snacks |
| Monitoring | Check every 2 minutes after 5 min | Walk away during baking |
| Cooling | Let cool 3–5 minutes before tasting | Eat immediately after baking |
| Storage | Transfer to airtight container | Leave in open bowl or original bag |
FAQ: Common Questions About Reviving Stale Snacks
Can I use a toaster oven instead of a full-sized oven?
Yes, a toaster oven works well and can be more energy-efficient for small batches. Just ensure even airflow and monitor closely, as smaller ovens may heat unevenly or more quickly.
Is it safe to reheat cheesy or flavored snacks?
Generally yes, but use lower temperatures (around 250°F) to prevent cheese from melting or artificial flavors from degrading. Baking time should be shorter—4 to 6 minutes max.
How long will revived chips stay crispy?
If stored properly in an airtight container, they can remain crisp for up to a week. However, they may gradually reabsorb moisture depending on kitchen humidity. For best results, consume within 2–3 days.
Maximizing Results: A Practical Checklist
Use this checklist each time you refresh stale snacks to ensure consistent success.
- ✅ Check expiration date—only revive snacks that are stale, not spoiled.
- ✅ Preheat oven to 250–300°F depending on snack type.
- ✅ Line baking sheet with parchment paper.
- ✅ Spread snacks in a single, non-overlapping layer.
- ✅ Set timer for 5 minutes; check and rotate/flipping if needed.
- ✅ Continue baking in 1–2 minute increments until desired crispness.
- ✅ Remove and let cool completely on the tray.
- ✅ Store in airtight container with optional desiccant.
- ✅ Label container with date of revival for freshness tracking.
Conclusion: Waste Less, Enjoy More
Reviving stale chips and crackers in the oven is a simple, effective technique that saves money and reduces food waste. Armed with the right temperature, timing, and storage habits, you can extend the life of your favorite snacks and enjoy their full flavor and texture long after they’ve lost their initial crunch.
This method isn’t just a kitchen hack—it’s a sustainable practice that aligns with mindful consumption. Instead of throwing out slightly stale snacks, give them a second life. The next time you open a bag and hear a disappointing rustle instead of a satisfying crackle, don’t reach for the trash. Reach for your oven.


 浙公网安备
33010002000092号
浙公网安备
33010002000092号 浙B2-20120091-4
Comments
No comments yet. Why don't you start the discussion?