
Candle wax spills on carpet are more common than many realize—especially during holidays, romantic dinners, or cozy evenings with scented candles. While the ambiance may be perfect, the aftermath can be frustrating. Wax hardens quickly, sticks stubbornly to fibers, and if not removed correctly, leaves behind oily stains, discoloration, or sticky residue that attracts dirt. The key isn’t just removing the wax—it’s doing so in a way that preserves the carpet’s texture, color, and integrity.
The good news is that you don’t need expensive cleaners or professional help for most wax spills. With the right technique and household tools, you can fully eliminate wax and any trace of residue. This guide walks through scientifically sound, field-tested methods that ensure complete removal while minimizing risk to your carpet.
Understanding Why Wax Is Tricky to Remove
Wax is hydrophobic, meaning it repels water, which makes traditional wet cleaning ineffective. When spilled, it cools and solidifies, embedding into carpet fibers. But beneath the visible chunk lies an oily film—residue from additives like dyes, fragrances, and softening agents—that standard scraping misses. This residue yellows over time and becomes a magnet for dust and grime.
Improper removal techniques, such as using boiling water or harsh solvents, can melt wax deeper into the backing or damage synthetic fibers. That’s why a layered approach—solid removal followed by deep residue extraction—is essential.
“Most people think removing the bulk wax is enough, but the invisible oils linger and degrade carpet quality over time.” — Dr. Linda Reeves, Textile Restoration Specialist
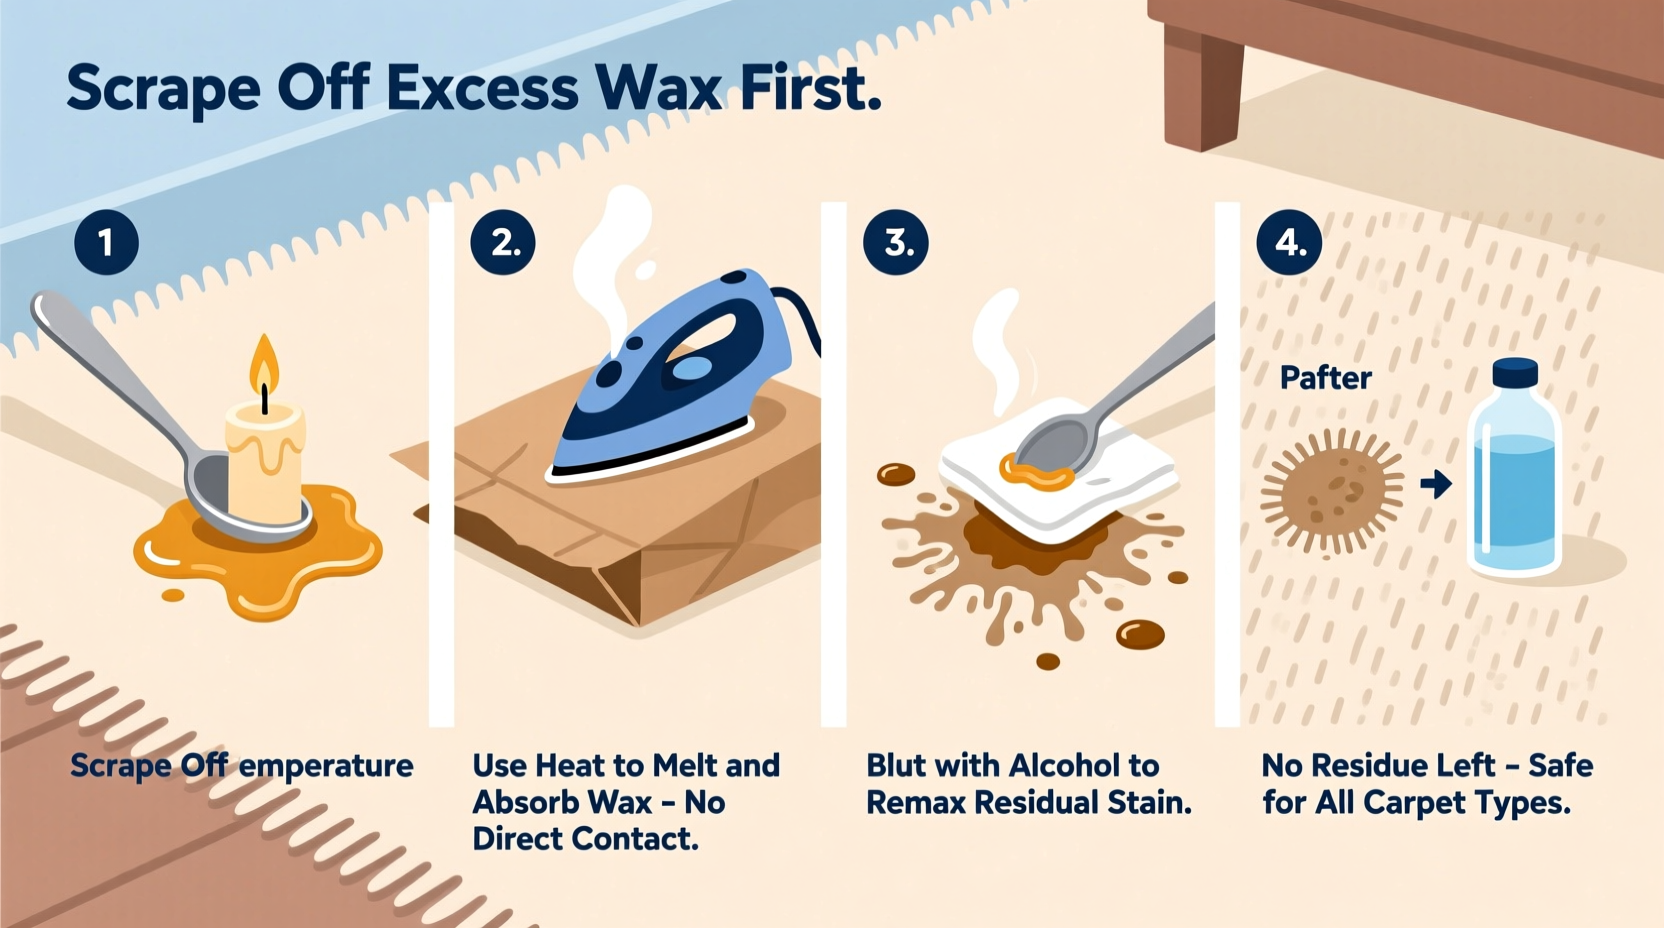
Step-by-Step Guide: Removing Wax Without Residue
Follow this five-phase process to extract both wax and residue safely. Each step builds on the last to ensure total cleanliness.
Phase 1: Cool and Harden (If Necessary)
If the wax is still warm or molten, let it cool completely. Do not touch or wipe it yet. For large spills, place an ice pack wrapped in a cloth over the area for 5–10 minutes to accelerate hardening. Cold wax is easier to lift without smearing.
Phase 2: Gently Scrape Off Bulk Wax
Use a blunt edge—a butter knife, plastic card, or spoon—to carefully lift the hardened wax. Work from the outer edge inward to avoid pushing wax deeper. Apply minimal pressure; aggressive scraping can fray fibers.
Phase 3: Apply Heat to Lift Remaining Wax
This is the critical stage for preventing residue. Use heat to gently melt trapped wax so it rises to the surface without soaking into padding. Place a clean, absorbent paper towel or brown bag over the spot. Set an iron to low or medium heat (no steam) and press it over the paper for 10–15 seconds. The wax will melt and transfer into the paper. Replace the paper as it becomes saturated and repeat until no more wax transfers.
Alternative: If you don’t have an iron, use a hairdryer on medium heat. Hold it 6 inches from the carpet and warm the area for 30 seconds. Blot immediately with a fresh paper towel. Repeat as needed.
Phase 4: Eliminate Oily Residue
Even after heat treatment, microscopic oils remain. To remove them:
- Mix one tablespoon of dish soap (like Dawn) with two cups of warm water.
- Dip a clean white cloth into the solution and wring it out thoroughly.
- Blot the area gently—do not scrub—to lift residual oils.
- Rinse by dabbing with a cloth dampened with plain water.
- Press a dry towel over the spot to absorb moisture.
For wool or delicate carpets, skip dish soap. Instead, use a few drops of white vinegar in a cup of water. Vinegar breaks down oil without harming natural fibers.
Phase 5: Dry and Restore Texture
After cleaning, fluff the carpet fibers with your fingers or a soft-bristle brush to restore their upright position. Allow the area to air-dry completely—ideally 6–8 hours—with airflow from a fan. Avoid walking on it until fully dry to prevent tracking moisture or dirt back in.
Do’s and Don’ts: Best Practices Table
| Do’s | Don’ts |
|---|---|
| Use a paper towel or brown bag with heat to absorb melted wax | Apply direct heat (e.g., iron touching carpet) without a protective layer |
| Blot gently with soapy water to remove residue | Scrub aggressively, which can spread wax and damage fibers |
| Test cleaning solutions on a hidden area first | Use bleach or ammonia-based cleaners—they can discolor carpet |
| Allow full drying before resuming foot traffic | Leave the area damp, which invites mold or mildew |
| Vacuum after drying to lift any flattened fibers | Ignore lingering stickiness—treat it immediately |
Real Example: A Holiday Spill Saved in Time
Sarah hosted a dinner party on New Year’s Eve when a taper candle tipped over near her living room rug—a light beige Berber carpet. She cooled the wax with ice, scraped off the main chunk, then used the iron-and-paper method. After three rounds, the paper showed faint yellow spots, proving residual wax was still present. She applied a vinegar-water mix, blotted, and dried overnight. The next morning, the carpet looked untouched. “I was ready to call a cleaner,” she said, “but this method saved me $150 and preserved the pile.”
Alternative Methods Compared
While the heat-and-absorb method is most effective, some prefer alternatives. Here’s how they stack up:
- Freezing with Ice: Effective for initial hardening but doesn’t address residue. Best paired with other steps.
- Commercial Wax Removers: Products like Goo Gone or WD-40 work on adhesives but can leave stronger chemical residues. Not recommended for carpets unless labeled safe.
- Steam Cleaning: Can melt and lift wax but risks driving it deeper if not followed by blotting. Use only with extraction capability.
- Baking Soda Paste: Mild abrasive; helps absorb oils when mixed with water. Sprinkle after cleaning, let sit 30 minutes, then vacuum. Good final step, not a standalone fix.
Frequently Asked Questions
Can I use a hairdryer instead of an iron?
Yes. A hairdryer is safer for delicate carpets because it offers less concentrated heat. Warm the wax gradually and blot immediately with paper towels. It takes longer than an iron but reduces burn risk.
What if the wax left a stain after removal?
If a colored ring remains, it’s likely dye residue. Mix one part hydrogen peroxide with two parts water and test on a hidden area. Dab onto the stain, wait 5 minutes, then blot and rinse. For wool, use a specialized carpet stain remover instead.
Will vinegar damage my carpet?
White vinegar is safe for most synthetic and natural carpets when diluted. However, excessive use can weaken latex backing over time. Limit applications to once per incident and always rinse with water afterward.
Checklist: Complete Wax Removal Process
Follow this checklist to ensure no step is missed:
- ✅ Let wax cool completely (use ice if needed)
- ✅ Scrape off bulk wax with a dull tool
- ✅ Cover spot with paper towel or brown bag
- ✅ Apply heat with iron (low setting) or hairdryer
- ✅ Replace paper as it absorbs wax
- ✅ Clean residue with dish soap/water or vinegar solution
- ✅ Rinse with damp cloth and blot dry
- ✅ Fluff fibers and allow full drying
- ✅ Vacuum to restore texture
- ✅ Inspect for stickiness or discoloration
Expert Tips for Preventing Future Wax Damage
Prevention is simpler than cleanup. Consider these habits:
- Place candles on trays or heat-resistant surfaces away from foot traffic.
- Trim wicks to ¼ inch to reduce dripping.
- Avoid placing candles near vents or fans where airflow can cause flickering and spillage.
- Use LED flameless candles in high-risk areas like dining tables or kids’ rooms.
“The best carpet care includes anticipating accidents. A well-placed coaster or candle holder prevents 90% of wax incidents.” — Mark Tolbert, Home Maintenance Consultant
Conclusion: Act Fast, Clean Thoroughly
Removing candle wax from carpet without leaving residue is entirely achievable with patience and the right method. The combination of mechanical removal, controlled heat, and gentle cleaning ensures both surface wax and hidden oils are gone. Rushing the process or skipping residue treatment leads to long-term staining and fiber degradation.
By following the steps outlined here, you protect your investment, maintain indoor air quality, and keep your home looking pristine. Whether it’s a birthday candle drip or a holiday centerpiece mishap, you now have the knowledge to respond confidently and effectively.


 浙公网安备
33010002000092号
浙公网安备
33010002000092号 浙B2-20120091-4
Comments
No comments yet. Why don't you start the discussion?