
Candle wax spills on fabric are more common than you might think—whether it’s a cozy dinner gone slightly wrong or a birthday celebration that left behind drips on the tablecloth. While wax may seem stubborn, especially when it hardens, removing it doesn’t require harsh chemicals or expensive cleaning products. With just two household items—paper towels and an iron—you can effectively lift wax from most fabrics without damaging the material. This method works by gently melting the wax and absorbing it into absorbent paper, leaving your fabric clean and intact.
The key to success lies in understanding the science behind the process: heat melts the wax, and capillary action pulls the liquefied wax into the paper towel. When done correctly, this technique is not only efficient but also safe for delicate materials like cotton, linen, polyester, and even some blends. However, proper preparation and caution are essential to avoid spreading the stain or scorching the fabric.
Why This Method Works
The combination of heat and absorption makes the paper towel and iron method one of the most reliable ways to deal with candle wax on fabric. Unlike solvents or freezing techniques, which can be messy or less effective, this approach targets the wax directly at its physical state—solidifying it first, then liquefying it under controlled conditions.
When the iron is applied over layers of paper towels, the heat penetrates the fabric just enough to melt the wax without burning the fibers. The melted wax is then drawn upward into the paper towels through absorption. Multiple layers ensure that as much wax as possible is captured before it re-hardens.
“Using gentle heat and absorbent materials is far safer than aggressive scrubbing or chemical removers, which can set stains or weaken fabric.” — Dr. Lena Patel, Textile Care Specialist, Home Fabric Research Institute
This method is particularly effective because it avoids water initially, which means no risk of spreading the wax further or creating a soapy mess. It’s ideal for spot treatment on upholstery, clothing, table linens, and curtains.
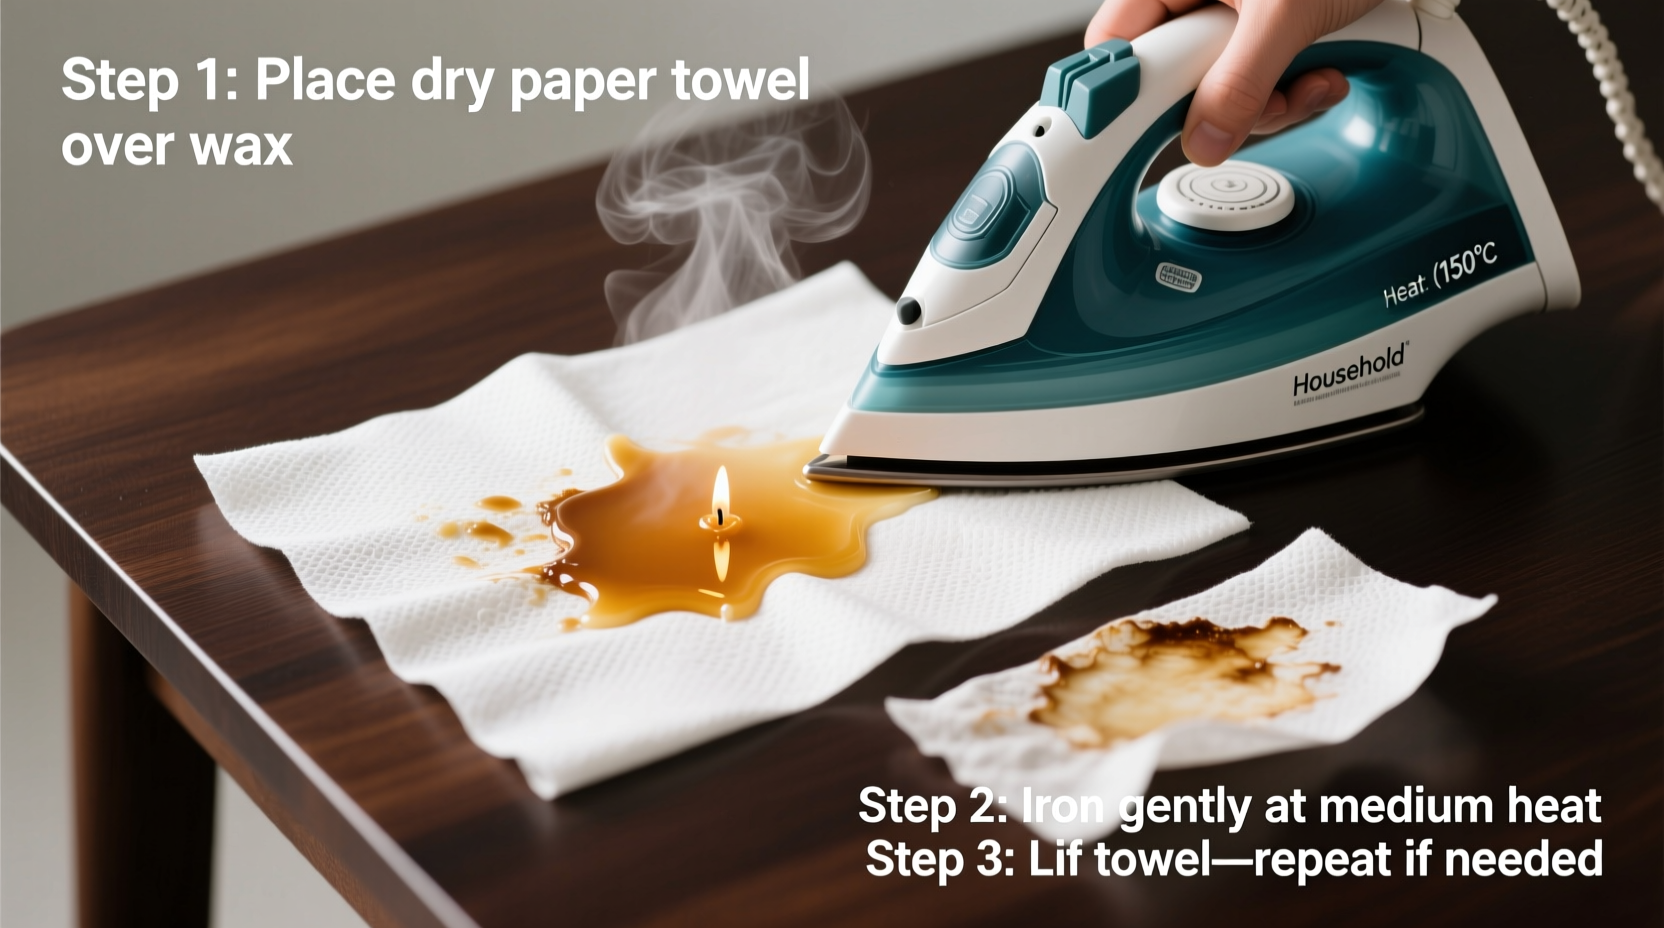
Step-by-Step Guide to Removing Wax with Paper Towels and an Iron
Follow this detailed sequence to safely and thoroughly remove candle wax from any washable fabric. Precision and patience are crucial—rushing the process can lead to smearing or damage.
- Let the wax harden completely. If the spill is fresh, allow it to cool and solidify. Do not attempt to wipe or scrape it while still liquid.
- Scrape off excess wax. Use a butter knife or credit card to gently lift large chunks of wax from the surface. Work from the outer edge toward the center to avoid pushing wax deeper into the fibers.
- Place the fabric flat on an ironing board. Ensure the stained area is smooth and taut. If treating clothing, turn it inside out to protect the visible side during initial heating.
- Lay 2–3 folded paper towels over the wax. The thickness helps absorb more wax and prevents direct contact between the iron and fabric.
- Set the iron to low or medium heat. Never use high heat, especially on synthetic fabrics. Test on an inconspicuous area first if unsure.
- Press the iron over the paper towels for 10–15 seconds. Do not slide the iron—use a pressing motion. The heat will melt the wax, which rises into the paper.
- Replace the paper towel once it absorbs wax. Continue layering fresh paper towels and repeating the pressing until no more wax transfers.
- Check the fabric. Once all visible wax is gone, inspect both sides. If residue remains, repeat the process with clean paper.
- Wash the fabric according to care instructions. After wax removal, launder normally to eliminate any oily residue or scent.
- Air dry and inspect before machine drying. Heat from a dryer can set any remaining wax, making it harder to remove later.
Do’s and Don’ts: What to Avoid During Wax Removal
To maximize effectiveness and minimize damage, follow these best practices. Some actions may seem logical but can actually worsen the situation.
| Do’s | Don’ts |
|---|---|
| Use low to medium heat on the iron | Never use high heat or steam directly on wax |
| Replace paper towels frequently as they absorb wax | Don’t reuse the same paper towel—it can re-deposit wax |
| Test iron temperature on a hidden area first | Don’t rub or scrub the wax aggressively |
| Wash the fabric after wax removal | Don’t put the item in the dryer until fully clean |
| Work slowly and replace paper as needed | Don’t leave the iron in one spot too long—risk of scorching |
Real Example: Saving a Linen Tablecloth After Dinner
Sarah hosted a dinner party and accidentally knocked over a taper candle, spilling wax across her cream-colored linen tablecloth. At first, she panicked—linen is delicate, and the wax had dripped in thick streaks. But remembering a tip from a friend, she waited until the next morning when the wax was fully hardened.
She placed the cloth on her ironing board, scraped off the bulk with a spoon, then layered three paper towels over the largest stain. Using her iron on “cotton” setting (medium heat), she pressed for 10 seconds at a time, replacing the paper each time it showed yellow spots. After five rounds, the wax was almost entirely gone. She repeated the process on smaller drips, then washed the tablecloth in cold water with mild detergent. After air drying, the fabric looked untouched—no stains, no stiffness.
Sarah noted that patience made the difference. “I wanted to rush it with higher heat,” she said, “but taking my time kept the linen soft and undamaged.”
Tips for Different Fabric Types
Not all fabrics respond the same way to heat. Adjust your approach based on the material to prevent warping, melting, or discoloration.
- Cotton & Linen: These natural fibers handle moderate heat well. Use medium settings and multiple paper layers.
- Polyester & Blends: Use low heat only. Synthetic fibers can melt or become shiny under high temperatures.
- Wool & Silk: Avoid direct iron contact. Place a thin cotton cloth between the iron and paper towel to diffuse heat.
- Upholstery & Curtains: Treat in place if removable. For non-removable items, work section by section and ventilate the room.
Frequently Asked Questions
Can I use a hairdryer instead of an iron?
Yes, but it’s less effective. A hairdryer melts wax slowly and unevenly, increasing the chance of spreading. An iron provides consistent, concentrated heat and immediate absorption when paired with paper towels.
What if the fabric is colored? Will the heat cause fading?
Heat alone rarely causes fading, but prolonged exposure can. Always test on a seam or hem first. Use the lowest effective heat setting and keep pressing intervals short (10–15 seconds).
Is it safe to use this method on jeans?
Absolutely. Denim is durable and responds well to this technique. Turn the jeans inside out to protect the outer finish, and use medium heat. Be mindful of pockets—wax can seep underneath seams.
Checklist: Removing Candle Wax from Fabric – Quick Reference
Keep this checklist handy for future spills:
- ✅ Allow wax to harden completely
- ✅ Scrape off excess wax gently
- ✅ Lay fabric flat on ironing board
- ✅ Place 2–3 layers of white paper towels over stain
- ✅ Set iron to low or medium heat (no steam)
- ✅ Press (don’t slide) for 10–15 seconds
- ✅ Replace paper towels as they absorb wax
- ✅ Repeat until no wax transfers
- ✅ Launder fabric according to care label
- ✅ Air dry and inspect before machine drying
Final Thoughts and Prevention Tips
Removing candle wax from fabric doesn’t have to be stressful or costly. With everyday tools like paper towels and an iron, most wax stains can be eliminated in under 30 minutes. The method is grounded in simple physics—heat and absorption—and works across a wide range of textiles when applied carefully.
That said, prevention is always better than cleanup. Consider using candle holders with drip catchers, trimming wicks to ¼ inch before lighting, or opting for flameless LED candles in high-risk areas like dining tables or near upholstered furniture. For fabric items used frequently around candles—like table runners or throw blankets—treat them with a fabric protector spray that repels oils and waxes.
“The fastest way to ruin a favorite piece of fabric isn’t the spill itself—it’s the panic response. Calm, methodical action saves more items than any miracle cleaner.” — Marcus Tran, Restoration Technician, Heritage Upholstery Services
Mastering this technique empowers you to host gatherings with confidence, knowing that a tipped candle won’t mean replacing linens or retiring a cherished item. It’s a small skill with lasting benefits, blending practicality with smart home stewardship.


 浙公网安备
33010002000092号
浙公网安备
33010002000092号 浙B2-20120091-4
Comments
No comments yet. Why don't you start the discussion?