
Permanent marker stains on wooden surfaces are more common than you might think—especially in homes with children or busy workspaces. Whether it’s a child’s artwork gone too far or an accidental mark during a labeling session, removing ink from wood can feel like a high-stakes task. The real challenge isn’t just eliminating the stain; it’s doing so without dulling, lifting, or otherwise compromising the wood’s protective finish.
Many household cleaners and DIY hacks promise quick fixes but often strip varnish, bleach the grain, or leave behind residue. This guide focuses exclusively on techniques that target the ink while preserving the integrity of the wood’s surface. From gentle solvents to precision tools and preventive habits, you’ll learn how to restore your furniture, trim, or cabinetry safely and effectively.
Understanding Wood Finishes and Why They Matter
Before attempting any removal method, it’s essential to understand what lies between the ink and the raw wood: the finish. Most finished wood surfaces—such as tables, dressers, doors, and baseboards—are coated with a protective layer designed to resist moisture, scratches, and wear. Common finishes include:
- Polyurethane – Durable and glossy; commonly used on floors and tabletops.
- Shellac – Natural resin-based; sensitive to alcohol and heat.
- Lacquer – Fast-drying and hard; found on modern furniture.
- Varnish – Oil-based and long-lasting; ideal for outdoor or high-moisture areas.
- Wax – Soft and traditional; requires regular reapplication.
Each reacts differently to solvents. For example, rubbing alcohol may dissolve shellac but won’t harm polyurethane. Using the wrong cleaner can result in cloudiness, peeling, or etching—damage that’s often worse than the original stain.
“Always test your cleaning method in an inconspicuous area first. A small patch of damage is better than a ruined tabletop.” — Daniel Reeves, Restoration Carpenter & Finish Specialist
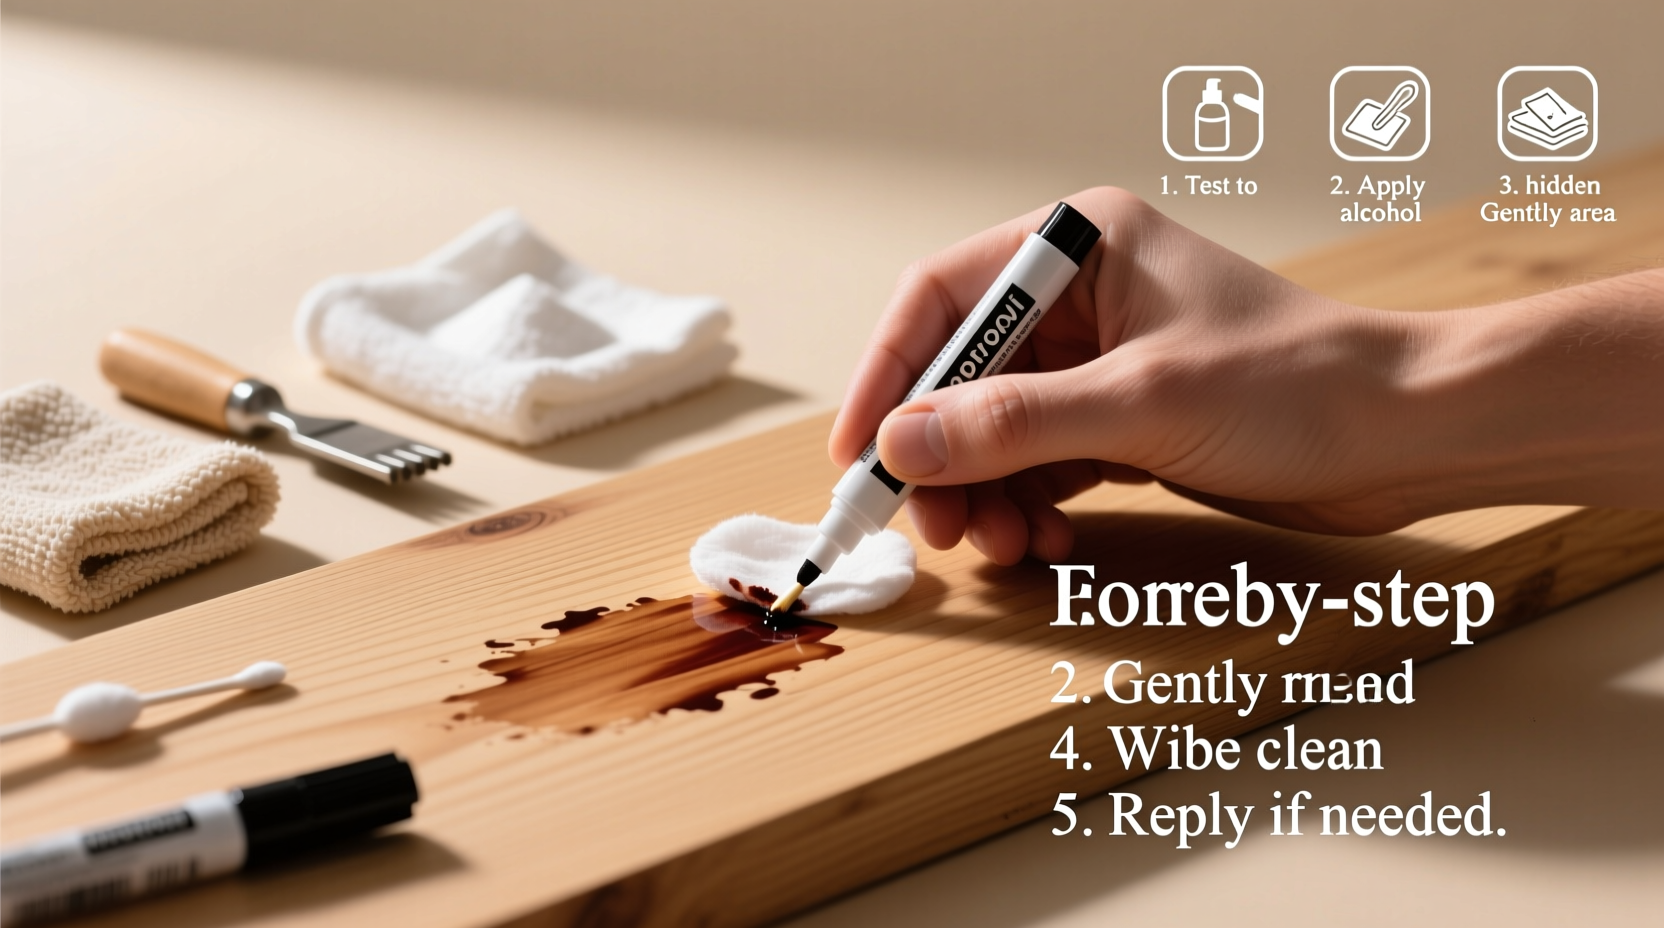
Safe and Effective Removal Methods (Step-by-Step)
The key to success is starting with the mildest possible solution and progressing only if necessary. Follow this logical sequence to avoid unnecessary risk.
Step 1: Blot and Assess
Don’t rub. Use a clean, dry cloth to gently blot the stained area. This removes excess ink and helps determine how deeply it has penetrated. Fresh marks are easier to remove than dried-in stains.
Step 2: Try Rubbing Alcohol (With Caution)
Isopropyl alcohol (70% or higher) is one of the most effective solvents for breaking down permanent marker ink. However, because it dissolves shellac and some lacquers, proceed carefully.
- Dampen a cotton swab or soft cloth with rubbing alcohol—do not soak it.
- Test on a hidden spot (e.g., underside of a table edge).
- If no finish damage occurs after 10 seconds, gently dab the stain in small circular motions.
- Rinse immediately with a water-dampened cloth to neutralize residual alcohol.
- Dry thoroughly with a microfiber towel.
Step 3: Try Non-Acetone Nail Polish Remover
If alcohol fails or risks the finish, non-acetone nail polish remover is a gentler alternative. It contains ethyl acetate, which lifts ink without attacking most sealants.
- Apply sparingly with a cotton ball.
- Work in small sections using light pressure.
- Wipe clean with a damp cloth afterward.
Note: Avoid acetone-based removers—they can melt many finishes and cause irreversible haze.
Step 4: Baking Soda Paste for Stubborn Marks
When solvents aren’t viable, switch to mechanical action with a mild abrasive. A baking soda paste provides gentle scrubbing power without scratching most sealed surfaces.
- Mix two parts baking soda with one part water to form a thick paste.
- Apply to the stain using a soft cloth or sponge.
- Buff in small circles with light pressure for 20–30 seconds.
- Wipe away residue with a damp cloth and dry completely.
This method works especially well on semi-gloss or satin finishes where minor abrasion won’t be visible.
Step 5: Magic Eraser (Melamine Foam) – Use Sparingly
A melamine foam eraser (commonly sold as a “Magic Eraser”) can lift surface-level ink through micro-abrasion. While effective, it removes a microscopic layer of finish each time it’s used.
Use only on flat, durable finishes like polyurethane. Avoid on waxed, oiled, or antique pieces. After use, apply a matching furniture polish to blend the area visually.
What Not to Do: Common Mistakes That Ruin Wood Finishes
Even well-intentioned efforts can backfire. Below is a summary of practices to avoid when dealing with permanent marker on finished wood.
| Action | Why It’s Harmful | Better Alternative |
|---|---|---|
| Using acetone or paint thinner | Dissolves most clear finishes instantly, leaving sticky or cloudy patches | Non-acetone nail polish remover or diluted alcohol |
| Rubbing aggressively with steel wool | Scratches deeply and removes finish layers permanently | Soft microfiber cloth or melamine foam with light pressure |
| Applying vinegar or lemon juice | Acidic nature can etch finishes and darken certain woods | Baking soda paste (neutral pH) |
| Leaving solvents on too long | Allows penetration into finish, causing swelling or lifting | Spot-test and rinse within 10–15 seconds |
| Skipping the test patch | Risk of full-scale damage due to unknown finish type | Always test behind legs, inside drawers, or under edges |
Real-Life Example: Removing Marker from a Heirloom Dining Table
Sarah M., a homeowner in Portland, discovered her six-year-old had drawn a detailed “spaceship” across the arm of their walnut dining table—a family heirloom refinished just two years prior. Panicked, she nearly reached for a commercial degreaser before pausing to research.
She began by testing rubbing alcohol on the table’s underside near a leg. Seeing no discoloration or tackiness, she applied it with a cotton swab directly to the ink. After three passes, most of the mark lifted. A final touch-up with a baking soda paste removed faint shadowing. The finish remained intact, and the repair was barely noticeable.
Her takeaway? “Going slow saved me from making it worse. I thought I needed something strong, but gentle steps worked best.”
Expert Tips for Long-Term Protection
Prevention is always more effective than correction. Once the stain is gone, take steps to reduce future incidents.
- Keep markers stored in closed cabinets or containers, especially around unfinished or delicate wood.
- Use felt pads or removable placemats on dining and coffee tables to create a sacrificial layer.
- Apply a fresh coat of furniture wax or polish every 3–6 months to reinforce the protective barrier.
- Educate children about appropriate drawing surfaces using positive reinforcement.
“The best defense against stains is a well-maintained finish. A healthy sealant repels liquids and makes cleanup faster.” — Lena Cho, Furniture Conservator at the National Woodcare Institute
Checklist: How to Remove Permanent Marker Safely
Follow this concise checklist to ensure a successful, damage-free removal process:
- Assess the stain: Is it fresh or dried? How large is the area?
- Identify the wood finish if possible (check manufacturer info or test discreetly).
- Choose your starting method: rubbing alcohol (test first), non-acetone remover, or baking soda paste.
- Perform a patch test in an inconspicuous location.
- Apply the solution gently with a cotton swab or soft cloth—no scrubbing yet.
- Blot and rinse the area with a slightly damp cloth to stop chemical action.
- Dry thoroughly with a lint-free towel.
- If residue remains, try the next gentle method (e.g., melamine foam).
- Restore luster with a compatible furniture polish.
- Monitor the area over 24 hours for delayed reactions (cloudiness, stickiness).
Frequently Asked Questions
Can I use hand sanitizer to remove permanent marker from wood?
Hand sanitizer contains alcohol and glycerin, making it somewhat effective on fresh ink. However, the added moisturizers can leave a greasy film, and the alcohol still poses a risk to shellac or lacquer. If used, apply minimally, wipe off immediately with a damp cloth, and dry thoroughly. A purer form of isopropyl alcohol is safer and more predictable.
Will toothpaste remove permanent marker from finished wood?
Some people recommend whitening toothpaste due to its mild abrasives. While it may lift surface ink, it can also leave swirl marks or dull the finish. Non-gel, non-whitening toothpaste mixed with baking soda is less risky, but a dedicated paste of baking soda and water offers more control and fewer additives. Proceed with caution and always test first.
What if the marker has soaked into unsealed wood?
If the wood is raw or unfinished, the ink will have penetrated deeper. In such cases, gentle sanding with 220-grit sandpaper may be necessary, followed by staining and refinishing to match. For valuable or antique pieces, consult a professional restorer before attempting DIY fixes.
Conclusion: Preserve Beauty Without Compromise
Removing permanent marker from wood doesn’t require harsh chemicals or drastic measures. With patience, the right knowledge, and a respect for the finish, most stains can be resolved using simple, accessible tools. The goal isn’t just to erase the mistake—it’s to do so without creating a new one.
By understanding your wood’s finish, starting with the gentlest approach, and avoiding common pitfalls, you protect not just the surface but the longevity and value of the piece. Whether it’s a child’s innocent doodle or an office mishap, these methods empower you to act confidently and effectively.


 浙公网安备
33010002000092号
浙公网安备
33010002000092号 浙B2-20120091-4
Comments
No comments yet. Why don't you start the discussion?